
An old adage says, ‘Give a man a fish and you feed him for a day; teach a man to fish and you feed him for a lifetime.’
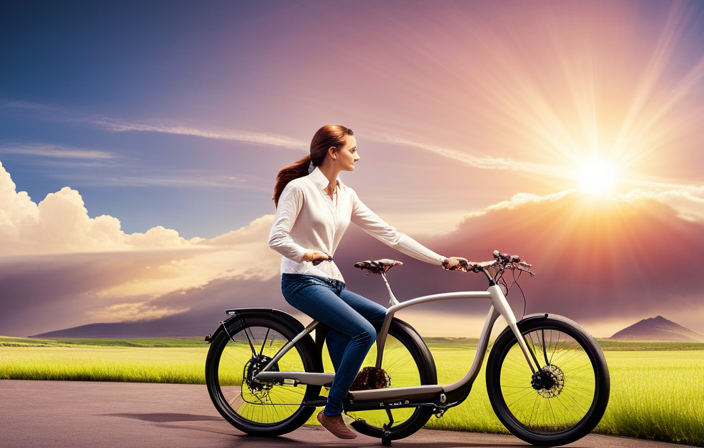
Similarly, by adding an electric motor to your bike, you can transform your trusty two-wheeler into a powerful vehicle that will enhance your riding experience for years to come.
In this article, I will guide you through the process of assessing your bike’s compatibility, choosing the right electric motor kit, and installing it with precision.
Get ready to ride into a new era of biking!
Key Takeaways
- Assess bike compatibility and choose the right electric motor kit
- Gather the necessary tools and equipment and prepare the bike for installation
- Install the electric motor kit and connect the motor to the battery
- Consider wiring and safety considerations, troubleshoot and maintain the electric motor and bike components

50 Strong Sports Water Bottles 6-Pack – Reusable 22 oz BPA-Free Plastic Bottles with Pull Top Cap – Made in USA – Top Rack Dishwasher Safe – Fits Most Bike Cages Brand - Clear
- Capacity: 22 oz per bottle
- Material: BPA-Free polyethylene
- Dishwasher Safe: Top rack dishwasher safe
As an affiliate, we earn on qualifying purchases.
Assessing Your Bike’s Compatibility
Before you start, make sure your bike’s frame is compatible with an electric motor. Assessing your bike’s compatibility is crucial for a successful bike modification.
Not all bikes can handle the added weight and power of an electric motor, so it’s important to evaluate your bike’s frame strength and design. Look for a sturdy frame made of materials like steel or aluminum that can withstand the stress and vibrations of the motor. Check if there is enough space in the frame to accommodate the motor and battery pack.
Additionally, consider the rear dropout spacing and axle type, as these factors may affect the installation of the motor.
By ensuring motor compatibility, you can avoid potential damage to your bike and ensure a safe and efficient electric bike conversion.
Choosing the Right Electric Motor Kit
To choose the right kit, you’ll want to consider factors such as the type of motor and its power output. Understanding the different motor types is crucial in making an informed decision. There are three main types of electric motors commonly used for bike conversions: hub motors, mid-drive motors, and friction drive motors. Each type has its advantages and disadvantages. Hub motors are the most common and easiest to install, as they are integrated into the wheel hub. They provide direct drive and are suitable for flat terrain. Mid-drive motors, on the other hand, are installed in the bike’s bottom bracket and provide better balance and weight distribution. They are more efficient on hilly terrain. Lastly, friction drive motors are attached to the bike’s tire and are the simplest to install, but they provide less power and are not suitable for off-road riding.
| Motor Type | Pros | Cons |
|---|---|---|
| Hub Motors | Easy installation, direct drive | Limited torque, less efficient uphill |
| Mid-Drive | Better balance, efficient on hills | More complex installation |
| Friction-Drive | Simple installation, lightweight | Less power, not suitable for off-road |
Gathering the Necessary Tools and Equipment
Gather the necessary tools and equipment for the installation process.
Before starting the installation of an electric motor on your bike, it is crucial to gather all the required tools and equipment.
Firstly, you will need a set of wrenches to remove the existing components and attach the motor kit securely.
Additionally, a screwdriver will be necessary for attaching the motor controller and other small components.
It is also important to have a torque wrench to ensure proper tightening of bolts and nuts.
Furthermore, you will need a wire cutter and stripper to connect the motor to the battery and controller.
Lastly, don’t forget to gather safety equipment such as gloves and safety glasses to protect yourself during the installation process.
Always prioritize safety precautions when handling electric components to prevent any accidents.
Preparing Your Bike for Installation
Now, you need to make sure your bicycle is ready for installation. Before you can begin the process of adding an electric motor to your bike, there are a few bike modifications that need to be made.
First and foremost, you will need to remove any accessories or components that may hinder the installation process, such as fenders or racks. Additionally, it is important to ensure that your bike is in good working condition. Check the brakes, tires, and chain to make sure they are in optimal shape.
Once your bike is prepared, you can move on to considering the power source options for your electric motor. There are various options available, including lithium-ion batteries or direct drive motors. Take the time to research and choose the best power source for your needs.
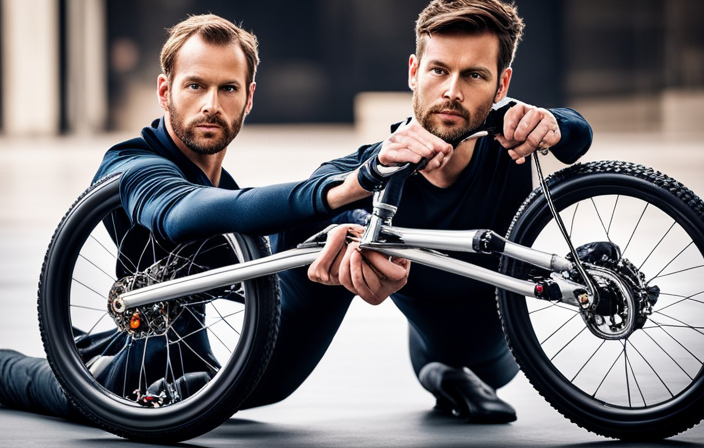
Installing the Electric Motor Kit
First and foremost, you need to ensure that your bicycle is properly prepared before installing the electric motor kit. This includes checking the frame for any damages or cracks, as well as making sure the brakes and gears are in good working condition. Once your bike is ready, you can begin installing the electric motor kit. Start by attaching the motor to the frame using the provided brackets and screws. Make sure it is securely fastened. Next, connect the motor to the battery by following the manufacturer’s instructions. Once everything is connected, you can adjust the motor’s power settings according to your preference. This can typically be done using a control panel or app provided with the kit. Lastly, it’s important to familiarize yourself with troubleshooting common installation issues, such as loose connections or error codes. Refer to the installation manual or contact customer support for assistance if needed.
| Adjusting the Motor’s Power Settings | Troubleshooting Common Installation Issues |
|---|---|
| – Use the control panel or app provided to adjust the power settings. | – Check for loose connections and ensure all wiring is properly connected. |
| – Start with lower power settings and gradually increase to find the right balance. | – Refer to the installation manual for error codes and troubleshooting steps. |
| – Pay attention to battery life and adjust power settings accordingly. | – Contact customer support for assistance if troubleshooting steps do not resolve the issue. |
| – Experiment with different power settings to find the most comfortable and efficient ride. | – Keep a record of any issues encountered and steps taken to resolve them for future reference. |
Connecting the Motor to the Battery
To connect the motor to the battery, you’ll need to follow the manufacturer’s instructions and ensure a secure connection.
Start by locating the battery on your bike and identifying the positive and negative terminals. It is crucial to make the correct battery connection to avoid any potential damage or malfunction.
Next, refer to the motor wiring diagram provided by the manufacturer and identify the corresponding wires for the battery connection. Take note of any color coding or labeling on the wires to ensure proper alignment.
Once you have identified the correct wires, use wire strippers to remove a small portion of the insulation. Then, connect the positive wire from the motor to the positive terminal on the battery, and the negative wire to the negative terminal.
Ensure that the connections are tight and secure to avoid any loose connections.
Following these steps will allow for a successful battery connection and enable the motor to function properly.
Wiring and Safety Considerations
Make sure you carefully consider the wiring and safety aspects when connecting the battery to the motor on your bicycle. Proper wiring techniques are crucial to ensure the motor functions safely and efficiently.
Start by using the appropriate gauge wires for the current requirements of your motor. This will prevent overheating and potential hazards. It is also important to secure all connections with proper connectors or soldering, avoiding loose or exposed wires that could lead to short circuits.
Additionally, consider using a fuse or circuit breaker to protect the motor and prevent damage in case of a power surge. Finally, don’t forget to insulate all exposed wires to prevent accidental contact and ensure electrical safety.
Following these wiring techniques and safety precautions will help you add an electric motor to your bike successfully.
Testing and Fine-Tuning the Electric Motor
Once you have connected the battery to the motor, it’s essential to test and fine-tune the electric motor for optimal performance. Testing the motor ensures that it is functioning correctly and allows you to identify any potential issues. Here are some testing methods to consider:
-
Load testing: Apply a load to the motor and measure its performance under different conditions. This helps determine the motor’s efficiency and power output.
-
Speed testing: Measure the motor’s speed at different voltage levels to find the sweet spot for maximum performance.
-
Temperature testing: Monitor the motor’s temperature during operation to ensure it doesn’t overheat. Adjust cooling mechanisms if necessary.
-
Noise testing: Pay attention to any unusual noises emitted by the motor, as they may indicate a problem that needs to be addressed.
By testing and fine-tuning the electric motor, you can optimize its performance, ensuring a smooth and efficient ride on your electric bike.
Maintaining and Troubleshooting Your Electric Bike
To keep your electric bike running smoothly, it’s important to regularly maintain and troubleshoot any potential issues. Troubleshooting common issues can help you identify and fix problems before they become major concerns.
One common issue is a loss of power. If your electric bike is not providing the expected level of assistance, check the battery connections and ensure they are secure. Additionally, make sure the battery is fully charged.
Optimizing battery performance is crucial for a long-lasting and efficient electric bike. To do this, avoid storing the battery in extreme temperatures and charge it regularly, even during periods of inactivity. It’s also important to keep the battery clean and free from dirt and debris.
By following these maintenance tips and troubleshooting common issues, you can ensure your electric bike performs at its best.
Enjoying the Benefits of Your Electric Bike
You’ll love experiencing all the advantages of an electric bike. One of the key benefits is maximizing the range of your electric bike. By understanding how to efficiently use the battery power, you can go further and enjoy longer rides without worrying about running out of charge.
It’s important to maintain a steady pace and avoid sudden acceleration or braking, as this can drain the battery faster. Another advantage is exploring off-road adventures with your electric bike. With the added power of the electric motor, you can easily tackle challenging terrains and enjoy the thrill of exploring new trails.
Just remember to adjust the power assist settings accordingly to conserve battery life. So get ready to embark on exciting off-road adventures and enjoy the benefits of your electric bike!
Frequently Asked Questions
Can I install an electric motor kit on any type of bike?
Yes, an electric motor kit can be installed on most types of bikes. The compatibility of the electric motor depends on the specific kit and the bike’s design. Adding an electric motor provides numerous benefits, such as increased speed, extended range, and easier uphill climbs.
How long does it typically take to install an electric motor kit on a bike?
Typically, it takes around 2-3 hours to install an electric motor kit on a bike. However, installation time can vary depending on the complexity of the kit and any common challenges that may arise during the process.
Do I need any special skills or knowledge to install an electric motor kit?
I don’t need any special skills or knowledge to install an electric motor kit on my bike, but having basic mechanical skills can be helpful. It’s important to have access to special tools and technical support for a smooth installation process.
Can I still use my bike as a regular bicycle after installing an electric motor kit?
After installing an electric motor kit on my bike, I can still use it as a regular bicycle. I can choose the right motor kit by considering factors such as power output and battery capacity. Regular maintenance is essential for optimal performance.
Is it possible to remove the electric motor kit from my bike if I change my mind or want to upgrade to a different kit?
Yes, it is possible to remove an electric motor kit from your bike if you change your mind or want to upgrade to a different kit. However, compatibility with your bike and the pros and cons of adding an electric motor kit should be considered.
Conclusion
In conclusion, adding an electric motor to your bike can transform your cycling experience and provide numerous benefits. It allows you to effortlessly tackle hills and cover longer distances, making your commute or recreational rides much easier.
Did you know that electric bikes are gaining popularity worldwide? In fact, global sales of e-bikes reached 40 million units in 2020, a significant increase from previous years.
So, by joining the growing community of electric bike enthusiasts, you can enjoy the convenience and efficiency that comes with this innovative technology.