Being a passionate cyclist, I’ve consistently sought innovative methods to improve my cycling experience. Adding a motor to my bicycle stands out as one of the most thrilling approaches to achieve this. It not only boosts the efficiency of my rides but also unlocks a realm of new opportunities for venturing into unfamiliar terrains and covering greater distances.
In this article, I will be sharing my step-by-step guide on how to add a motor to your bicycle. From determining your needs and budget to installing the motor and connecting the electrical components, I will cover everything you need to know to get started.
So, whether you’re a seasoned cyclist or just looking to try something new, follow along and discover how to easily transform your bicycle into a motorized vehicle.
Key Takeaways
- Feasibility assessment is crucial before adding a motor to a bicycle, taking into consideration factors such as terrain, distance, and weight.
- There are two main types of motors: electric and gas, each with their respective advantages and disadvantages.
- Basic tools and components such as a motor mount, wiring, connectors, and lithium-ion batteries are necessary for installation.
- Adjustments to chain tension and tire pressure can improve performance and ensure a smooth ride.
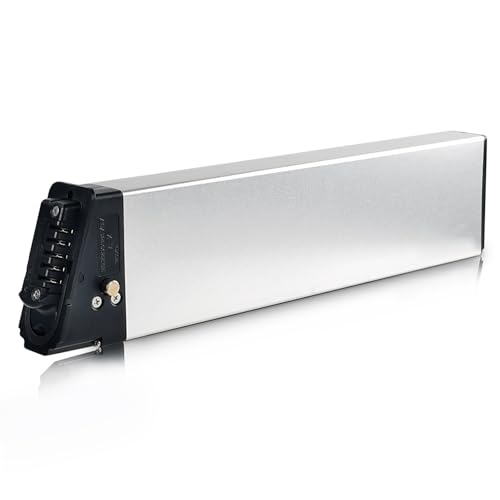
ShunTongDa 48V 10.4Ah 14Ah Folding Ebike Battery 48 Volt DCH-006 Built in Electric Bike Batteries with 30A BMS Totguard for 250W 500W 750W 1000W Motor Foldable E-Bike Battery (48V10.4Ah A Grade Cell)
①Battery Type: 18650 lithium ion batteries, Voltage: 48V, Capacity: 10.4Ah, Real High-Label Capacity. 30A BMS, Wattage at 500Wh,...
As an affiliate, we earn on qualifying purchases.
Determine Your Needs and Budget
Before you start dreaming of zooming around on your newly motorized bike, it’s important to figure out your needs and budget. Assessing feasibility is a crucial first step.
Consider the terrain you’ll be riding on, the distance you’ll need to travel, and the weight you’ll be carrying. A motorized bike can make your life easier, but you need to make sure it’s practical for your needs.
Next, you’ll need to choose the motor type that best suits your needs and budget. There are two main types of motors: electric and gas. Electric motors are more environmentally friendly and cost less to operate, but they have a shorter range and require more frequent charging. Gas motors are more powerful and have a longer range, but they emit exhaust fumes and are more expensive to operate.
Once you’ve assessed your needs and budget and chosen the motor type that’s right for you, it’s time to gather your tools and materials.
Amazon Product B0CYT6TBYX
As an affiliate, we earn on qualifying purchases.
Gather Your Tools and Materials
First, you’ll need to gather all the tools and materials you’ll need for this project. You’ll want to make sure you have everything on hand before you get started.
For the motor, there are two main types to consider: hub motors and mid-drive motors. Hub motors are easier to install and are better for flat terrain, while mid-drive motors provide more power for hills and are generally more efficient. You’ll also need to choose the right battery, which will depend on the type of motor you choose and how much power you need.
Lithium-ion batteries are a popular choice because they are lightweight and have a long lifespan. In addition to the motor and battery, you’ll need some basic tools such as wrenches, pliers, and screwdrivers. You may also need specialized tools depending on the specific motor you choose.
Other materials you’ll need include a motor mount, wiring, and connectors. It’s important to make sure you have all the necessary parts before you start the installation process. Once you have everything you need, you can move on to the next step of installing the motor.
Amazon Product B0CQ7PSNVX
As an affiliate, we earn on qualifying purchases.
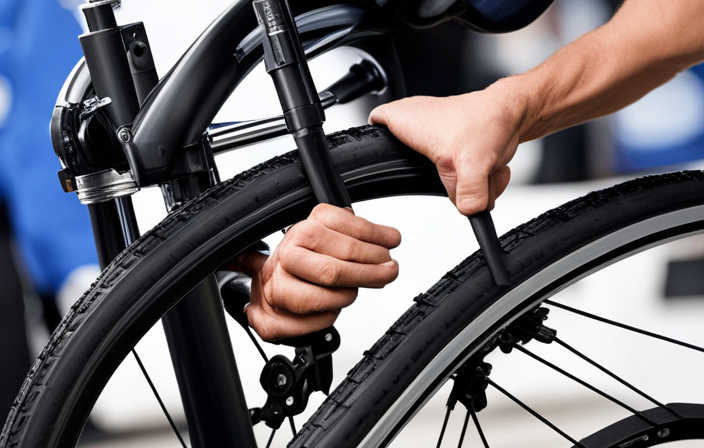
Install the Motor
Now that I’ve gathered all my tools and materials, it’s time to get my hands dirty and start installing the motor. The first step is to determine the motor placement on the bicycle. I need to make sure that the motor is securely attached to the frame and that it won’t interfere with the pedals or any other moving parts.
Once I’ve found the perfect spot, I can start mounting the motor onto the frame using the bolts and brackets provided in the kit. Next, I need to connect the power source to the motor. This involves attaching the battery to the frame and running the wires from the battery to the motor.
It’s important to make sure that the wires are properly insulated and secured to prevent any accidents or damage to the motor. Once the power source is connected, I can move on to the next step of connecting the electrical components.
Amazon Product B0CQ7KXL1S
As an affiliate, we earn on qualifying purchases.
Connect the Electrical Components
To connect the electrical components, you’ll need to start by identifying the different wires and their corresponding connectors. Motor wiring is usually color-coded, so it’s essential to check the wiring diagram that comes with the kit. The most common colors are red, black, and green. The red wire is the positive wire that connects to the battery’s positive terminal. The black wire is the negative wire that connects to the battery’s negative terminal. The green wire connects to the throttle.
Another essential aspect to consider is battery placement. The battery should be placed in a secure and accessible location. It’s recommended to mount the battery in the center of the bicycle frame, as it provides better balance. Make sure the battery is securely mounted and won’t move during the ride. Once all the wires are connected, double-check all the connections and make sure there are no loose wires. With the electrical components connected, it’s time to test and adjust the motor’s performance.
Test and Adjust
Before you start riding, you should test and adjust the performance of your electric bike, ensuring a smooth and efficient ride.
To begin with, you must test the motor to ensure it’s functioning properly. This can be done by slowly accelerating the bike and checking for any unusual sounds or vibrations. If everything appears normal, you can proceed to adjust the performance of your electric bike.
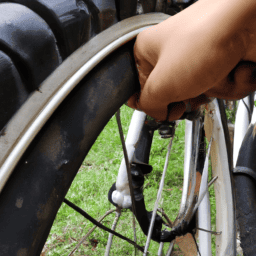
Performance adjustments are essential to ensure that your bike operates at its best. One way to improve performance is by adjusting the tension of the chain. A loose chain will create unnecessary friction, reducing the efficiency of the motor. You can adjust the tension by loosening the bolts that connect the motor to the bike frame and moving the motor slightly before tightening the bolts again.
Additionally, you should check the tire pressure and make sure it’s at the recommended level to ensure a smooth ride.
By performing these checks and adjustments, you can ensure that your electric bike is in top condition and ready to take you wherever you need to go.
Frequently Asked Questions
Are there any legal restrictions on adding a motor to a bicycle?
I researched the regulations overview and insurance requirements for adding a motor to a bicycle. There are legal restrictions on the type of motor and power output allowed. Insurance may also be required, depending on the state.
What kind of maintenance will be required for the motor and electrical components?
Regular maintenance is crucial for the longevity of the motor and electrical components. Battery lifespan varies depending on usage and quality. Keeping the motor clean and lubricated, checking connections, and replacing worn parts will ensure optimal performance. As they say, "an ounce of prevention is worth a pound of cure."
Can any type of bicycle be converted to an electric bike?
When considering converting a bicycle to electric, cost considerations, advantages and disadvantages should be weighed. Any bicycle can be converted with varying degrees of difficulty and expense. Factors such as frame material and design can affect the conversion process.
How does adding a motor to a bicycle affect its weight and balance?
Adding a motor to a bicycle increases its weight and changes its balance. Motor power affects acceleration speed and top speed, while battery range determines how far you can go before needing a recharge. Proper installation is crucial for optimal performance.
What safety precautions should be taken when riding an electric bike?
To ride an electric bike safely, I must wear a helmet and follow traffic laws. Proper training for handling an electric bike is crucial to avoid accidents.
Conclusion
Well, folks, I’ve successfully added a motor to my bicycle after following the steps outlined in this article. I must admit, it was quite a challenge, but I’m glad I did it.
It was worth all the effort, especially when I saw the look on my friends’ faces as I passed them with ease. However, I must caution you.
Adding a motor to your bike may seem like a simple task, but it’s not for the faint of heart. It requires a lot of skill, knowledge, and patience. So, if you’re up for the challenge, go ahead and give it a try.
But if you’re not sure, I suggest you leave it to the professionals. After all, there’s a reason why they call it a ‘motorcycle.’