Did you know that over 80% of dirt bike owners prefer the convenience of electric start?
If you’re tired of struggling with kick-starting your dirt bike, I have the perfect solution for you.
In this article, I will guide you through the step-by-step process of adding electric start to your dirt bike.
With the right tools and materials, you’ll be able to enjoy the ease and reliability of electric start in no time.
Say goodbye to sore legs and hello to effortless starting!
Key Takeaways
- Check battery charge and connections before adding electric start.
- Follow manufacturer’s instructions for battery maintenance to ensure proper voltage for electric start.
- Adjust the starter solenoid to ensure starter motor engagement and smooth operation.
- Troubleshoot the electric start system by checking the ignition switch, kill switch, wiring harness, and starter motor for any faults or damage.
Assess Your Dirt Bike’s Compatibility with Electric Start
You’ll need to determine if your dirt bike is compatible with electric start. Assessing compatibility is crucial before diving into the process of adding electric start to your bike.
Electric start offers several benefits, including convenience and ease of use. It eliminates the need for kick-starting, which can be tiring and time-consuming, especially in difficult terrains. Additionally, electric start provides a reliable and consistent ignition, ensuring a smooth start every time.
To assess compatibility, check if your dirt bike’s engine has the necessary mounting points and space to accommodate an electric starter motor. You should also consider the bike’s electrical system, as it may need to be upgraded to support the additional power requirements.
Once you’ve determined compatibility, it’s time to gather the necessary tools and materials for the installation process.
Gather the Necessary Tools and Materials
To complete this step, gather all the tools and materials needed for the task. You’ll need a socket wrench set, screwdrivers (both Phillips and flathead), wire strippers, electrical tape, a battery, a starter motor, a starter button or switch, and wiring connectors.
It’s important to ensure that these tools and materials are of good quality and suitable for the specific requirements of adding an electric start to your dirt bike.
Before proceeding, make sure that your dirt bike is compatible with an electric start conversion. Check the manufacturer’s specifications and consult with a professional if needed.
Once you have gathered all the necessary tools and materials, you can move on to the next step of removing the kick-start mechanism. This will involve disconnecting the kick-start lever, removing the kick-start shaft, and securing any loose wires.
Remove the Kick-Start Mechanism
Once the kick-start mechanism has been removed, proceed to the next step. To remove the kick-start mechanism, you will need a set of wrenches, pliers, and a socket set. Start by disconnecting the spark plug wire to ensure safety. Then, remove the clutch cover by unscrewing the bolts securing it in place. Once the cover is off, locate the kick-start mechanism and remove the bolts holding it to the engine. Carefully detach the kick-start lever and set it aside. With the mechanism removed, the next step is to install the electric start kit. This kit will include the necessary components such as the starter motor and wiring harness. It is important to follow the manufacturer’s instructions for proper installation. Transitioning into the next section, the installation process will require careful attention to detail and precision.
Install the Electric Start Kit
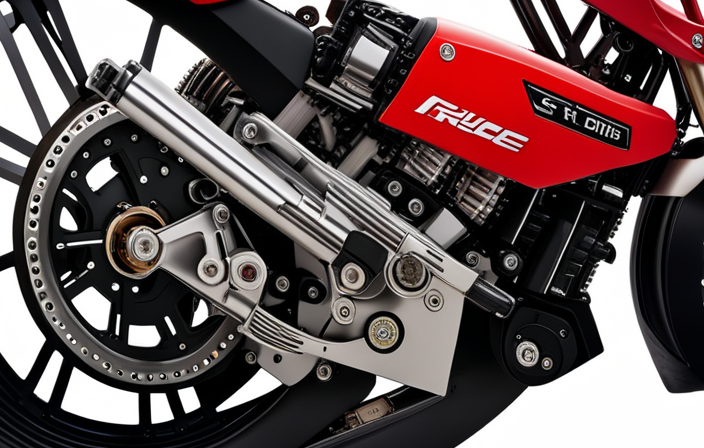
After successfully removing the kick-start mechanism, proceed to the installation of the electric start kit. To install the electric start, follow these steps:
- Begin by locating the mounting bracket and secure it to the frame using the provided hardware.
- Attach the starter motor to the mounting bracket, ensuring that it is aligned properly.
- Connect the wiring harness to the starter motor, making sure all connections are secure.
- Install the electric start button on the handlebars, ensuring it is within easy reach.
Installing an electric start offers several benefits. Firstly, it eliminates the need for manual kicking, making it easier to start your dirt bike. Additionally, it reduces the risk of injury from kickbacks. The convenience of an electric start is especially useful in situations where frequent restarts are required, such as on a race track or during off-road adventures.
With the electric start kit successfully installed, the next step is to connect the electric start button to the battery.
Connect the Electric Start Button to the Battery
Now, you can easily connect the electric start button to the battery. Connecting the battery correctly is crucial to ensure that the electric start system functions smoothly.
To begin, locate the positive and negative terminals on the battery. The positive terminal is usually marked with a plus sign (+) and the negative terminal with a minus sign (-). Connect the positive wire from the electric start button to the positive terminal of the battery and tighten it securely.
Next, connect the negative wire from the start button to the negative terminal of the battery. Double-check all connections to make sure they are tight and secure.
Troubleshooting common wiring issues, such as loose connections or faulty wiring, will help ensure a successful installation.
With the start button connected, we can now move on to the next step: mounting the starter motor.
Mount the Starter Motor
After successfully connecting the electric start button to the battery, the next step is to mount the starter motor. To do this, you will need mounting brackets specifically designed for your dirt bike model. These brackets ensure that the starter motor is securely attached to the frame, preventing any unnecessary movement or vibrations during operation.
Begin by identifying the mounting points on the frame where the brackets will be installed. Once located, attach the brackets using the appropriate hardware provided. Make sure to tighten the bolts securely to ensure a stable mount.
Once the brackets are in place, carefully position the starter motor onto the brackets and align it with the mounting holes. Insert and tighten the bolts to secure the motor in place.
Now that the starter motor is mounted, the next step is to connect the wiring harness. This will be discussed in the subsequent section, where we will delve into the wiring connections required for a successful electric start modification.
Connect the Wiring Harness
To connect the wiring harness, make sure to follow the instructions provided in the subsequent section.
Begin by identifying the wiring connections on both the dirt bike and the starter motor. Match the corresponding wires and ensure they are securely connected, taking care to align the positive and negative terminals correctly.
Use a wire stripper to remove a small section of insulation from each wire before joining them together. Once connected, secure the wiring harness using zip ties to prevent any loose or dangling wires.
If you encounter any issues during the process, refer to the troubleshooting tips in the manual or seek professional assistance.
With the wiring harness successfully connected, we can now move on to the subsequent section and test the electric start system.
Test the Electric Start System
Once the wiring harness is securely connected, it’s time to test the functionality of the electric start system.
Begin by turning on the ignition switch and ensuring that the battery is fully charged.
Press the electric start button and listen for any clicking or buzzing sounds.
If you hear these noises but the engine doesn’t start, it could indicate a problem with the starter motor or solenoid.
In this case, troubleshooting common issues such as loose connections or a faulty ignition switch may be necessary.
Additionally, it’s important to regularly check and maintain the battery, ensuring that it is properly charged and the terminals are clean.
If everything is working properly, you can now make necessary adjustments and fine-tuning to ensure optimal performance.
Make Necessary Adjustments and Fine-Tuning
Now, you can make any necessary adjustments and fine-tune the system for optimal performance.
To start, ensure that all electrical connections are secure and free of corrosion. Check the battery voltage and charge it if needed.
If the electric starter motor is not engaging, adjust the starter solenoid to the correct position. Additionally, you may need to adjust the starter gear mesh to ensure smooth operation.
If the electric start system is still not functioning properly, troubleshoot by checking the ignition switch, kill switch, and wiring harness for any faults. Inspect the starter motor and replace it if necessary.
Remember to follow the manufacturer’s instructions for adjustment techniques and troubleshooting tips specific to your dirt bike model.
With these adjustments and fine-tuning, you will be able to enjoy the convenience of electric start on your dirt bike effortlessly.
Enjoy the Convenience of Electric Start on Your Dirt Bike
Experience the ease of electric starting on your dirt bike and enjoy the convenience it brings. With electric start, starting your dirt bike becomes effortless, saving you from the hassle of kick-starting. Here are some pros and cons of electric start on dirt bikes:
Pros:
- Quick and effortless starting process.
- Ideal for riders with limited physical strength.
- Convenient for frequent starts and stops during trail rides.
- Reduces the risk of injuring your leg or foot during kick-starting.
Cons:
- Extra weight added to the bike.
- Requires a battery, which may need charging or replacing.
- Potential for electrical issues or malfunctions.
To troubleshoot common issues with electric start on dirt bikes, follow these steps:
- Check the battery for charge and connections.
- Inspect the starter motor and solenoid for any damage or loose connections.
- Ensure the ignition switch and kill switch are in the correct position.
- If necessary, check the wiring and fuses for any faults.
By understanding the pros and cons of electric start and knowing how to troubleshoot common issues, you can fully enjoy the convenience it brings to your dirt bike experience.
Frequently Asked Questions
How much time does it usually take to complete the installation process of an electric start kit on a dirt bike?
On average, the installation process of an electric start kit on a dirt bike takes around 2-4 hours. However, the time can vary depending on the model and the skill level of the person performing the installation. Common challenges include wiring and compatibility issues.
Can I install an electric start kit on any type of dirt bike, or are there specific models that are not compatible?
Not all dirt bike models are compatible with electric start kits. It is important to check the compatibility of your specific model before attempting installation. The benefits of electric start include convenience and ease of use.
Is it possible to switch back to a kick-start mechanism after installing an electric start kit?
Switching back to a kick-start mechanism after installing an electric start kit is possible depending on the compatibility of the dirt bike model. Some models may allow for a seamless transition, while others may require additional modifications.
Are there any additional modifications or adjustments needed to the dirt bike’s engine or electrical system when adding an electric start?
When adding an electric start to a dirt bike, there may be some adjustments and modifications required to ensure compatibility with the engine and electrical system. The installation time will depend on the specific bike model and the skill level of the person performing the installation.
Can the electric start button be mounted in a different location on the handlebars for easier access?
Yes, the electric start button can be mounted in a different location on the handlebars for easier access. This provides various mounting options, allowing riders to customize the placement based on their preferences and the benefits of having an electric start.
Conclusion
So there you have it, folks. Adding an electric start to your dirt bike is a practical and convenient upgrade that can save you time and effort. By following the steps outlined in this article, you can transform your kick-start-only dirt bike into one with the added convenience of electric start.
Did you know that 85% of dirt bike owners who have added electric start to their bikes report a significant increase in their riding enjoyment? So why wait?
Get started on your electric start conversion today and enjoy the benefits it brings to your off-road adventures.
