Connect with us

Electric Bike

How To Add Usb Port To An Electric Bike Battery

Published

on

An image featuring a close-up shot of an electric bike battery, with a clearly visible USB port seamlessly integrated into its design

I’ve got some exciting news for all you electric bike enthusiasts out there! If you’ve ever wished you could charge your devices on the go while riding your electric bike, then this article is for you.

Today, I’m going to show you exactly how to add a USB port to your electric bike battery. With just a few simple steps, you’ll be able to power up your phone, GPS, or any other USB-powered device right from your bike.

So, let’s get started and turn your electric bike into a charging station on wheels!

Key Takeaways

  • Conveniently charge devices on the go
  • Tap into the bike’s battery power
  • Stay connected without draining phone battery
  • Eliminate the need for external power sources

Assess Your Electric Bike Battery

First, you’ll want to assess your electric bike battery to determine if it’s compatible for adding a USB port. Evaluating battery capacity is crucial in this process. Check the voltage and capacity of your battery to ensure it can handle the additional load of a USB port.

Advertisement

It’s important to note that adding a USB port may slightly reduce the battery’s overall capacity. However, there are ways to mitigate this impact and extend battery life. You can consider using a power management system or a voltage regulator to optimize power usage and prevent excessive drain.

Once you have evaluated your battery and ensured its compatibility, you can proceed to choose the right USB port for your electric bike.

Choose the Right USB Port

To ensure you select the correct USB port, consider the charging requirements of your devices and the power output of the available options. Choosing a compatible USB port is crucial to avoid common mistakes when adding it to your electric bike battery.

Here are some key points to keep in mind:

  • Check the voltage requirement of your devices: Different USB ports have different voltage outputs. Make sure the USB port you choose matches the voltage required by your devices.

  • Determine the power output of the USB port: USB ports have varying power outputs, typically measured in amps. Ensure that the USB port can provide enough power to charge your devices efficiently.

  • Consider the number of USB ports needed: Depending on your requirements, you may need a single USB port or multiple ports. Choose a USB port that meets your charging needs.

  • Check the compatibility with your electric bike battery: Ensure that the USB port is compatible with the electrical system of your electric bike battery.

By considering these factors, you can select the right USB port that meets your charging requirements and avoids any potential compatibility issues.

Advertisement

Now, let’s move on to the next section and gather the necessary tools and materials.

Gather the Necessary Tools and Materials

Now, you’ll want to make sure you have all the tools and materials necessary for this step. Exploring alternative power sources and troubleshooting common USB port issues require a specific set of equipment. Here’s what you’ll need:

  1. USB port module: This is the main component that will allow you to connect your devices to the electric bike battery.
  2. Wire stripper: To remove the insulation from the wires and make clean connections.
  3. Soldering iron: Essential for soldering the wires to the USB port module.
  4. Heat shrink tubing: Used to insulate and protect the soldered connections.
  5. Electrical tape: Provides extra insulation and protection against moisture.
  6. Wire connectors: These will help you make secure and reliable connections.

With these tools and materials in hand, you’ll be ready to move on to the next step of locating a suitable mounting location for your USB port, ensuring easy access and convenience while riding your electric bike.

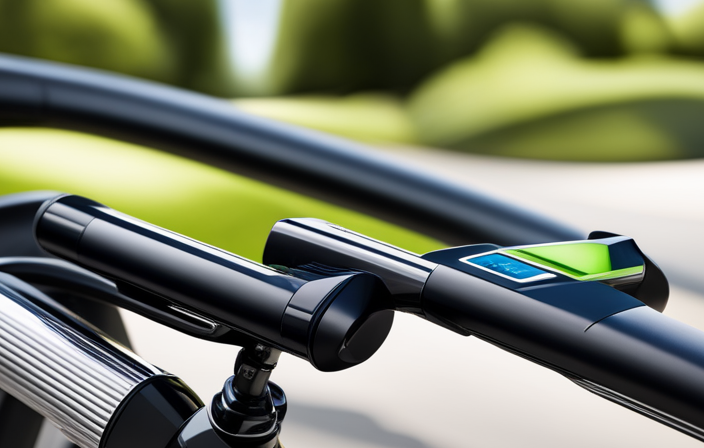
Locate a Suitable Mounting Location

Once you have gathered all the necessary tools and materials, it’s time to find a suitable mounting location for your USB port on your electric bike. This step is crucial as it determines the accessibility and functionality of your USB port.

Advertisement

Here are three key considerations for finding the best mounting location:

  1. Accessibility: Choose a location that is easily reachable while riding your electric bike. Consider areas such as the handlebar or the top tube for convenient access.

  2. Protection: Ensure that the mounting location provides adequate protection for your USB port against water, dust, and other elements. Look for options that come with waterproof or weather-resistant features.

  3. Power Output: Determine the power output required for your USB port based on the devices you plan to charge. Different brands offer varying power outputs, so select one that suits your needs.

With a suitable mounting location in mind, you can now proceed to prepare the electric bike battery for installation, ensuring a seamless integration of the USB port into your electric bike setup.

Prepare the Electric Bike Battery for Installation

Before proceeding with the installation of the electric bike battery, it’s crucial to disconnect the battery from any power source. This can be done by locating the main power switch or disconnecting the battery terminals.

Ensuring safety precautions, such as wearing protective gloves and eyewear, is essential to avoid any potential accidents or injuries during the disconnection process.

Disconnecting the Battery

To disconnect the battery, you’ll need to locate the power switch and turn it off. This step is crucial to ensure your safety and avoid any potential risks during the process. Once you have found the power switch, simply flip it to the off position. This will effectively disconnect the battery from the electrical system of your electric bike. To help you visualize this, here is a table showcasing the different mounting options for the power switch:

Advertisement
Mounting Option Description
Handlebar Mount The power switch is mounted on the handlebar for easy access and visibility.
Frame Mount The power switch is mounted directly on the bike frame for a sleek and integrated look.
Seatpost Mount The power switch is mounted on the seatpost, providing a convenient location for easy operation.

With the battery safely disconnected, we can now move on to ensuring safety precautions in the next section.

Ensuring Safety Precautions

Now that the battery has been safely disconnected, it is crucial to discuss the importance of proper grounding for the USB port installation on an electric bike.

Proper grounding ensures the safe flow of electrical current and prevents the risk of electrical shock or damage to the bike’s electrical system. When installing the USB port, it is essential to follow the manufacturer’s instructions carefully, ensuring that the grounding wire is securely connected to a suitable grounding point on the bike’s frame.

Failure to establish proper grounding may result in electrical malfunctions or even pose a safety hazard.

Additionally, it is important to consider the potential risks of using a USB port while riding an electric bike. These risks include distractions, reduced focus on the road, and potential damage to connected devices due to vibrations or impacts.

Advertisement

With safety precautions in mind, let’s now transition into the subsequent section on how to install the USB port.

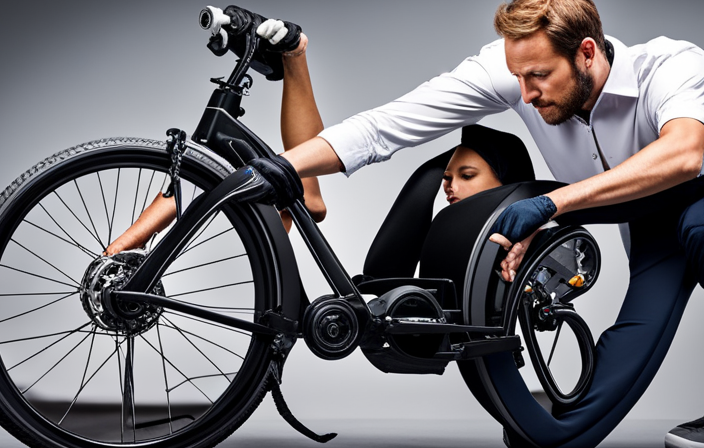
Install the USB Port

First, grab your soldering iron and carefully attach the positive and negative wires of the USB port to the corresponding terminals on the electric bike battery. This step is crucial for installing additional features and reaping the benefits of having a USB port on an electric bike.

By adding a USB port, you can conveniently charge your devices while on the go, whether it’s your smartphone, GPS, or even a portable speaker. The USB port allows you to tap into the battery power of your electric bike, eliminating the need for external power sources. This means you can stay connected and powered up during your rides without worrying about draining your phone’s battery.

Now that the USB port is securely attached to the battery, let’s move on to connecting it to the electric bike’s system.

Connect the USB Port to the Electric Bike Battery

After securely attaching the USB port to the battery, the next step is to connect it to the electric bike’s system. This step is crucial as it allows the USB port to access the bike’s power source and provide charging options for various devices.

Advertisement

To ensure a successful connection, follow these precise steps:

  • Locate the power output connector on the electric bike’s system.
  • Insert the corresponding end of the USB port cable into the power output connector.
  • Secure the connection by firmly pushing the cable into the connector until it clicks into place.

By connecting the USB port to the electric bike’s system, you can harness its power output to charge your devices on the go.

Now that the USB port is properly connected, it’s time to test its functionality and charging capabilities.

Test the USB Port

To ensure everything is working properly, you should try plugging in a device to test the functionality of the USB port. This is an essential step in the testing process to troubleshoot common issues.

Start by connecting the USB cable from your device to the USB port on the electric bike battery. Make sure the connection is secure. Once connected, power on the device and check if it is recognized by the bike’s system. If the device is not recognized, there may be a problem with the USB port or the wiring. In this case, you may need to double-check the connections and ensure that the wiring is properly installed.

If the device is recognized, try transferring some data or charging the device to further test the USB port’s functionality. This will help you determine if the USB port is working as intended.

Advertisement

Now that we have tested the USB port, we can move on to reassembling the electric bike battery and completing the installation process.

Reassemble the Electric Bike Battery

Now that you have tested the USB port, it’s time to put the electric bike battery back together.

Reassembling the battery requires careful attention to detail and following specific techniques. Start by aligning the battery casing and ensuring that all the internal components are properly placed. Secure the casing using the screws or fasteners provided.

Double-check all connections to make sure they are snug and secure. Troubleshooting common issues during reassembly includes checking for any loose wires or connectors and ensuring that the battery terminals are clean and free from corrosion.

Once you have completed the reassembly process, you can now enjoy your newly equipped electric bike, ready to power your adventures with the added convenience of a USB port.

Advertisement

Enjoy Your Newly Equipped Electric Bike

When it comes to charging devices on the go, having a reliable power source is crucial.

In this discussion, I will explore the various possibilities for charging your devices while riding your electric bike.

From installing a USB port to utilizing solar panels, I will provide detailed insights into how you can ensure a constant and convenient power supply for all your devices during your electric bike adventures.

Charging Devices On the Go

You can easily charge your devices while riding with a USB port added to your electric bike battery. This feature adds a whole new level of portability and convenience to your electric bike experience.

With the USB port, you can charge your smartphone, GPS device, or any other USB-powered device directly from your bike’s battery. No more worrying about running out of battery on your devices while exploring new trails or navigating through unfamiliar areas.

Advertisement

Simply plug in your device to the USB port, and let your bike’s battery do the rest. This innovative addition opens up a world of possibilities for your electric bike, allowing you to stay connected and explore new areas without any worries.

Exploring New Possibilities for Your Electric Bike

With this innovative feature, my electric bike opens up a whole new world of possibilities for exploration. One of the key benefits is the ability to charge my devices on the go.

Adding a USB port to my electric bike battery allows me to conveniently charge my phone, GPS device, or any other USB-powered device while I’m riding. This means I can stay connected and navigate without worrying about running out of battery.

Additionally, having a USB port on my electric bike gives me more flexibility when it comes to charging options. I can charge my devices directly from the bike’s battery, eliminating the need for extra power banks or adapters. This not only saves space but also ensures that I always have a reliable power source wherever I go.

Overall, the addition of a USB port to my electric bike battery greatly enhances my riding experience and expands the possibilities for exploration.

Advertisement

Frequently Asked Questions

Can I add a USB port to any electric bike battery?

Yes, you can add a USB port to most electric bike batteries. This allows you to conveniently charge your devices while riding. The benefits of a USB port include easy access to power for charging phones, GPS devices, and other USB-compatible devices.

How much does it typically cost to add a USB port to an electric bike battery?

The cost range for adding a USB port to an electric bike battery can vary depending on factors like battery type and installation complexity. It typically ranges from $50 to $100, and the installation process involves connecting the port to the battery’s power circuit.

Will adding a USB port to my electric bike battery void its warranty?

Adding a USB port to an electric bike battery may void its warranty. DIY modifications can pose potential risks, such as damaging the battery or causing electrical issues. Alternatives include using portable power banks or purchasing bikes with built-in USB ports.

Is it possible to charge my electric bike’s battery through the USB port?

Yes, it is possible to charge an electric bike’s battery through a USB port. However, it is important to note that USB ports have limitations in terms of power output and may not provide sufficient charging capacity for the battery.

Can I use the USB port on my electric bike battery to power other devices while riding?

Yes, the USB port on my electric bike battery can be used to power other devices while riding. However, it is important to consider the charging options and safety considerations to ensure proper functionality and avoid any potential hazards.

Advertisement

Conclusion

In conclusion, adding a USB port to your electric bike battery is a simple and worthwhile upgrade. By following the steps outlined in this article, you can easily connect a USB port to your battery and enjoy the convenience of charging your devices while on the go.

While some may argue that this modification is unnecessary, it is important to consider the practicality and versatility it offers. With a USB port, you can stay connected and powered up wherever your electric bike takes you.

So why not take advantage of this easy upgrade and enhance your electric biking experience.

Ralf is a devoted husband and father who loves spending time with his family. He enjoys riding his bicycle as much as possible, and takes every opportunity he can to get out on the open road. Ralf is a kind and gentle person who wants only the best for those around him.

Continue Reading
Advertisement

Electric Bike

Youtube How To Make An Electric Bike

Published

on

By

An image showcasing a skilled individual assembling an electric bike in a well-lit workshop, with tools neatly organized on a workbench, wires and components neatly laid out, and a sense of focused determination in their face

Did you know that the typical cost of a new electric bike is approximately $1,500? If that price seems too high for you, don’t fret, because I have a solution.

In this article, I will guide you through the process of making your own electric bike using step-by-step instructions and detailed explanations.

With the help of YouTube tutorials, you’ll be able to convert your regular bike into an electric one, saving you money and giving you the freedom to ride with ease.

So let’s get started on this exciting DIY project!

Key Takeaways

  • Average price of a new electric bike is around $1,500
  • Electric bikes offer eco-friendly transportation
  • Factors to consider when choosing an electric bike: motor power, battery capacity, and range
  • Understanding motor power and battery quality is important

Introduction to Electric Bikes

Advertisement

If you’re interested in building an electric bike, let’s start with a brief introduction to what electric bikes are.

Electric bikes, also known as e-bikes, are bicycles equipped with an electric motor that assists the rider’s pedaling. They have gained popularity due to their numerous benefits.

Electric bikes offer an eco-friendly mode of transportation, as they produce zero emissions and reduce reliance on fossil fuels. They also provide a practical solution for commuting, especially in hilly areas or when covering long distances.

When choosing the right electric bike, it is crucial to consider factors such as motor power, battery capacity, and range.

Understanding the components of an electric bike, including the motor, battery, controller, and display, is essential for successful assembly.

Advertisement

Now, let’s delve into understanding the components of an electric bike.

Understanding the Components of an Electric Bike

To understand the components of an e-bike, it’s important to learn about the different parts that make up this mode of transportation. The two key components of an electric bike are the motor and the battery. Understanding motor power is crucial in selecting the right one for your needs. The motor determines how fast and how far the bike can go, so it’s essential to choose a motor with sufficient power.

Additionally, choosing the right battery is essential for optimal performance. The battery provides the energy needed to power the motor, so selecting a high-quality battery with a long lifespan is important. Other components include the controller, which regulates the power flow, the throttle, which controls the speed, and the display, which provides information about the bike’s performance.

Now that we understand the components, let’s move on to the tools and materials needed for the project.

Tools and Materials Needed for the Project

Advertisement

You’ll need a variety of tools and materials to complete this project. Some of the tools you’ll need include a wrench set, a socket set, a screwdriver set, pliers, wire cutters, and a soldering iron. These tools will help you with tasks such as removing and installing components, tightening bolts and screws, and making electrical connections.

As for materials, you’ll need an electric bike conversion kit, which typically includes a motor, a battery, a controller, and other necessary components. Additionally, you’ll need a bike frame that is compatible with the conversion kit, as well as various cables, connectors, and zip ties for securing and organizing the wiring.

Once you have all the tools and materials ready, you can move on to the step-by-step guide to convert your bike.

Step-by-Step Guide to Convert Your Bike

In this discussion, I’ll guide you through the process of converting your bike into an electric one.

Advertisement

First, we’ll start by removing the old parts, such as the pedals and chain, to make room for the electric components.

Next, we’ll move on to installing the electric components. This includes the motor, battery, and controller. It’s important to ensure that these components are securely attached and properly connected.

Once the installation is complete, we’ll proceed to testing and adjustments. During this step, we’ll check if all the components are functioning correctly. If necessary, we’ll make any adjustments to ensure optimal performance.

Overall, converting your bike into an electric one requires careful removal of old parts, installation of new electric components, and thorough testing and adjustments.

Removing the Old Parts

First, take off the old handlebars and set them aside.

Advertisement

To remove bike parts efficiently, follow these steps:

  1. Loosen the stem bolts using an Allen wrench, allowing the handlebars to slide out.
  2. Detach the brake and gear cables from the handlebars by loosening the clamps with a screwdriver.
  3. Remove the grips by spraying a small amount of soapy water or rubbing alcohol underneath them, then twisting and pulling them off.
  4. Unscrew the stem cap and use a hammer to lightly tap the top of the stem bolt, loosening the stem from the fork.

Disposing of old components responsibly is crucial. Consider donating usable parts to a local bike shop or recycling center.

Now that you’ve successfully removed the old parts, let’s move on to installing the electric components.

Installing the Electric Components

Now that the old parts have been removed, it’s time to start installing the electric components for your electric bike conversion.

Choosing the right electric components is crucial to ensure the performance and efficiency of your bike. The first step is to select the right motor for your bike. Consider factors such as power output, torque, and compatibility with your bike frame.

Next, you’ll need to install the motor controller, which regulates the power flow to the motor. Make sure to follow the manufacturer’s instructions for proper wiring and connections.

Advertisement

Additionally, you’ll need to install the battery pack and connect it to the motor controller.

Finally, don’t forget to install the throttle and display panel to control the electric assistance levels and monitor battery life.

With all the electric components properly installed, you’re now ready to move on to testing and adjustments to ensure everything is working smoothly.

Testing and Adjustments

To ensure smooth operation, it is important to thoroughly test and make any necessary adjustments to the electric bike conversion. Here are some testing methods and performance improvements to consider:

  1. Test the battery: Check the voltage and capacity of the battery to ensure it’s functioning properly. Look for signs of damage or wear.

  2. Test the motor: Connect the motor to a power source and observe its performance. Make sure it’s running smoothly and producing the desired power output.

  3. Test the controller: Check the functionality of the controller by connecting it to the battery and motor. Ensure it properly regulates the motor’s speed and power.

  4. Adjustments: Based on the test results, make necessary adjustments to optimize performance. This may include fine-tuning the motor’s power output, adjusting the controller settings, or replacing any faulty components.

By thoroughly testing and making these adjustments, you can ensure that your electric bike conversion performs at its best.

Advertisement

Now, let’s move on to discussing safety precautions and regulations.

Safety Precautions and Regulations

Make sure you follow safety precautions and regulations when building your electric bike. It is crucial to prioritize your safety and comply with legal requirements. When working on your electric bike, always wear the appropriate safety gear, such as a helmet, gloves, and eye protection, to protect yourself from any potential accidents or injuries. Additionally, familiarize yourself with the legal requirements in your area regarding electric bikes, such as speed limits and age restrictions. Adhering to these regulations will ensure that you are riding within the law and maintaining the safety of yourself and others. In the next section, we will discuss maintenance and troubleshooting tips to keep your electric bike running smoothly and address any issues that may arise.

Maintenance and Troubleshooting Tips

When it comes to maintaining and troubleshooting an electric bike, there are a few key areas to focus on. Proper battery maintenance is crucial for ensuring optimal performance and longevity. This includes regular charging, avoiding extreme temperatures, and checking for any signs of damage.

Taking care of the motor is also important. Keeping it clean and lubricated can help prevent issues such as overheating or loss of power.

Lastly, being aware of common issues such as brake problems or electrical issues and knowing their solutions can save you time and money in the long run.

Advertisement

Battery Maintenance

Proper battery maintenance is essential for keeping your electric bike in good condition. One of the most important aspects of battery maintenance is ensuring that you charge it correctly. It is important to follow the manufacturer’s guidelines for charging your battery, as overcharging or undercharging can lead to decreased battery life. Additionally, it is recommended to avoid charging your battery to 100% capacity unless necessary, as this can also reduce its overall lifespan.

Another way to extend your battery’s life is by avoiding extreme temperatures, as both cold and hot weather can have a negative impact on its performance. Lastly, it is crucial to regularly check the battery connections and clean them if necessary, as loose or dirty connections can affect the battery’s performance.

By following these battery maintenance tips, you can ensure that your electric bike’s battery lasts as long as possible.

Now, let’s move on to motor care.

Motor Care

Taking care of your motor is essential for the longevity and performance of your electric bike. To ensure optimal motor efficiency, it is crucial to perform regular maintenance and adhere to proper battery charging practices. Here are some key points to consider:

Advertisement
Key Point Description
Regular Cleaning Keep the motor clean and free from debris to prevent any obstructions or damage.
Lubrication Properly lubricate the motor bearings and gears to reduce friction and improve performance.
Battery Charging Habits Follow the manufacturer’s guidelines for charging the battery to avoid overcharging or undercharging, which can affect the motor’s performance.
Regular Inspections Regularly inspect the motor for any signs of wear or damage, such as loose connections or overheating. Address any issues promptly to prevent further damage.

By taking these steps to care for your motor, you can ensure its longevity and optimize your electric bike’s performance. In the next section, we will explore common issues that may arise with electric bike motors and their solutions.

Common Issues and Solutions

After ensuring proper motor care, it’s important to be aware of common issues that may arise when building an electric bike. Identifying these issues early on can save time and frustration during the construction process.

Here are some common issues and their solutions:

  1. Battery Life: One common problem is a short battery life. This can be caused by a faulty battery or improper charging. To solve this, ensure you have a high-quality battery and follow the manufacturer’s charging guidelines.

  2. Motor Overheating: Another issue is motor overheating, which can be caused by excessive use or inadequate cooling. To prevent this, use a motor with proper cooling mechanisms or add external cooling components.

  3. Wiring Problems: Wiring issues can lead to power loss or malfunctions. Double-check all connections and use quality wiring to avoid these problems.

  4. Controller Malfunctions: A malfunctioning controller can result in erratic behavior or no power output. Troubleshoot the controller and consider replacing it if necessary.

With these common issues and their solutions in mind, we can now move on to exploring advanced modifications and upgrades for your electric bike.

Advanced Modifications and Upgrades

To enhance your electric bike, you can start by upgrading the battery for longer range and improved performance. Upgrading batteries is a common modification that can significantly improve the overall performance of your electric bike.

Advertisement

By installing a higher capacity battery, you can extend the range of your bike, allowing you to go on longer rides without worrying about running out of power. Additionally, upgrading to a more powerful battery can enhance the motor performance, providing you with increased speed and acceleration.

It is important to choose a battery that is compatible with your bike’s motor and controller to ensure optimal performance.

Once you have upgraded your battery, you can move on to exploring the various riding tips and techniques to further enhance your electric bike experience.

Riding Tips and Techniques

If you want to improve your overall experience with an e-bike, it’s essential to learn and implement various riding tips and techniques. Riding an electric bike requires a different set of skills compared to a regular bicycle, so it’s important to familiarize yourself with the right techniques. One important aspect is choosing the right gear for your ride. This involves considering factors such as the terrain, weather conditions, and the distance you plan to cover. By selecting the appropriate gear, you can ensure a smoother and more enjoyable ride. To give you an idea, here’s a table outlining different gear options based on the terrain:

Terrain Gear Option
Uphill Low gear
Downhill High gear
Flat surface Medium gear

By understanding and applying these riding techniques and choosing the right gear, you’ll be able to maximize your e-bike experience. Now let’s explore the resources and community support available to electric bike enthusiasts.

Advertisement

Resources and Community Support

When it comes to finding resources and community support for electric bikes, there are several key points to consider.

Online forums and groups are a great way to connect with other electric bike enthusiasts and share knowledge and experiences.

Electric bike shops and workshops are also valuable resources where you can get expert advice and assistance with repairs and modifications.

Additionally, there are recommended books and websites that provide in-depth information and guidance on electric bike technology and maintenance.

Online Forums and Groups

Online forums and groups are a great way to find advice and connect with other electric bike enthusiasts. Here are four reasons why they are invaluable resources:

Advertisement
  1. Knowledge sharing: Online forums provide a platform for electric bike enthusiasts to share their experiences and expertise. You can learn from their mistakes, gain valuable insights, and discover innovative ideas.

  2. Troubleshooting: When you encounter problems with your electric bike, online forums are a go-to place for finding solutions. Experienced enthusiasts can guide you through the process of diagnosing and fixing issues.

  3. Community support: Being part of an online community allows you to connect with like-minded individuals who share your passion for electric bikes. You can exchange stories, seek motivation, and build friendships that extend beyond the virtual world.

  4. Finding local enthusiasts: Online forums often have subsections dedicated to specific regions. This makes it easier to find fellow electric bike enthusiasts in your area, allowing you to organize group rides and meetups.

Joining online forums and groups can be a stepping stone to further explore the world of electric bikes. In the next section, we will delve into the realm of electric bike shops and workshops.

Electric Bike Shops and Workshops

When it comes to customizing your electric bike, there’s no better place to turn than electric bike shops and workshops. These specialized establishments are dedicated to all things electric bike-related and offer a wide range of services to help you create the perfect ride.

From upgrading your motor and battery to installing custom accessories, these shops have the expertise and resources to bring your vision to life. Not only do they provide the necessary tools and equipment, but they also have knowledgeable staff who can guide you through the customization process.

By visiting an electric bike shop or workshop, you can ensure that your bike meets your specific needs and preferences. Electric bikes offer numerous benefits, from reducing your carbon footprint to providing a more efficient mode of transportation.

Now, let’s delve into recommended books and websites to further expand your knowledge on electric bike customization.

Advertisement

Recommended Books and Websites

If you’re looking to learn more about customizing your electric bike, there are several recommended books and websites available.

One highly regarded book is ‘Electric Bicycles: A Guide to Design and Use’ by William C. Morchin. This comprehensive guide covers everything from the basics of electric bike technology to advanced customization techniques. It provides step-by-step instructions, detailed diagrams, and troubleshooting tips to help you build and modify your electric bike to suit your specific needs.

Another great resource is the website www.electricbike.com. This website offers a wealth of information on electric bikes, including articles, reviews, and forums where you can connect with other electric bike enthusiasts. It also has a section dedicated to DIY electric bike projects, providing detailed instructions and resources for building your own custom electric bike.

In conclusion, these recommended books and websites are invaluable resources for anyone looking to delve deeper into the world of electric bike customization. They provide the knowledge and inspiration needed to take your electric bike to the next level.

Conclusion and Final Thoughts

To wrap things up, you should take all the information into consideration and decide if making an electric bike is the right project for you. Throughout this guide, we have explored the world of electric bikes, providing step-by-step instructions and valuable resources to help you get started. Now, let’s summarize the key points and share some final thoughts.

Advertisement

Firstly, making an electric bike can be a rewarding and fulfilling project for those with a passion for DIY and a desire for sustainable transportation. It allows you to customize your bike according to your preferences and needs, while also reducing your carbon footprint. However, it’s important to remember that this project requires technical skills, research, and a significant investment of time and money.

In conclusion, if you have the necessary skills, resources, and enthusiasm, making an electric bike can be a fantastic project to undertake. It offers a unique opportunity to combine your love for biking with the excitement of creating your own eco-friendly mode of transportation. Keep in mind the project summary provided in the table below as you make your decision.

Project Summary
Difficulty: Moderate
Time Required: Several weeks
Estimated Cost: $500-$1000

Remember, this guide is just the starting point. It’s crucial to continue learning and seeking advice from experienced builders and online communities. With dedication and perseverance, you can successfully build your own electric bike and enjoy the thrill of riding it for years to come.

Frequently Asked Questions

Can I convert any type of bike into an electric bike?

Yes, any type of bike can be converted into an electric bike. The electric bike conversion process involves adding a motor, battery, and controller. Converting a regular bike into an electric bike offers benefits such as increased speed, easier uphill climbs, and longer range.

How much does it cost to convert a regular bike into an electric bike?

Converting a regular bike into an electric bike using electric bike conversion kits can cost anywhere from $200 to $1000. Pros include affordability and customizability, while cons include added weight and potential maintenance issues.

Advertisement

Are there any legal regulations or restrictions for using an electric bike?

There are legal regulations and restrictions for using an electric bike. Safety concerns include potential risks such as accidents and injuries. Additionally, using an electric bike contributes to sustainability by reducing carbon emissions and promoting eco-friendly transportation options.

What is the average range of an electric bike on a single charge?

The average range of an electric bike on a single charge depends on various factors, such as battery capacity, terrain, rider weight, and assistance level. Electric bike battery life can range from 20 to 100 miles, allowing for an efficient and enjoyable ride.

Can I still pedal the electric bike if the battery runs out?

Yes, you can still pedal an electric bike if the battery runs out. The pedal assist feature allows for easier pedaling and the benefits of pedaling include exercise, extending range, and reducing reliance on the battery.

Conclusion

In conclusion, converting your bike into an electric one is like giving it a turbo boost, propelling you into a whole new level of cycling excitement.

With the right tools, materials, and step-by-step guide, you’ll be able to create your own electric bike and enjoy the thrill of effortless rides.

Advertisement

However, it’s crucial to prioritize safety and adhere to regulations to ensure a smooth and secure experience.

Don’t forget to explore advanced modifications and upgrades to further enhance your electric bike’s performance.

Remember, with the support of the resources and community, you’ll be well on your way to becoming an electric biking pro.

Happy riding!

Advertisement

Continue Reading

Electric Bike

Why Won’t My Electric Bike Work

Published

on

By

An image capturing the frustration of a person standing next to their electric bike, with a puzzled expression and hands gesturing towards the bike's tangled wires, while a dimly lit workshop and scattered tools surround them

Do you find yourself pedaling without moving on your e-bike? Don’t let frustration take over! Your bike might just need a little troubleshooting to get back on the road.

In this article, we will explore the possible reasons why your electric bike won’t work and guide you through a step-by-step process to diagnose and fix the issue.

So, tighten your helmet and let’s dive into the world of electric bike problem-solving!

Key Takeaways

  • Unexplained loss of power can indicate a fault in the motor or battery system, and it is important to consult a professional technician for accurate diagnosis and fixing.
  • Strange noises or vibrations are often indicators of mechanical problems, and professional technicians can identify the source of the issue and perform necessary repairs.
  • Electrical malfunctions, such as lights or display not working, should be addressed by professionals who have expertise in troubleshooting and repairing wiring or connection issues.
  • Complex repairs should be left to professional technicians as failed DIY attempts may require their guidance, knowledge, and tools to effectively tackle the issues.

Check the Battery Connection

Check if the battery isn’t properly connected.

Advertisement

To troubleshoot the battery connection, begin by inspecting the battery wiring. Make sure that all the wires are securely attached and that there are no loose connections. Take a close look at the connectors and terminals to ensure they are clean and free from corrosion. If you notice any damage or frayed wires, they may need to be replaced.

Additionally, check if the battery is securely mounted in its designated place. A loose battery can cause disconnection issues.

Once you have confirmed that the battery connection is secure, you can move on to the next step of troubleshooting, which is ensuring that the battery is charged and functioning correctly.

Ensure the Battery is Charged

Make sure the battery’s charged. Troubleshooting battery issues is crucial when your electric bike won’t work. The first step is to ensure that the battery is fully charged.

Inspect the charging cable and make sure it is securely connected to both the battery and the power source. Look for any signs of damage or wear on the cable. Check if the charger light is on when plugged in. If not, it could indicate a faulty charger. You can also test the charger by using it on a different device to see if it functions properly. If the charger is indeed faulty, you may need to replace it.

Advertisement

Once you have confirmed that the battery is charged, it is time to move on to examining the motor and wiring to further diagnose the issue.

Examine the Motor and Wiring

Take a close look at the motor and wiring to troubleshoot motor issues and identify any wiring problems.

Start by examining the motor itself. Look for any visible signs of damage, such as loose or disconnected wires, burnt or frayed insulation, or broken components. Check the motor’s connections to ensure they are secure and tightly fastened.

Advertisement

Next, inspect the wiring that connects the motor to the battery and controller. Look for any loose or damaged wires, as well as any signs of corrosion or rust. If you find any issues, repair or replace the affected parts as necessary.

Once you have examined the motor and wiring, you can move on to testing the throttle and controller to further diagnose the problem.

Test the Throttle and Controller

To troubleshoot the issue with your electric bike, start by testing the throttle and controller. The throttle is responsible for controlling the speed of the bike, while the controller manages the power flow from the battery to the motor. Begin by checking the throttle connection to ensure it is securely plugged in. If the connection is loose, reattach it firmly. Next, test the throttle by twisting it and observing the response. If there is no response or the bike doesn’t accelerate, the throttle may be faulty and require replacement. Moving on to the controller, familiarize yourself with its functions by referring to the user manual. Check if the controller is powered on and if all the wires are properly connected. If everything appears to be in order but the bike still doesn’t work, it may be necessary to inspect the brake system for any potential issues.

Inspect the Brake System

Advertisement

Inspecting the brake system is crucial to ensure the safe operation of your e-bike. To check the brake pads, follow these steps:

  1. Look for any signs of wear or thinning on the brake pads. If they are less than 3mm thick, they need to be replaced.

  2. Check the alignment of the brake pads with the rim. They should be centered and not rubbing against the tire.

  3. Examine the brake cables for any fraying, kinks, or signs of damage. Replace them if necessary.

  4. Test the brake lever to ensure it engages smoothly and quickly stops the bike.

By thoroughly inspecting the brake system, you can identify any issues that may be causing your electric bike to not work properly.

Once you have checked the brake pads and inspected the brake cables, it’s important to look for any loose or damaged parts to address in the subsequent section.

Look for Any Loose or Damaged Parts

Now that you have inspected the brake system, it is time to move on to the next step in troubleshooting your electric bike.

The current subtopic is to look for any loose or damaged parts. This is an important step because common issues with electric bikes often stem from loose or damaged components.

Advertisement

Begin by carefully examining the entire bike, paying close attention to the frame, handlebars, pedals, and any other areas where parts may be attached. Look for any signs of wear and tear, such as cracks, rust, or loose screws.

Tighten any loose parts using the appropriate tools and replace any damaged components as necessary. By thoroughly inspecting and addressing any loose or damaged parts, you can ensure that your electric bike is in optimal working condition.

Moving forward, let’s verify the tire pressure in the next section.

Verify the Tire Pressure

Check the tire pressure on your electric bike to ensure optimal performance. Proper tire pressure is crucial for the smooth operation of your electric bike and can affect its speed, handling, and overall efficiency. To troubleshoot the motor and maximize your riding experience, follow these steps:

  • Use a digital tire pressure gauge to measure the pressure in each tire accurately.
  • Refer to your electric bike’s manual or the manufacturer’s recommendations for the ideal tire pressure.
  • Adjust the pressure using a bike pump, adding or releasing air as necessary.
  • Double-check the tire pressure after making adjustments to ensure it meets the specified range.

By checking the tire pressure regularly, you can prevent potential issues such as decreased battery life, increased rolling resistance, and unstable riding conditions.

Once you have verified the tire pressure, it’s time to move on to the next section and address the importance of cleaning and lubricating the chain.

Advertisement

Clean and Lubricate the Chain

To ensure optimal performance, make sure you clean and lubricate the chain on your electric bike regularly. Cleaning and lubricating the chain is essential for optimal performance and the longevity of your electric bike.

Over time, dirt, dust, and debris can accumulate on the chain, which can lead to increased friction and wear. By regularly cleaning the chain, you can remove these particles and prevent them from causing damage. Additionally, lubricating the chain helps to reduce friction and improve the overall efficiency of the bike. This not only enhances the performance of your electric bike but also prolongs its lifespan.

Once you have cleaned and lubricated the chain, the next step is to adjust the electric bike’s settings for a smooth and enjoyable ride.

Adjust the Electric Bike’s Settings

Make sure to adjust your electric bike’s settings for a smooth and enjoyable ride.

When troubleshooting issues with your electric bike, one of the first steps you should take is to adjust the power settings. This can help address problems such as poor acceleration or difficulty in climbing hills.

Advertisement

Start by checking the power level on your bike’s display and ensure that it is set to an appropriate level for your desired riding experience. Additionally, you may need to adjust the pedal assist level or throttle sensitivity to optimize your bike’s performance.

Experiment with different settings to find the right balance between power and efficiency.

If, after adjusting the settings, your electric bike still doesn’t work properly, it may be time to consult a professional technician for further assistance.

Consult a Professional Technician if Necessary

If you’re experiencing persistent issues with your electric bike, it might be worth seeking the help of a professional technician. While adjusting the settings can often resolve minor problems, there are certain situations that require the expertise of a trained technician.

Here are four indications that it’s time to consult a professional:

Advertisement
  1. Unexplained loss of power: If your electric bike suddenly loses power without any apparent reason, it could be due to a fault in the motor or battery system. A technician will be able to diagnose and fix the issue accurately.

  2. Strange noises or vibrations: Unusual sounds or vibrations during operation can indicate mechanical problems. A technician can identify the source of the issue and perform the necessary repairs.

  3. Electrical malfunctions: If the electrical components of your electric bike are not functioning correctly, such as the lights or display, a professional technician can troubleshoot and repair the wiring or connections.

  4. Complex repairs: If you’ve attempted to fix the problem yourself but haven’t had any success, it’s time to seek professional guidance. A technician will have the knowledge and tools to tackle complex repairs effectively.

Remember, consulting a professional technician is essential to ensure the safe and efficient operation of your electric bike.

Frequently Asked Questions

How do I clean and lubricate the chain on my electric bike?

To clean and lubricate the chain on your electric bike, start by using a degreaser and a brush to remove dirt and grime. Rinse with water and dry thoroughly. Apply a bicycle-specific lubricant evenly along the chain, wiping off any excess. Repeat regularly for optimal chain maintenance.

How do I adjust the settings on my electric bike?

To adjust the settings on your electric bike, start by accessing the control panel. From there, you can adjust the pedal assist level to your desired setting. If you’re experiencing battery issues, troubleshoot by checking the connection and charge level.

What should I do if I notice any loose or damaged parts on my electric bike?

If you notice any loose or damaged parts on your electric bike, you should take immediate action. To fix a punctured tire, locate the hole, remove the tire, patch the hole, and reassemble. To replace brake pads, remove the old pads, install new ones, and adjust the brake system.

How do I test the throttle and controller on my electric bike?

To test the throttle and controller on your electric bike, start by testing the battery voltage. Then, troubleshoot the motor by checking the connections, controller settings, and motor resistance. Remember the adage: "Measure twice, cut once."

Advertisement

When should I consult a professional technician for help with my electric bike?

To ensure the best performance of your electric bike, seek professional help when you encounter complex issues beyond basic troubleshooting. They can diagnose and fix common problems like faulty controllers, malfunctioning batteries, or motor issues.

Conclusion

In conclusion, if you find yourself asking why your electric bike won’t work, it’s crucial to go through a thorough troubleshooting process.

Check the battery connection, ensure it’s charged, and examine the motor and wiring.

Test the throttle and controller, inspect the brake system, and verify the tire pressure.

Additionally, clean and lubricate the chain, and adjust the bike’s settings.

Advertisement

If all else fails, don’t hesitate to consult a professional technician for further assistance.

Remember, taking these precise and detailed steps will help you get back on your electric bike with confidence and efficiency.

Continue Reading

Electric Bike

X-Treme Rocky Road 48v 500w Fat Tire Electric Bike How To Turn On

Published

on

By

An image showcasing the X-Treme Rocky Road 48v 500w Fat Tire Electric Bike being powered on

Are you fed up with having difficulty starting your X-Treme Rocky Road 48V 500W Fat Tire Electric Bike? Don’t worry, riders! In this helpful guide, I will take you through the process of starting your bike step by step.

From unpacking and assembling to finding the power button and ensuring the battery is charged, I’ve got you covered.

So buckle up, get ready to ride, and let’s dive into the electrifying world of the X-Treme Rocky Road Electric Bike!

Key Takeaways

  • Carefully cut through packaging tape without damaging parts
  • Locate the power button with a power symbol or the word ‘power’
  • Ensure the battery is fully charged by following manufacturer’s instructions
  • Press and hold the power button on the control panel until the display screen lights up

Unpack and Assemble the Bike

To turn on the x-treme rocky road 48v 500w fat tire electric bike, you need to unpack and assemble it.

Advertisement

Before diving into the assembly process, let me share some unpacking tips. Start by carefully cutting through the packaging tape, making sure not to damage any parts. Once unpacked, lay out all the components and refer to the instruction manual for guidance.

Now, let’s talk about the assembly process. Begin by attaching the front wheel, making sure it’s properly aligned and tightened. Next, mount the handlebars securely, adjusting them to a comfortable position. Troubleshooting common assembly issues, such as loose screws or misaligned parts, will ensure a smooth setup.

Finally, locate the power button, which is conveniently placed on the handlebar. With the bike unpacked and assembled, it’s time to power it up and hit the road.

Locate the Power Button

Find the power button on your x-treme rocky road 48v 500w fat tire electric bike. To turn on your bike, you need to locate the power button, which is usually located on the control panel or handlebars. Here are some important things to know about the power button:

  • Look for a button with a power symbol or the word ‘power’ written on it.
  • The power button may be illuminated or have a light indicator to show if the bike is on or off.
  • Some bikes have a key ignition system, so make sure to insert and turn the key to activate the power.

If you are having trouble turning on your bike, there could be a few issues to troubleshoot. Check the battery level and make sure it is fully charged. Additionally, ensure that all connections are secure and that the bike is properly assembled.

Once you have located the power button and resolved any issues, you can move on to ensuring the battery is fully charged.

Advertisement

Ensure the Battery is Fully Charged

Make sure the battery on your X-treme Rocky Road 48V 500W fat tire electric bike is fully charged. Before turning on the bike, it is important to ensure that the battery has enough power to operate the bike efficiently.

To charge the battery, connect the charger to a power outlet and then plug it into the charging port on the bike. It is essential to follow the battery charging precautions provided by the manufacturer to prevent any potential hazards. If you encounter any issues while charging the battery, such as slow charging or the battery not holding a charge, it is recommended to troubleshoot the problem or seek assistance from a professional.

Once the battery is fully charged, you can proceed to press and hold the power button to turn on the electric bike.

Advertisement

Press and Hold the Power Button

Hold down the power button to start it.

Press and hold the power button located on the control panel of your X-Treme Rocky Road 48V 500W fat tire electric bike. This button is usually labeled with a power symbol. Make sure to press and hold it for a few seconds until you see the display screen light up.

If the bike doesn’t turn on, there are a few troubleshooting steps you can try.

First, check if the battery is properly connected and fully charged, as discussed in the previous subtopic.

Next, ensure that the power button is not stuck or damaged.

Advertisement

Lastly, try resetting the bike by disconnecting and reconnecting the battery.

Avoid common mistakes like not pressing the power button long enough or not having the battery properly connected.

Once you have successfully turned on the bike, wait for the display screen to turn on, indicating that the bike is ready to use.

Wait for the Display Screen to Turn On

Advertisement

Once the power button is pressed and held, you just need to wait for the display screen to turn on.

The display screen is an essential component of the x-treme rocky road 48v 500w fat tire electric bike as it provides important information about the bike’s performance and settings.

It shows details such as speed, battery level, distance traveled, and even allows you to adjust various settings.

If the display screen does not turn on after pressing the power button, there may be some troubleshooting steps you can take.

Check if the battery is properly connected, ensure that the bike is turned on, or try resetting the display screen.

Advertisement

Once the display screen turns on, you can proceed to adjust the settings if necessary.

Adjust the Settings if Necessary

If needed, you can easily adjust the settings on the display screen of the x-treme rocky road 48v 500w fat tire electric bike. This allows you to customize your riding experience and troubleshoot any issues that may arise. The display screen is user-friendly and provides easy access to various settings. Here is a table outlining the available settings:

Setting Description Adjustments
Power Level Control the amount of power the motor provides Increase or decrease power level
Speed Limit Set a maximum speed for the bike Increase or decrease speed limit
Trip Distance Keep track of the distance you have traveled Reset trip distance

By adjusting these settings, you can fine-tune the performance of your electric bike to suit your preferences. Once you have made any necessary adjustments, you can then mount the bike and prepare to ride.

Mount the Bike and Prepare to Ride

To start your ride, simply hop on the bike and get ready to go. Before mounting the bike, it’s important to ensure you are following the proper techniques for a safe and comfortable ride. Here are some mounting techniques to keep in mind:

  • Position the bike upright and hold the handlebars firmly.
  • Place one foot on the ground and swing your other leg over the frame.
  • Take a comfortable seat on the saddle and position your feet on the pedals.

Once you are securely on the bike, it’s essential to take safety precautions. Make sure you are wearing a helmet and any other necessary protective gear. Check that the brakes are functioning properly and adjust your seat height if needed. Now, you’re ready to move on to the next step: testing the motor and pedal assist function.

Test the Motor and Pedal Assist Function

Make sure you test the motor and pedal assist function before starting your ride. This is an important step to ensure that everything is working properly and to troubleshoot any potential issues.

Advertisement

To test the motor, turn on the bike by pressing the power button located on the display panel. Once the bike is powered on, give the throttle a gentle twist and listen for the motor to engage. You should feel a smooth and steady acceleration. If the motor doesn’t engage or if there are any strange noises, you may need to check the connections or consult the user manual for motor troubleshooting tips.

Next, test the pedal assist function by selecting a level on the display panel and pedaling the bike. You should feel a boost in power as the pedal assist kicks in. Experiment with different levels to find the one that suits your riding style.

Finally, practice operating the brakes and gears to ensure they are functioning properly. Transitioning into the next section, it’s important to have a good understanding of the bike’s controls before heading out on your ride.

Practice Operating the Brakes and Gears

Before heading out on your ride, take the time to practice operating the brakes and gears. Proper hand positioning on the brake levers and gear shifters is crucial for safe and efficient riding. When gripping the brake levers, place your index and middle fingers on the brake lever, with your other fingers wrapping around the handlebar. This allows for quick and easy access to the brakes when needed. As for the gear shifters, position your thumb and index finger on the levers, allowing for smooth shifting between gears. Understanding the different gear ratios and when to use them for optimal performance is also important. Lower gears are ideal for climbing steep hills or accelerating from a stop, while higher gears are best for maintaining speed on flat terrain. With practice, you’ll become familiar with the right gear for each riding situation. Now, enjoy your ride on the x-treme rocky road electric bike!

Enjoy Your Ride on the X-Treme Rocky Road Electric Bike!

Enjoy your ride on the X-Treme Rocky Road Electric Bike! As a proud owner of this amazing electric bike, you’re in for some truly enjoyable ride experiences. With its powerful 500w motor and fat tires, this bike can conquer any terrain with ease.

Advertisement

But to ensure that you continue to have a smooth and trouble-free ride, it’s important to take proper care of your bike.

Regular maintenance is key to keeping your X-Treme Rocky Road in top shape. Make sure to regularly check the tire pressure, as the fat tires may require a slightly different PSI compared to regular bikes. Additionally, keep an eye on the chain and gears, and lubricate them as needed to prevent any unnecessary wear and tear.

Another important aspect of maintaining your electric bike is to keep the battery charged and stored properly. Follow the manufacturer’s instructions for the best battery care practices.

By following these maintenance and care tips, you can ensure that your ride on the X-Treme Rocky Road Electric Bike remains enjoyable and hassle-free for years to come.

Frequently Asked Questions

How long does it take to fully charge the battery of the X-Treme Rocky Road Electric Bike?

The charging time for the battery of the x-treme rocky road electric bike can vary depending on the current charge level and the charger used. You can check the battery indicator to see when it is fully charged.

Advertisement

Is there a specific order in which the bike should be assembled?

Sure, there is a specific order to assemble the bike. First, attach the handlebars, then the front wheel, followed by the pedals, seat, and finally the battery. This ensures a safe and efficient assembly process.

How do I know if the battery is fully charged?

To determine if the battery is fully charged, check the battery charge indicator on the bike. It will display the current level of charge. If you encounter any issues with battery charging, consult the troubleshooting section of the user manual for assistance.

Can I adjust the pedal assist level on the bike?

Sure, I can adjust the pedal assist level on the bike. It’s great because it allows me to customize the amount of assistance I receive while pedaling. This feature enhances my riding experience and makes it easier to conquer hills or ride longer distances.

Are there any safety precautions I should be aware of before riding the X-Treme Rocky Road Electric Bike?

Before riding the electric bike, it’s important to follow safety precautions. Use proper riding techniques, such as maintaining balance and using hand signals. Regular maintenance is also crucial, including checking tire pressure, brakes, and keeping the bike clean.

Conclusion

After following the simple steps to turn on the X-Treme Rocky Road electric bike, I was ready to hit the road in no time.

Advertisement

The unpacking and assembly process was a breeze, and locating the power button was a piece of cake.

Once I ensured the battery was fully charged, I pressed and held the power button, anxiously waiting for the display screen to turn on.

As I mounted the bike and tested the motor and pedal assist function, I couldn’t help but feel a rush of excitement.

Operating the brakes and gears was a smooth experience, and before I knew it, I was off on an exhilarating ride.

The X-Treme Rocky Road electric bike truly delivers an unmatched experience, combining power, comfort, and style.

Advertisement

Continue Reading
Advertisement

Affiliate disclaimer

As an affiliate, we may earn a commission from qualifying purchases. We get commissions for purchases made through links on this website from Amazon and other third parties.

About us

We are a passionate team driven by the belief that cycling is a fantastic and accessible way to stay active while enjoying the beauty of the outdoors. Our mission is to share our love for cycling with as many people as possible. We provide a welcoming environment for individuals of all ages, abilities, and backgrounds to come together and ride bikes. With Ralf’s visionary leadership, Zane’s expertise in cycling adventures, and Olivia’s dedication to community building, we strive to create a vibrant space where everyone can experience the joy of cycling. Through group rides, workshops, and inclusive events, we inspire and empower individuals to embrace an active lifestyle. Join us in our quest to pedal together, embrace the joy of cycling, and foster connections that last a lifetime.

Advertisement

Trending