Cycling is a delightful, effective, and beneficial mode of transportation. Yet, if your bike isn’t properly tuned, it might cause unease, soreness, or injuries. Adjusting your seat to the appropriate height stands out as a crucial tweak to ensure a comfortable ride.
If your seat is too low, you will experience knee pain and fatigue, and if it is too high, you will risk damaging your lower back. To adjust your bicycle seat height, you don’t need to be a professional cyclist or bike mechanic. With a few simple steps, you can make sure that your seat is at the correct height for your body type and riding style.
In this article, I will guide you through the process of determining your ideal seat height, adjusting your seat, and testing your new position to ensure that you can ride comfortably and safely. So, let’s get started!
Key Takeaways
- Correct seat height is crucial for comfortable and efficient bike riding.
- Ideal seat height can be determined by measuring inseam and using a bike fit calculator.
- Adjusting seat height can be done easily with the right tools and knowledge.
- Testing new seat height is important to ensure comfort and efficiency.
Understand the Importance of Correct Seat Height
You can’t underestimate the importance of having the correct seat height when riding a bike. It’s a critical factor in ensuring a comfortable and efficient ride.
Not only does the right seat height prevent discomfort and potential injury, but it also maximizes the benefits of cycling, such as increased cardiovascular health and muscle strength.
Having the correct seat height improves your riding position and balance, allowing you to pedal more efficiently. It also helps avoid knee and hip pain, which can result from improper alignment.
Therefore, taking the time to adjust your bike seat to the correct height is crucial for a smooth and enjoyable ride.
Let’s move on to determining your ideal seat height.
Determine Your Ideal Seat Height
To find your perfect position, it’s important to establish the ideal height of your saddle. This can be determined by measuring your inseam and using a bike fit calculator. Here are three steps to follow:
-
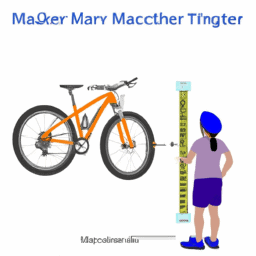
Measure your inseam: Stand with your legs shoulder-width apart and measure the distance from the floor to your crotch. Make sure to wear the shoes you’ll be cycling in.
-
Input your measurements into a bike fit calculator: There are many online calculators that can help you determine your ideal seat height based on your inseam and other body measurements.
-
Make adjustments: Once you’ve determined your ideal seat height, adjust your saddle accordingly. You may need to make small adjustments and test ride to find the perfect position.
Now that you’ve determined your ideal seat height, it’s time to make any necessary adjustments to your saddle.
Adjusting Your Seat Height
Once you have determined the ideal height for your saddle, it’s time to fine-tune its placement for maximum comfort and efficiency. Adjusting your seat height can be done easily with the right tools and knowledge. Here are some steps to follow:
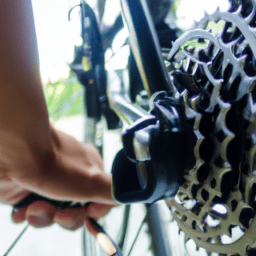
- Loosen the bolt or quick-release lever that holds the seat post in place.
- Adjust the height of the saddle by raising or lowering it to the desired level.
- Tighten the bolt or lever back up to secure the seat at the new height.
It’s important to avoid common mistakes such as adjusting the seat too high or too low, which can result in discomfort and even injury. Troubleshooting tips include checking the seat angle and making sure it is level, as well as double-checking the seat’s position and making sure it is centered over the bike’s frame. Once you have made these adjustments, you can test your new seat height to ensure it feels comfortable and efficient.
Test Your New Seat Height
Now that I’ve adjusted my bicycle seat height, it’s time to test it out. First, I’ll ride on flat terrain to get a feel for the new height.
While pedaling, I’ll observe my technique and adjust as needed to ensure maximum comfort and efficiency.
Ride on Flat Terrain
Cruising on flat terrain is made more comfortable by finding the perfect seat height for your bicycle. Here are some tips to help you ride smoothly on flat terrain:
-
Keep your knees slightly bent. When riding on flat terrain, it’s important to keep your knees slightly bent to absorb any shocks from the road. This will also help you maintain better balance and control of your bike.
-
Use your core muscles. Engaging your core muscles will help you maintain proper posture and balance on your bike. This will allow you to pedal more efficiently and effectively.
-
Stay relaxed. It’s important to stay relaxed and comfortable when riding on flat terrain. This will help you conserve your energy and avoid unnecessary fatigue.
Observing your pedaling technique is the next step in improving your bike ride.
Observe Your Pedaling Technique
To pedal like a pro, you need to pay attention to how smoothly you’re pushing down on the pedals, as if you’re painting a picture with your feet. Pedaling technique analysis is crucial to ensure you’re not wasting energy or putting unnecessary strain on your joints.
Start by observing your feet as they move in a circular motion around the pedals. Are you pushing down hard on one side and barely tapping the other? This asymmetry can cause discomfort and even injury over time. Aim to distribute your weight evenly on both pedals and keep a consistent rhythm.
Another common mistake is bouncing up and down on the saddle as you pedal. This can make it harder to maintain a steady pace and reduces your efficiency. Instead, focus on keeping your upper body stable and engaging your core muscles to support your pedal strokes.
As you become more aware of your pedaling technique, you may find that your seat height needs to be adjusted to optimize your performance.
Adjust as Needed
You can fine-tune your pedaling technique for maximum efficiency and comfort by paying attention to your body and making small changes. First, make sure that your seat height is adjusted properly. A common mistake is setting the seat too low, which reduces your pedaling power and puts extra strain on your knees. On the other hand, setting the seat too high can cause you to rock side to side or overreach, which can lead to discomfort and injury.
To find the right seat height, stand next to your bike and adjust the seat so that it aligns with your hip bone. Then, sit on the bike and place your foot on the pedal in the 6 o’clock position. Your leg should be almost fully extended with a slight bend in the knee. If you feel like you’re reaching for the pedals, the seat is too high. If your hips rock or your knees are bent more than 90 degrees, the seat is too low. Remember to make small adjustments and test ride before making any major changes. If you’re unsure or need more help, consider finding resources such as online tutorials or a bike fitting specialist.
Transition: Now that you have adjusted your seat height, it’s time to consider additional bike fit adjustments to further optimize your riding experience.
Consider Additional Bike Fit Adjustments
Now that I’ve adjusted my seat height, I need to consider additional bike fit adjustments to optimize my riding experience.
These include handlebar height and reach, cleat positioning, and saddle tilt and fore-aft positioning.
Correctly adjusting these components can improve comfort, power transfer, and overall performance on the bike.
Handlebar Height and Reach
Adjusting handlebar height and reach can greatly improve your comfort and performance while cycling. Here are some tips to help you get the most out of your handlebar adjustments:
-
Start by adjusting the handlebar height. This can be done by loosening the stem bolt and adjusting the height of the stem. Once you’ve found the right height, tighten the bolt to secure the position.
-
Next, adjust the reach of the handlebars. This can be done by adjusting the stem length or swapping out the stem entirely. A shorter stem will bring the handlebars closer to you, while a longer stem will push them farther away.
-
Make sure your handlebar grip is comfortable. You may want to experiment with different grip types or add padding to the handlebars.
-
Check your brake adjustment after making handlebar adjustments. If the brake levers are too far or too close, adjust them to a comfortable position.
-
Lastly, remember that handlebar adjustments should be made gradually and with small increments. Test out the adjustments on a short ride before making any major changes.
Adjusting your handlebar height and reach is just one aspect of achieving a proper bike fit.
The next step is to consider the positioning of your cleats.
Cleat Positioning
Getting the right cleat positioning on your cycling shoes can help maximize power transfer and prevent injury while riding, so it’s important to take the time to find the optimal position.
Start by checking your shoe compatibility with the cleat system you have. Different shoe brands and models have varying bolt patterns and hole placements, so make sure your cleats match your shoes to avoid any misalignment issues.
Once you have the correct cleat system, adjust the angle of your cleats. The angle of your cleats affects the position of your feet on the pedals and can have a significant impact on your power output and comfort. Experiment with different angles until you find the one that feels most natural and comfortable for you.
Finding the right cleat positioning is just one aspect of achieving optimal cycling performance and comfort.
Next, we’ll move on to discussing saddle tilt and fore-aft positioning.
Saddle Tilt and Fore-Aft Positioning
Make sure you’re comfortable on your bike by finding the right tilt and position for your saddle – this will prevent pain and discomfort during long rides. To adjust the tilt of your saddle, loosen the bolt underneath it with an Allen key, then adjust the angle until you find a comfortable position.
A level saddle is ideal for most riders, but some may prefer a slight tilt forward or backward. It’s important to experiment with different angles to find what works best for you.
In addition to tilt, the fore-aft position of your saddle can also affect your comfort on the bike. A saddle that’s too far forward or backward can cause pain in your knees, hips, or lower back. To adjust the fore-aft position, loosen the bolts underneath your saddle and slide it forward or backward until you find the right position.
It’s also important to consider the materials of your saddle – leather or synthetic materials can affect the amount of friction and pressure you feel while riding. Experiment with different saddles until you find one that provides the most comfort for your riding style.
Frequently Asked Questions
How often should I adjust my bike seat height?
It’s important to have proper bike fit, including seat height. Measuring inseam length is a good starting point. Personally, I adjust my seat height every time I change shoes or ride a new bike.
Can I adjust my bike seat height while riding?
No, you cannot adjust your bike seat height while riding. Proper seat height benefits your comfort, power, and injury prevention. Common mistakes when adjusting seat height include setting it too low or high and not checking levelness.
Does my body weight affect my ideal seat height?
My body weight affects my body posture on the bike, and thus my ideal seat height. When choosing a bike type, consider the intended riding style and terrain to determine the appropriate seat height for optimal performance and comfort.
How do I know if my seat is too high or too low?
If my seat is too high, my hips will rock side to side. If it’s too low, my knees will hurt. Proper bike posture requires adjusting seat height for different riding styles.
Are there any specific tools I need to adjust my bike seat height?
To adjust my bike seat height, I’ll need a wrench, allen key, or seatpost clamp depending on the type of bike. DIY seat height adjustment requires these tools and careful attention to the desired height and levelness.
Conclusion
Well folks, that’s all there is to it! Adjusting your bicycle seat height may seem like a simple task, but it’s important to get it right for comfort and optimal performance.
Remember, the correct seat height can help prevent injuries and improve your overall cycling experience.
So go ahead and give it a try – determine your ideal seat height, make the necessary adjustments, and test it out on your next ride.
And don’t forget to consider other bike fit adjustments that may help you ride more comfortably and efficiently.
Happy cycling!


