As a cyclist, understanding the significance of a dependable braking mechanism is crucial. Among the leading choices for bicycle brakes are hydraulic disc brakes, celebrated for their steadfast braking capabilities and straightforward maintenance. Nevertheless, it’s common for even the most superior hydraulic brakes to diminish in efficiency with time, necessitating adjustments.
In this article, we’ll guide you through the process of adjusting hydraulic bicycle brakes so you can keep your ride safe and smooth.
First, it’s important to understand how your brake system works. Hydraulic disc brakes use a fluid-filled system to transmit force from the brake lever to the brake caliper. When you squeeze the brake lever, the fluid is forced through the brake hose and into the caliper, where it pushes the brake pads against the rotor to slow down or stop the wheel. Understanding this system will help you diagnose and fix any issues that may arise.
So, let’s get started with the first step: checking your brake pads.
Key Takeaways
- Proper alignment of brake pads is crucial for optimal braking performance.
- Regular maintenance and checking for signs of wear can prevent accidents and ensure optimal performance of brake system.
- Adjusting cable tension using the barrel adjuster can make a big difference in how the brakes feel.
- Bleeding brakes with a bleed kit and brake fluid is crucial for maintaining performance.

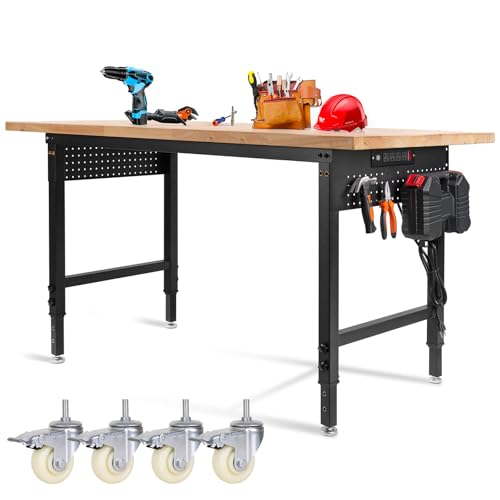
48" Height Adjustable Workbench, 2000 LBS Load Capacity Rubber Wood Top Workstation with Power Outlet and Foot Pads, Heavy-Duty Hardwood Worktable for Garage Workshop (with Foot Pads and Socket,48'')
A variety of adjustable positions: Our height adjustment ranges from 26.3" to 35", allowing you to use this...
As an affiliate, we earn on qualifying purchases.
Understand Your Brake System
You gotta understand your brake system before you can make any adjustments, so let’s break it down.
Hydraulic brake components include the brake lever, hose, caliper, and piston. The brake lever is located on the handlebar and is responsible for activating the system.
The hose connects the lever to the caliper and carries the hydraulic fluid. The caliper holds the brake pads and houses the piston, which is responsible for pushing the pads against the rotor.
To ensure your hydraulic brake system functions optimally, regular maintenance is key. Make sure to keep the system clean and free of debris. Take care not to contaminate the hydraulic fluid with dirt or grease, as this can damage the system.
Additionally, check the hose for any cracks or leaks, and replace it if necessary. Keep an eye on the brake pads and replace them when they become worn.
With a basic understanding of your brake system and some simple maintenance tips, you’ll be ready to check your brake pads in no time.
MUWOOD Height Adjustable Workbench with Wheels 60”×22” Heavy Duty Work Table 2000 LBS Capacity Rolling Work Table Rubber Wood Work Station with Power Outlet & Pegboard for Garage, Office, Workshop
PLEASE RECOGNIZE THE MUWOOD BRAND WHEN PURCHASING! SOLID RUBBER WOOD AND THICK STEEL: The tabletop is made of...
As an affiliate, we earn on qualifying purchases.
Check Your Brake Pads
When it comes to maintaining your bicycle’s brake system, checking your brake pads is a crucial step. You should be aware of the signs of wear, such as reduced braking power, a squealing sound, or visible thinning of the pads. If you notice any of these signs, it’s time to replace your brake pads.
To do so, follow these steps: remove the old pads, clean the brake caliper and rotor, and install the new pads properly.
Signs of Wear
If you notice a decrease in braking power or a consistent squeaking noise, it may indicate signs of wear in your hydraulic bicycle brakes. It’s important to check your brake rotors for any signs of warping or damage that may be causing the decreased braking power.
Additionally, replacing brake cables can also improve the braking performance of your hydraulic bicycle brakes. To determine if your brake pads are worn down, inspect them for any visible signs of wear like uneven surfaces or a decrease in thickness.
Another way to test if your brake pads are worn is to listen for a high-pitched squeaking noise when you apply the brakes. If you hear this noise, it’s an indication that your brake pads need to be replaced. Remember, it’s crucial to replace worn brake pads to ensure your safety while riding.
In the next section, we’ll discuss how to replace them.
How to Replace Them
Replacing worn brake pads is a crucial step in maintaining the safety and performance of your bike. To replace them, you’ll need a few tools such as a 5mm Allen wrench, a pair of pliers, and a new set of brake pads.
First, remove the wheel from your bike and take out the retaining pin or bolt that holds the brake pads in place. Then, pull out the old brake pads and insert the new ones, making sure that they’re properly aligned with the rim of the wheel.
One common mistake when replacing brake pads is not properly aligning them with the rim. Another mistake is not tightening the retaining pin or bolt enough, which can cause the brake pads to come loose while riding.
Once you’ve replaced the brake pads, it’s important to adjust your calipers to ensure that the pads are hitting the rim at the correct angle.

60" Adjustable Workbench with Wheels and Drawer, Solid Wood Rolling Work Bench Table with Power Outlet, Metal Tool Bench Work Bench for Garage, Large Load Capacity Workbench for Workshop,Office,Home
[engineered for heavy-duty use]: Supported by sturdy iron brackets and durable solid wood up to 3000 pounds. Measuring...
As an affiliate, we earn on qualifying purchases.
Adjust Your Calipers
To get your brakes working at their best, you need to make sure your calipers are adjusted properly. Caliper alignment is key to ensuring that your brake pads hit the rim evenly, and brake cable tension affects how much force you need to apply to stop.
Begin by checking the alignment of your calipers. Loosen the caliper mounting bolt, squeeze the brake lever, and then tighten the bolt while holding the lever down. This will ensure that the caliper is centered on the rim.
Next, adjust the brake cable tension. If the cable is too loose, you’ll have to pull the brake lever further to get the same amount of stopping power. If it’s too tight, the brake pads will rub against the rim and slow you down even when you’re not trying to brake. Find the barrel adjuster on your brake lever or caliper and turn it until the cable tension feels just right.
Once you’ve made these adjustments, you’re ready to bleed your brakes to ensure that there’s no air in the system. By adjusting your calipers and brake cable tension, you’ll be able to get the most out of your hydraulic bicycle brakes. With these tweaks, you’ll be able to stop on a dime and ride with confidence.
But before you hit the road, make sure to bleed your brakes to ensure they’re working at their best.
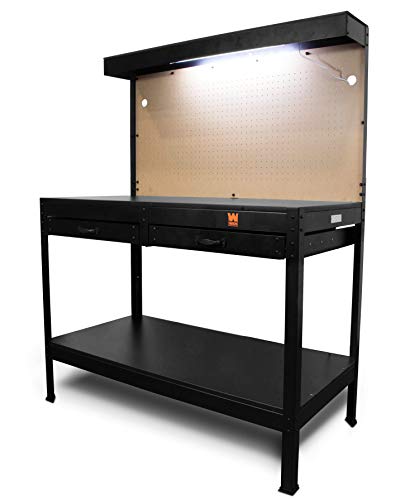
WEN WB4723T 48-Inch Workbench with Power Outlets and Light, Black
Perfect for woodworkers, mechanics, or anyone else in need of reliable organization
As an affiliate, we earn on qualifying purchases.
Bleed Your Brakes
Get ready to experience the thrill of confident and smooth braking by bleeding your brakes. Bleeding your hydraulic bicycle brakes is a crucial step in maintaining their performance. This process involves removing any air bubbles that have entered the brake lines and replacing them with fresh brake fluid. To do this, you will need a bleed kit and brake fluid.
Before you begin bleeding your brakes, make sure to read the instructions carefully and have all the necessary tools and materials ready. The table below outlines the steps involved in bleeding your brakes using a bleed kit. Follow each step carefully to ensure that your brakes are properly bled and functioning at their best. Once you have completed the bleeding process, move on to the next section to test your brakes.
| Step | Instructions |
|---|---|
| 1 | Remove the wheel so that the brake pads are separated. |
| 2 | Fill the syringe with fresh brake fluid and attach it to the bleed port on the brake lever. |
| 3 | Attach the bleed hose to the bleed port on the caliper and place the other end in a container to catch the used brake fluid. |
| 4 | Slowly pump the brake lever until all the air bubbles have been removed from the brake line. |
| 5 | Tighten the bleed port and remove the syringe and hose. Reinstall the wheel and test your brakes. |
Now that you have successfully bled your brakes, it’s time to test them. The next section will guide you through the process of testing your brakes to ensure that they are working correctly.
Test Your Brakes
Congratulations, you’re almost ready to go flying down those hills again, but before you do, let’s make sure those brakes are stopping you on a dime with a quick and easy test. Brake maintenance is crucial to ensure your safety on the road, so take some time to perform a simple test to make sure everything is working as it should.
To begin, squeeze the brake lever on your handlebars and make sure the brake pads engage the wheel rim. If the pads don’t engage the rim, try adjusting the cable tension or aligning the brake caliper.
Next, check if the brake lever feels spongy or if it reaches the handlebar before the brake pads engage the rim. If so, you may need to bleed your brakes or replace the brake pads.
Troubleshooting tips like these will help you ensure your brakes are in excellent working condition, so take some time to make any necessary adjustments before hitting the road.
Testing your brakes is a crucial step in brake maintenance. By following these simple steps, you can ensure that your brakes are in tip-top condition and ready to keep you safe on the road. Remember to troubleshoot any issues and make any necessary adjustments before you head out on your next ride.
Frequently Asked Questions
What type of hydraulic fluid should I use for my brakes?
To select the proper hydraulic fluid for your bicycle brakes, it’s important to choose a viscosity that matches the manufacturer’s specifications. Keep your brake fluid clean and fresh to ensure optimal performance and prevent damage to your system.
How often should I bleed my hydraulic brakes?
To maintain optimal performance, bleed hydraulic brakes at least once a year or sooner if the brake lever feels spongy. Always use high-quality brake fluid to prevent degradation and ensure consistent braking power.
How do I know if my brake rotors need to be replaced?
When braking, if you hear a grinding noise, feel a pulsing sensation, or experience poor braking performance, these are signs of rotor wear. Consider replacing or resurfacing your rotors.
Can I use the same brake pads on both front and rear brakes?
You should use brake pads compatible with both front and rear brakes. However, it’s important to replace them when they’re worn out. Replacing them in time will ensure proper braking and prevent damage to the rotors.
What is the best way to clean my hydraulic brake system?
To clean your hydraulic brake system, use specific hydraulic brake cleaning techniques and recommended cleaning products for hydraulic brakes. Avoid using harsh chemicals and make sure to thoroughly dry all components before reassembly.
Conclusion
Congratulations, you’ve successfully adjusted your hydraulic bicycle brakes! It may have been a bit intimidating at first, but with the right tools and knowledge, you were able to tackle this task like a pro.
You can now enjoy a smoother and more responsive braking experience on your rides.
But wait, before you hit the road, make sure to take a moment to appreciate the importance of regular brake maintenance. Just like any other component of your bike, your brakes require proper care and attention to ensure optimal performance and safety.
Don’t wait until you’re in a sticky situation to realize that your brakes are not up to par. Take the time to check and adjust them regularly, and your bike (and your body) will thank you for it.
Remember, a well-maintained bike is a happy bike, and a happy bike means a happier you. So, keep on pedaling, keep on exploring, and keep on taking care of your trusty steed.
Your bike will be your faithful companion for years to come, and with your newfound brake adjusting skills, you can ride with confidence and peace of mind. Happy trails!