Get ready to embark on an electrifying journey with the Jetson Electric Bike! This step-by-step guide will show you how to assemble your very own bike, ensuring a smooth and efficient ride.
From unboxing to connecting the battery, we’ll cover all the necessary steps to have you cruising in no time.
So grab your tools and let’s dive into the world of electric biking, where convenience and eco-friendliness meet in perfect harmony.
Key Takeaways
- Carefully inspect all components for damage before assembly.
- Make sure all necessary parts are included and check for any visible defects.
- Follow the step-by-step assembly instructions provided in the manual or seek customer support if needed.
- After assembly, connect the battery, charge it, and test the brakes and gears before riding.

Young Electric E-Bike Rack with Ramp, Hitch 2 Bike Rack, 200 lbs Capacity Electric Bike Carrier, Foldable Platform Mount for Cars, Trucks, SUVs, Minivans, Up to 5-Inch Fat Tire for 2'' Receiver
200LBS CAPACITY & V-GROOVE RAMP: The latest electric bike rack features an upgrade V-groove ramp for easy loading...
As an affiliate, we earn on qualifying purchases.
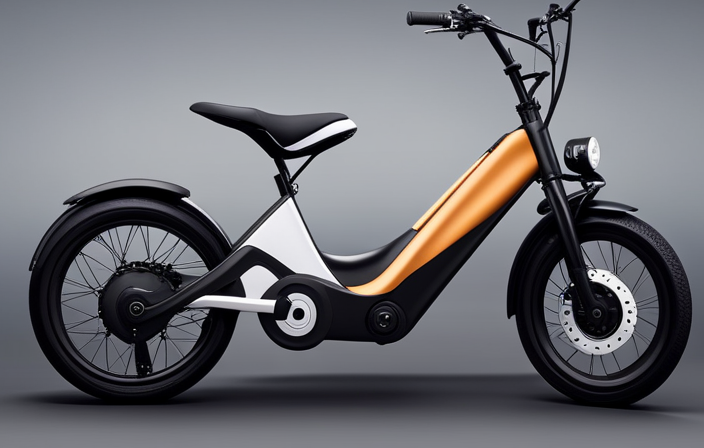
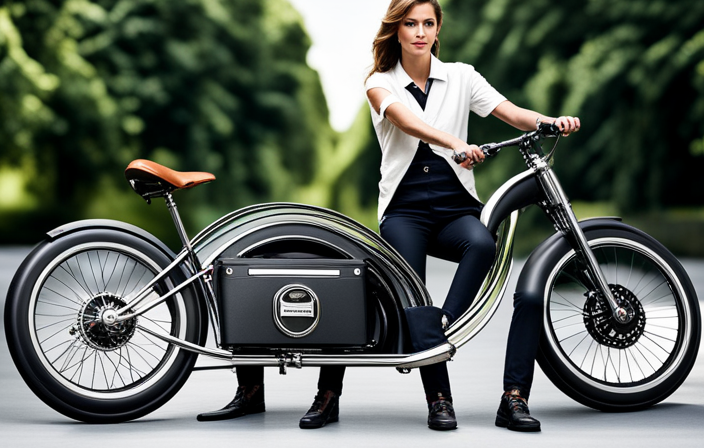
Unboxing Your Jetson Electric Bike
Now you can start by unboxing your Jetson Electric Bike and getting familiar with all the components. The unboxing experience is exciting, and it’s a chance to make your first impressions.
When you open the box, you’ll find the mainframe of the bike securely packaged. Take it out carefully, ensuring not to damage any parts. Next, you’ll see the handlebars, pedals, seat, and other accessories neatly arranged.
It’s essential to check that all the necessary parts are included, such as the charger, tools, and user manual. Take a moment to inspect each component, making sure everything is in excellent condition. Get a sense of the bike’s quality and craftsmanship.
Once you’ve completed the unboxing, you can move on to checking the parts and tools needed for assembly.

Ebike Rack with Ramp for 2 E-Bikes 200 lbs Capacity Fits 5" Fat Tire, Hitch Bike Rack for Cars SUVs Trucks with 2" Receiver, Foldable Tilting Locking No Assembly Needed E-Bike Platform Carrier
COMPACT FOLDABLE DESIGN WITH 4 WHEELS: The Eco Pro Hitch 2 E-Bike rack is ready to use straight...
As an affiliate, we earn on qualifying purchases.
Checking the Parts and Tools Needed
First, make sure you have all the necessary parts and tools. Here are the items you should have:
- Jetson Electric Bike frame
- Front wheel and tire
- Rear wheel and tire
- Battery pack
- Charger
Before starting the assembly process, carefully inspect each part for any signs of damage. This includes checking for cracks, scratches, or any other visible defects. If you notice any issues, contact the manufacturer for assistance.
Next, organize the tools you will need for the assembly. These may include a set of Allen wrenches, a screwdriver, and possibly a wrench or pliers. Having these tools readily available will make the assembly process much smoother and efficient.
Once you have checked for damage and organized your tools, you are ready to move on to the next step of attaching the handlebars.

Swagman Standard Fork Mount Rooftop Bike Carrier
EASY TO ASSEMBLE: The STANDARD is easy to assemble with no tools required, sets up in just minutes...
As an affiliate, we earn on qualifying purchases.
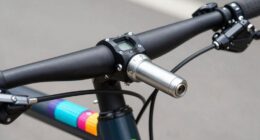
Attaching the Handlebars
To attach the handlebars, position them onto the frame and tighten the bolts using an Allen wrench. Before securing them, adjust the handlebar height to your preference. Loosen the stem bolts, position the handlebars at the desired height, and then tighten the bolts again. Once the handlebars are in place, choose the right handlebar grips. Look for grips that provide a comfortable and secure grip. Now that the handlebars are attached and adjusted, we can move on to installing the front wheel, the next step in assembling the Jetson electric bike.
Swagman UPRIGHT Roof Mount Bike Rack
EASY TO ASSEMBLE: The UPRIGHT roof rack installs in minutes following the instructions and carries one bike with...
As an affiliate, we earn on qualifying purchases.
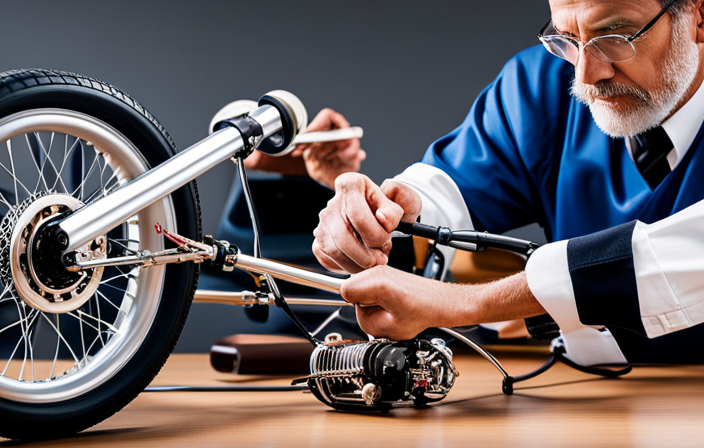
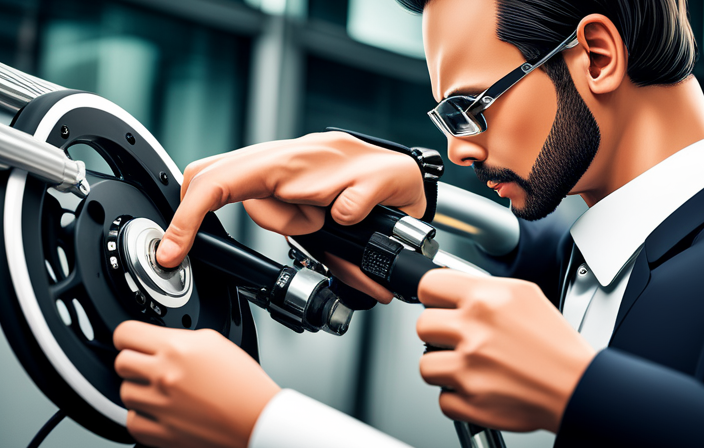
Installing the Front Wheel
To install the front wheel, you’ll need to align the axle with the fork dropouts and tightly secure it using the quick release lever. Start by inserting the axle into the fork dropouts, making sure it goes all the way through. Then, align the wheel so that it is centered between the fork blades. Once aligned, tighten the quick release lever by flipping it to the closed position, making sure it is tight enough to prevent any movement.
After the front wheel is securely attached, you can proceed to installing the front fender. This will help protect you from any debris that may be kicked up while riding. Simply attach the fender to the designated mounting points on the fork and tighten the screws or bolts to secure it in place.
If you encounter any issues with wheel alignment, double-check that the axle is properly inserted and tightened. Additionally, ensure that the quick release lever is fully closed and tightened. If problems persist, consult the instruction manual or contact customer support for further assistance.
Now that the front wheel is installed, it’s time to move on to mounting the seat and adjusting the height.
Mounting the Seat and Adjusting the Height
Once you have securely attached the front wheel, it’s time to mount the seat and adjust the height. Proper seat adjustments are crucial for a comfortable and efficient ride. To install the seat, locate the seat post and slide it into the seat tube on the bike frame. Use the quick-release lever or bolts to securely fasten the seat in place. Now, it’s time to adjust the seat height. Stand beside the bike and lift the seat to your hip level. Tighten the seat clamp to secure the seat at the desired height. Remember to ensure that the seat is level and aligned with the bike frame. With the seat properly installed and adjusted, you are now ready to move on to attaching the pedals for a complete setup.
Attaching the Pedals
Now that you have successfully adjusted the seat height, it’s time for you to attach the pedals.
Start by locating the left and right pedals. The left pedal is usually labeled with an ‘L’ and the right pedal with an ‘R.’
Take note that the left pedal is reverse threaded, meaning you need to turn it clockwise to tighten it. The right pedal, on the other hand, is threaded normally, so you tighten it counterclockwise.
Once you have identified the correct pedals, insert them into the corresponding crank arms. Use a pedal wrench or an adjustable wrench to tighten them securely. Make sure the pedals are tightened evenly and are not loose.
Now that the pedals are attached, you can move on to connecting the battery and charging it without any delay.
Connecting the Battery and Charging
First, you’ll need to connect the battery and start charging it. To extend the battery life and ensure efficient charging, follow these steps:
| Step | Action |
|---|---|
| 1 | Locate the battery compartment on the frame of the bike. |
| 2 | Align the connectors on the battery with the corresponding ports in the compartment. |
| 3 | Gently push the battery into place until it clicks securely. |
| 4 | Plug the charger into an electrical outlet and connect the other end to the charging port on the battery. |
| 5 | Leave the battery to charge for the recommended time, usually indicated in the user manual. |
Once the battery is connected and charging, you can proceed to the next step of testing the brakes and gears to ensure they are functioning properly.
Testing the Brakes and Gears
To ensure proper functionality, test the brakes and gears after connecting and charging the battery. Start by squeezing the brake levers to check the brake performance. Ensure that the brakes engage smoothly and bring the bike to a complete stop. If you notice any issues, such as a loose or spongy feel, adjust the brake cable tension accordingly.
Next, shift through the gears to assess their accuracy. Make sure the chain moves smoothly between gears without skipping or hesitation. Adjust the derailleur if needed to ensure precise gear shifting. Testing the brakes and gears will ensure a safe and efficient ride.
Now, let’s move on to adjusting the bike for comfort and a personalized fit.
Adjusting the Bike for Comfort
Start by making adjustments to the bike for a more comfortable ride. Here are four important adjustments to consider:
-
Bike seat: Ensure that the seat is at the right height for your comfort. It should be positioned so that your feet can touch the ground when you’re sitting on the seat and your legs are extended slightly when pedaling.
-
Handlebar height: Adjust the handlebars to a height that allows you to maintain a relaxed and natural position while riding. This will help prevent strain on your back and shoulders.
-
Seat angle: Tilt the seat slightly forward or backward to find the most comfortable position for your body. Experiment with different angles until you find the one that feels best for you.
-
Handlebar position: Adjust the handlebars forward or backward to find the most comfortable reach for your arms. This will ensure that you have proper control and grip while riding.
By making these adjustments, you can customize your bike to fit your body and enhance your overall comfort while riding.
Now, let’s move on to some important safety tips and maintenance guidelines to keep in mind for your Jetson electric bike.
Safety Tips and Maintenance Guidelines
Now let’s delve into some essential safety tips and maintenance guidelines for your Jetson electric bike.
When it comes to bike maintenance, regular check-ups are crucial. Inspect the tires for any signs of wear and tear, and ensure they are properly inflated to avoid accidents. Keep the chain clean and well-lubricated to enhance its longevity and prevent it from rusting. Additionally, check the brakes regularly to guarantee they are working efficiently.
Safety precautions are vital while riding your electric bike. Always wear a helmet to protect your head in case of any mishaps. Follow traffic rules and be aware of your surroundings. Use hand signals to indicate your intentions, and stay visible by wearing bright-colored clothes or using reflective accessories.
Lastly, be cautious when riding at night and consider mounting lights on your bike for increased visibility.
By following these maintenance guidelines and safety precautions, you can enjoy a safe and smooth ride on your Jetson electric bike.
Frequently Asked Questions
What is the maximum weight limit for the Jetson Electric Bike?
The maximum weight limit for the Jetson electric bike is [maximum weight limit]. It is important to stay within this limit to ensure safe and efficient operation of the bike.
Can I use the Jetson Electric Bike in the rain?
Yes, you can ride the Jetson electric bike in the rain, but it’s like taking a cat for a swim – not recommended! To protect your bike, dry it thoroughly after each ride and consider using a waterproof cover.
How long does it take to fully charge the bike’s battery?
It takes approximately 4-6 hours to fully charge the battery of the Jetson electric bike. However, it is important to note that frequent charging can decrease the battery lifespan over time.
Are replacement parts readily available for the Jetson Electric Bike?
Yes, replacement parts for the Jetson electric bike are readily available. Customer reviews on the availability of spare parts have been positive, making it easy to find what you need for repairs or upgrades.
Can the Jetson Electric Bike be folded for easy storage or transportation?
Yes, the Jetson electric bike is foldable, making it easy to store and transport. Its foldable design allows for convenient portability, making it a great option for those who need to save space or take it on the go.
Conclusion
In conclusion, assembling my Jetson Electric Bike turned out to be a breeze.
I carefully unboxed all the parts and checked the necessary tools.
Attaching the handlebars was a simple twist and tighten process.
Installing the front wheel was a smooth ride, and mounting the seat was a snap.
Connecting the battery was like plugging in a puzzle piece, and charging it was a quick and effortless task.
Testing the brakes and gears provided a smooth and responsive experience.
Adjusting the bike for comfort was like finding the perfect fit.
Following the safety tips and maintenance guidelines ensures a worry-free and enjoyable ride.
I’m now ready to hit the road with my new electric bike!