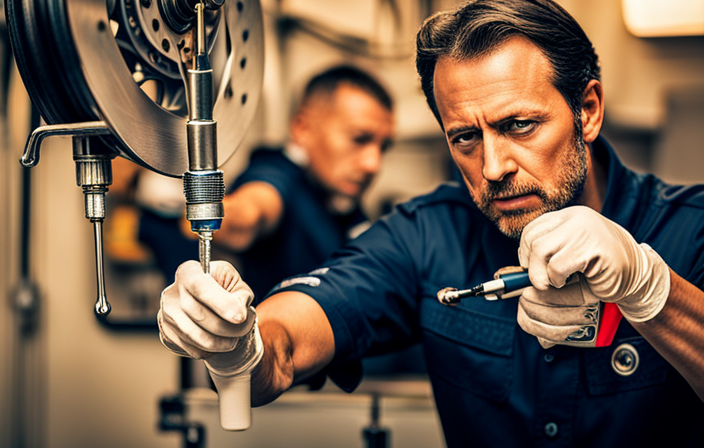
So you’ve been riding your bike, feeling the excitement of the journey, when you suddenly notice that your brakes are not working as well as they should be.
Don’t worry, my friend, because I’m here to guide you through the process of bleeding your bicycle brakes.
This precise and detailed article will equip you with the necessary knowledge and tools to effectively bleed your brakes, ensuring optimal performance and safety.
Let’s dive in and get those brakes pumping like never before!
Key Takeaways
- Choose the right brake fluid based on the bicycle’s manual or professional advice
- Clean and prepare the bicycle and work area before starting the bleeding process
- Identify the brake system and fluid type to ensure proper bleeding technique
- Follow the step-by-step process of removing brake pads and caliper, attaching the bleed kit, pumping and flushing brake fluid, and reinstalling brake pads and caliper
Gather the Necessary Tools and Materials
To bleed bicycle brakes, you’ll need to gather the necessary tools and materials.
The first step is choosing the right brake fluid. It’s important to use a brake fluid that is compatible with your bicycle’s brake system. Check your bicycle’s manual or consult a professional to ensure you select the correct type.
Next, you’ll want to take safety precautions during brake bleeding. Wear gloves to protect your hands from the brake fluid, as it can be corrosive. Additionally, make sure you have eye protection to shield your eyes from any splashes.
Once you have the right brake fluid and safety gear, you’re ready to move on to the next section about preparing your bicycle and work area.
Prepare Your Bicycle and Work Area
Before beginning, make sure your bike and workspace are ready. Clean your bike thoroughly to ensure there’s no dirt or debris that could contaminate the brake system. Gather all the necessary cleaning supplies, such as degreaser, brushes, and rags. Also, make sure to have safety precautions in place, such as wearing gloves and safety goggles to protect yourself from any chemicals or debris.
Next, prepare your work area by setting up a clean and organized space. Clear any clutter and have all your tools within reach. Lay down a clean towel or mat to protect your bike and catch any spills. Additionally, ensure good ventilation in the area to avoid inhaling any fumes from the cleaning products.
Now that your bike and work area are prepared, it’s time to identify the brake system and fluid type.
Identify the Brake System and Fluid Type
Once you’ve cleaned your bike and prepared your work area, it’s important to identify the type of brake system and fluid being used. Choosing the right brake fluid is crucial to ensure optimal performance and safety. There are different types of brake systems, such as hydraulic and mechanical, each requiring specific fluids. Understanding the different types of brake systems will help you determine the appropriate fluid to use. To help you easily identify the brake system and fluid type, refer to the table below:
| Brake System | Fluid Type |
|---|---|
| Hydraulic | DOT fluid |
| Mechanical | Cable |
By knowing the type of brake system and fluid, you can proceed to the next section, where we will remove the brake pads and caliper. It’s important to follow the correct steps to ensure a smooth and successful brake bleeding process.
Remove the Brake Pads and Caliper
First, you’ll need to take off the brake pads and caliper. This step is crucial in order to access the brake system and properly bleed the brakes.
Here are some discussion ideas to consider:
-
Brake pad replacement: While you have the brake pads off, it’s a good time to inspect them for wear and replace them if necessary. This ensures optimal braking performance.
-
Caliper maintenance: Take the opportunity to clean and inspect the caliper for any signs of damage or corrosion. Lubricating the caliper pins and slides can also improve its functionality.
Next, attach the bleed kit and open the bleed valve. This will allow you to begin the process of bleeding the brake system and removing any air bubbles that may have accumulated.
Attach the Bleed Kit and Open the Bleed Valve
To start the process, you’ll need to attach the bleed kit and open the bleed valve.
First, locate the bleed valve on your brake caliper. It is usually a small screw or bolt on the side.
Next, take the hose from the bleed kit and connect it to the bleed valve. Make sure it is securely attached to prevent any leaks.
Once everything is connected, slowly open the bleed valve by turning it counterclockwise. This will allow the old brake fluid to flow out.
Keep an eye on the fluid level in the brake reservoir and add more as needed.
Once all the old fluid has been flushed out, you can transition into the next step of pumping and flushing the brake fluid.
Pump and Flush the Brake Fluid
After attaching the bleed kit and opening the bleed valve, you can begin pumping and flushing the brake fluid.
To do this, start by squeezing the brake lever multiple times in a slow and controlled manner. This pump and flush technique helps to remove any air bubbles or contaminants that may be present in the brake system.
As you pump the lever, you will notice the brake fluid being pushed out through the bleed hose and into the catch container. It is important to continue pumping until the brake fluid coming out of the system is clean and free from any air bubbles.
During this process, it is crucial to keep an eye out for any common brake fluid issues such as discoloration or signs of contamination.
Once you have thoroughly pumped and flushed the brake fluid, you can move on to the next step of checking for air bubbles and repeating the process.
Check for Air Bubbles and Repeat the Process
After successfully pumping and flushing the brake fluid, it is crucial to check for any remaining air bubbles in the system. This step is essential in ensuring the brakes function optimally and prevent any potential brake issues.
To do this, I recommend the following three steps:
-
Start by inspecting the brake lines and connections for any visible air bubbles. These can indicate air trapped within the system.
-
Next, slowly squeeze the brake lever and observe if there are any spongy or inconsistent feelings. This could be a sign of remaining air bubbles.
-
If you detect any air bubbles or experience sponginess, repeat the process of pumping and flushing the brake fluid until the system feels firm and consistent.
By carefully following these steps, you can effectively troubleshoot brake issues and prevent any future problems.
Now, let’s move on to the next section where we will learn how to reinstall the brake pads and caliper.
Reinstall the Brake Pads and Caliper
Now you can begin reinstalling the brake pads and caliper. Start by aligning the brake pads with the rotor. Make sure the pads are facing the correct direction, with the side marked ‘R’ on the right side and the side marked ‘L’ on the left side.
Carefully slide the brake pads into the caliper, ensuring that they are seated properly.
Next, align the caliper with the rotor and slide it onto the mounting brackets. Tighten the bolts just enough to hold the caliper in place, but don’t fully tighten them yet. This will allow you to adjust the caliper alignment later.
Finally, transition into the next step by saying, "Now that the brake pads and caliper are installed, it’s time to test and adjust the brakes to ensure proper functionality."
Test and Adjust the Brakes
To ensure your brakes are functioning properly, you’ll want to test and make any necessary adjustments.
Start by checking the brake pad alignment. The pads should contact the rim evenly on both sides when the brake lever is squeezed. If they aren’t aligned, loosen the mounting bolt and adjust the position until they are centered.
Additionally, inspect the brake pad wear indicators. These small grooves on the surface of the pads indicate when they need to be replaced. If the grooves are no longer visible, it’s time for new pads.
After aligning the pads and checking the wear indicators, squeeze the brake lever to test the brakes. They should engage smoothly and bring the bike to a complete stop. If any adjustments are needed, refer to the manufacturer’s instructions.
Remember to maintain and regularly check your brake system to ensure optimal performance and safety.
Maintain and Regularly Check Your Brake System
Make sure you regularly maintain and check your brake system to ensure optimal performance and safety.
Regular maintenance is crucial for the longevity and effectiveness of your bicycle brakes. Start by inspecting the brake pads for wear and tear, ensuring they have enough material left. If they are worn out, replace them immediately.
Additionally, check the brake cables for any signs of fraying or damage. If you notice any issues, replace the cables promptly.
It is also important to regularly clean and lubricate the brake calipers and levers to prevent them from becoming stiff or sticky.
Troubleshooting common brake issues, such as squeaking or lack of responsiveness, can often be resolved by adjusting the brake pads or tightening the brake cables.
By following these tips, you can maintain a reliable and safe brake system for your bicycle.
Frequently Asked Questions
How often should I bleed my bicycle brakes?
You should bleed your bicycle brakes every 6-12 months, depending on your usage and the condition of your brake system. Properly bleeding bicycle brakes ensures optimal performance and safety on the road.
Can I use any type of brake fluid for bleeding my brakes?
I researched the pros and cons of using different types of brake fluids for bleeding. It’s important to use the right type for your bike. I’ll also cover common mistakes to avoid during the process.
Is it necessary to remove the brake pads and caliper before bleeding the brakes?
To properly bleed bicycle brakes, it is not necessary to remove the brake pads and caliper. However, it is important to position the caliper in a way that allows for easy access to the bleed port.
How do I know if there are air bubbles in the brake system?
To test for air bubbles in the brake system and troubleshoot spongy brakes, I can perform a simple procedure. I’ll pump the brake lever a few times and hold it down to see if it slowly sinks, indicating the presence of air bubbles.
What should I do if my brakes feel spongy even after bleeding?
If my brakes feel spongy even after bleeding, there may be other issues causing the problem. I would troubleshoot common brake issues like worn brake pads or contaminated fluid. I could also consider alternative methods for improving brake performance, such as upgrading to higher quality brake components.
Conclusion
In conclusion, bleeding bicycle brakes is a crucial skill for any cyclist. By following the steps outlined in this article, you can ensure that your brake system is in optimal condition, providing you with the stopping power you need on the road.
Remember to gather all the necessary tools and materials, prepare your bike and work area, and identify the brake system and fluid type. Don’t forget to check for air bubbles and repeat the process if needed.
With proper maintenance and regular checks, your brakes will be as smooth as butter, giving you a confident and safe ride.


