Hello! If you’re going through this, it likely means you’re interested in understanding how to bleed the disc brakes on your bike. Fear not, it might seem complex, but it really isn’t. Performing a bleed on your brakes is a crucial aspect of keeping your bicycle in top condition, guaranteeing that your brakes work efficiently and securely.
Before we get started, let’s go over what exactly bleeding your brakes means. Over time, air can get trapped in your brake lines which can cause your brakes to feel spongy and less responsive. Bleeding your brakes involves removing the air from the brake lines and replacing it with hydraulic fluid. This will improve the performance of your brakes and give you more control over your bike.
So, let’s gather our tools and get started!
Key Takeaways
- Bleeding brakes is important for bike maintenance and safety.
- Proper tools, preparations, and a clean workspace are necessary for the process.
- The bleeding process involves removing trapped air and replacing it with hydraulic fluid.
- Common mistakes and troubleshooting include over-tightening bleed port, air bubbles in syringe, fluid leakage, and uneven lever feel.
Gather the Necessary Tools
You’re gonna need a few things to get started, so grab your Allen wrench set and a bleed kit with a syringe and tubing. Tool selection is crucial in this process, as you want to make sure you have the right tools for the job.
In terms of the bleed kit, make sure the syringe and tubing fit the size of your brake system, as there are different sizes for different brands and models. Additionally, it’s important to have a clean workspace to prevent any contamination during the bleeding process.
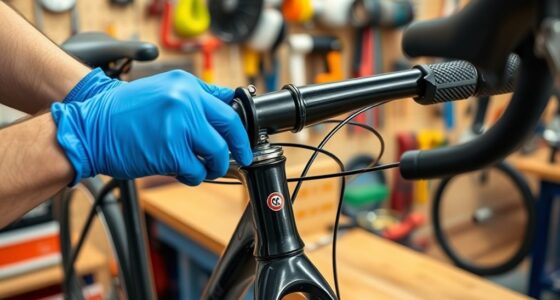
Safety precautions are also key when working with brake fluid. Make sure to wear gloves and eye protection to avoid any potential harm from the fluid. It’s also important to work in a well-ventilated area to prevent inhaling any fumes.
Once you have your tools and safety gear ready, it’s time to move on to preparing your bike for the bleeding process.
Prepare Your Bike
Before starting the maintenance process, it’s important to make sure your ride is resting on a stable surface. Begin by cleaning your bike thoroughly to remove any dirt, debris, or grime that may interfere with the bleeding process. Use a soft-bristled brush or a damp cloth to get rid of any dirt or mud on the bike’s frame, wheels, and brake components.
Inspect the components of your bike carefully, paying close attention to the brake levers, calipers, and rotors. Look for any signs of damage, wear and tear, or corrosion that may indicate the need for replacement. Additionally, make sure that all bolts, nuts, and screws are tightened correctly, and that there are no loose parts that could become a safety hazard.
Once you have cleaned and inspected your bike, you’re now ready to move on to the next step of bleeding your brakes.
Without further ado, let’s move on to the next section and learn how to bleed your bicycle disc brakes effectively.
Bleed Your Brakes
As you get ready to hit the trails, ensuring that your bike’s braking system is in top-notch condition is crucial for a safe and enjoyable ride. Bleeding your brakes is a necessary step to achieve optimal performance. Here’s a step-by-step guide on how to bleed your bicycle disc brakes.
Before we dive into the procedure, let’s take a look at the following table that outlines the common mistakes and troubleshooting steps you might encounter during the process.
| Common Mistakes | Troubleshooting |
|---|---|
| Over-tightened bleed port | Use a torque wrench to tighten the bleed port to the recommended specification |
| Air bubbles in the syringe | Tap the syringe and hose to release the air, or start from the beginning |
| Brake fluid leakage | Tighten the fittings and double-check the seals, or replace damaged parts |
| Uneven lever feel | Check for rotor contamination or pad wear, or repeat the bleeding process |
Now that you’re aware of the common mistakes and how to troubleshoot them, let’s proceed with the bleeding process. Once you’ve removed the brake pads and cleaned the rotor, attach the bleed block to the caliper and connect the syringe to the bleed port. Slowly push the fluid into the caliper until there are no air bubbles in the syringe. Once you’re done, don’t forget to reinstall the brake pads.
Reinstall the Brake Pads
After bleeding the brake system, it’s time to put the brake pads back in place to ensure proper braking performance. Begin by inspecting the brake pads for wear and replace them if necessary.
Proper alignment of the brake pads is crucial for optimal braking power, so make sure to align them correctly. To do this, slide the brake pads into the caliper, making sure that the pads are centered over the rotor. Tighten the bolts to secure the brake pads in place, but be careful not to over-tighten them.
It’s important to note that brake pads wear out over time and need to be replaced periodically. Inspect the brake pads regularly and replace them if they are worn down to the wear indicators.
Reinstalling the brake pads after bleeding the brake system ensures that they are properly aligned and in good condition for effective braking. With the brake pads in place, it’s time to test your brakes and make sure they’re working correctly.
Test Your Brakes
Now that I’ve reinstalled my brake pads and bled my bicycle disc brakes, it’s time to test my brakes.
To do this, I’ll squeeze the brake lever and check for proper modulation. If the brakes aren’t responding correctly, I’ll need to make adjustments as needed.
It’s important to ensure that my brakes are working properly before hitting the road to ensure my safety while cycling.
Squeeze the Brake Lever
Gently squeeze the brake lever to apply pressure to the brake pads against the rotor. This will allow you to check if the brake caliper position is correct and if there’s enough brake fluid in the system.
If the lever feels spongy or there’s excessive travel, there may be air in the system that needs to be bled out. To do this, refer to the manufacturer’s instructions or seek the help of a professional.
When squeezing the brake lever, pay attention to the feeling of the lever. It should feel firm, and there should be no excessive travel. If the lever pulls all the way to the handlebar, there may be an issue with the brake caliper position or brake pad wear.
Additionally, check for proper modulation by squeezing the lever harder and softer to test how the brakes respond. This will help you ensure that the brakes are functioning correctly and are safe to use.
Check for Proper Modulation
Check for proper modulation.
Feel the brake lever response as you gradually apply pressure to ensure smooth and controlled braking. Testing the effectiveness of your brakes is important to ensure that they’re working optimally.
Proper modulation is key to achieving the right amount of braking force required for different terrain and speeds. To test modulation, apply gradual pressure to the brake lever and see how the brake pads engage with the rotor. The brakes should engage smoothly and consistently, without any sudden jerks or grabbing.
If the brakes engage too abruptly, adjust the sensitivity of the brake lever to reduce the initial bite.
Adjusting sensitivity can be done by turning the reach adjustment knob on the brake lever. This knob allows you to adjust the distance between the brake lever and the handlebar, which affects how much pressure is required to engage the brakes. Turning the reach adjustment knob clockwise will move the brake lever closer to the handlebar, requiring less pressure to engage the brakes. Conversely, turning it counterclockwise will move the brake lever farther from the handlebar, requiring more pressure to engage the brakes.
Make adjustments as needed to achieve the desired modulation and braking force.
Make Adjustments as Needed
You can tweak the reach adjustment knob on the brake lever to fine-tune the pressure needed for a smooth and controlled braking experience. This adjustment allows you to change the position of the brake lever from the handlebar, which can help those with smaller hands or those who prefer a different riding position.
To adjust the reach, locate the knob on the brake lever and turn it in either direction until you find the most comfortable and effective position. Common mistakes when adjusting the reach include turning the knob too much in one direction, which can cause the brake lever to become too far from the handlebar, making it difficult to reach.
Another mistake is not testing the brake lever after making adjustments, which can lead to unexpected results. To troubleshoot any issues, make sure to test the lever after each adjustment and adjust incrementally to avoid over-tightening or over-loosening the knob.
Remember to always refer to the manufacturer’s guidelines for any specific instructions on adjusting the reach.
Make adjustments as needed.
Frequently Asked Questions
What is the purpose of bleeding bicycle disc brakes?
Bleeding bicycle disc brakes is essential for maintaining optimal stopping power and preventing brake failure. It removes air bubbles and contaminants from the brake system, ensuring consistent and reliable performance. Tips for successful bleeding include using the right tools, following the manufacturer’s instructions, and taking your time.
How often should I bleed my bicycle disc brakes?
Regular maintenance is crucial for optimal performance of disc brakes. Signs of brake fluid contamination include a discolored or cloudy appearance. Bleeding should be done when necessary, based on usage and fluid condition.
Can I use any type of brake fluid for bleeding my bicycle disc brakes?
When bleeding bicycle disc brakes, it’s important to use the correct brake fluid for your specific brake system. Not all brake fluids are compatible with all systems. Always refer to your manufacturer’s recommendations to ensure proper function and safety.
Is it necessary to remove the brake caliper when bleeding my bicycle disc brakes?
Removing the brake caliper isn’t necessary while bleeding bicycle disc brakes, but it enhances the bleeding technique. Safety precautions are essential. Also, the type of brake fluid used must match the recommended fluid for the brake system.
What should I do if my brakes still feel spongy after bleeding them?
If my brakes still feel spongy after bleeding them, I troubleshoot by checking for leaks, making sure all air is removed from the system, and ensuring proper brake pad alignment. Brake bleeding techniques may need to be revisited if issues persist.
Conclusion
In conclusion, bleeding your bicycle disc brakes is a necessary maintenance task that ensures the safety and efficiency of your bike. With the right tools and a little bit of patience, anyone can learn how to do it themselves. However, if you feel unsure or uncomfortable performing this task, it’s always best to take your bike to a professional.
Just like how we take care of our physical health through regular check-ups and maintenance, our bikes require the same attention to ensure they perform at their best. Bleeding your brakes may seem like a daunting task, but it’s an important step in keeping your bike running smoothly and avoiding any potential accidents on the road.
So, take the time to learn how to bleed your brakes and give your bike the care it deserves.


