Like a smoothly operating machine, the bicycle chain moves us forward with each push of the pedal, transferring our energy to the wheels.
But what happens when that chain becomes a hindrance, a tangled mess that needs to be broken? Fear not, for I am here to guide you through the intricate process of breaking a bicycle chain.
With the right tools, precise technique, and a dash of patience, you’ll be back on the road in no time.
So let’s dive into the world of chain breaking and unleash the freedom of smooth cycling.
Key Takeaways
- Use a chain tool compatible with your specific chain type to push out the chain pin and separate the chain links.
- Ensure your bike is clean and well-maintained before breaking the chain by removing dirt or debris from the chain and regularly applying lubrication.
- Carefully align the chain breaker tool’s pin with the center of the damaged link and apply steady pressure to push the pin through the link.
- When installing the replacement chain, ensure it is properly threaded through the drivetrain and connected securely using a master link or chain pin.

Under Armour Squeeze Water Bottles, 32 oz Water Bottles, Sideline Sports Water Bottle with Quick-Shot Lid, Quick & Easy Hydration, Gym Water Bottles, Squeeze Bottle, 1 32oz Bottle
- Easy Hydration: Quick-shot lid and one-way valve
- On-the-Go Use: One-hand operation for active hydration
- Measurement Markings: Ounces and milliliters for tracking
As an affiliate, we earn on qualifying purchases.
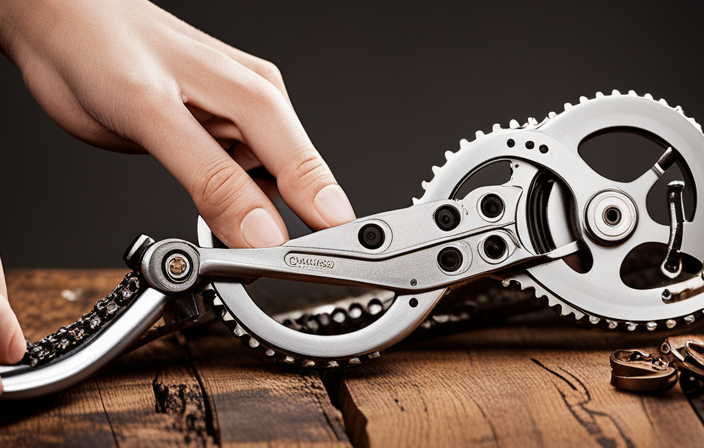
Gather the Necessary Tools
You’ll need a few tools to break a bicycle chain. First and foremost, you’ll need a chain tool. This handy device allows you to push out the chain pin and separate the chain links. It’s important to choose a chain tool that is compatible with your specific chain type.
Additionally, having a pair of needle-nose pliers can be helpful for removing any stubborn pins. When breaking a bicycle chain, there are some common mistakes to avoid. One of these is applying excessive force, which can damage the chain or the tool. Another mistake is not properly aligning the chain tool with the chain pin, which can lead to a pin that is difficult to remove.
Following these tips for smooth chain maintenance will ensure a successful chain break. Now that you have the necessary tools, it’s time to prepare your bike for the chain breakage process.
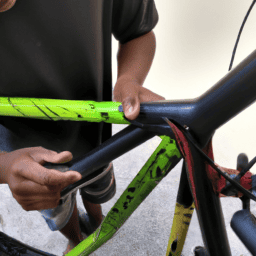
Prepare Your Bike
First, make sure your bike is properly equipped. Before attempting to break a bicycle chain, it’s important to ensure that your bike is clean and well-maintained. Cleaning techniques, such as using a degreaser and a brush, can help remove any dirt or debris that may be present on the chain. Additionally, regularly applying lubrication to the chain can improve its performance and longevity. Maintenance tips include checking for any signs of wear or damage, such as rust or stretched links, which may indicate the need for chain replacement. By properly preparing your bike through cleaning and maintenance, you can ensure that the chain breaking process goes smoothly.
Now, let’s move on to the next step – locating the chain link.
Locate the Chain Link
To find the chain link, start by examining the links closely for any signs of wear or damage. Look for any rust, loose pins, or bent plates. If you notice any issues, it might be necessary to clean the bike chain or fix a bent link before proceeding. Cleaning a bike chain involves removing it from the bike, soaking it in degreaser, scrubbing it with a brush, and then drying and lubricating it before reattaching it. Fixing a bent bike chain requires using a chain tool to carefully straighten the bent link. Once you have located the chain link and addressed any necessary repairs or cleaning, you can proceed to the next step of positioning the chain breaker tool. This tool will allow you to break the chain and remove it from the bike.
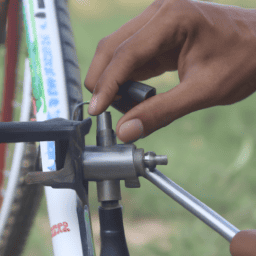
Position the Chain Breaker Tool
Once you’ve identified the damaged link, position the chain breaker tool precisely on the targeted area. To use the chain breaker tool effectively, make sure the pin aligns with the center of the damaged link. This is crucial as it ensures a clean break and prevents any further damage to the chain.
Apply steady pressure on the chain breaker tool to push the pin through the link, gradually loosening it. Take care not to apply excessive force, as this can cause the pin to break or damage the chain further. Common mistakes when using a chain breaker tool include misaligning the pin with the link or using too much force. By avoiding these errors, you can successfully break the chain without causing any unnecessary damage.
Transitioning to the next section, let’s move on to breaking the chain.
Break the Chain
Now, it’s time to actually separate the links of the chain. To break the chain, follow these steps:
- Position the chain breaker tool onto one of the chain links, aligning the pin with the chain pin.
- Turn the handle of the chain breaker tool clockwise until the pin begins to push against the chain pin.
- Continue turning the handle until the chain pin is fully pushed out of the link, separating the chain.
- Carefully remove the broken chain from the bike, making sure not to damage any other components.
Breaking the chain is an essential step in bike maintenance, especially when dealing with a broken or damaged chain. Once the chain is broken, you can proceed to remove the broken chain and replace it with a new one.
Remove the Broken Chain
To remove the broken chain from your bike, carefully detach it from the rest of the components.
Begin by locating the chain break, which is usually a link that has been separated or damaged. Use a chain tool or a pair of pliers to push out the pin that holds the broken link together.
Once the pin is removed, the broken chain can be easily separated. Be cautious not to damage any other parts of the bike during this process.
Safely remove the broken chain from the bike by gently pulling it away from the gears and derailleurs. This will prevent any further damage to the bike’s components.
With the broken chain removed, we can now move on to the next step of installing the replacement chain.
Install the Replacement Chain
To install the replacement chain, start by threading it through the drivetrain, making sure it passes through all the necessary gears and pulleys.
Next, reconnect the chain using either the master link or chain pin, ensuring it is securely fastened.
This process requires precision and attention to detail to ensure proper functioning of the drivetrain.
Thread the replacement chain through the drivetrain
Once you’ve removed the old chain, you can start threading the replacement chain through the drivetrain. This step is crucial for proper chain maintenance and troubleshooting common chain issues. To thread the replacement chain, follow these steps:
- Begin by placing the chain onto the smallest chainring in the front and the smallest cog in the rear.
- Hold the chain at the front chainring and slowly pedal backward, guiding the chain onto the chainring teeth.
- Continue pedaling backward while guiding the chain onto the rear derailleur jockey wheel and onto the cogs.
- Once the chain is fully threaded, check for any twists or kinks. Make sure the chain is properly seated on all the teeth.
Now that the replacement chain is threaded through the drivetrain, you can move on to the next step of reconnecting the chain using the master link or chain pin.
Reconnect the chain using the master link or chain pin
Now, you can reconnect the chain using either the master link or chain pin. If you don’t have a master link, don’t worry, there are alternatives to reconnect the chain. Here are some options:
-
Quick Link: This is a reusable master link that can be easily installed without any tools. It allows for quick and convenient chain removal and installation.
-
Missing Link: Similar to the quick link, this is a tool-free option that provides a secure connection. It is designed to be easy to install and remove when needed.
-
Chain Tool: If you don’t have a master link or quick link, you can use a chain tool to push the chain pin back into place. This requires more effort and precision, but it is a reliable method.
-
Split Link: Also known as a power link, this is another alternative to a master link. It allows for easy chain removal and installation without the need for tools.
Now that the chain is back together, let’s move on to the next step and check the chain length.
Check the Chain Length
First, make sure your bicycle chain is the correct length. To adjust chain tension, you may need to either remove or add links to achieve the desired length.
A chain that is too loose can result in poor shifting performance, while a chain that is too tight can cause excessive wear on the drivetrain components.
Additionally, cleaning and maintaining the chain regularly is crucial for optimal performance and longevity. Use a degreaser and a brush to remove dirt and grime, then thoroughly dry the chain before applying lubrication.
Proper lubrication reduces friction and prevents rust, ensuring smooth and efficient pedaling. Now that the chain is clean and at the correct length, it’s time to move on to the next step: lubricating the chain for optimal performance.
Lubricate the Chain
When it comes to maintaining a bicycle chain, one crucial step is to apply lubricant. By doing so, you can significantly reduce friction between the chain and the gears, ensuring smooth and efficient operation.
However, it’s important to wipe off any excess lubricant after application to prevent dirt and debris from sticking to the chain, which could cause it to wear out faster.
So, make sure to apply the right amount of lubricant and keep your chain clean for optimal performance.
Apply lubricant to the chain to reduce friction
To reduce friction, it’s best to apply lubricant to the bicycle chain. This simple step can provide numerous benefits for your bike and keep it running smoothly.
Here are three reasons why using lubricant on bicycle chains is beneficial:
-
Improved performance: Lubricant reduces the friction between the chain and the gears, allowing for smoother and more efficient pedaling.
-
Increased lifespan: By reducing the wear and tear on the chain, lubricant helps prolong its lifespan, saving you money on replacements.
-
Rust prevention: Applying lubricant creates a protective barrier that helps prevent rust and corrosion, particularly important if you ride in wet or humid conditions.
However, there are common mistakes to avoid when applying lubricant to your bicycle chain. These include using too much lubricant, not wiping off excess, and using the wrong type of lubricant. Remember, proper application of lubricant will maximize its benefits and ensure a longer lifespan for your chain.
Now, let’s move on to the next step: wiping off any excess lubricant.
Wipe off any excess lubricant
Next, make sure to wipe off any extra lubricant from the chain. This step is crucial in maintaining the performance and longevity of your bicycle chain. Excess lubricant can attract dirt, dust, and debris, which can lead to increased friction and wear on the chain.
To clean the chain, use a clean rag or a specialized chain cleaning tool. Start by gripping the chain with the rag or inserting the tool between the chain links. Move the chain through the rag or tool several times, ensuring that all sides of the chain are thoroughly cleaned. This cleaning technique removes the excess lubricant and any contaminants that may have accumulated on the chain.
Now, with the chain clean and free from excess lubricant, you can move on to the next step of testing the chain’s functionality.
Test the Chain
First, make sure to test the chain by giving it a gentle tug. This will help determine if there are any weak links or if the chain needs to be replaced.
When inspecting the chain links, pay attention to the following:
- Check for any visible signs of wear or damage, such as rust or bent links.
- Look for tight or stiff links that do not move freely.
- Ensure that the chain is properly lubricated and not dry or sticky.
- Verify that the chain is aligned correctly and not twisted or misaligned.
- Listen for any unusual noises or grinding sounds when the chain is in motion.
By conducting a thorough chain test and inspection, you can identify any potential issues and take the necessary steps to maintain or repair your bicycle chain.
Frequently Asked Questions
How long does it usually take to break a bicycle chain?
On average, it takes me around 10-15 minutes to break a bicycle chain. Common causes include excessive force applied to the pedals, poor maintenance leading to wear and tear, or accidents such as getting the chain stuck.
Can I use any type of lubricant for the chain?
Yes, you can use WD-40 to lubricate your bicycle chain. However, it is necessary to clean the chain before applying any lubricant. This ensures optimal performance and prevents dirt and debris from causing damage.
Are there any safety precautions I need to take while breaking the chain?
When breaking a bicycle chain, it is important to take safety precautions. Wear gloves and eye protection to prevent injury. You will need a chain tool to remove the pin and a master link to reconnect the chain.
How often should I check the chain length?
I regularly check my chain length as part of my chain maintenance routine. It’s important to look for signs of a worn out chain, such as elongation or rust, to prevent any issues while riding.
Can I reuse the broken chain or should I discard it?
You can definitely reuse a broken chain, but it’s not recommended. Discarding it has benefits as it ensures optimal performance and safety. Replacing the chain with a new one is the best option for a smooth and efficient ride.
Conclusion
After following the step-by-step process of breaking a bicycle chain, I can confidently say that it is not as difficult as it may seem. By gathering the necessary tools and properly preparing your bike, you can easily locate and break the chain using a chain breaker tool.
Installing a replacement chain and ensuring proper lubrication is crucial for smooth operation. Don’t forget to check the chain length and give it a thorough test before hitting the road.
So, next time your chain breaks, fear not, for you now possess the knowledge to fix it yourself!