Ever thought about going on an extended bike ride or a camping adventure but were limited by how much you could pack? Or perhaps you’re looking for a solution to haul groceries or other essentials without depending on a vehicle?
Well, I have a solution for you: building your own bicycle trailer. I know what you’re thinking: ‘But I don’t have any experience building things!’ Don’t worry, neither did I when I first started.
But with a little bit of planning and some basic tools, anyone can build a sturdy and functional bicycle trailer. And trust me, the feeling of accomplishment you’ll get when you attach it to your bike and start pedaling is unbeatable.
So, let’s get started on building your very own bicycle trailer.
Key Takeaways
- Building a bicycle trailer can solve the problem of carrying gear or groceries without a car.
- The materials used should be strong, safe, and weather-resistant, and necessary tools include saw, drill, screws, bolts, measuring tape, and level.
- Design considerations include load weight, single or double wheel, size, frame materials, wheels, hitch, and safety.
- Building techniques can include welding and clamp-on trailer hitch, and finishing touches include adding reflectors and lights for safety, painting or decorating the trailer, and testing and adjusting weight distribution and suspension.

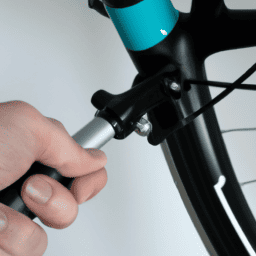
Topeak Ratchet Rocket Lite DX Bike Repair and Maintenance Tool, 16 Functions, Includes Nylon Bag, Black
Fine tooth ratchet mechanism with reverse lever and thumb wheel
As an affiliate, we earn on qualifying purchases.
Gather Your Materials and Tools
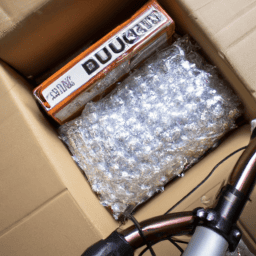
Before I could start constructing my bicycle trailer, I knew it was crucial to gather all the necessary materials and tools.
Choosing appropriate materials was the first step I took. I made sure that the materials I chose were strong enough to support the weight of the items I planned to carry. I also considered the weather conditions and opted for materials that were waterproof and durable.
Another important consideration was safety. I made sure to choose materials that were not only strong but also safe to use. For example, I opted for materials that weren’t sharp or rough to avoid any potential injury.
After selecting the appropriate materials, I moved on to gathering the necessary tools. This included a saw, drill, screws, bolts, measuring tape, and a level.
With all the materials and tools at hand, I was ready to start designing and planning my bicycle trailer.

ROCKBROS 16 In 1 Multi-Function Bike Tool Kit - Portable Foldable Bike Multitool Cycling Tool Kit With Allen Wrench, Tire Levers
Package includes 1 pack bike repair tools.
As an affiliate, we earn on qualifying purchases.
Design and Planning
To start, it’s important to consider your needs and preferences when designing your bicycle trailer. Sketching ideas on paper can help visualize the final product. Some questions to ask yourself include: What will I be hauling? How much weight can my bike handle? Do I want a single or double wheel trailer? What size do I need?
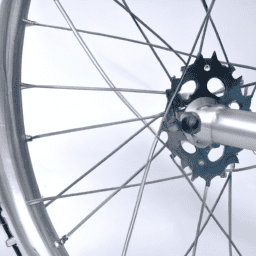
Once you have a rough idea of what you want, you can start selecting materials. The frame can be made from wood, aluminum, or steel tubing. The wheels can be purchased or salvaged from an old bike. The hitch can be homemade or purchased. It’s important to choose materials that are sturdy and durable, as they will need to withstand the stresses of hauling loads.
After sketching ideas and selecting materials, the next step is to create a detailed plan for building the frame. This involves deciding on the frame’s dimensions, angles, and joints. The frame should be designed to distribute weight evenly and provide stability while in motion. The size and shape of the frame will depend on the size and weight of the load you plan to haul.
Once the frame design is finalized, it’s time to start building.

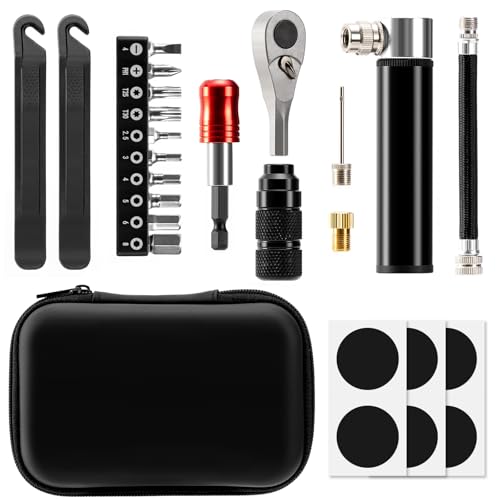
DURATECH 41 Pieces Bike Repair Tools, Complete Bike Tools Kit with Storage Box, Mountain Bike Maintenance Tools, for Mountain, Road, and Park Bicycle with Chain Riveter, Tire Levers, Crank Puller
Complete Kit: Our Bike tool kit includes everything you need to perform both major or delicate work without...
As an affiliate, we earn on qualifying purchases.
Building the Frame
Now that I’ve selected my materials and designed my bicycle trailer frame, it’s time to start building it.
I’ll be using welding techniques to attach the metal tubes together, specifically the MIG weld, which is the easiest and most common type of welding for beginners.
Before welding, I’ll make sure to clean the metal tubes to remove any rust or dirt that may interfere with the welding process. Then, I’ll use a clamp to hold the tubes in place while I weld them together.
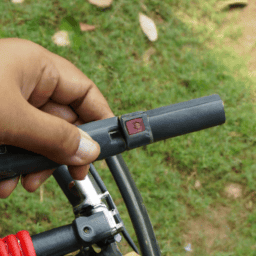
As for the trailer hitch, there are different options available depending on the type of bike I have. I’ll be using a clamp-on trailer hitch, which can be easily attached and removed from the bike’s rear axle.
It’s important to make sure that the hitch is securely attached to the bike and that it can support the weight of the trailer.
Once the frame and hitch are completed, it’s time to move on to creating the body of the trailer.
With the frame and hitch constructed, the next step is to start building the body of the bicycle trailer.
WINFAVO Bike Repair Tool Kit with Mini Pump & 10 Magnetic Bits - Alloy Multitool for Bicycle, MTB, Road Cycling - Portable Multifunction Tool Set Include Tire Inflator for Presta/Schrader Valves
【Multifunctional Bike Repair Tool Kit with 10 Interchangeable Bits】: Designed specifically for bicycles, mountain bikes (MTBs), and road...
As an affiliate, we earn on qualifying purchases.
Creating the Body
Once the frame and hitch are securely attached, it’s time to start crafting the body of the bike trailer. It’s important to carefully choose the materials that’ll be used. The materials must be strong enough to hold the weight of the load and durable enough to withstand the elements. Common materials include wood, metal, PVC pipes, and canvas.
Weight distribution is also an important consideration when creating the body of the bike trailer. The weight of the load should be evenly distributed over the axles to prevent the trailer from tipping or becoming unstable during use. It’s also important to ensure that the body of the trailer is securely attached to the frame and hitch.
Once the body is complete, the finishing touches can be added to make the trailer both functional and visually appealing.
Finishing Touches
Now that the body of my bicycle trailer is complete, I’ll move on to the finishing touches.
First, I’ll add reflectors and lights to make the trailer visible and safe for nighttime rides.
Next, I’ll consider painting or decorating the trailer to give it a personal touch or make it more aesthetically pleasing.
Finally, I’ll test and adjust the trailer to ensure that it’s functioning properly and ready for use.
Adding Reflectors and Lights
Don’t forget to add reflectors and lights to your bicycle trailer to ensure visibility and safety while riding at night. Reflectors should be placed on the sides, front, and back of the trailer to increase visibility from all angles. Installing them is easy, and most come with adhesive backing or can be screwed on.
For lights, you can choose between battery-powered or rechargeable options. Lights should be placed on the back of the trailer, facing outward, and should be bright enough to be seen from a distance. Some lights even come with different settings, such as flashing, to increase visibility.
Adding these safety features to your bicycle trailer is a crucial step in ensuring the safety of both you and your cargo while riding at night.
To add a personal touch to your trailer, you can now move on to painting or decorating it.
Painting or Decorating the Trailer
Get creative and add a splash of personality to your ride by painting or decorating your new mobile cargo carrier. Whether you want to make your trailer stand out or blend in with your bike’s color scheme, there are a few techniques you can use to achieve the desired look.
Here are some ideas to get you started:
-
Spray painting techniques: If you want a smooth, even coat of paint on your trailer, spray painting is the way to go. Make sure to use a primer beforehand to help the paint adhere to the metal surface. Keep the nozzle about 6-8 inches away from the trailer and apply thin coats, allowing each layer to dry before adding another.
-
Vinyl decal application: Another way to add some flair to your trailer is to apply vinyl decals. These are easy to find online or at craft stores and come in a variety of designs and colors. Clean the surface of your trailer thoroughly before applying the decal, and use a squeegee to smooth out any air bubbles or wrinkles.
Once you’ve painted or decorated your trailer to your liking, it’s time to move on to testing and adjusting it for optimal performance.
Testing and Adjusting the Trailer
To ensure your mobile cargo carrier is operating at its best, you’ll need to test and adjust it. Have you ever wondered how to properly balance the weight distribution of your trailer? It’s crucial to distribute the weight evenly across the trailer to prevent any accidents or damage to your goods. A poorly balanced trailer can cause it to tip over, sway, or even detach from the bicycle.
One way to test and adjust the weight distribution is to use a simple table. In the first column, list the items you plan to carry in the trailer. In the second column, write down the weight of each item in pounds. In the third column, calculate the total weight of all the items. Finally, in the fourth column, write down the ideal weight distribution for your trailer. Typically, the weight distribution should be 60% on the back wheel and 40% on the front wheel. Adjust the items in the trailer until the weight distribution is just right. Another essential element to adjust is the suspension. The suspension system helps absorb shock and vibrations, ensuring your goods stay intact. Adjust the suspension according to the weight of your load, road conditions, and your bike’s speed. A properly adjusted suspension system will make your ride smoother and prevent any damage to your goods.
Frequently Asked Questions
How much weight can the bicycle trailer hold?
I’ve determined the max weight capacity of my bicycle trailer to be 100 pounds. It’s important to distribute weight evenly to prevent swaying. I recommend using bungee cords or straps to secure your load and avoid exceeding the weight limit.
Can the bicycle trailer be easily disassembled for storage or transportation?
Disassembly of a bicycle trailer is easy, making it ideal for storage and transportation. Using a bicycle trailer for transportation offers benefits such as reduced carbon footprint and improved health. To maintain durability, regularly inspect the trailer and lubricate moving parts.
How much time does it typically take to build a bicycle trailer?
To build a bicycle trailer, tools needed include a drill, saw, and wrenches. Materials required are plywood, metal piping, and bolts. It typically takes me 10-15 hours to complete, depending on my level of experience.
Is it difficult to attach the trailer to the bicycle?
Attaching a bicycle trailer can be challenging for beginners. Pros include the ability to haul heavy loads and transport children. Recommended brands include Burley and Thule. Cons may include difficulty maneuvering and added weight to the bike.
Are there any safety precautions that should be taken when using a bicycle trailer?
When using a bicycle trailer, it’s crucial to follow proper hitching techniques to prevent accidents. Reflective materials increase visibility for added safety. Always wear a helmet, obey traffic laws, and distribute weight evenly to avoid tipping.
Conclusion
In conclusion, building a bicycle trailer was a challenging but rewarding experience. I felt like a detective piecing together a puzzle as I gathered my materials and tools. The design and planning phase felt like a chess game, where each move had to be thought out carefully.
Building the frame was like constructing a building, making sure each piece fit snugly together. Creating the body felt like sculpting a masterpiece, shaping and molding until it was just right. Adding the finishing touches was like putting the cherry on top of a sundae – the final touch that made it complete.
Overall, building a bicycle trailer requires patience, attention to detail, and creativity. But the end result is a functional and unique piece of equipment that can bring joy and practicality to your daily life. So go ahead, grab some materials and tools, and let your imagination run wild.
The journey may be challenging, but the destination is certainly worth it.