Constructing a bicycle wheel resembles assembling a complicated puzzle, ultimately yielding a dependable and functional means of travel. As someone passionate about cycling, I’ve always been captivated by the complexities of a bicycle wheel and the journey of creating one from the beginning.
It may seem daunting at first, but with the right tools, components, and a methodical approach, building a bicycle wheel can be a rewarding and satisfying experience.
In this article, I will guide you through the step-by-step process of building a bicycle wheel. From lacing the spokes to truing and tensioning the wheel, I will provide detailed instructions and tips to help you create a durable and well-balanced wheel.
So, whether you’re a seasoned mechanic or a beginner looking to expand your knowledge, read on to learn how to build a bicycle wheel that will take you on many smooth and enjoyable rides.
Key Takeaways
- Building a bicycle wheel requires the right tools, components, and a methodical approach.
- Spokes are crucial for strength, stability, and durability, and different lacing patterns can affect performance.
- Truing the wheel and adjusting spoke tension with a truing stand are essential for precise adjustments and stability.
- Tensioning and stress-relieving the wheel ensure correct spoke tension and a strong, stable, and reliable mode of transportation.
Gather the Necessary Tools and Components
You’ll need to grab some essential tools and components before you can start building your own bike wheel, so don’t skimp on the prep work if you want a smooth ride. Choosing appropriate components is key to ensuring the safety and longevity of your wheel.
You’ll need a rim, spokes, and a hub that are compatible with each other and appropriate for your intended use. Make sure to research and select components that meet your needs and fit within your budget. Understanding spoke patterns is another important consideration.
Spokes are the thin metal rods that connect the rim to the hub and provide the wheel with its strength and stability. The way these spokes are arranged can greatly affect the durability and performance of the wheel. Take time to learn about different spoke patterns and choose one that is appropriate for your riding style and intended use.
With your components selected and your spoke pattern in mind, you can move on to lacing the wheel.
Lacing the Wheel
Assembling the spokes and hub together, it’s time to bring the wheel to life. The first step is to choose a cross lacing technique that suits your needs.
The most common technique is the 3-cross pattern, which involves each spoke crossing three other spokes before reaching the rim. This pattern provides a strong and stable wheel but can be time-consuming to lace up. Other cross patterns like 2-cross or 4-cross can be used, depending on the wheel’s intended use and rider’s preference.
Once the cross lacing pattern is decided, it’s time to calculate the spoke length required for the build. Spoke length is determined by measuring the distance between the hub flange and the rim hole, taking into account the lacing pattern and the desired tension. This calculation can be done using an online spoke length calculator or by consulting with the wheel manufacturer.
With the correct spoke length, the spokes can be threaded through the hub flange and laced onto the rim. After lacing the wheel, it’s time to move onto truing the wheel to ensure it runs smoothly and evenly.
Truing the Wheel
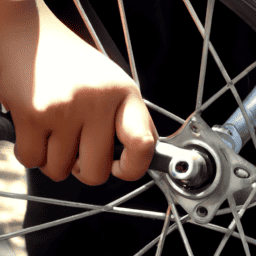
In truing the wheel, the first thing I do is check for lateral and radial runout by spinning the wheel in a truing stand.
I then adjust spoke tension, making sure to tighten or loosen spokes in small increments to avoid damaging the rim.
To ensure accuracy, I always use a truing stand to make adjustments and check progress as I work my way around the wheel.
Overall, I’m careful to take my time and make small adjustments so that I don’t cause any further damage to the wheel.
Checking for lateral and radial runout
To ensure a quality build, it’s crucial to check for any lateral or radial runout in your bicycle wheel. This involves measuring runout, or the deviation from a true circle, and correcting any wobble that is detected. Proper runout is important for optimal wheel performance, as it ensures a smooth ride and prevents unnecessary wear on the tire.
To measure lateral runout, place the wheel in a truing stand and use a dial gauge to measure the distance between the rim and the gauge at several points around the rim. Radial runout can be measured by placing the wheel in a stand and using the same dial gauge to measure the distance between the rim and the gauge as the wheel is spun.
If runout is detected, it can be corrected by adjusting the spoke tension. With proper attention to runout and spoke tension, your wheel will be in top shape for your next ride.
Adjusting spoke tension
You’ll want to get your hands dirty and start tweaking those spokes to fine-tune the tension and straighten out any kinks, like a skilled musician tuning their instrument.
First, you’ll need to measure deflection by using a spoke tension meter. This device will give you an accurate reading of the tension on each spoke.
Once you have these measurements, you can start navigating the spoke patterns to adjust the tension as needed. When adjusting the tension, it’s important to keep in mind that each spoke affects the tension of its neighboring spokes.
In order to maintain balance, you’ll need to make small adjustments to each spoke in a specific order. This process can be time-consuming, but it’s crucial for achieving a perfectly true wheel.
Once you’ve completed this step, you’ll be ready to move on to the next section about using a truing stand to fine-tune the wheel even further.
Using a truing stand
Now it’s time to place your wheel onto the truing stand and start making adjustments to bring it into perfect alignment. Using a truing stand is essential to building a bicycle wheel, as it allows for precise and accurate adjustments to be made.
The stand consists of two arms that hold the wheel in place and a gauge that measures the distance between the rim and the stand. By rotating the wheel and adjusting the tension of the spokes, you can bring the rim into perfect alignment and eliminate any wobbles or hops.
One of the most common mistakes when using a truing stand is applying too much force to the spokes. It’s important to make small adjustments and check the alignment frequently to avoid over-tightening the spokes and damaging the wheel.
Additionally, using a truing stand has several benefits, such as increasing the lifespan of the wheel and improving the overall performance of the bike. By taking the time to properly true your wheel, you’ll ensure a smoother ride and reduce the risk of any future issues.
Now that the wheel is properly aligned using the truing stand, it’s time to move onto tensioning and stress-relieving the wheel.
Tensioning and Stress-Relieving the Wheel
Don’t skip the tensioning and stress-relieving step. This is a crucial part of building a bicycle wheel that shouldn’t be overlooked.
Tensioning techniques ensure that each spoke is tightened to the correct tension, allowing the wheel to be strong and stable. Stress relief methods are used to remove any remaining stress in the wheel, ensuring that it won’t fail under heavy use.
To start tensioning the wheel, tighten each spoke in small increments, moving around the wheel in a pattern until each spoke has been tightened to the desired tension. Then, stress-relieve the wheel by applying pressure to each side of the rim, gently bending it inwards and outwards. Repeat this process several times until the wheel no longer makes any creaking noises.
Now that the wheel has been properly tensioned and stress-relieved, it’s time to move on to the final touches and safety checks.
Final Touches and Safety Checks
Now that the wheel is tensioned and stress-relieved, it’s time to add the final touches and conduct safety checks.
First, I’ll install the tire and tube, making sure they’re properly aligned and seated on the rim.
Then, I’ll check for proper inflation, making sure the pressure matches the recommended range on the tire.
Lastly, I’ll inspect the wheel for any issues or defects, such as loose spokes or cracks in the rim, to ensure the wheel is safe and ready for use.
Installing the tire and tube
To fit the tire and tube onto the wheel, you’ll need to remove the rubber band holding them together and insert the tube inside the tire. Start by mounting one side of the tire onto the rim, making sure that the directional arrow on the tire points in the correct direction of rotation.
Once one side of the tire is mounted, insert the tube into the tire, making sure that the valve stem lines up with the valve hole in the rim. Carefully tuck the tube into the tire, being careful not to pinch it between the tire and rim.
Once the tube is fully inserted into the tire, it’s time to mount the other side of the tire onto the rim. This can be a bit tricky, so it’s important to take your time and work slowly. Start by pushing the tire onto the rim at the opposite end from the valve stem, then work your way around the tire, using your thumbs to push the tire onto the rim.
Once the tire is fully mounted, it’s time to check for proper inflation.
Checking for proper inflation
Make sure the tire is properly inflated by using a tire gauge to check the pressure, and you’ll be good to go with your newly installed tire and tube! Here are some important things to keep in mind:
-
Importance of pressure: Inflating your tire to the recommended pressure ensures that you’ll have a comfortable ride, good traction, and that the tire will wear evenly. Riding on underinflated tires can cause premature wear and increase the risk of flats, while overinflated tires can lead to a harsh ride and poor handling.
-
Proper gauge usage: Use a tire gauge to check the pressure, as it’s the most accurate way to measure. Make sure the gauge you’re using is compatible with the valve type on your tube (either Presta or Schrader). Unscrew the valve cap, press the gauge onto the valve, and read the pressure on the gauge. If the pressure is too low, use a pump to add air. If it’s too high, release some air by depressing the valve stem.
-
Ideal pressure range: The ideal pressure range is usually printed on the sidewall of the tire. It’s important to inflate the tire to the recommended pressure range, which may vary depending on the tire size and intended use. If you’re unsure, consult the manufacturer’s website or the packaging that came with your tire.
-
Regular checks: It’s important to check your tire pressure regularly, especially if you’re riding frequently or over long distances. Changes in temperature and altitude can affect pressure, so it’s a good idea to check before each ride.
After ensuring that your tire is properly inflated, it’s time to inspect for any issues or defects before hitting the road.
Inspecting for any issues or defects
Before you head out on your ride, don’t forget to give your tire a thorough inspection for any defects or issues that could cause problems down the road. When building a bicycle wheel, quality control measures are essential to ensure that the final product is safe and reliable. Identifying defects in the tire is one such measure.
First, check the tire for any physical damage such as cuts, punctures, or tears. These could compromise the integrity of the tire and lead to a blowout while riding.
You should also inspect the sidewalls for any bulges or deformities, which could indicate a weak spot in the tire. Additionally, check the tread for any signs of wear or unevenness, which could affect the tire’s grip and handling.
By thoroughly inspecting the tire for any defects, you can ensure that your bicycle wheel is safe and ready for the road.
Frequently Asked Questions
How long does it typically take to build a bicycle wheel?
Estimating the timeframe for building a bicycle wheel depends on skill level and available resources. Learning from online tutorials and practice can take a few hours, while a professional can complete the task in minutes.
Can I reuse old spokes or do I need to buy new ones?
I can reuse old spokes, but there are pros and cons. The reused spokes may not fit perfectly, and they may be weaker and more likely to break. Alternatives to new spokes include buying used ones or rebuilding the wheel with a different spoke count.
How do I know if my wheel is properly tensioned and stress-relieved?
To check tension and stress-relieve a wheel, I use a spoke tension meter and truing stand. I adjust spoke tension until all spokes have equal tension and the wheel is true. I stress-relieve by squeezing pairs of spokes together.
Can I use any type of rim tape or is there a specific kind recommended?
There are different types of rim tape available, each with their own advantages and disadvantages. To ensure optimal performance, it’s important to properly install the recommended type of rim tape for your specific wheel and tire combination.
Are there any special considerations for building a wheel for a specific type of riding, such as mountain biking or road cycling?
When building a wheel for mountain biking or road cycling, it’s important to consider the specific riding style. Wheel components, such as rim width and hub type, should be chosen accordingly. Spoke count is also crucial for durability and performance.
Conclusion
In conclusion, building a bicycle wheel requires patience, precision, and the right tools. It’s not a task for the faint-hearted, but it can be a rewarding experience that teaches you a lot about the mechanics of your bike.
As the old adage goes, ‘measure twice, cut once.’ This rings true for wheel-building as well. Taking the time to double-check your measurements and ensure that everything is aligned properly will save you from a lot of frustration down the road.
It’s important to keep in mind that wheel-building is not a one-and-done process. Even after you’ve finished building your wheel, it’s necessary to periodically check the tension and trueness of the wheel to ensure that it’s functioning properly.
With practice and attention to detail, building a bicycle wheel can become a valuable skill to have in your arsenal as a cyclist.