
I’m excited to share with you the incredible journey of building your very own electric bike from scratch.
In this article, I’ll guide you through the process, step by step, so you can experience the thrill of riding a free, eco-friendly mode of transportation.
We’ll explore how to assess your bicycle for conversion, source low-cost parts, choose the right battery and motor, and even extend your battery life.
Get ready to join the DIY electric bike community and embrace the future of sustainable travel.
Let’s get started!
Key Takeaways
- Building your own electric bike can be a cost-effective and enjoyable project.
- Assessing and sourcing parts is crucial for a successful conversion.
- Electric bike conversion kits provide the necessary components for the transformation.
- Proper building techniques and maintenance are essential for safety and longevity.

Schwinn Sporterra RX Gravel Bike, 700c Mens and Womens Bike, 14-Speed Drop Bar Gravel Bicycle, Mechanical Disc Brakes, Rigid Fork, Aerodynamic Riding Position, Quick Release Seat Post, Adult Bicycle
GRAVEL BICYCLE: Enjoy next level riding with the Sporterra RX by Schwinn. With 700c wheels, this mens and...
As an affiliate, we earn on qualifying purchases.
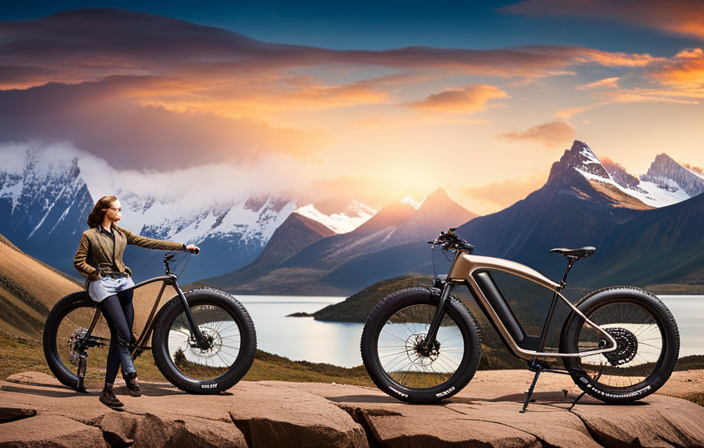
Introduction to Building Your Own Electric Bike
Building your own electric bike is a great way to save money and have fun while doing it. When it comes to building techniques, there are a few key considerations to keep in mind.
First, you need to decide whether you want to convert an existing bicycle or build from scratch. Converting an existing bike is often the more cost-effective option, as it eliminates the need to purchase a new frame and other components. However, building from scratch allows for more customization and can be a rewarding challenge for those who enjoy the process.
Cost considerations are also important when building your own electric bike. The total cost will depend on factors such as the type of battery, motor, and other components you choose. It’s important to research and compare prices to find the best deals. Additionally, consider the long-term costs of maintenance and replacement parts.
Now that you understand the building techniques and cost considerations, the next step is to assess your bicycle for conversion. This involves evaluating the frame, brakes, and other components to ensure they are suitable for an electric conversion. By carefully assessing your bicycle, you can determine if any modifications or upgrades are needed before proceeding with the conversion process.

EVAPLUS UL Certified 54.6V 1.5A Fast Electric Bike Charger for 48V Ebike Battery - Replacement for Razor, Jetson, Voyage, Gotrax, Ninebot,Segway, Hiboy(DC Connector:5.5x2.5/2.1mm)
54.6V 1.5A Smart Charger: for 48V Electric bicycle electric scooter battery, Input Voltage 120VAC 50/60HZ,Over output Voltage Protection;Over...
As an affiliate, we earn on qualifying purchases.
Assessing Your Bicycle for Conversion
Before you start, it’s important to evaluate your bicycle to determine if it’s suitable for conversion. Evaluating compatibility is crucial to ensure that the necessary modifications can be made to successfully convert your bike into an electric one. Here are four key factors to consider:
-
Frame design: Check if your bike has a sturdy frame that can handle the additional weight of the electric components. Look for a robust and well-built frame that can support the motor, battery, and other components without compromising stability.
-
Wheel size: Electric bike conversion kits are typically designed for specific wheel sizes. Verify that your bike’s wheel size matches the compatibility requirements of the conversion kit you plan to use. Mismatched wheel sizes may result in improper alignment, affecting the overall performance and safety of your electric bike.
-
Brake system: Ensure that your bike has a reliable braking system. Electric bikes tend to be heavier than traditional bikes, so it’s essential to have brakes that can effectively stop the increased weight and speed of your electric bike.
-
Bottom bracket compatibility: The bottom bracket is the part of the bike where the crankset and pedals are attached. Make sure your bike’s bottom bracket is compatible with the motor system of the conversion kit you intend to use. This compatibility ensures a secure and efficient connection between the motor and the bike’s drivetrain.
Assessing these factors will help you determine if your bike is suitable for conversion. Once you have evaluated compatibility, you can move on to sourcing free or low-cost parts, which will be discussed in the next section.

54.6V 2A Electric Charger for 48V Ebike Lithium Battery (13S Li-ion Battery), Electric Bike Charger with 7 Charging Port Plugs
48V Ebike Lithium Battery Charger: Designed for 48V lithium batteries ONLY (13S Li-ion packs / battery voltage marked...
As an affiliate, we earn on qualifying purchases.
Sourcing Free or Low-Cost Parts
After assessing your bicycle for conversion, now let’s discuss how to source affordable parts.
When it comes to finding free or discounted bike parts, there are a few creative ways to repurpose materials for your electric bike.
One option is to check with local bike shops or repair centers. They often have spare parts or abandoned bicycles that they may be willing to donate or sell at a low cost.
Online platforms like Craigslist or Freecycle can also be great resources for finding free or heavily discounted bike parts.
Another option is to join online forums or communities dedicated to electric bike conversions. Here, you can connect with other enthusiasts who may be willing to trade or give away parts they no longer need.
Additionally, consider repurposing materials from other sources. For example, old electric scooters or mobility scooters can provide motors or batteries that can be adapted for your electric bike.
By thinking creatively and exploring different avenues, you can source the parts you need without breaking the bank.
Transitioning to the next section, understanding electric bike conversion kits, will provide further insight into the process of building your free electric bike.

Fancy Buying 7-in-1 Universal 54.6V 2A ebike Charger for 48v Fast and Safe Charging of 13S Li-ion Battery
【Universal 54.6V 2A Fast Charger】Designed for 48V-54.6V lithium batteries (13S Li-ion packs), this 54.6v 2a charger supports global...
As an affiliate, we earn on qualifying purchases.
Understanding Electric Bike Conversion Kits
When it comes to converting your bicycle into an electric bike, understanding the different options available in conversion kits is essential. Electric bike conversion kits provide all the necessary components to transform your regular bike into a powerful electric vehicle. These kits typically include a motor, controller, battery, and other necessary accessories.
One of the main benefits of using an electric bike conversion kit is that it allows you to enjoy the advantages of an electric bike without having to purchase a whole new bike. The conversion process involves removing the existing front or rear wheel and replacing it with a wheel that contains a built-in motor. The controller is then mounted onto the frame, and the battery is attached in a convenient location. The motor is powered by the battery, and the controller regulates the motor’s speed and power output.
Choosing the right battery and motor is crucial for achieving optimal performance and range. In the next section, I will discuss the factors to consider when selecting the appropriate battery and motor for your electric bike conversion.
Choosing the Right Battery and Motor
To achieve optimal performance and range, you’ll need to choose the right battery and motor for your conversion kit. The battery you select will determine the capacity and range of your electric bike, while the motor power will dictate the speed and torque. Here are four important factors to consider when choosing a battery and motor:
-
Battery Types: There are various battery types available for electric bikes, such as lithium-ion, lead-acid, and nickel-metal hydride. Lithium-ion batteries are lightweight, have high energy density, and longer lifespan compared to other options. They are the most popular choice for electric bike conversions.
-
Capacity: The capacity of the battery is measured in ampere-hours (Ah) and determines the range of your electric bike. Higher capacity batteries allow for longer rides without recharging, but they are also heavier and more expensive.
-
Voltage: The voltage of the battery should match the requirements of the motor. Most electric bike conversion kits operate on 36V or 48V systems. Higher voltage systems generally offer more power and speed.
-
Motor Power: The motor power is measured in watts (W) and determines the speed and torque of your electric bike. Choose a motor with sufficient power to meet your needs, considering factors like the terrain you’ll be riding on and your weight.
Now that you understand the importance of choosing the right battery and motor, let’s move on to the next step of removing the bike’s original components to make way for the conversion kit.
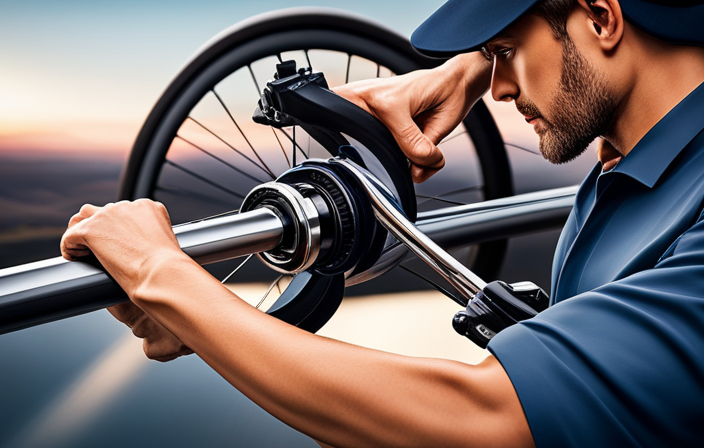
Removing the Bike’s Original Components
Before removing the bike’s original components, it’s important to gather the necessary tools for the task. You will need a set of Allen wrenches, a screwdriver, and possibly a pair of pliers. These tools will allow you to remove the various bolts and screws that hold the components in place. Once you have gathered your tools, you can begin the process of removing the bike’s original components.
To help you understand the process, here is a table outlining the main components that you will need to remove and upgrade:
| Component | Purpose |
|---|---|
| Brakes | To slow down or stop the bike |
| Gears | To change the bike’s speed and pedal resistance |
| Crankset | Transfers pedal power to the rear wheel |
| Chain | Transfers power from the crankset to the rear wheel |
To remove these components, start by loosening the bolts or screws that hold them in place. Carefully disconnect any cables or wires that are attached. Keep track of the order in which you remove the components, as this will make reassembly easier later on.
With the bike’s original components removed, you are now ready to install the electric motor and battery.
Installing the Electric Motor and Battery
Now that I’ve successfully removed the bike’s original components, it’s time to move on to installing the electric motor and battery. This is a crucial step as it will provide the necessary power for the bike to run on electricity.
To begin, I’ll start by installing the motorized wheel. This wheel comes with a built-in motor that will drive the bike forward. I carefully align the motorized wheel with the bike’s rear frame and securely attach it using the provided bolts and nuts. Once properly fastened, I ensure that the wheel spins freely without any obstructions.
Next, I connect the battery cables. The electric bike relies on a battery pack to store and supply power to the motor. I locate the battery compartment on the bike and connect the positive and negative battery cables to their corresponding terminals, ensuring a tight and secure connection. This step is crucial for the proper functioning of the electric system.
With the motorized wheel installed and the battery cables connected, we can now move on to wiring and connecting the electrical components. This will ensure that the power from the battery is properly distributed to all the necessary parts of the electric bike.
Wiring and Connecting the Electrical Components
Once the motorized wheel is securely attached and the battery cables are connected, it’s time to wire and connect the electrical components for proper power distribution. This step is crucial in ensuring that your electric bike functions smoothly and efficiently. To begin, gather all the necessary electrical components such as the controller, throttle, and brake sensors. Refer to the manufacturer’s instructions for specific wiring diagrams and guidelines.
One important aspect of wiring is making correct electrical connections. Use insulated connectors to join wires securely and prevent any short circuits. Take extra care when connecting the battery to the controller, ensuring the positive and negative terminals are properly aligned. It’s also essential to route the wires neatly and keep them away from moving parts or excessive heat sources.
To help you visualize the wiring connections, refer to the table below:
| Component | Wire Color |
|---|---|
| Battery | Red |
| Controller | Black |
| Throttle | Green |
| Brake Sensors | Yellow |
Troubleshooting tips: If you experience any issues with your electrical connections, check for loose connections, damaged wires, or blown fuses. Double-check the wiring diagram to ensure everything is connected correctly. If problems persist, consult a professional or seek guidance from online forums or community groups.
With the electrical components properly wired and connected, you can now move on to testing and fine-tuning your electric bike, ensuring that everything is functioning as intended.
Testing and Fine-Tuning Your Electric Bike
To ensure optimal performance, you should start by testing and fine-tuning the electrical components of your newly assembled ride. Testing techniques are crucial to identifying any issues or areas for improvement.
One method is to use a multimeter to measure the voltage and current at different points in the circuit. This will help you identify any potential voltage drops or current leaks. Additionally, you can use an oscilloscope to analyze the signals and waveforms, ensuring they are within the desired range.
Pay close attention to the motor controller, battery connections, and throttle response. Fine-tuning involves adjusting the settings and parameters to achieve the best performance. This includes calibrating the motor controller to match the specifications of your motor and battery, adjusting the throttle sensitivity, and fine-tuning the regenerative braking system.
By testing and fine-tuning your electrical components, you can make performance improvements and ensure a smooth and efficient ride.
Once you have verified the functionality and performance of the electrical components, you can proceed to the next section, which involves adding safety features and accessories to your electric bike.
Adding Safety Features and Accessories
Make sure you install a reliable set of lights, such as front and rear LED lights, to enhance your visibility and ensure the safety of your rides. Safety precautions should always be a top priority when riding an electric bike.
As you venture out on your electric bike, it is essential to equip yourself with the necessary accessories to protect yourself and others on the road. In addition to lights, consider investing in a helmet, reflective clothing, and a bell or horn to alert pedestrians and other cyclists of your presence. These accessories will not only increase your safety but also ensure that you comply with local regulations. Another important accessory to consider is a sturdy lock to secure your bike when parked, preventing theft and providing peace of mind.
By taking these safety measures and equipping your electric bike with essential accessories, you can enjoy your rides with confidence and peace of mind.
Now that you have added the necessary safety features and accessories to your electric bike, it is important to know how to maintain and troubleshoot your bike to ensure its optimal performance.
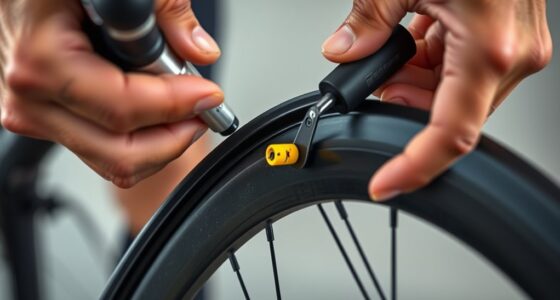
Maintaining and Troubleshooting Your Electric Bike
As I maintain and troubleshoot my electric bike, it’s important to regularly inspect the tires for any signs of wear or damage. The tires are a crucial component of the bike and ensuring they are in good condition is essential for a smooth and safe ride. When inspecting the tires, I check for any cuts, bulges, or excessive wear. If I notice any of these issues, I replace the tires immediately to prevent any accidents or damage to the bike.
In addition to tire maintenance, troubleshooting the battery and motor is also an important aspect of maintaining an electric bike. To troubleshoot the battery, I first check the connections to ensure they are secure. If the battery is not charging or the power is not lasting as long as it should, I may need to replace the battery. Troubleshooting the motor involves checking the connections and inspecting the wiring for any signs of damage. If the motor is not functioning properly, it may need to be repaired or replaced.
To help visualize the maintenance and troubleshooting process, here is a table outlining the steps to take for each component:
| Component | Maintenance Steps | Troubleshooting Steps |
|---|---|---|
| Tires | Inspect for wear or damage Replace if necessary |
– |
| Battery | Check connections Replace if not charging or power is low |
– |
| Motor | – | Check connections Inspect wiring for damage Repair or replace if necessary |
Riding and Enjoying Your Free Electric Bike
When you hop on your new electric bicycle, you’ll experience the joy and freedom of effortless riding. The advancements in electric bike technology have made it easier than ever to enjoy the open road without the physical exertion of traditional biking.
Here are some riding techniques and maintenance tips to help you fully enjoy your electric bike:
-
Proper body positioning: Maintain an upright posture while riding to ensure maximum comfort and control. Keep your back straight and your shoulders relaxed, allowing the bike’s electric motor to do most of the work.
-
Smooth acceleration and braking: Gradually increase your speed by smoothly applying the throttle, rather than abruptly twisting it. When it comes to braking, use both the electric motor’s regenerative braking system and the traditional brakes to slow down smoothly and efficiently.
-
Regular maintenance checks: Keep your electric bike in top shape by regularly checking and adjusting the tire pressure, ensuring the chain is properly lubricated, and inspecting the brake pads for wear and tear. Additionally, clean your bike after each ride to remove any dirt or debris that may affect its performance.
By implementing these riding techniques and following the maintenance tips, you can fully enjoy the effortless riding experience provided by your electric bike.
Now, let’s explore some tips for extending the battery life of your bike.
Tips for Extending Battery Life
To maximize your battery life, it’s important to avoid letting it fully drain before recharging. Proper charging habits can significantly extend the lifespan of your battery.
Firstly, always use the charger provided by the manufacturer, as using incompatible chargers may damage the battery. When charging, it’s best to do so at room temperature, as extreme temperatures can negatively impact battery performance. It’s recommended to charge your battery to around 80% capacity and avoid fully charging it, as this can cause stress on the battery cells. Additionally, try to avoid rapid charging, as it generates more heat and can reduce battery life.
In addition to proper charging habits, implementing energy-saving techniques can help extend your battery life. Adjusting your electric bike’s power settings to a lower level can reduce energy consumption and allow your battery to last longer. Another technique is to be mindful of your acceleration and braking. Smooth and gradual acceleration, as well as gentle braking, can minimize energy usage and increase battery efficiency. Finally, reducing unnecessary weight on your electric bike can also help conserve battery power.
By following these charging habits and energy-saving techniques, you can maximize the lifespan and performance of your electric bike’s battery.
Now, let’s delve into another aspect of the DIY electric bike journey – joining the DIY electric bike community and benefiting from their knowledge and experiences.
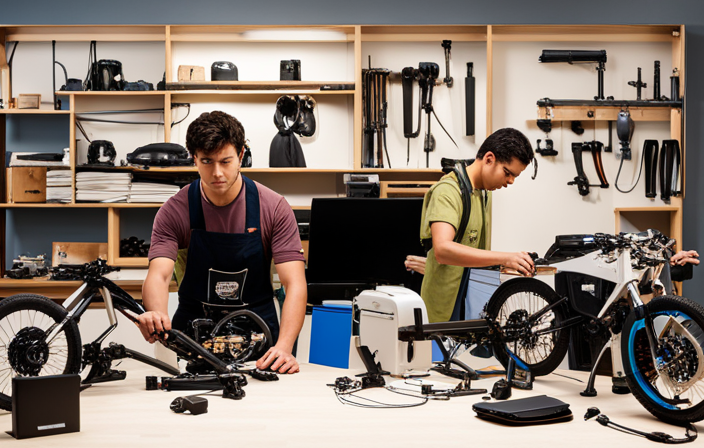
Joining the DIY Electric Bike Community
Transition: Now that we know how to extend the battery life of our electric bikes, let’s explore the world of DIY electric bike projects and discover how to find free bike parts to build our own eco-friendly transportation.
Current Subtopic: Joining the DIY Electric Bike Community
Building your own electric bike can be a rewarding and cost-effective project. By joining the DIY electric bike community, you can gain valuable knowledge and resources to help you in your endeavor. Here are some key steps to get started:
-
Research and Education: Begin by educating yourself on the basics of electric bike conversions. Understand the components involved, such as motors, batteries, and controllers. Familiarize yourself with the different types of electric bike systems and their pros and cons.
-
Online Forums and Communities: Engage with the DIY electric bike community through online forums and discussion groups. These platforms offer a wealth of information, advice, and recommendations. Share your ideas, ask questions, and learn from experienced builders.
-
Salvage and Recycling Centers: Visit salvage yards, recycling centers, or even browse online marketplaces to find free or inexpensive bike parts. Many people discard bikes, unaware that their components can be repurposed for electric bike projects. Look for motors, batteries, and other essential parts that can be refurbished or modified.
-
Local DIY Workshops and Classes: Attend local DIY workshops and classes dedicated to electric bike conversions. These gatherings provide hands-on experience and guidance from experts in the field. You can learn valuable skills, gain practical knowledge, and network with like-minded individuals.
Embracing the Benefits of Eco-Friendly Transportation
Embracing the advantages of eco-friendly transportation can have a positive impact on your daily commute and contribute to a more sustainable future. One of the most effective ways to reduce your carbon footprint while commuting is by using electric bikes. Electric bikes, also known as e-bikes, are bicycles equipped with an electric motor that assists with pedaling. They offer numerous benefits for commuters, making them an excellent choice for environmentally conscious individuals.
Using electric bikes for commuting not only reduces your carbon footprint but also provides a range of other advantages. Firstly, e-bikes are a cost-effective transportation option. Compared to cars or public transportation, e-bikes require minimal maintenance and have lower operating costs. Secondly, electric bikes promote physical activity. While the electric motor assists with pedaling, riders still need to put in effort, resulting in a healthier and more active lifestyle. Additionally, e-bikes offer the flexibility of choosing between manual pedaling or electric assistance, making them suitable for riders of all fitness levels.
To better understand the benefits of electric bikes for commuting and reducing carbon footprints, let’s take a look at the table below:
| Benefits of Electric Bikes for Commuting |
|---|
| Reduces carbon emissions |
| Cost-effective transportation option |
| Promotes physical activity |
| Suitable for riders of all fitness levels |
| Provides flexibility in pedaling |
Frequently Asked Questions
What tools and equipment will I need to build my own electric bike?
To build my own electric bike, I’ll need a few essential tools and equipment.
Firstly, I’ll require an electric bike conversion kit. This kit includes components like a motor, battery, and controller. Having this kit will provide me with the necessary parts to convert my regular bike into an electric one.
Additionally, a step-by-step guide will be crucial. This guide will assist me in the conversion process, ensuring that I have clear instructions to follow. It will outline the necessary steps and provide helpful tips along the way.
Having both the conversion kit and the step-by-step guide will ensure that I have all the necessary resources for successfully building my electric bike.
How long does it typically take to convert a regular bicycle into an electric bike?
Converting a regular bicycle into an electric bike typically takes around 5-10 hours, depending on your experience and the complexity of the conversion.
First, gather the necessary tools like a wrench, screwdriver, and wire cutters.
Begin by removing the pedals, crankset, and front wheel.
Install the electric motor, battery, and controller, ensuring all connections are secure.
Troubleshooting tips include checking wiring connections and testing the system before riding.
Are there any legal requirements or regulations I need to be aware of when riding an electric bike?
When it comes to riding an electric bike, it’s crucial to be aware of the legal requirements and regulations in your country. Electric bike safety is of utmost importance, and understanding the rules can help ensure a smooth and legal ride.
Regulations vary across countries, so it’s essential to familiarize yourself with local laws regarding speed limits, age restrictions, helmet usage, and any licensing or registration requirements.
Always prioritize safety and adhere to the specific regulations in your area.
Can I still pedal the bike without using the electric motor?
Yes, you can still pedal the electric bike without using the electric motor. This allows for a more traditional biking experience and can be beneficial for exercise purposes.
However, it is important to note that the electric motor provides numerous benefits, such as effortless acceleration and assistance on uphill climbs.
To maintain and care for the electric motor, regularly check the battery charge, clean the motor casing, and ensure proper lubrication of moving parts.
How much weight can an electric bike typically carry?
The weight capacity of an electric bike typically depends on various factors. These factors include the strength and design of the bike frame, the power and torque of the motor, the size and quality of the battery, and the type and condition of the tires.
Electric bike weight capacity can range from around 250 pounds to over 400 pounds, but it’s important to consider these factors to ensure safe and efficient operation.
Conclusion
In conclusion, building my own electric bike has been an exhilarating journey.
As I glide through the streets, the wind whispers in my ears, carrying the scent of freedom and sustainability.
The hum of the motor harmonizes with the beating of my heart, a symphony of clean energy.
With each pedal, I leave behind a trail of progress, a testament to my commitment to a greener future.
Join me on this electrifying adventure and together, let’s pave the way to a cleaner, more sustainable world.