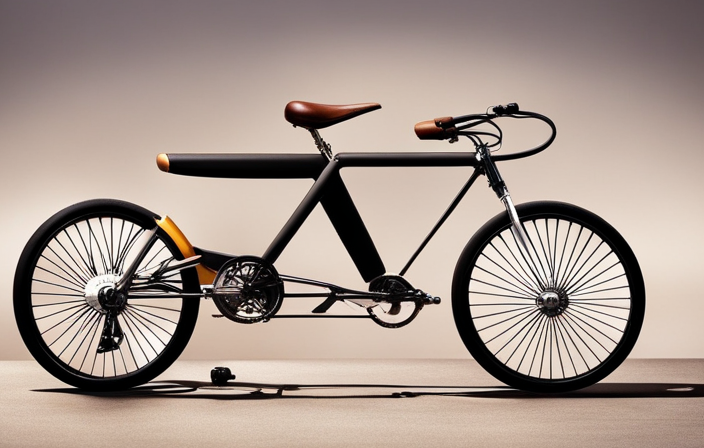

I’ve always had a deep interest in bicycles and the sense of liberty they provide. However, what if there was a bicycle designed to accommodate more than a single rider and provide a distinctive cycling experience? This is exactly the role a quadricycle bicycle plays.
In this article, I will guide you through the process of building your very own quadricycle bicycle. From gathering the necessary tools and materials to designing and planning your bike, building the frame, adding the pedals, seats, and brakes, to testing and adjusting your quadricycle, I’ll be with you every step of the way.
Building a quadricycle bicycle is not only a fun project, but it’s also a great way to customize a bike that fits your specific needs and preferences. So let’s get started!
Key Takeaways
- Building a quadricycle bicycle requires specific materials and tools, as well as metalworking experience or a mentor.
- Design and planning considerations are important, including customization options for the frame, proper alignment and weight distribution, and safety regulations.
- Comfortable seating, handling, and safety are key considerations when designing and building a quadricycle bicycle.
- Regular maintenance practices and troubleshooting are necessary to ensure optimal performance and safety.
Gather the Necessary Tools and Materials
You’re gonna need some tools and materials to make this quadricycle, so let’s get started by gathering everything you’ll need.
First off, you’ll need a welding machine, angle grinder, drill press, and other metalworking tools to fabricate the frame. You can either purchase these from a hardware store or borrow them from a friend who has them. If you don’t have any experience with metalworking, you may want to consider taking a class or finding a mentor who can guide you through the process.
Once you have the necessary tools, you’ll need to buy the materials to build the quadricycle. This includes steel tubing, wheels, gears, chains, and other bike components. You can purchase these from a local bike shop or online. The cost estimate for these materials varies depending on the quality and brand. It’s important to do your research and compare prices to make sure you’re getting the best deal.
With all the tools and materials gathered, it’s time to move on to designing and planning your quadricycle bicycle.
Design and Plan Your Quadricycle Bicycle
Now that I’ve gathered all the necessary tools and materials, it’s time to design and plan my quadricycle bicycle.
The first step is to choose a design plan that suits my needs and preferences.
Next, I need to consider the seating and weight distribution to ensure a safe and comfortable ride.
Finally, I must determine the size of the quadricycle to fit my body and allow for proper maneuverability.
Choose a Design Plan
To pick a design plan for your quadricycle bicycle, check out the latest blueprints and schematics available online. Design inspiration can come from a variety of sources, including vintage cars, motorcycles, and even boats. Customization options are endless, allowing you to add your own personal flair, such as custom paint jobs, unique handlebars, or even a sidecar.
Don’t be afraid to think outside the box and choose a funky or retro design that speaks to your personality. Just remember, even though you’re building a vintage-style bike, you still need to use modern materials and safety regulations to ensure a smooth and secure ride.
When choosing a design plan, it’s important to consider factors such as the number of wheels, frame material, and the overall size of the bike. You want to make sure the design you choose is both aesthetically pleasing and functional.
In the next section, we’ll discuss considerations for seating and weight distribution to ensure your quadricycle bicycle is both comfortable and safe to ride.
Considerations for Seating and Weight Distribution
When designing your custom quadricycle bicycle, two crucial considerations that shouldn’t be overlooked are seating comfort and weight distribution balance. Seating comfort is a key factor that can affect how long and enjoyable your ride will be. It’s important to choose a seat design that provides adequate support for your back and buttocks, and that is positioned at a comfortable height and angle. You may want to consider adding a padded seat cushion or backrest for extra comfort.
Weight distribution balance is another important factor to consider. Proper weight distribution can improve the bike’s stability and handling, making it easier to maneuver and control. To achieve this, you should distribute the weight evenly between the four wheels, taking into consideration the weight of the riders, cargo, and any accessories or modifications you may have added. You may want to experiment with different weight distributions to find the optimal balance for your bike.
When considering seating and weight distribution, it’s important to keep in mind the overall size and dimensions of your quadricycle bicycle. In the next section, we’ll discuss how to determine the proper size and measurements for your custom ride.
Determine the Size
As you envision your dream ride, imagine yourself comfortably seated and cruising through the streets with ease by determining the proper size and measurements for your personalized quadricycle. The size of your quadricycle will affect many aspects of its performance, such as stability, maneuverability, and comfort.
To determine the size, consider the following:
-
The number of passengers: Determine how many people will be riding the quadricycle. This will impact the size of the vehicle, as well as the number and placement of seats.
-
The intended use: Will your quadricycle be used primarily for leisurely rides, or will it be used as a mode of transportation? This will impact the size and weight of the vehicle, as well as the type of materials used in construction.
-
Your height: Consider your own height, as well as the height of the other passengers. This will impact the size of the vehicle, as well as the placement of the pedals and handlebars.
-
Storage space: Determine if you will need any storage space on the quadricycle for items such as bags, coolers, or groceries. This will impact the size and design of the vehicle.
Once you’ve determined the proper size for your quadricycle, you can begin choosing materials and building the frame.
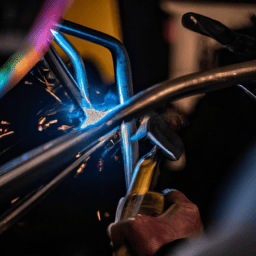
Build the Frame
The sturdy metal pipes curve and twist like vines as the frame of the quadricycle bicycle comes together. Building the frame is the foundation of a successful quadricycle bicycle, and it requires precise welding techniques and customization options. Welding the frame together requires a steady hand and a keen eye for detail. There are a variety of welding techniques to choose from, including MIG, TIG, and stick welding. Each technique has its own pros and cons, so it’s important to choose the one that best suits your skill level and the materials you are using.
Customization options for the frame include the size and shape of the frame, as well as any additional features you may want to add, such as storage compartments or a canopy. It’s important to take your time with the customization process, as a well-designed frame can make all the difference in the performance and comfort of your quadricycle bicycle. With the frame complete, it’s time to move on to adding the pedals, seats, and brakes.
Assembling a quadricycle bicycle requires patience and attention to detail, and building the frame is just the first step. By carefully choosing your welding techniques and customizing the frame to your liking, you can create a sturdy and comfortable quadricycle that will provide hours of enjoyment.
Add the Pedals, Seats, and Brakes
I’ll now discuss the next steps to complete the quadricycle bicycle.
To begin, I installed the pedals and crankshaft, making sure they were properly aligned for efficient pedaling.
Next, I added the seats and backrests, ensuring they were securely fastened to the frame.
Finally, I installed the brakes, making sure they were adjusted correctly and functioning properly for safe stopping.
Installation of Pedals and Crankshaft
Get ready to feel the power in your legs as you pop on those pedals and attach the crankshaft! Pedal installation techniques may vary depending on the type of pedals you’ve chosen.
For instance, if you’re using clipless pedals, you’ll need to attach cleats to your cycling shoes before you can clip them into the pedals. On the other hand, if you’re using flat pedals, you’ll only need to place them on the crank arms and tighten them with a wrench.
Once the pedals are securely attached, it’s time to install the crankshaft. This can sometimes be a tricky process, but don’t worry, there are troubleshooting crankshaft issues you can address if you encounter any problems.
First, make sure that the bottom bracket is properly installed and tightened. Then, slide the crank arms onto the bottom bracket spindle, and secure them using a crank bolt. Finally, check that the cranks are correctly aligned and that the pedals spin smoothly.
With the pedals and crankshaft in place, it’s time to move onto adding seats and backrests for a comfortable ride.
Adding Seats and Backrests
Now that we’ve successfully installed the pedals and crankshaft, it’s time to move on to the next step – adding seats and backrests. The design and aesthetics of the seats and backrests are important factors to consider. They will not only affect the overall look of the quadricycle bicycle but also play a crucial role in ensuring the comfort of the riders.
When designing the seats and backrests, it’s essential to take into account the ergonomic factors. These include the height, width, and angle of the seats, as well as the distance between them. The seats should be positioned in such a way that they provide enough legroom for the riders and allow them to maintain a comfortable posture while riding. Additionally, the backrests should be designed to provide adequate support to the riders’ backs, reducing the risk of any discomfort or injury.
By considering these factors, we can ensure that the seats and backrests are not only aesthetically pleasing but also functional and comfortable for the riders.
Moving forward, the next step is to install the brakes. With the seats and backrests in place, we can move on to ensuring the safety of the riders by installing reliable and efficient brakes.
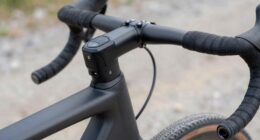
Installing Brakes
Ensuring the safety of riders is a top priority, and one way to achieve this is by installing efficient and reliable brakes on the quadricycle. There are different types of brakes that can be used, such as rim brakes, disc brakes, and coaster brakes.
Each type has its advantages and disadvantages, and the choice depends on personal preference and the intended use of the quadricycle. Rim brakes, for example, are easy to maintain and adjust, but they are not as effective in wet conditions. Disc brakes, on the other hand, provide better stopping power, but they require more maintenance. Coaster brakes are simple to use and require minimal maintenance, but they may not be suitable for steep hills or heavy loads.
Regardless of the brake type chosen, regular maintenance is essential to ensure proper functioning and longevity. Some maintenance tips include cleaning the braking surfaces regularly to prevent wear and tear, checking the brake pads for wear and replacing them when necessary, and adjusting the brake cables to maintain proper tension. It’s also important to test the brakes before each ride to ensure they’re functioning correctly and to make any necessary adjustments.
With efficient and reliable brakes installed and regularly maintained, riders can enjoy a safer and more comfortable ride on their quadricycle.
In the next section, we’ll discuss how to test and adjust the quadricycle bicycle to ensure optimal performance.
Test and Adjust Your Quadricycle Bicycle
Now that I’ve built my quadricycle bicycle, it’s time to test and adjust it.
Before hopping on, it’s important to take safety precautions, such as wearing a helmet and checking all bolts and screws for tightness.
Once ready, I’ll take it for a test ride and make any necessary adjustments to ensure a smooth and safe ride.
Lastly, I’ll need to keep up with maintenance to keep my quadricycle in top shape for future rides.
Safety Precautions
To keep myself and others safe while riding my quadricycle bike, it’s important to follow a few simple safety precautions.
Firstly, investing in proper gear is essential. Wearing a helmet is a must, and it’s also a good idea to wear protective clothing, such as gloves and knee pads. This will help to protect you in case of a fall or collision. Additionally, make sure that your clothing is visible, especially if you plan on riding at night. You can wear reflective clothing or attach reflective strips to your clothing to increase your visibility.
Secondly, regular maintenance practices are crucial to ensuring that your quadricycle bike is in good working order. Before each ride, check that your brakes are working properly, your tires are inflated to the correct pressure, and that all bolts and screws are tightened. If you notice any issues, take the time to fix them before riding. It’s also a good idea to have your bike serviced regularly by a professional. This will help to prevent any major problems from occurring and will keep your bike in top condition.
By following these safety precautions and regularly maintaining your quadricycle bike, you can ensure a safe and enjoyable ride.
Now, let’s move on to the next section, where we’ll discuss how to test ride and make adjustments to your bike.
Test Ride and Adjustments
So, you’re itching to take your four-wheeled speed demon for a spin, eh? Well, before you go tearing up the pavement, let’s talk about how to test ride and make any necessary adjustments.
First things first, make sure you have comfortable seating. Adjust the seat height and position until you find a comfortable position. You should be able to reach the pedals without stretching your legs too far, and your back should be upright and relaxed. If you’re not comfortable, you won’t enjoy the ride, so take the time to get this right.
Once you’re seated comfortably, it’s time to test the handling performance. Start slowly and get a feel for how the quadricycle handles. Make sure it turns smoothly and doesn’t feel wobbly or unstable. If you notice any issues, such as excessive noise or vibration, stop and make adjustments as needed. You might need to adjust the wheel alignment or tighten bolts, for example.
Don’t rush this process – it’s crucial to ensure your quadricycle is safe and enjoyable to ride.
Now that you’ve tested your quadricycle and made any necessary adjustments, it’s time to talk about maintenance tips. It’s essential to keep your quadricycle in good condition to ensure safe and smooth riding.
Maintenance Tips
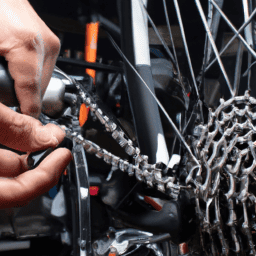
To ensure your ride remains safe and enjoyable, it’s important that you regularly perform maintenance tasks on your four-wheeled vehicle. Neglecting maintenance can lead to common issues such as flat tires, loose bolts, and chain problems. Here are some maintenance tips to keep your quadricycle bicycle running smoothly:
-
Check tire pressure regularly: Low tire pressure can cause instability and affect handling. Use a tire pressure gauge to ensure all four tires are inflated to the recommended level.
-
Tighten bolts and nuts: Vibration from riding can cause bolts and nuts to loosen over time. Go through all the bolts and nuts on your quadricycle and tighten them if necessary.
-
Keep the chain lubricated: A dry chain can cause unnecessary wear and tear and affect pedaling efficiency. Apply chain lubricant regularly to keep it running smoothly.
In case you encounter any issues despite regular maintenance, here are some troubleshooting tips:
-
Flat tire: Carry a spare tube and a pump with you on rides. If you get a flat, replace the tube and inflate it using the pump.
-
Loose chain: Adjust the tension of the chain by loosening the bolts that hold the rear axle in place and moving it backward or forward. Re-tighten the bolts once you have the correct tension.
-
Brake problems: Check that the brake pads are making sufficient contact with the wheel rim. Adjust the brake cable tension if necessary. If the brake pads are worn, replace them.
Frequently Asked Questions
What is the maximum weight capacity of the quadricycle bicycle?
As I examine the quadricycle design, I can confidently state that the maximum weight capacity is determined by the materials used and the structural integrity of the frame. A precise calculation is required to ensure safety.
How long does it typically take to build a quadricycle bicycle?
Building a quadricycle bicycle is a time-consuming process that requires patience and attention to detail. The duration depends on your experience level and the tools at your disposal. To optimize the building process, use proper tools and follow expert tips.
Are there any safety regulations that need to be considered when riding a quadricycle bicycle on public roads?
When riding a quadricycle bicycle on public roads, road safety and legal requirements must be considered. Proper equipment such as lights, reflectors, and brake systems are necessary. Follow traffic laws and wear appropriate safety gear.
Can the quadricycle bicycle be customized with different colors or designs?
Oh boy, can the quadricycle bicycle be customized? The options are endless! From a rainbow paint job to a sleek black design, the possibilities are limitless. And if you’re feeling fancy, some brands even offer partnership options for a truly unique ride.
Is it possible to convert a regular bicycle into a quadricycle bicycle?
Converting a regular bicycle into a quadricycle comes with pros and cons for commuting. Adding electric assist can improve efficiency, but may increase weight and cost. Consider benefits and drawbacks before making modifications.
Conclusion
In conclusion, building a quadricycle bicycle was a challenging yet rewarding experience. I was able to construct a sturdy frame using steel tubing and welding techniques, thanks to careful planning and designing. The addition of pedals, seats, and brakes required attention to detail and a thorough understanding of bike mechanics.
After several test runs, I realized that the quadricycle was not balanced properly and tended to tip over when turning corners. Luckily, I ran into a retired bike mechanic who gave me some tips on adjusting the weight distribution and center of gravity. With his help, I was able to make the necessary adjustments and now my quadricycle is running smoothly.
Overall, building a quadricycle bicycle was a challenging yet satisfying project. It required a combination of technical skills and creative problem-solving, but with the right tools, materials, and attention to detail, anyone can build their own unique and functional bike.