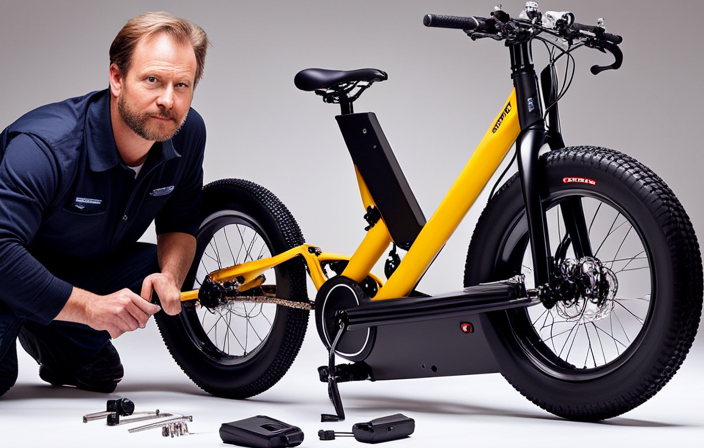
So, you’ve got an old cordless drill lying around, and you’ve always wanted to build your own electric bike? Well, you’re in luck! In this article, I’ll guide you through the step-by-step process of transforming that drill into a fully functional electric bike.
With the right tools and materials, a little bit of tinkering, and some electrical know-how, you’ll be cruising around on your very own DIY electric bike in no time.
Let’s get started!
Key Takeaways
- Troubleshoot any motor or component problems such as strange noises or vibrations.
- Test ride the bike to assess its speed, acceleration, and overall performance.
- Adjust the brakes for safety by checking brake tension and making necessary adjustments.
- Fine-tune the speed controller and troubleshoot common issues like poor acceleration or unexpected jerking.
Gather the Necessary Tools and Materials
You’ll need to gather all the necessary tools and materials for building your electric bike from a cordless drill.
When it comes to choosing the right motor and battery, it is important to consider the power and efficiency required for your specific needs. Research different options and select a motor that matches the desired speed and torque for your bike. Additionally, choose a battery that can provide enough energy to support your desired range.
Safety and legality are paramount when building an electric bike. Ensure that your motor and battery comply with local regulations and standards. It is also important to wear appropriate safety gear and follow all traffic laws while riding.
Now that you have all the necessary information, let’s move onto the next step: disassembling the cordless drill.
Disassemble the Cordless Drill
To begin disassembling the cordless drill, start by removing the battery pack. This is a crucial step in the process of repurposing power tools for cordless drill modifications.
Once the battery pack is removed, you can proceed with the following steps:
- Locate the screws holding the casing of the drill together and use a screwdriver to remove them.
- Carefully separate the two halves of the drill casing, exposing the inner components.
- Identify the motor and wiring within the drill, which will be utilized to power the electric bike.
By disassembling the cordless drill, you gain access to the essential components needed for your electric bike project.
Now that the drill is taken apart, we can move on to preparing the bike frame for the installation of the motor and other components.
Prepare the Bike Frame
First, secure the frame of your bicycle in a stable position for the upcoming modifications. Preparing the bike frame is an essential step in building an electric bike.
Start by removing any unnecessary components such as the pedals, chain, and derailleur. This will create space for the electric motor and other necessary parts.
Inspect the frame for any damage or cracks, as a sturdy frame is crucial for the safety and performance of the electric bike.
Next, measure the dimensions of the frame to determine the right motor size and type for your electric bike. Consider factors such as power output, torque, and compatibility with the battery.
Install the Electric Motor
Once the bike frame is properly prepared, it’s time to install the electric motor. This step is crucial in converting a regular bike into an electric one. Here’s how to do it:
-
Position the motor: Determine the ideal location for the motor on the bike frame. Consider weight distribution and accessibility for maintenance.
-
Align the motor: Ensure that the motor is properly aligned with the bike’s chain and rear wheel. This alignment is crucial for efficient power transfer.
-
Secure the motor: Use mounting brackets or clamps to securely attach the motor to the bike frame. Make sure it is tightly fastened to prevent any movement during operation.
-
Connect the motor to the battery: Follow the manufacturer’s instructions to connect the motor to the battery pack. Double-check all connections to ensure they are secure and properly insulated.
Connect the Motor to the Bike Frame
Now that the motor is securely attached to the bike frame, the next step is to connect it to the battery pack. This is an essential part of the electric bike conversion process, as it allows the motor to receive the necessary power to function. To connect the motor to the battery pack, you will need to consider mounting options and motor placement. It is crucial to ensure that the motor is positioned in a way that allows for easy access and proper alignment with the battery pack. Depending on the bike frame and available space, you may have different options for mounting the motor. Refer to the table below for a visual representation of the mounting options and motor placement possibilities.
| Mounting Option | Motor Placement |
|---|---|
| Rear Rack | Rear of the bike |
| Frame Triangle | Center of the bike |
| Water Bottle Cage | Down tube |
With the motor securely connected to the battery pack, the next section will focus on the installation of the battery and controller.
Install the Battery and Controller
To install the battery and controller, carefully follow the instructions provided in the user manual.
The battery capacity is crucial for determining the range and power of your electric bike. Choose a battery with sufficient capacity to meet your needs.
The controller regulates the power flow from the battery to the motor, so its performance is essential for a smooth and efficient ride.
When connecting the battery, ensure that the positive and negative terminals are correctly aligned with the corresponding connectors on the controller.
Once the battery and controller are securely installed, it’s time to connect the wiring. This will allow the different components of your electric bike to communicate and function properly.
Connect the Wiring
After securely installing the battery and controller, it’s important to connect the wiring for proper communication and functionality of the electric bike components. This step ensures that all the electrical connections are in place and the bike is ready to be powered up. To help you understand the wiring process better, here is a table outlining the different components and their corresponding connections:
| Component | Connection |
|---|---|
| Motor | Connect to controller |
| Battery | Connect to controller |
| Throttle | Connect to controller |
| Brake Sensor | Connect to controller |
Troubleshooting common wiring issues is essential to ensure smooth operation of your electric bike. If you encounter any problems, check for loose connections, damaged wires, or faulty components. Additionally, to extend the range of your electric bike, consider these tips: use pedal-assist mode, maintain proper tire pressure, avoid excessive weight, and choose a lower power level. Now that the wiring is complete, let’s move on to testing the electric bike to ensure everything is functioning correctly.
Test the Electric Bike
Make sure you take the necessary safety precautions before testing the functionality of your newly assembled electric bike.
Once you have connected all the wiring and double-checked it for any loose connections, it’s time to test your creation.
Start by turning on the power switch and observe the test results closely. Pay attention to any strange noises or vibrations, as they could indicate a problem with the motor or other components.
If everything seems to be running smoothly, take your electric bike for a short test ride. Note the speed, acceleration, and overall performance.
If you encounter any issues during the test, refer to the troubleshooting tips provided in the previous sections.
Once you have completed the test, you can move on to the next section to make adjustments and fine-tuning for optimal performance.
Make Adjustments and Fine-Tuning
You should first check the tension of the brakes and adjust them if necessary. This is crucial to ensure your safety while riding the electric bike.
Here are some important adjustments and fine-tuning steps to consider:
-
Adjusting the speed controller: Fine-tuning the speed controller allows you to optimize the performance of your electric bike. By adjusting the settings, you can increase or decrease the speed according to your preference.
-
Troubleshooting common issues: Sometimes, you may encounter issues such as poor acceleration or unexpected jerking. Troubleshooting these problems involves checking the wiring connections, inspecting the battery voltage, and ensuring the throttle is working properly.
-
Balancing the weight distribution: Proper weight distribution is essential for a smooth and stable ride. Adjust the position of the battery and other components to achieve a well-balanced electric bike.
-
Fine-tuning the suspension: To enhance your riding experience, fine-tune the suspension system. Adjust the preload and rebound settings to match your weight and riding style.
By making these adjustments and fine-tuning your electric bike, you can optimize its performance and ensure a safe and enjoyable ride.
Now, let’s move on to the next section and start to enjoy your DIY electric bike!
Enjoy Your DIY Electric Bike!
Now that your DIY electric bike is ready, it’s time to hop on and enjoy the ride! Using an electric bike for commuting offers numerous benefits. First, it’s an eco-friendly mode of transportation, reducing your carbon footprint and helping to combat air pollution. Second, it allows you to avoid traffic congestion and arrive at your destination faster. Third, it provides a great way to exercise and stay active while commuting. To ensure a smooth and enjoyable ride, it’s important to maintain and troubleshoot your DIY electric bike regularly. Here are some tips: regularly check the battery level and charge it when needed, keep the tires properly inflated, clean and lubricate the chain regularly, and inspect the brakes for any signs of wear or damage. By following these tips, you can ensure your DIY electric bike stays in top condition and provides a reliable and efficient means of transportation.
| Benefits of using an electric bike for commuting | Tips for maintaining and troubleshooting your DIY electric bike |
|---|---|
| Eco-friendly mode of transportation | Regularly check the battery level and charge it when needed |
| Helps combat air pollution | Keep the tires properly inflated |
| Avoids traffic congestion | Clean and lubricate the chain regularly |
| Provides exercise and physical activity | Inspect the brakes for any signs of wear or damage |
| Reliable and efficient means of transportation |
Frequently Asked Questions
How much power does the electric motor provide?
The power output of the electric motor can be determined through an electric motor efficiency analysis. This analysis evaluates the efficiency of the motor in converting electrical energy into mechanical power, providing an accurate measurement of its power output.
How long does it take to fully charge the battery?
Charging time for the battery depends on its capacity. Generally, it takes around 4-6 hours to fully charge a standard electric bike battery. However, larger capacity batteries may require longer charging times.
Are there any safety precautions to keep in mind while building the electric bike?
When building a DIY electric bike, it is crucial to prioritize safety measures. Wear protective gear, use proper insulation and wiring techniques, and ensure the battery is securely mounted to avoid accidents and ensure a safe riding experience.
Can the electric motor be controlled using a smartphone app?
Yes, the electric motor can be controlled using a smartphone app. With advanced smartphone app features and remote control possibilities, users can easily control their electric bike, enhancing convenience and providing a seamless riding experience.
Can the electric bike be used in all weather conditions?
Yes, the electric bike can be used in all weather conditions. Weatherproofing considerations, such as sealing electrical components and using waterproof connectors, help protect against moisture. However, extreme weather conditions can impact battery life.
Conclusion
In conclusion, building an electric bike from a cordless drill has been an exhilarating journey.
By gathering the necessary tools and materials, disassembling the drill, and preparing the bike frame, I was able to install the electric motor and connect it seamlessly.
Through connecting the wiring and conducting thorough testing, I ensured a safe and efficient ride.
Making adjustments and fine-tuning was crucial for optimal performance.
Now, with my DIY electric bike, I’m ready to hit the road with a newfound sense of freedom and power, taking life by the handlebars.


