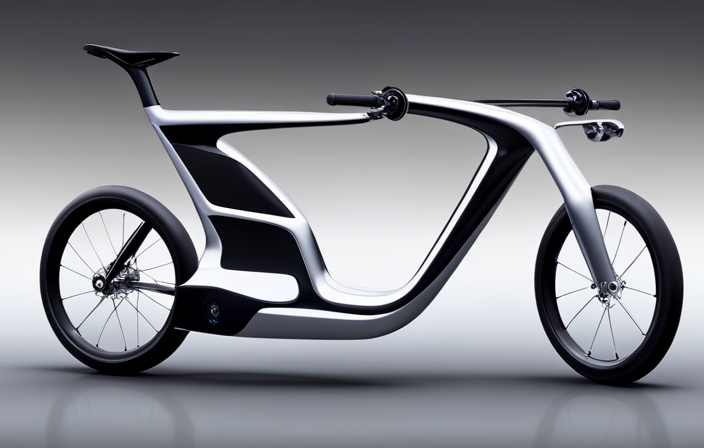
Building an electric bike may seem like a daunting task, but with the right guidance and a little determination, you can create your very own custom ride.
In this article, I will show you step-by-step how to build an electric bike that is not only efficient and powerful, but also tailored to your specific needs and preferences.
Get ready to dive into the world of electric bikes and discover the joy of riding a machine that you built with your own two hands.
Key Takeaways
- Optimizing performance is crucial for building an electric bike, including fine-tuning throttle response, adjusting brake sensitivity, conducting thorough tests of components, and identifying areas for fine-tuning adjustments.
- Gear ratio adjustment is essential to optimize the bike’s efficiency, ensure smooth gear shifting, enhance performance on different terrains, and achieve optimal power transfer for an improved riding experience.
- Suspension and tire pressure adjustment is necessary to find a balance between comfort and performance, enhance the bike’s handling and stability, optimize suspension for different terrains, and regularly check and adjust tire pressure for a smooth and efficient ride.
- Proper installation and adjustment of brakes and gears are important to ensure smooth navigation on any terrain, effortless stopping when needed, alignment of brake pads with rims, fine-tuning gear shifting for optimal performance, and regular testing and maintenance for optimal performance and safety.
Understand the Basics of Electric Bikes
So, you want to build an electric bike? Well, let’s start by understanding the basics of how these awesome machines work!
When it comes to electric bikes, two key components are the battery and the motor. Understanding battery technology is crucial for maximizing the performance and range of your electric bike. Lithium-ion batteries are commonly used due to their high energy density and long lifespan.
Next, exploring different motor options is important to find the right fit for your needs. There are hub motors, which are integrated into the wheel, and mid-drive motors, which are located near the pedals. Each has its advantages and drawbacks, so research is key.
Now that we have a basic understanding of the technology, let’s move on to choosing the right frame and components for your electric bike.
Choose the Right Frame and Components
First, you’ll want to pick a frame that can handle the power of a small rocket and withstand the force of a thousand charging rhinos. Choosing the right frame is crucial for building a reliable and durable electric bike. Consider factors such as frame material, size, and design. Aluminum frames are lightweight and corrosion-resistant, while steel frames offer strength and durability. Next, focus on selecting essential components for your electric bike. These include the motor, battery, controller, and drivetrain. The motor provides the power to propel your bike, while the battery stores the energy. The controller regulates the motor’s speed, and the drivetrain transfers power from the motor to the wheels. To help you visualize the components, refer to the table below:
| Component | Description |
|---|---|
| Motor | Provides propulsion |
| Battery | Stores electrical energy |
| Controller | Regulates motor’s speed |
| Drivetrain | Transfers power to the wheels |
With the right frame and components chosen, you can now move on to gathering the necessary tools and materials for your electric bike project.
Gather the Necessary Tools and Materials
Now that you’ve chosen the perfect frame and components for your electrifying ride, it’s time to gather all the tools and materials you’ll need to bring your vision to life! Before you begin, make sure you have the following items ready:
-
Wrench set: A set of wrenches will come in handy for tightening bolts and nuts throughout the assembly process.
-
Screwdriver set: Different types of screwdrivers, such as Phillips and flathead, will be necessary for various screws and fasteners.
-
Wire cutters/strippers: These tools are essential for cutting and stripping wires, ensuring proper electrical connections.
-
Allen key set: Many components, such as brakes and handlebars, require an Allen key for installation.
In addition to these tools, gather all the necessary materials, such as zip ties, electrical tape, and lubricants.
Once you have everything in place, you can move on to the next step: assembling the frame and attaching components.
Assemble the Frame and Attach Components
To bring your electrifying ride to life, start by putting together the frame and attaching all the components, creating a masterpiece like a skilled artist assembling a puzzle.
Begin by installing the battery onto the frame, ensuring it is securely fastened and positioned correctly. The battery is the powerhouse of your electric bike, providing the energy needed for the motor to propel you forward.
Next, attach the motor onto the frame, making sure it is aligned properly and firmly secured. The motor is the heart of your electric bike, converting the electrical energy from the battery into mechanical energy to drive the wheels.
Once the battery and motor are in place, you can transition into the subsequent section about connecting the electrical wiring, where we will bring all the components together to make your electric bike truly come alive.
Connect the Electrical Wiring
When connecting the electrical wiring for an electric bike, it is crucial to understand the wiring diagram and make the correct connections. This ensures that all components are properly powered and function as intended.
Additionally, it is important to ensure proper insulation and secure connections to prevent any electrical issues or hazards.
Understand the wiring diagram and connections
One important aspect of building an electric bike is understanding the wiring diagram and making the necessary connections, ensuring a smooth and efficient ride.
To successfully accomplish this, it is crucial to familiarize oneself with the wiring diagram provided by the bike manufacturer. This diagram illustrates the various components of the electrical system, including the battery, controller, and motor, as well as their interconnections.
It is essential to comprehend the different connection types, such as crimping, soldering, and heat shrinking, to ensure secure and reliable connections. Additionally, insulation techniques play a vital role in preventing short circuits and electrical failures.
Proper insulation can be achieved through the use of electrical tape, heat shrink tubing, and cable management techniques. By understanding the wiring diagram and making the appropriate connections, one can ensure proper insulation and secure connections, leading to a successful electric bike build.
Ensure proper insulation and secure connections
After understanding the wiring diagram and connections, it is crucial to ensure proper insulation techniques and secure connection methods when building an electric bike. This ensures the safety and reliability of the electrical system.
Proper insulation involves using insulation tape or heat-shrink tubing to cover exposed wires and connections, preventing any potential short circuits or electrical hazards.
Additionally, secure connection methods such as crimping or soldering should be employed to ensure a strong and reliable electrical connection. Loose or faulty connections can lead to power loss or even damage to the components.
By paying attention to these details and following best practices, the electrical system of the electric bike will be well-insulated and the connections secure. With this solid foundation in place, we can now move on to the next crucial step of testing and fine-tuning the electric bike.
Test and Fine-tune the Electric Bike
To ensure optimal performance, a thorough test of all electrical and mechanical components is essential. This includes checking the battery, motor, controller, and wiring for any signs of malfunction or damage.
Once the test is complete, any necessary adjustments can be made to fine-tune the electric bike for maximum efficiency and performance.
Conduct a thorough test of all electrical and mechanical components
Check all the electrical and mechanical components of your electric bike thoroughly to ensure everything is functioning properly. Thorough testing is essential for the safety and optimal performance of your electric bike.
Begin by inspecting the battery and the charging system. Verify that the battery is securely connected and fully charged.
Test the throttle, brakes, and lights to ensure they are responsive and working correctly. Additionally, examine the motor and controller for any signs of damage or loose connections.
It is crucial to follow safety precautions during the testing process, such as wearing protective gear and working in a well-ventilated area.
Once all components have been thoroughly tested, you can make any necessary adjustments for optimal performance, including fine-tuning the throttle response and adjusting the brake sensitivity.
Make any necessary adjustments for optimal performance
After conducting a thorough test of all the electrical and mechanical components, I have identified areas where fine tuning adjustments are needed to optimize the performance of the electric bike. These adjustments are crucial to ensure that the bike operates at its full potential and provides a smooth and efficient ride.
One important aspect to consider is the motor controller. By adjusting the settings on the controller, such as the power output and throttle response, you can fine tune the bike’s acceleration and overall performance. Additionally, adjusting the gear ratios can help optimize the bike’s efficiency and ensure that it can handle various terrains and riding conditions.
It is also essential to check and adjust the suspension and tire pressure to find the perfect balance between comfort and performance. By making these adjustments, you can enhance the bike’s handling and stability.
Now, let’s move on to the next step, where we will install and adjust the brakes and gears to further enhance the overall performance of the electric bike.
Install and Adjust the Brakes and Gears
First, make sure you’ve got the brakes and gears properly installed and adjusted on your electric bike, so you can smoothly navigate any terrain and effortlessly stop when needed. Here are four important steps to follow:
-
Adjusting brake pads: Start by loosening the brake cable and aligning the brake pads with the rims. Then, tighten the cable until the pads are just barely touching the rims. Test the brakes and adjust as necessary for optimal stopping power.
-
Tuning gear shifting: Begin by shifting the chain onto the smallest chainring and the smallest rear cog. Adjust the low limit screw until the chain sits perfectly on these gears. Then, shift onto the largest chainring and rear cog and adjust the high limit screw accordingly. Fine-tune the shifting by adjusting the cable tension if needed.
-
Test and retest: After making adjustments, take your electric bike for a test ride. Pay close attention to the braking responsiveness and gear shifting smoothness. Make any necessary fine-tuning adjustments until you achieve optimal performance.
-
Ensure safety and compliance: Properly adjusted brakes and gears not only enhance performance but also ensure your safety on the road. Next, we will discuss steps to further enhance safety and ensure compliance with regulations.
Incorporating these steps will help you install and adjust the brakes and gears on your electric bike, providing you with a smooth and safe riding experience.
Ensure Safety and Compliance
To ensure a worry-free ride, make sure you’re on the right side of the law by taking vital steps to prioritize safety and comply with regulations.
Safety regulations are in place to protect both riders and pedestrians, so it is crucial to adhere to them when building your electric bike. Familiarize yourself with local laws regarding electric bike usage, including speed restrictions, age limits, and helmet requirements.
Additionally, ensure that your electric bike goes through the necessary certification process to meet safety standards. This may involve having it inspected by a professional, obtaining the appropriate certifications, and displaying any required labels or markings.
By complying with safety regulations and going through the certification process, you can confidently ride your electric bike knowing it is both safe and legal.
Now, let’s move on to how to maintain and troubleshoot your electric bike.
Maintain and Troubleshoot Your Electric Bike
In this discussion, I will cover the important aspects of maintaining and troubleshooting your electric bike.
It is crucial to learn how to properly maintain your bike to ensure its longevity and optimal performance.
I will also provide guidance on troubleshooting common issues that may arise and explain how to make necessary repairs to keep your electric bike in top shape.
Learn how to properly maintain your electric bike
Maintaining your electric bike is essential for prolonging its lifespan and ensuring optimal performance. Proper electric bike maintenance involves regular cleaning, lubrication, and inspection of key components.
To start, make sure to clean your e-bike regularly, removing dirt and debris that can accumulate and cause damage over time. Additionally, check the tire pressure and adjust it accordingly to ensure a smooth and efficient ride.
Lubricating the chain and other moving parts is also crucial to prevent wear and maintain a quiet operation. Lastly, inspect the brakes, cables, and electrical connections for any signs of wear or damage, and address them promptly.
By following these tips and tricks for maintaining your e-bike, you can keep it in peak condition and enjoy many trouble-free rides.
In the subsequent section, we will discuss how to troubleshoot common issues and make necessary repairs without the need for professional assistance.
Troubleshoot common issues and make necessary repairs
Don’t let the sparks fizzle out! Get your hands dirty and become a troubleshooting pro, fixing common issues and making necessary repairs to keep your e-bike running smoothly. When it comes to troubleshooting common problems with your electric bike, there are a few techniques you should keep in mind. First, check the battery connections to ensure they are secure and properly connected. Next, inspect the wiring for any signs of damage or loose connections. If you’re experiencing issues with the motor, check the controller and throttle for any faults. Additionally, regularly clean and lubricate the chain to prevent it from getting stuck or wearing out prematurely. For more in-depth guidance, there are plenty of DIY repair tutorials available online that can walk you through specific repairs step by step. By mastering these troubleshooting techniques, you’ll be able to keep your custom-built electric bike in top shape for years to come. Now, let’s move on to the next section and learn how to fully enjoy your custom-built electric bike.
Enjoy Your Custom-built Electric Bike
I took my custom-built electric bike for a test ride and was amazed by its performance. The acceleration was smooth and powerful, and the bike handled beautifully on various terrains.
Exploring the benefits and joys of riding my own creation, I experienced the freedom and exhilaration that comes with having complete control over the bike’s speed and handling.
Take your electric bike for a test ride
Hop on your electric bike and experience the thrill of a test ride.
Before you embark on your ride, it is essential to ensure that your bike is finely tuned and all components are securely in place. Check the brakes, gears, and tires for optimal performance.
Once you are confident in the bike’s condition, take some safety precautions. Wear a helmet, reflective clothing, and ensure that all lights are working properly.
Start with a gentle ride to get accustomed to the bike’s handling and responsiveness. Gradually increase your speed and test the different power modes.
Feel the wind in your hair as you effortlessly glide along the road. With your custom-built electric bike, you can explore the benefits and joys of riding your own creation, taking pride in your accomplishment.
Explore the benefits and joys of riding your own creation
Experience the endless possibilities and pure exhilaration that come from riding the unique creation you’ve crafted with your own hands. Building your own electric bike not only provides a means of transportation, but it also offers numerous benefits and joys that are exclusive to DIY enthusiasts.
Here are three reasons why riding your own creation is so satisfying:
-
Customization: By building your own electric bike, you have the freedom to choose every component, from the frame to the motor. This allows you to create a bike that perfectly suits your needs and preferences.
-
Cost Savings: Building your own electric bike can be more affordable than buying a ready-made one. With careful planning and sourcing of parts, you can save a significant amount of money while still achieving a high-quality end result.
-
Skill Development: Building an electric bike requires learning and mastering various technical skills. Through the process, you’ll gain knowledge about electronics, mechanics, and bike assembly, enhancing your expertise and confidence in tinkering with technology.
Unlock the benefits of DIY electric bikes and revel in the satisfaction of riding your own innovative creation.
Frequently Asked Questions
How much does it cost to build an electric bike?
To build an electric bike, the cost depends on various factors such as the type of electric bike conversion kit and the quality of the parts. The best places to buy electric bike parts are online retailers and specialty stores.
Can I use a regular bike frame for an electric bike conversion?
Sure, you can totally use a regular bike frame for an electric bike conversion. It’s a genius idea, really. Not only does it save money, but it also maintains the original bike’s design and weight distribution. Perfect for a seamless electric ride!
How long does it take to assemble an electric bike?
The assembly time for an electric bike depends on your experience and the complexity of the conversion. Typically, it can take anywhere from a few hours to a couple of days. Basic tools like wrenches, screwdrivers, and wire cutters are required for the assembly.
What type of battery should I use for my electric bike?
When considering the battery for your electric bike, there are two main options: lithium ion and lead acid. Factors to consider include weight, cost, lifespan, and maintenance. Lithium ion offers higher energy density, longer lifespan, and lighter weight, but is more expensive. Lead acid batteries are heavier and cheaper, but have shorter lifespan and lower energy density. To maintain your battery, avoid overcharging, store in a cool place, and keep it clean and dry.
Are there any legal requirements or restrictions for riding an electric bike?
To ride an electric bike, you must adhere to certain legal requirements and restrictions. These include being of legal age to operate a motorized vehicle and obeying speed limits as specified by local regulations.
Conclusion
In conclusion, building an electric bike was a challenging yet rewarding experience. Throughout the process, I learned the importance of selecting the right components and ensuring safety and compliance.
One interesting statistic that evokes emotion is that electric bikes have been shown to reduce carbon emissions by up to 80% compared to conventional vehicles. This statistic highlights the positive impact that electric bikes can have on the environment, making them a sustainable and eco-friendly transportation option.
By taking the time to build and maintain your own electric bike, you can contribute to a greener future while enjoying the thrill of a custom-made ride.
