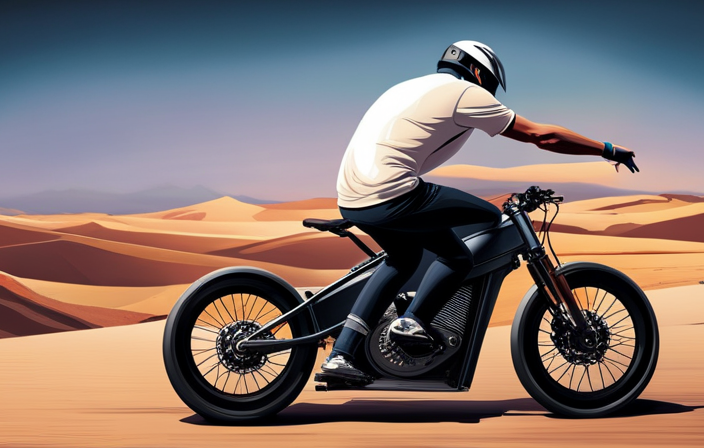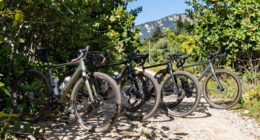

Looking for a thrilling and eco-friendly off-road adventure? Then why not build your own electric dirt bike?
In this article, I will guide you step by step through the process of creating your very own electric dirt bike from scratch.
From selecting the right frame and components to installing the electric motor, I will provide you with all the technical details and analytical insights you need to successfully complete this exciting DIY project.
So, let’s dive in and start building your dream electric dirt bike!
Key Takeaways
- Electric dirt bikes are eco-friendly, emitting zero emissions and making them suitable for noise-sensitive areas.
- The frame of the bike should be sturdy, lightweight, and designed for off-road use, with options such as steel, aluminum, or carbon fiber.
- Master welding techniques like MIG, TIG, and arc welding to accurately fabricate metal components and ensure structural integrity.
- Install the electric motor, battery, and controller securely onto the frame, following manufacturer’s instructions and considering weight distribution and balance.
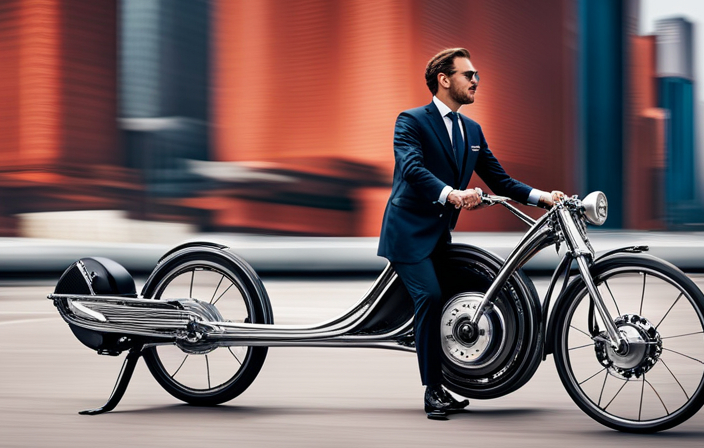
Introduction to Electric Dirt Bikes
Electric dirt bikes are a popular choice among riders who want a thrilling off-road experience. The benefits of electric dirt bikes are numerous.
First and foremost, they are eco-friendly, emitting zero emissions and reducing our carbon footprint. Additionally, electric dirt bikes are quieter than their gas-powered counterparts, making them ideal for riding in noise-sensitive areas.
When comparing electric dirt bikes to gas-powered ones, there are several key differences to consider. Electric dirt bikes have instant torque, providing quick acceleration and a smoother ride. They also require less maintenance, as there are no oil changes or spark plug replacements necessary.
Choosing the right frame and components for your electric dirt bike is crucial to ensure optimal performance and durability. Now let’s delve into the process of selecting the perfect frame and components for your electric dirt bike.
Choosing the Right Frame and Components
When it comes to building an electric dirt bike, selecting a suitable frame is crucial for optimal performance. The frame should be sturdy, lightweight, and designed specifically for off-road use.
Additionally, understanding the different components of an electric bike, such as the motor, battery, and controller, is essential for building a powerful and efficient machine.
By carefully choosing the right frame and components, you can ensure that your electric dirt bike is capable of handling the demands of off-road riding while maximizing its performance.
Selecting a Suitable Frame
To build an electric dirt bike, you’ll need to start by selecting a suitable frame. The frame is the foundation of your bike and plays a crucial role in its performance and durability. When choosing a frame, consider the building techniques used and the materials it is made of.
There are various building techniques to choose from, including steel, aluminum, and carbon fiber. Steel frames are strong and durable but can be heavy. Aluminum frames are lightweight and offer good strength but can be more expensive. Carbon fiber frames are incredibly lightweight and provide excellent strength, but they can be costly.
It’s important to select a frame that suits your riding style and budget.
Understanding electric bike components is the next step in building your electric dirt bike, so let’s dive into that.
Understanding Electric Bike Components
Understanding the components of an e-bike is essential for building a high-performance and reliable electric dirt bike. When it comes to battery technology, it is crucial to choose the right type and capacity that can provide sufficient power for the dirt bike’s motor.
Lithium-ion batteries are commonly used due to their high energy density and long lifespan. Additionally, exploring motor controller options is important to ensure smooth operation and efficient power delivery. There are various types of controllers available, such as brushless DC motor controllers, which offer precise speed control and regenerative braking capabilities.
To move forward into the subsequent section about gathering the necessary tools and equipment, it is vital to have a thorough understanding of the battery technology and motor controller options to make informed decisions and ensure optimal performance for the electric dirt bike.
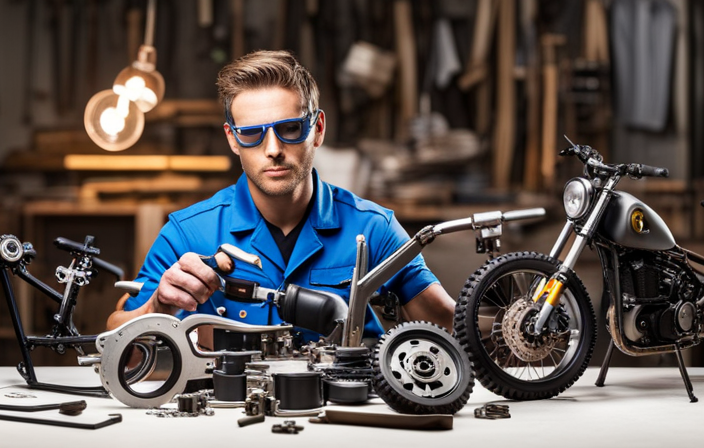
Gathering the Necessary Tools and Equipment
First, make sure you have all the necessary tools and equipment to build an electric dirt bike. When it comes to welding techniques, you’ll need a welding machine, welding helmet, gloves, and protective clothing. These tools are essential for joining metal components together securely.
Additionally, selecting the right components is crucial for the bike’s performance. You’ll need a motor, battery pack, controller, throttle, and wiring harness. Make sure to choose components that are compatible with each other and suitable for off-road use.
Once you have gathered all the necessary tools and components, you can move on to building the bike’s frame. This step involves measuring and cutting the metal tubing, then welding it together to create a sturdy and durable frame for your electric dirt bike.
Building the Bike’s Frame
When it comes to building the bike’s frame, two key points to consider are welding and fabrication techniques and ensuring structural integrity.
In terms of welding and fabrication techniques, it is important to have a solid understanding of different welding methods such as MIG, TIG, and arc welding, as well as the ability to fabricate metal components accurately. This will ensure that the frame is strong and durable.
Additionally, ensuring structural integrity involves carefully designing and constructing the frame to withstand the stresses and forces it will encounter during the bike’s operation, such as jumps and rough terrain. Attention to detail and precision are crucial to create a frame that is both safe and efficient.
Welding and Fabrication Techniques
To build an electric dirt bike, you’ll need to master welding and fabrication techniques. Welding techniques are essential for joining metal components together, ensuring the strength and stability of the bike’s frame. There are several methods of welding that can be used, including MIG (Metal Inert Gas) welding, TIG (Tungsten Inert Gas) welding, and arc welding. Each technique has its advantages and is suitable for different types of joints. Fabrication methods, on the other hand, involve cutting, bending, and shaping metal to create the desired components for the bike’s frame. These methods may include using a bandsaw for cutting metal, a press brake for bending, and a sheet metal roller for shaping. By mastering these techniques, you can ensure the structural integrity of your electric dirt bike.
Ensuring Structural Integrity
Ensuring the structural integrity of your project is crucial for the overall success and safety of the final product. To ensure structural strength, it is important to identify and reinforce any weak areas in the frame.
This can be done by using additional braces or gussets to strengthen critical joints or stress points. Welding techniques such as fillet welds or plug welds can be employed to provide additional strength. It is also essential to choose the right materials for your frame, such as high-strength steel or aluminum alloys, to ensure maximum durability.
Regular inspections should be conducted throughout the building process to identify any potential weak spots and address them immediately. By ensuring structural integrity, you can guarantee that your electric dirt bike will be reliable and safe to ride.
Moving on to the next section, installing the electric motor provides the power needed for an exhilarating ride.
Installing the Electric Motor
First, you’ll need to mount the electric motor onto the frame of the dirt bike. The electric motor installation is a critical step in building an electric dirt bike. Proper motor placement and alignment are essential for optimal performance and safety.
Start by identifying the suitable location on the frame to mount the motor. Ensure that the motor is securely attached, using sturdy brackets or mounts. Pay attention to the alignment of the motor with the bike’s chain and sprockets to ensure smooth power transfer. It is crucial to follow the manufacturer’s instructions for motor installation and use any recommended hardware. Additionally, consider the weight distribution and balance of the bike to maintain stability.
Once the motor is securely mounted, you can move on to adding the battery and controller, which will provide the necessary power for the electric motor to operate efficiently.
Adding the Battery and Controller
Next, you’ll need to attach the battery and controller to provide power for your electric motor.
The battery is an essential component of your electric dirt bike as it stores the electrical energy needed to run the motor. Before connecting the battery, ensure that it is fully charged to maximize performance and riding time.
Carefully mount the battery securely onto the frame using appropriate brackets or straps. Once the battery is in place, connect the controller to it using the provided wiring harness.
The controller is responsible for regulating the power output from the battery to the motor, ensuring smooth and efficient operation. After connecting the controller, take the time to program it according to the manufacturer’s instructions to optimize performance for your specific bike.
Now, with the battery and controller properly installed, you are ready to move on to mounting the wheels and suspension system for a complete electric dirt bike.
Mounting the Wheels and Suspension System
Once the battery and controller are securely attached, it’s time to mount the wheels and suspension system. Proper mounting techniques are crucial to ensure a stable and efficient electric dirt bike.
Start by aligning the wheels with the frame, ensuring that they are centered and straight. Securely fasten the wheels to the axle using the appropriate bolts or nuts, following the manufacturer’s instructions.
Next, focus on the suspension system modifications. This is where you can make adjustments to improve the bike’s handling and performance. Consider upgrading the shocks or adding aftermarket components to enhance the bike’s suspension capabilities. By fine-tuning the suspension, you can achieve better control and stability on various terrains.
Once the wheels and suspension system are in place, the next step is to install the braking system to ensure optimal safety and control.
Installing the Braking System
When it comes to installing the braking system on my electric dirt bike, choosing the right brakes is crucial. I need to carefully consider factors such as the type of terrain I will be riding on and my personal riding style.
Additionally, ensuring proper brake function is of utmost importance to ensure my safety while riding. Regular maintenance and inspection will be necessary to guarantee that the braking system is in optimal condition at all times.
Choosing the Right Brakes
To ensure safety and optimal stopping power, it’s important to choose the right brakes for your electric dirt bike. When it comes to choosing the right brake pads, there are several factors to consider. First, you need to determine the type of riding you will be doing. If you’ll be riding on rough terrains and need maximum stopping power, sintered brake pads are a great choice. They are made from metal particles and offer excellent durability and heat resistance. On the other hand, organic brake pads are better suited for lighter riding conditions as they provide smoother stopping power.
To compare different braking systems, it’s essential to assess their performance and features. Hydraulic disc brakes are commonly used in electric dirt bikes due to their superior stopping power and modulation. They operate by using hydraulic fluid to transmit force from the brake lever to the brake caliper, resulting in consistent and responsive braking. In contrast, mechanical disc brakes use cables to activate the brake caliper, offering a more affordable option but sacrificing some performance.
Choosing the right brakes is crucial for the overall safety and performance of your electric dirt bike. Ensuring proper brake function is essential for a smooth and controlled riding experience.
Ensuring Proper Brake Function
Make sure you regularly inspect and maintain your brakes to ensure they are functioning properly. Proper brake function is crucial for the safety and performance of your electric dirt bike.
Here are some brake maintenance tips to keep in mind:
-
Check brake pads: Inspect the brake pads for wear and tear. Replace them if they are worn down beyond the recommended thickness.
-
Fluid level and quality: Regularly check the brake fluid level and ensure it is at the correct level. Also, inspect the fluid quality and replace it if it appears dirty or contaminated.
-
Bleed the brakes: Air can get trapped in the brake lines, affecting brake performance. So, bleeding the brakes periodically is essential to remove any air bubbles and maintain proper brake function.
Common brake issues include squeaking or grinding noises, reduced braking power, or a spongy brake lever. These issues can be resolved by adjusting the brake pads, replacing worn-out parts, or bleeding the brakes.
Ensuring proper brake function is essential for a safe and enjoyable riding experience.
Now, let’s move on to the next section about wiring and electronics setup.
Wiring and Electronics Setup
When it comes to wiring and electronics setup for an electric dirt bike, there are two key points to consider.
Firstly, connecting lights and indicators is crucial for ensuring proper visibility on the road. These components need to be wired correctly and securely to avoid any issues while riding.
Secondly, installing safety features is essential for the rider’s well-being and to comply with safety regulations. Safety features such as a kill switch and emergency stop button should be included in the setup.
By addressing these aspects of the wiring and electronics setup, the electric dirt bike can be made safer and more functional.
Connecting Lights and Indicators
First, you’ll need to connect the lights and indicators on your electric dirt bike. This is an essential step to ensure your bike is visible and safe on the road. Installing turn signals and connecting the wiring harness is crucial for proper functioning of the lights and indicators. To give you a clear idea of the process, let’s break it down into a step-by-step guide:
| Step | Task |
|---|---|
| 1 | Locate the turn signals and wiring harness on your bike. |
| 2 | Connect the wiring harness to the turn signals using the appropriate connectors. |
| 3 | Ensure the connections are secure and free from any loose wires. |
| 4 | Mount the turn signals in the desired locations on your bike. |
| 5 | Test the lights and indicators to ensure they are working correctly. |
Once you have successfully connected the lights and indicators, you can move on to installing safety features to further enhance the functionality and safety of your electric dirt bike.
Installing Safety Features
To enhance the functionality and safety of your electric dirt bike, you should consider installing safety features.
Safety gear plays a crucial role in protecting the rider from potential injuries. Make sure to equip yourself with a helmet, gloves, knee pads, and a durable riding suit. These items will provide necessary protection in case of an accident.
Additionally, it’s important to learn and practice proper riding techniques. This includes maintaining proper balance, using correct body positioning, and mastering braking and acceleration. By honing your skills, you can improve your control over the bike and reduce the risk of accidents.
Furthermore, keep in mind that regular maintenance and inspections are essential for ensuring the continued safety of your electric dirt bike. This will involve testing and troubleshooting various components to identify any potential issues.
Testing and Troubleshooting
One important step in building an electric dirt bike is testing and troubleshooting to ensure the bike functions properly. This process involves using various troubleshooting techniques to identify and address common issues that may arise during the build.
To effectively troubleshoot the bike, there are three sub-lists of tasks that need to be completed:
-
Testing the electrical system:
- Checking the battery voltage and connections.
- Testing the motor controller for proper functioning.
- Verifying the functionality of the throttle and brake sensors.
-
Inspecting the mechanical components:
- Checking the chain tension and alignment.
- Ensuring the brakes are properly adjusted and functioning.
- Verifying the suspension system for any issues.
-
Conducting road tests:
- Testing the bike on different terrains to identify any performance issues.
- Ensuring the bike accelerates smoothly and reaches the desired top speed.
- Checking for any abnormal vibrations or noises during operation.
By thoroughly testing and troubleshooting the electric dirt bike, you can address any issues and ensure that the bike functions optimally.
In the subsequent section about painting and customizing the bike, you can truly make it your own.
Painting and Customizing the Bike
After testing and troubleshooting, you can personalize and customize your electric dirt bike with a fresh paint job and unique modifications. Custom paint jobs are a great way to make your bike stand out and reflect your personal style. Whether you choose a bold color or a sleek design, the right paint job can transform your bike into a true work of art.
Additionally, aftermarket accessories can enhance both the performance and appearance of your electric dirt bike. From upgraded suspension systems to high-performance batteries, there are endless possibilities to customize your ride.
However, it is important to remember that safety should always be a top priority. Before hitting the trails with your newly customized bike, make sure to familiarize yourself with the necessary safety precautions and riding tips. By taking these precautions, you can enjoy your customized electric dirt bike to the fullest.
Safety Precautions and Riding Tips
After carefully painting and customizing my electric dirt bike, it’s time to focus on safety precautions and riding tips.
When it comes to riding an electric dirt bike, wearing the right riding gear is crucial. A well-fitted helmet, goggles, gloves, and sturdy boots will provide the necessary protection.
Additionally, it’s essential to learn and practice off-road riding techniques to enhance safety and control. These techniques include proper body positioning, maintaining a relaxed grip, and using the bike’s suspension effectively. Being aware of the terrain and adjusting riding style accordingly is also important.
Remember, safety should always be the top priority when riding.
Now that we have covered safety, let’s move on to the next section about maintenance and care, where we will explore the necessary steps to keep our electric dirt bike in top condition.
Maintenance and Care
When it comes to maintaining and caring for an electric dirt bike, there are two key areas that require attention: regular inspections and cleaning, as well as battery maintenance and charging.
Regular inspections are crucial to ensure that all components are in good working order and to identify any potential issues before they become major problems.
Cleaning the bike regularly not only keeps it looking its best, but also helps to prevent the buildup of dirt and debris that can affect performance.
As for the battery, proper maintenance and charging are essential to ensure optimal performance and longevity. This includes checking the battery’s voltage, cleaning the terminals, and following the manufacturer’s instructions for charging.
Regular Inspections and Cleaning
To maintain your electric dirt bike, you should regularly inspect and clean it. Regular maintenance is crucial for ensuring optimal performance and longevity of your bike.
Start by visually inspecting the bike for any signs of wear or damage, such as loose bolts or worn-out tires. Check the brakes, suspension, and electrical components for any abnormalities.
It’s also important to clean your bike regularly to prevent dirt and debris from affecting its performance. Use a mild detergent and water to clean the frame, wheels, and other parts. Avoid using high-pressure water, as it can damage the electrical components. Additionally, consider using a silicone-based protectant to keep the bike looking new and to prevent rust.
By regularly inspecting and cleaning your electric dirt bike, you can ensure that it stays in top condition for your next adventure.
When it comes to battery maintenance and charging, there are a few important steps to follow to ensure optimal battery life and performance.
Battery Maintenance and Charging
After ensuring that your electric dirt bike is clean and in good condition, it’s crucial to focus on battery maintenance and charging. The battery is the heart of your electric dirt bike, and taking care of it properly will extend its lifespan and maximize its performance.
To optimize battery life, follow these charging techniques:
- Charge the battery fully before each ride to ensure maximum power output.
- Avoid overcharging the battery, as it can lead to reduced capacity and potential damage.
Additionally, consider investing in a smart charger that provides a balanced and controlled charge, preventing overcharging and undercharging. Regularly inspect the battery for any signs of damage or wear, such as leaks or corrosion.
Now that you understand the importance of battery maintenance and charging, let’s delve into the exciting world of joining the electric dirt bike community.
Joining the Electric Dirt Bike Community
When it comes to joining the electric dirt bike community, there are a few key points to consider.
Firstly, finding riding groups and events is essential for connecting with like-minded individuals and expanding your knowledge and skills.
Additionally, sharing experiences and tips with other riders can be incredibly valuable in terms of learning new techniques and troubleshooting any issues you may encounter.
By actively participating in the community, you can enhance your overall riding experience and become a more proficient electric dirt bike rider.
Finding Riding Groups and Events
Looking for riding groups and events? You can easily connect with local riders and find exciting dirt biking events near you. Joining riding clubs is a great way to meet fellow enthusiasts and get involved in the electric dirt bike community. These clubs often organize group rides, races, and other events where you can test your skills and have fun. To find local events and riding groups, you can use online forums, social media platforms, and dedicated websites that cater to dirt bike enthusiasts. Additionally, attending trade shows and exhibitions related to electric bikes can provide you with valuable networking opportunities. By joining these riding groups and participating in events, you can learn from experienced riders, discover new trails, and gain valuable insights into electric dirt bike maintenance and upgrades. In the next section, we will discuss the importance of sharing experiences and tips to further enhance your electric dirt bike journey.
Sharing Experiences and Tips
To enhance your electric dirt bike journey, you can share experiences and tips with fellow riders and enthusiasts. By connecting with others who have built their own electric dirt bikes, you can gain valuable insights and learn from their experiences.
One of the main benefits of sharing experiences is getting tips for customizing your bike. Others may have discovered unique modifications or accessories that can improve the performance or aesthetics of your electric dirt bike.
Additionally, discussing challenges faced during the building process can be helpful. You can learn about common obstacles and how to overcome them, saving you time and frustration.
By sharing experiences and tips, you can accelerate your knowledge and make the most of your electric dirt bike project.
In the conclusion, we will explore how to enjoy your DIY electric dirt bike to the fullest.
Conclusion: Enjoying Your DIY Electric Dirt Bike
Now that you’ve completed your DIY electric dirt bike, it’s time to kick back and enjoy the ride. After all the hard work and dedication you put into the build process, it’s rewarding to finally experience the benefits of your own DIY electric bike.
Here are three things to keep in mind as you start enjoying your creation:
-
Power and Speed: Feel the adrenaline rush as you twist the throttle and experience the instant torque of your electric motor. With the ability to reach top speeds quickly, you’ll be able to conquer any off-road terrain with ease.
-
Quiet and Smooth: Unlike traditional dirt bikes, your electric dirt bike runs quietly and smoothly. Enjoy the peacefulness of your surroundings without disturbing the environment or others around you.
-
Low Maintenance: With fewer moving parts and no need for oil changes or gas refills, your DIY electric dirt bike requires minimal maintenance. Spend less time in the garage and more time out on the trails.
Sit back, relax, and savor the fruits of your labor with your DIY electric dirt bike. Enjoy the freedom, thrill, and satisfaction that comes with riding your own creation.
Frequently Asked Questions
How much does it cost to build an electric dirt bike?
Building an electric dirt bike can cost anywhere from $2,000 to $10,000, depending on the quality of components and customization. While the initial investment may be higher than a traditional bike, the long-term advantages include lower operating costs, reduced maintenance, and a quieter ride. However, some disadvantages include limited range and the need for periodic battery replacement.
Is it legal to ride an electric dirt bike on public roads?
Riding an electric dirt bike on public roads can be a thrilling experience, but it’s important to consider the pros and cons. Safety regulations, such as wearing protective gear and following traffic laws, must be followed to ensure a safe and legal ride.
Can I convert my existing dirt bike into an electric dirt bike?
Yes, you can convert your existing dirt bike into an electric dirt bike. The converting process involves removing the internal combustion engine and replacing it with an electric motor. The performance of electric dirt bikes can vary, so it’s important to compare specifications before making the conversion.
How long does the battery last before needing to be recharged?
The battery performance of an electric dirt bike is crucial, determining how long it lasts before needing a recharge. Charging time varies depending on the battery capacity and charger power, typically taking a few hours to achieve a full charge.
Are there any specific maintenance requirements for an electric dirt bike?
Maintenance tips for an electric dirt bike include regular cleaning, checking and lubricating the chain, inspecting the brakes and tires, and ensuring all electrical connections are secure. Common issues may include battery degradation and motor overheating.
Conclusion
After countless hours of hard work and dedication, I’m finally able to sit back and admire my creation – a DIY electric dirt bike.
It is a true testament to the power of innovation and a reflection of my passion for adventure.
Like a lightning bolt cutting through the darkness, this electric beast is ready to conquer any terrain with its electrifying speed and unrivaled performance.
As I rev the engine and feel the wind in my hair, I know that I have unlocked a whole new world of excitement and possibilities.
So, fellow riders, join me in this thrilling journey as we embrace the future of off-road riding.
Let’s electrify the dirt!