
Did you know that electric bikes are becoming increasingly popular, with sales growing by 52% in 2020 alone?
If you’re interested in joining the electric biking revolution, this article will guide you through the process of building your own electric motor for a bike.
By understanding the basics, gathering the necessary materials, and following the step-by-step instructions, you’ll be able to transform your regular bike into an efficient and eco-friendly mode of transportation.
Get ready to experience the thrill of riding an electric bike you built yourself!
Key Takeaways
- Understanding the importance of electric motor efficiency and troubleshooting common motor issues
- Choosing the right motor based on power, efficiency, bike weight, and desired speed
- Properly installing the motor on the bike, ensuring optimal performance and safety
- Connecting the motor to a battery, installing a throttle or pedal assist system, and understanding their benefits and considerations
Amazon Product B0CQ7PSNVX
As an affiliate, we earn on qualifying purchases.
Understand the Basics of Electric Motors
To build an electric motor for a bike, it’s important to understand the basics of how electric motors work. Electric motor efficiency is a crucial aspect to consider when designing and building your motor. It refers to the ratio of the useful work output to the electrical power input. By maximizing efficiency, you can ensure that your motor operates at its peak performance while minimizing energy waste.
Troubleshooting common motor issues is another essential skill to have. Familiarize yourself with common problems such as overheating, excessive noise, or motor failure, and learn how to diagnose and fix them.
Once you have a solid understanding of electric motor basics and troubleshooting, you can move on to the next step of gathering the necessary materials and tools for your electric bike motor project.

Young Electric E-Bike Rack with Ramp, Hitch 2 Bike Rack, 200 lbs Capacity Electric Bike Carrier, Foldable Platform Mount for Cars, Trucks, SUVs, Minivans, Up to 5-Inch Fat Tire for 2'' Receiver
200LBS CAPACITY & V-GROOVE RAMP: The latest electric bike rack features an upgrade V-groove ramp for easy loading...
As an affiliate, we earn on qualifying purchases.
Gather the Necessary Materials and Tools
First, you’ll need to gather all the materials and tools necessary for the project. Here is a detailed materials list and the tools needed:
| Materials List | Tools Needed |
|---|---|
| Electric motor | Wrench set |
| Battery | Screwdriver set |
| Controller | Wire stripper |
| Throttle | Soldering iron |
| Wiring | Multimeter |
To build an electric motor for your bike, you’ll require an electric motor, battery, controller, throttle, wiring, and various tools. The electric motor is the heart of the system, providing the power to propel your bike. The battery will store and supply the electrical energy needed. The controller regulates the flow of electricity. The throttle controls the speed. Wiring connects all the components together. To assemble the motor, you’ll need a wrench set to secure it to the bike frame. A screwdriver set will be necessary for attaching the controller and throttle. A wire stripper and soldering iron are needed to connect the wiring. A multimeter will help you test the electrical connections. With all the necessary materials and tools gathered, you can now move on to choosing the right motor for your bike.

Ebike Rack with Ramp for 2 E-Bikes 200 lbs Capacity Fits 5" Fat Tire, Hitch Bike Rack for Cars SUVs Trucks with 2" Receiver, Foldable Tilting Locking No Assembly Needed E-Bike Platform Carrier
COMPACT FOLDABLE DESIGN WITH 4 WHEELS: The Eco Pro Hitch 2 E-Bike rack is ready to use straight...
As an affiliate, we earn on qualifying purchases.
Choose the Right Motor for Your Bike
Now, let’s focus on selecting the appropriate motor for your bicycle.
When choosing an electric motor for your bike, it’s important to consider the electric motor power and efficiency. The electric motor power determines how much force the motor can apply to propel your bike forward. It is crucial to match the motor power with your bike’s weight and the desired speed.
Additionally, electric motor efficiency is important as it determines how much of the electrical energy is converted into mechanical energy to move your bike. Look for motors with high efficiency ratings to maximize the range and battery life.
Once you have selected the right motor for your bike, you can proceed to the next section and learn how to install the motor on your bike seamlessly.
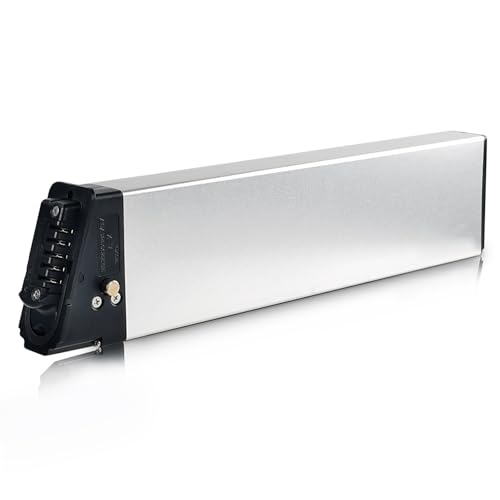
ShunTongDa 48V 10.4Ah 14Ah Folding Ebike Battery 48 Volt DCH-006 Built in Electric Bike Batteries with 30A BMS Totguard for 250W 500W 750W 1000W Motor Foldable E-Bike Battery (48V10.4Ah A Grade Cell)
①Battery Type: 18650 lithium ion batteries, Voltage: 48V, Capacity: 10.4Ah, Real High-Label Capacity. 30A BMS, Wattage at 500Wh,...
As an affiliate, we earn on qualifying purchases.
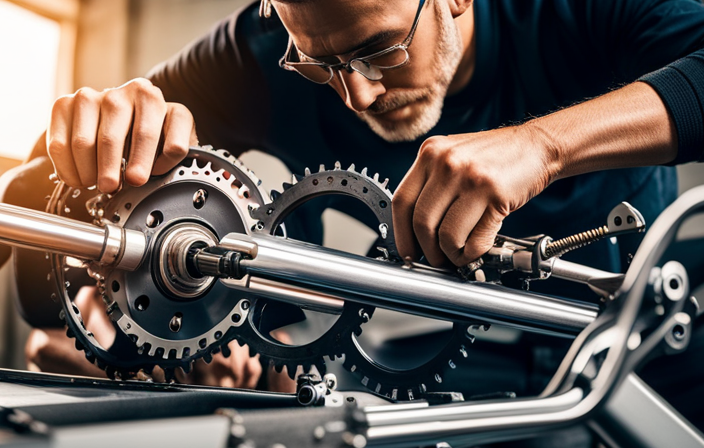
Install the Motor on Your Bike
Once you’ve chosen the right motor for your bicycle, it’s time to seamlessly install it onto your bike. Before starting the motor installation process, familiarize yourself with the different mounting options available for your specific motor model. The most common mounting options include rear wheel installation, mid-drive installation, and front wheel installation. Each option has its own advantages and considerations, so ensure you select the one that suits your needs best.
To install the motor, follow these steps:
- Begin by removing the existing wheel from your bike, if necessary.
- Attach the motor to the designated mounting point using the appropriate hardware.
- Align the motor properly to ensure optimal performance and safety.
- Secure the motor in place tightly, double-checking all connections.
With the motor successfully installed on your bike, you can now proceed to the next step of connecting it to a battery.
Connect the Motor to a Battery
To connect the motor to a battery, you’ll need to ensure that all the necessary wiring is in place and properly connected. Start by connecting the motor to the bike frame securely. This will ensure that it stays in place during your rides and doesn’t cause any unnecessary vibrations.
Next, choose the right battery for your electric motor. Consider factors such as voltage, capacity, and size to ensure compatibility with your motor. Make sure to connect the positive and negative terminals of the battery to the corresponding terminals on the motor. It’s crucial to follow the manufacturer’s instructions and use the appropriate connectors to ensure a secure and reliable connection.
Once the battery is connected, you can move on to installing a throttle or pedal assist system, which will control the motor’s power output seamlessly.
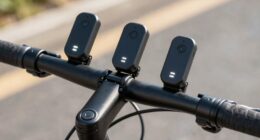
Install a Throttle or Pedal Assist System
To connect the motor to a battery, you’ve made significant progress in building your electric motor for a bike. Now, it’s time to take it a step further and install a throttle or pedal assist system. This is an important decision as it will determine how you control the speed of your electric bike.
Here’s a comparison of throttle vs. pedal assist systems:
-
Throttle:
- Pros: Provides instant power and control, allowing you to accelerate without pedaling.
- Cons: Can drain the battery quickly if used excessively, and may not be legal in all areas.
-
Pedal Assist:
- Pros: Offers a more natural riding experience as the motor assists your pedaling.
- Cons: Requires some effort to activate the motor, and may not provide instant power.
Adding electric assist to your bike has numerous benefits, including increased speed, reduced effort, and extended range.
In the next section, we’ll delve into how to mount the controller and wiring, ensuring a seamless integration of your electric motor system.
Mount the Controller and Wiring
Now, you can mount the controller and wiring for a seamless integration of your electric motor system. Start by referring to the wiring diagram provided by the manufacturer to ensure proper placement and connection of the controller.
Locate a suitable mounting location for the controller, preferably near the battery and within reach for easy access. Use mounting brackets or straps to secure the controller in place, ensuring it is securely fastened to prevent any movement.
Next, carefully route the wiring from the battery to the controller, making sure to avoid any sharp edges or moving parts that could damage the wires. Use zip ties or tape to secure the wiring along the frame of the bike for a clean and organized appearance.
Before finalizing the installation, double-check all connections and ensure they are tight and secure. Once the controller and wiring are properly mounted, you can move on to the next step, which is to test and fine-tune your electric motor setup.
Test and Fine-Tune Your Electric Motor
Once the controller and wiring are securely mounted, it’s time to test and fine-tune your electric motor setup. Start by checking all connections to ensure they are properly secured and insulated.
Proceed to power up the motor and observe its performance. Pay close attention to any unusual noises, vibrations, or overheating. Use a multimeter to measure the voltage output and ensure it matches the specifications of your motor.
If any issues arise during testing, employ troubleshooting techniques such as isolating components, checking for loose connections, and inspecting for damaged parts. Adjust the controller settings as needed to optimize the motor’s performance.
Once you are satisfied with the motor’s functionality, proceed to the next section about ensuring safety and legal compliance. Incorporate appropriate safety measures and adhere to local regulations to ensure the safety of yourself and others.
Ensure Safety and Legal Compliance
Now that you have successfully tested and fine-tuned your electric motor, it is crucial to ensure safety and legal compliance before hitting the road.
Safety regulations and legal requirements play a vital role in ensuring the safe operation of your electric bike. Here are three key points to consider:
-
Familiarize yourself with local safety regulations and legal requirements regarding electric bikes. This includes speed limits, age restrictions, and equipment mandates.
-
Ensure your electric motor installation meets safety standards. Double-check all connections and fastenings, ensuring that all components are securely in place.
-
Make sure you have proper lighting and reflectors on your electric bike to enhance visibility, especially during nighttime rides.
By adhering to safety regulations and legal requirements, you can confidently enjoy your newly electric bike, knowing that you are riding responsibly and legally.
Enjoy Your Newly Electric Bike!
Get ready to hit the road and experience the joy of riding your new electric bike! With the addition of an electric bike conversion kit, you can enhance your bike’s performance and enjoy a whole new level of riding.
These conversion kits come with a range of benefits that make them a popular choice among bike enthusiasts. Firstly, they provide a significant boost to your bike’s power, allowing you to effortlessly conquer hills and ride longer distances.
Additionally, electric bike conversion kits offer adjustable power levels, giving you control over the speed and intensity of your ride. This allows you to customize your biking experience to your liking.
Not only do these kits provide a thrilling ride, but they also promote eco-friendly transportation by reducing carbon emissions.
So, get ready to experience the convenience and excitement of your newly electric bike!
Frequently Asked Questions
How much power does an electric motor need to have to be suitable for a bike?
To be suitable for a bike, an electric motor needs to have sufficient power requirements and consider efficiency. It should provide enough power to propel the bike and have high efficiency to optimize battery life and reduce energy consumption.
Can I use any type of battery for my electric bike motor?
Yes, you can use various types of batteries for your electric bike motor, but it is important to ensure battery compatibility. Lithium-ion batteries are commonly used due to their high energy density, lightweight, and long lifespan.
Are there any legal restrictions or requirements for using an electric motor on a bike?
To ensure compliance with electric bike motor safety regulations, it is important to familiarize yourself with local laws. Using an electric motor on a bike offers advantages in terms of efficiency, as it allows for easier pedaling and extended range.
How long does it take to install an electric motor on a bike?
Installing an electric motor on a bike is a breeze! With just a few tools like a wrench and screwdriver, you can transform your bike into a powerful machine in no time. It’s as quick as lightning!
Is it possible to convert a regular bike into an electric bike without any prior technical knowledge?
Converting a regular bike into an electric bike without technical knowledge is possible, but there are pros and cons. Challenges include choosing the right conversion kit, installing it correctly, and understanding battery maintenance and range limitations.
Conclusion
Congratulations on successfully building your own electric motor for your bike! By following the steps outlined in this article, you have gained a deeper understanding of the basics of electric motors and have acquired the necessary skills to create your own sustainable transportation option.
As you enjoy the smooth and efficient ride of your newly electric bike, you can take pride in the fact that you have taken a step towards a greener future.
Keep exploring and innovating, and let your electric bike be a symbol of your commitment to a sustainable lifestyle.