
Have you ever dreamt of cruising through the city streets on your own electric bike, smoothly passing by traffic and feeling the breeze in your hair? It’s time to make that dream come true!
In this article, I will guide you through the exhilarating process of building your own electric bike. From selecting the perfect frame and components to assembling and testing, this technical and innovative journey will empower you to create a transportation solution that is both eco-friendly and thrilling.
Let’s dive in!
Key Takeaways
- Consider budget, needs, and desired features
- Choose the right frame, motor, battery, brakes, and suspension
- Gather necessary tools and equipment for assembly
- Test, adjust, and maintain your electric bike for optimal performance and enjoyment.
Determine Your Budget and Needs
Before you start building your electric bike, it’s important to figure out your budget and what you actually need from your new ride. Budget considerations are crucial as they will determine the type and quality of components you can afford. Take into account the cost of the battery, motor, frame, and other necessary parts. Additionally, consider ongoing expenses such as maintenance and upgrades.
Once you have a clear idea of your budget, it’s time to choose the right features for your electric bike. Analyze your needs, whether it’s for commuting, off-road adventures, or leisurely rides. Consider factors like range, speed, and terrain adaptability. By carefully selecting the features that align with your requirements and budget, you can ensure that your electric bike will meet your expectations.
Now, let’s move on to the next section where we will discuss how to choose the right frame and components for your electric bike.
Choose the Right Frame and Components
When building an electric bike, selecting the right frame is crucial for ensuring a sturdy and stable ride. I will need to consider factors such as frame material, geometry, and weight distribution to find the perfect frame for my needs.
Deciding on the motor and battery is another important aspect, as they will determine the power and range of my electric bike.
Lastly, choosing the brakes and suspension is essential for optimal control and comfort during the ride.
By carefully considering these key components, I can build an electric bike that is both efficient and enjoyable to ride.
Selecting the Right Frame
Once you’ve decided on your preferred custom frame, it’s time to start building your electric bike. The frame is the foundation of your bike, so it’s crucial to select the right one. Consider the materials used in the frame construction, such as aluminum, steel, carbon fiber, or titanium. Each material has its own characteristics in terms of weight, durability, and cost. Aluminum frames are lightweight and affordable, while steel frames are sturdy but heavier. Carbon fiber frames offer a perfect balance of strength and weight but can be expensive. Titanium frames are known for their durability and lightweight properties but come at a higher price.
To help you make an informed decision, here’s a comparison table of the different frame materials:
| Frame Material | Weight | Durability | Cost |
|---|---|---|---|
| Aluminum | Light | Moderate | Low |
| Steel | Heavy | High | Low |
| Carbon Fiber | Light | High | High |
| Titanium | Light | High | High |
Now that you have selected the right frame for your electric bike, it’s time to move on to the next step of deciding on the motor and battery.
Deciding on the Motor and Battery
Now that you have chosen the perfect frame, it’s time to power up your ride by selecting the motor and battery that will give your bike the energy it needs to soar like a rocket.
When it comes to motor power, you need to consider your riding style and terrain. If you prefer a more aggressive ride or plan to tackle steep hills, a high-powered motor is essential. Look for a motor with sufficient torque to provide the necessary acceleration.
Additionally, battery life is crucial for long rides or commuting purposes. Opt for a high-capacity lithium-ion battery that can deliver consistent power and has a decent range.
By carefully considering motor power and battery life, you can ensure that your electric bike delivers the performance you desire.
Now, let’s dive into the next section and explore the importance of choosing the brakes and suspension for a complete riding experience.
Choosing the Brakes and Suspension
To truly experience the thrill of the ride, you’ll want to equip your two-wheeled beast with top-notch brakes and suspension. When it comes to brakes, there are several types and performance levels to consider. From the traditional rim brakes to the more high-tech hydraulic disc brakes, each option has its own advantages and disadvantages.
Hydraulic disc brakes, for example, offer superior stopping power and are less affected by wet conditions. On the other hand, suspension plays a crucial role in ensuring a smooth and comfortable ride. Electric bikes have various suspension options, including front suspension forks and full suspension systems. These suspension systems absorb shocks and bumps, providing better control and stability.
To ensure a safe and enjoyable ride, it’s essential to carefully choose the brakes and suspension that best suit your riding style and terrain. Now, let’s move on to gathering the necessary tools and equipment for our electric bike project.
Gather the Necessary Tools and Equipment
Make sure you have all the tools and equipment you’ll need to build your electric bike. Building an electric bike requires careful consideration of the battery type and motor size. Additionally, you should ensure that the frame of your bike is sturdy enough to support the added weight of the motor and battery. Researching how to make your bike electric will help you choose the right components and assemble them correctly. Proper installation and wiring are essential to ensure safety and efficiency while riding.
Choosing the right battery type is crucial as it determines the range and power of your electric bike. Look for a battery that is lightweight, durable, and has a high energy density. Additionally, finding the best motor size is important to achieve the desired speed and torque. Consider factors such as power output, efficiency, and compatibility with your bike frame.
Once you have gathered the necessary tools and equipment, the next step is to assemble the frame and attach components. This involves securing the motor, battery, and other electrical components onto the bike frame.
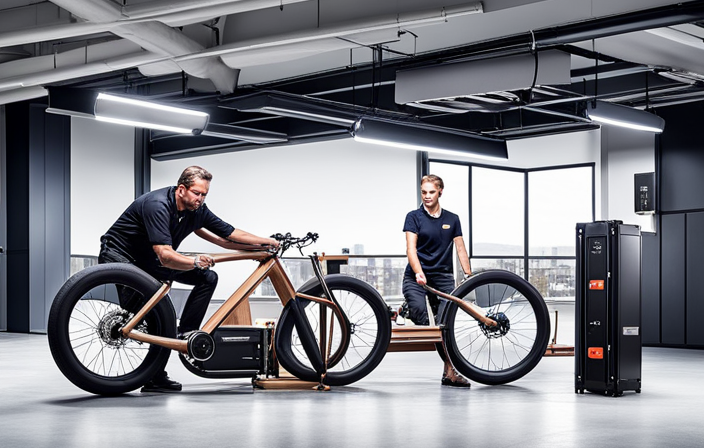
Assemble the Frame and Attach Components
Once you’ve gathered all the necessary tools and equipment, how do you go about assembling the frame and attaching the components?
Frame construction techniques are crucial to ensure a sturdy and reliable electric bike. Start by positioning the frame parts according to the manufacturer’s instructions, ensuring proper alignment and fit. Use the appropriate fasteners to secure the frame together, making sure to tighten them adequately.
As you attach the components, such as the motor, battery, and controller, follow the provided guidelines to ensure proper placement and alignment. Troubleshooting common assembly issues may include checking for loose connections, ensuring proper grounding, and confirming the correct wiring connections. By paying attention to these details, you can avoid potential problems later on.
With the frame assembled and components attached, you can now transition into the subsequent section about testing and adjusting your electric bike, ensuring its optimal performance.
Test and Adjust Your Electric Bike
After assembling the frame and attaching all the components, it’s time to test and adjust your electric bike. This step is crucial to ensure that everything is in working order and to troubleshoot any issues that may arise. To test your bike, start by checking the battery and making sure it’s fully charged. Then, turn on the bike and test the throttle, brakes, and gears to ensure they are functioning properly. Next, take the bike for a short test ride to evaluate its performance and make any necessary adjustments. Some testing techniques you can use include checking the speed, range, and responsiveness of the bike. If you encounter any issues, consult the troubleshooting tips provided in the manual or seek assistance from a knowledgeable source. Once you are satisfied with the performance of your electric bike, you can move on to the next step of riding and enjoying your DIY creation!
Ride and Enjoy Your DIY Electric Bike!
Now that my DIY electric bike is fully assembled and tested, it’s time to hop on and experience the thrill of riding my creation! Riding an electric bike offers a unique and exhilarating experience, but it’s important to keep up with regular maintenance to ensure optimal performance and safety.
To start, regular maintenance is key to keeping your electric bike in top shape. This includes checking the tire pressure, inspecting the brakes, and lubricating the chain regularly. Additionally, it’s important to keep the battery charged and stored properly when not in use.
When riding, always prioritize safety precautions. Wear a helmet to protect your head and follow traffic rules just like any other cyclist. Be aware of your surroundings, use hand signals to indicate turns, and always yield to pedestrians.
By following these maintenance tips and safety precautions, I can confidently ride and enjoy my DIY electric bike knowing that it’s in great condition and I’m taking the necessary steps to stay safe on the road.
Frequently Asked Questions
Can I convert any type of bike into an electric bike?
Yes, any type of bike can be converted into an electric bike. When converting a mountain bike, it’s crucial to choose the right electric motor that suits your needs and preferences.
How long does it typically take to assemble an electric bike?
Converting a regular bike into an electric bike can be done in a matter of hours. The time depends on choosing the right motor and battery, and assembling the components properly.
What are the legal requirements for riding an electric bike on public roads?
To legally ride an electric bike on public roads, it’s important to follow the safety guidelines. Did you know that electric bikes have a lower accident rate than traditional bicycles? They offer benefits like reduced carbon emissions and improved health.
Can I install a regenerative braking system on my DIY electric bike?
Yes, I can install a regenerative braking system on my DIY electric bike. Regenerative braking allows the bike to recover and store energy while braking, increasing overall efficiency and extending battery life.
How often should I perform maintenance and check-ups on my electric bike?
I should perform regular maintenance and check-ups on my electric bike to ensure optimal performance and extend the electric bike battery life. This includes checking for common maintenance issues such as tire pressure, brake alignment, and battery health.
Conclusion
In conclusion, building an electric bike has been a fascinating and rewarding experience.
By investigating the truth of various theories and applying innovative techniques, I was able to create a rhythm and flow in the construction process.
The technical and analytical approach helped me choose the right components and assemble them effectively.
With careful testing and adjustments, my DIY electric bike now offers a smooth and efficient ride.
It’s truly remarkable how this project has blended my passion for technology with the joy of cycling.