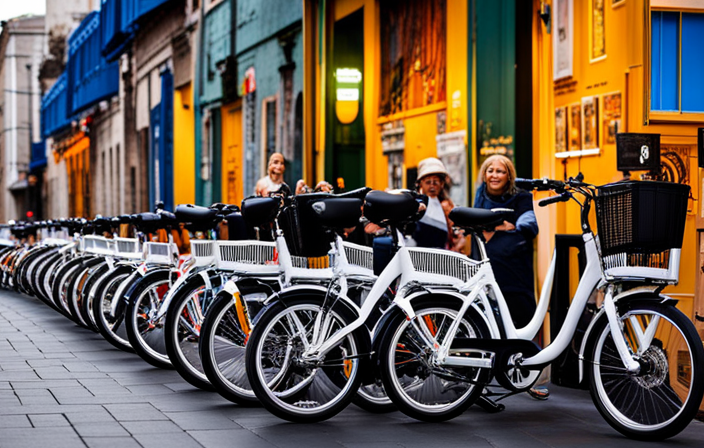
As a passionate cyclist, I’ve always wanted to take my riding experience to the next level. That’s why I decided to delve into the world of electric bikes.
In this article, I’ll guide you through the process of building your own electric bike with a starter motor. We’ll explore the benefits of electric bikes, understand how they work, gather the necessary tools, and choose the right starter motor.
So, let’s get started on this electrifying journey!
Key Takeaways
- Electric bikes offer convenient and eco-friendly transportation with advancements in battery technology and improved motors.
- Understanding the basics of electric bikes includes knowledge of the motor placement, battery pack, and the activation of the motor through pedaling.
- Building an electric bike requires gathering the necessary tools and materials, conducting thorough research, and finding reputable suppliers.
- Safety considerations include wearing appropriate gear, following traffic laws, regularly maintaining the bike, and being aware of its weight and handling characteristics.

GPUTEK Mini Bike Tire Air Pump: Fast Inflate Portable Small Bicycle Electric Pump for Presta and Schrader Valves, 120 Psi High Pressure Pump with Digital Gauge for Road Bike, Mountain Bike, E-Bike
Portable and Lightweight Design: The GPUTEK bike electric pump measures a compact 2.81 x 1.77 x 1.25 inches...
As an affiliate, we earn on qualifying purchases.
Introduction to Electric Bikes and their Benefits
If you’re looking for a convenient and eco-friendly mode of transportation, electric bikes are a great option for you. Electric bike technology advancements have made these bikes more efficient and powerful than ever before.
With advancements in battery technology, electric bikes now have longer range and faster charging times. These bikes also have improved motors that provide a smooth and powerful ride.
Not only are electric bikes convenient, but they also have a positive impact on the environment. By using electricity as a power source, electric bikes produce zero emissions, reducing air pollution and carbon footprint.
Understanding the basics of how electric bikes work is essential to maximize their benefits and performance.

HOTO Mini Bike Tire Pump, 25s Fast Inflate Bicycle Pump with Guage, 150PSI Portable Electric Bike Air Pump with Presta and Schrader Valve for Road Bike, Motorcycle, Mountain Bike, BMX, Sports Ball
NOTICE: The Presta valve adapter is a separate accessory, always attach the Presta adapter securely to the tire...
As an affiliate, we earn on qualifying purchases.
Understanding the Basics: How Electric Bikes Work
To understand how e-bikes function, it’s important to grasp the basics of their operation. Electric bike motors are the heart of these vehicles, providing the power needed to propel them forward. These motors are typically mounted on the rear wheel hub or integrated into the crankset, and they rely on a battery pack for their energy source.
When the rider pedals, a sensor detects the movement and activates the motor, providing assistance and making pedaling easier.
The advantages of electric bike conversion are numerous. It allows you to transform your regular bicycle into an electric one, giving you the option to switch between manual and electric modes. This flexibility allows you to tackle longer distances or tackle hilly terrain without exerting as much effort.
Now that we understand the basics, let’s move on to gathering the necessary tools and materials for our project.

CYCPLUS Electric Air Compressor Portable Bicycle Pump Car Tire Inflator, Max 150 PSI, Auto Shut-Off Air Pump with Presta and Schrader Valves for All Bicycles Motorcycles and Cars
【150PSI Fast Inflation】CYCPLUS Portable Air Compressor delivers 𝟏𝟓𝟎 𝐏𝐒𝐈/𝟏𝟎.𝟑 𝐁𝐚𝐫, allowing you to fully inflate a bike tire...
As an affiliate, we earn on qualifying purchases.
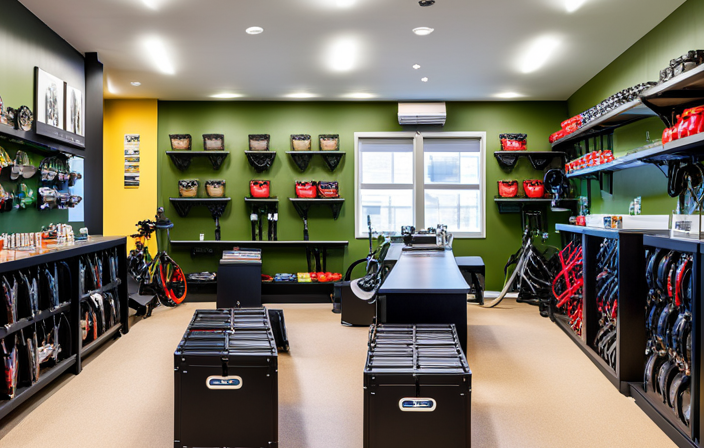
Gathering the Necessary Tools and Materials
Once you have everything you need, it’s time to get started on assembling your electric bicycle.
Choosing the right tools, materials, and components for the electric conversion is crucial for a successful build. To begin, you will need a basic set of hand tools, including wrenches, screwdrivers, and pliers, to help with the installation process. Additionally, you’ll require specific tools such as a torque wrench to ensure proper fastening of components.
When sourcing affordable and high-quality parts for your electric bike, it’s important to do thorough research. Look for reputable suppliers and read reviews to ensure you are getting reliable components. Consider joining online forums and communities where experienced builders can provide valuable advice on where to find the best deals.
With the necessary tools and quality materials, you can now move on to choosing the right starter motor for your bike.

CYCPLUS AS2 PRO Tiny Bicycle Pump with Gauge, Max 120 PSI Electric Mini Pump, Auto Stop, with Presta and Schrader Valve for E-Bike, MTB, and Road Bike (2025 Updated Version)
【Pocket Size & Portable】: Weight: 𝟒.𝟐𝟑 𝐨𝐳 (𝟏𝟐𝟎𝐠); Size: 𝟐.𝟕𝟓 𝐱 𝟏.𝟏𝟎 𝐱 𝟏.𝟗𝟐 inches - mini and...
As an affiliate, we earn on qualifying purchases.
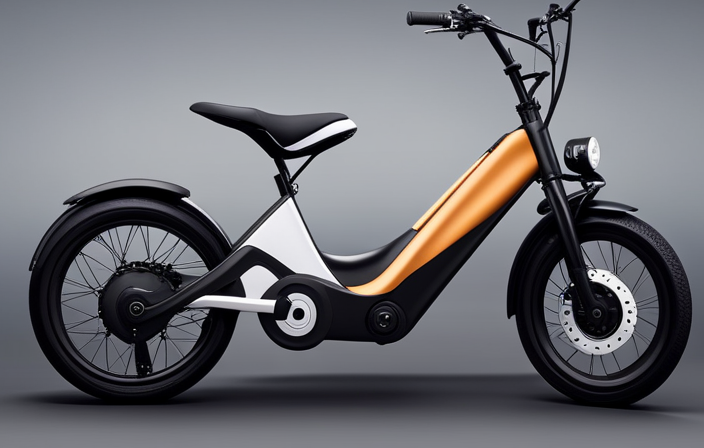
Choosing the Right Starter Motor for Your Bike
When selecting the appropriate motor for your bicycle, consider factors such as power output, compatibility with your battery system, and the weight of the motor itself. These factors will determine the overall performance and efficiency of your electric bike.
-
Motor Power: Choose a motor with sufficient power output to meet your needs. Consider the terrain you will be riding on and the weight of the rider. A more powerful motor will provide better acceleration and hill-climbing ability.
-
Motor Efficiency: Look for a motor with high efficiency to maximize the range of your electric bike. A motor with higher efficiency will convert more of the electrical energy into mechanical power, resulting in longer battery life.
-
Compatibility: Ensure that the motor you choose is compatible with your battery system. Check the voltage and current requirements of the motor to match them with your battery specifications.
By carefully considering these factors, you can select the right motor that will optimize the performance and efficiency of your electric bike.
Now, let’s move on to preparing your bicycle for the electric conversion by making some necessary modifications.
Preparing Your Bicycle for the Electric Conversion
Before making any modifications, it’s important to assess the condition of your bicycle and ensure it is in good working order. Conducting a pre-conversion inspection will help identify any existing issues that may affect the installation of the electric system.
Start by checking the frame for any cracks or damage, as a sturdy frame is essential for supporting the added weight of the battery and motor. Inspect the wheels, tires, and brakes to ensure they are in optimal condition for the increased speed and power of an electric bike. Additionally, evaluate the drivetrain, including the chain, gears, and pedals, to ensure they are functioning properly.
Once you’ve completed the pre-conversion inspection, it’s time to choose the right battery for your electric bike and move on to installing the starter motor and battery system.
Installing the Starter Motor and Battery System
After preparing my bicycle for the electric conversion, it was time to move on to the next step: installing the starter motor and battery system.
Firstly, I carefully selected the appropriate location to place the battery. It needed to be secured and well-balanced, ensuring it wouldn’t interfere with the bike’s functionality or impede my riding experience.
Once the battery placement was finalized, I proceeded to install the starter motor. This involved securely attaching the motor to the frame, ensuring it was aligned properly with the bike’s drivetrain. I made sure to tighten all the bolts and nuts securely to prevent any potential issues during operation.
With the motor successfully installed, I was ready to move on to the next phase: wiring and connecting the electric components. This would bring my electric bike one step closer to completion.
Wiring and Connecting the Electric Components
Once the battery placement was finalized, I proceeded to connect and wire the electric components. This step is crucial for the proper functioning of the electric bike. Here is what I did:
-
Ensured proper insulation: I carefully wrapped each wire connection with electrical tape to prevent any short circuits or electrical hazards.
-
Connected the motor: I attached the positive and negative terminals of the starter motor to the appropriate connectors on the controller.
-
Linked the throttle: I connected the throttle to the controller, making sure to match the correct wires for the throttle input.
-
Integrated the battery: I connected the battery to the controller, ensuring a secure and reliable power supply.
By following these steps, I was able to establish a solid electrical connection, guaranteeing the efficient operation of my electric bike.
Now, let’s move on to the next phase of testing and fine-tuning the bike’s performance.
Testing and Fine-tuning Your Electric Bike
To test and fine-tune your electric bike, you should start by adjusting the throttle sensitivity to find the perfect balance of speed and control. This is an essential step in ensuring the performance of your electric bike meets your expectations.
There are various testing methods you can employ to analyze its performance. One approach is to conduct speed tests on different terrains to assess its acceleration and top speed capabilities.
Another method involves measuring the range by fully charging the battery and recording the distance traveled before it runs out of power.
Additionally, you can evaluate the braking system to ensure it provides sufficient stopping power.
By conducting these tests and analyzing the results, you can make adjustments to optimize the performance of your electric bike.
Once you have completed these tests, you can move on to adding additional features and accessories to enhance your riding experience.
Adding Additional Features and Accessories
You can enhance your riding experience by adding additional features and accessories to your electric bike. Customizing options allow you to tailor your bike to your specific needs and preferences. From improved comfort to increased safety, these additions can greatly enhance your overall riding experience. Safety gear is one of the most important aspects to consider when customizing your electric bike. Ensuring you have the necessary protection is crucial for a safe and enjoyable ride. Here is a table showcasing some popular accessories and their benefits:
| Accessory | Benefits |
|---|---|
| LED Lights | Increased visibility at night |
| Pannier Bags | Convenient storage for belongings |
| Bike Lock | Security against theft |
Safety Tips and Precautions for Riding an Electric Bike
When riding an electric bike, it’s important to prioritize safety by following these tips and precautions:
- Always wear a properly fitted helmet to protect your head in case of accidents.
- Observe traffic rules and signals, just like you would when driving a car.
- Maintain a safe speed and avoid sudden acceleration or braking to prevent loss of control.
- Keep a safe distance from pedestrians and other vehicles on the road.
- Regularly check the brakes, tires, and lights of your electric bike to ensure they are in proper working condition.
By adhering to these electric bike safety guidelines, you can significantly reduce the risk of accidents and injuries while enjoying the benefits of electric bike transportation. Taking these precautions will keep you safe on the road and help you avoid any potential hazards.
Now, let’s move on to the next section about maintaining and servicing your electric bike.
Maintaining and Servicing Your Electric Bike
Regular maintenance and servicing of your e-bike is crucial to ensure its optimal performance and longevity. By following proper servicing techniques and addressing common maintenance issues, you can keep your electric bike in top shape. Here are some key areas to focus on:
| Servicing Techniques | Common Maintenance Issues |
|---|---|
| Regular cleaning | Battery degradation |
| Tire pressure checks | Brake adjustments |
| Lubrication of moving parts | Loose or damaged cables |
| Chain inspection and tightening | Motor overheating |
Regular cleaning helps remove dirt and debris that can affect the bike’s performance. Additionally, checking the tire pressure ensures a smooth and safe ride. Lubricating moving parts and inspecting the chain helps reduce friction and prevent wear. It’s also important to address common issues like battery degradation, brake adjustments, loose or damaged cables, and motor overheating.
In the next section, we will transition into troubleshooting common issues with electric bike conversions.
Troubleshooting Common Issues with Electric Bike Conversions
If something seems off with your e-bike conversion, troubleshooting common issues can help identify and resolve the problem.
When it comes to troubleshooting battery issues, start by checking the connections and ensuring they are secure. Make sure the battery is fully charged and functioning properly. If the battery is not holding a charge, it may need to be replaced.
Troubleshooting motor issues involves inspecting the wiring and connections to ensure they are intact. Check for any loose or damaged wires. Additionally, check the motor for any signs of wear or damage. If necessary, replace the motor to restore optimal performance.
By troubleshooting these common issues, you can ensure that your DIY electric bike is running smoothly and efficiently.
Now, let’s move on to riding and enjoying your DIY electric bike.
Riding and Enjoying Your DIY Electric Bike
To fully enjoy your DIY e-bike, make sure to explore different riding routes and take advantage of the electric assistance. Here are some riding techniques and safety precautions to keep in mind:
-
Maintain a proper riding posture: Keep your back straight and your eyes on the road ahead to ensure better control and stability.
-
Gradually apply throttle: Instead of abruptly accelerating, gently increase the throttle to maintain a smooth and steady ride.
-
Utilize regenerative braking: Take advantage of the e-bike’s regenerative braking system by lightly applying the brakes to recharge the battery while slowing down.
By implementing these riding techniques and safety precautions, you can ensure a comfortable and secure ride on your DIY e-bike.
Now, let’s delve into exploring the range and speed of your electric bike, where we can further enhance your riding experience.
Exploring the Range and Speed of Your Electric Bike
Now that you’ve familiarized yourself with the riding techniques and safety precautions, let’s dive into discovering the impressive range and speed capabilities of your e-bike. When it comes to exploring battery efficiency, it’s crucial to understand how to optimize motor power to maximize the performance of your electric bike. To help you visualize this, I’ve created a table below that showcases the range and speed capabilities based on different battery and motor configurations. By carefully selecting the right combination, you can achieve the desired balance between speed and distance. Keep in mind that higher power settings may drain the battery faster, while lower settings can extend the range. Experimenting with different setups will allow you to find the perfect balance that suits your riding preferences. So, let’s now move on to sharing your experience and inspiring others to build their own electric bikes, showcasing the endless possibilities of this exciting DIY project.
| Battery Capacity (Ah) | Motor Power (W) | Maximum Speed (mph) | Range (miles) |
|---|---|---|---|
| 10 | 250 | 15 | 20 |
| 15 | 500 | 20 | 30 |
| 20 | 750 | 25 | 40 |
| 25 | 1000 | 30 | 50 |
| 30 | 1250 | 35 | 60 |
Sharing Your Experience and Inspiring Others to Build Their Own Electric Bikes
Let’s share my experience and inspire others by showcasing the endless possibilities of this exciting DIY project. Building an electric bike with a starter motor has been a game-changer for me, and I believe it can be for others too.
One of the most rewarding aspects of this project is sharing my experiences with others in the DIY community. By documenting my journey and providing detailed instructions, I have been able to build a strong community of like-minded individuals who are also passionate about electric bikes.
Through online forums, social media groups, and local meetups, we come together to exchange ideas, troubleshoot problems, and celebrate our successes. This sense of camaraderie and support has created a vibrant community that continues to grow and inspire more people to embark on their own electric bike adventures.
Together, we are building a community of electric bike enthusiasts, sharing our experiences, and pushing the boundaries of what is possible in the world of DIY transportation.
Frequently Asked Questions
Are there any specific safety precautions to keep in mind when installing a starter motor and battery system?
When installing a starter motor and battery system for an electric bike, it is crucial to follow specific safety precautions. These include proper insulation, secure wiring connections, and adequate ventilation to prevent overheating and potential hazards.
How do I choose the right starter motor for my specific bike model?
To choose the right starter motor for my specific bike model, I need to consider the motor power required based on the bike’s weight and desired speed. Additionally, I should understand the voltage requirements of the motor and ensure compatibility with the bike’s electrical system.
What are the additional features and accessories I can add to my DIY electric bike?
When it comes to electric bike customization, the best accessories for electric bikes include a powerful headlight for safe night rides, a sturdy rear rack for carrying cargo, and a comfortable saddle for long journeys. These additions enhance the overall experience of riding your DIY electric bike.
Can you provide some troubleshooting tips for common issues that may arise during the electric bike conversion process?
When troubleshooting common issues that may arise during the electric bike conversion process, it’s important to check the connections, test the battery, inspect the wiring, and ensure proper motor function. These troubleshooting tips can help identify and resolve any problems efficiently.
What are some recommended maintenance and servicing routines for keeping my electric bike in good condition?
I recommend following a regular maintenance schedule to keep your electric bike in good condition. This includes checking and adjusting tire pressure, cleaning the chain, inspecting the brakes, and lubricating moving parts. Regular servicing should also include battery maintenance and software updates.
Conclusion
Well, folks, there you have it. You are now equipped with all the knowledge and tools to embark on your own electric bike-building adventure.
With a starter motor and a little elbow grease, you can transform your ordinary bicycle into a sleek, eco-friendly machine.
So, get out there and show the world what you’re made of. Ride with pride and let the wind whip through your hair as you effortlessly glide past those poor souls still stuck in the past.
Embrace the future and inspire others to join you on this electrifying journey.
Happy biking, my friends!