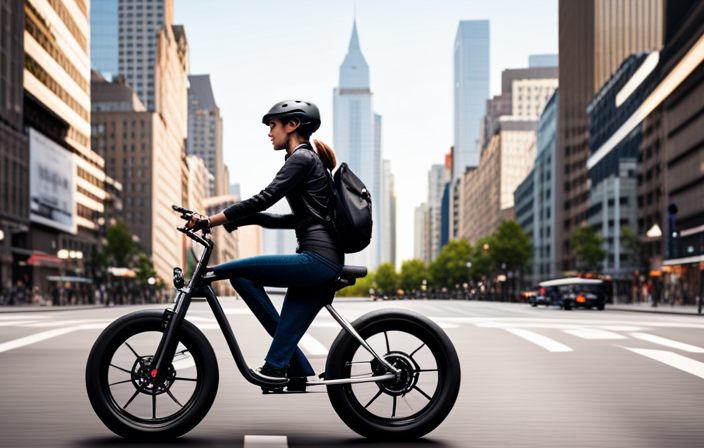

I’ve always been fascinated by the idea of building my own electric bike. The thought of cruising around effortlessly, powered by a starter motor, is both exciting and practical.
In this article, I’ll guide you through the process of converting a regular bike into an electric one, using a starter motor. We’ll cover everything from choosing the right bike to understanding the rules and regulations in your area.
So buckle up, because we’re about to embark on an electrifying journey!
Key Takeaways
- Converting a regular bike into an electric bike enhances the cycling experience.
- Electric bikes are a cost-effective alternative to traditional transportation methods.
- Choosing the right bike for conversion is important, considering the weight and size of the components.
- Removing the bike’s original components and installing and connecting the motor and electrical components are crucial steps in building an electric bike.

Sportneer Bike Lock: 5 Digit Combination High Security Anti Theft Bike Chain Lock - 3.2/3.6/4ft Heavy Duty Keyless Bicycle Lock for Bike Motorcycle Scooter Door & Gate - Easy to Use, Bike Accessories
High Security & Keyless Design: Say goodbye to the hassle of carrying keys and hello to keyless convenience....
As an affiliate, we earn on qualifying purchases.
Introduction to Electric Bike Conversion
Let’s learn about the basics of converting a regular bike into an electric bike.
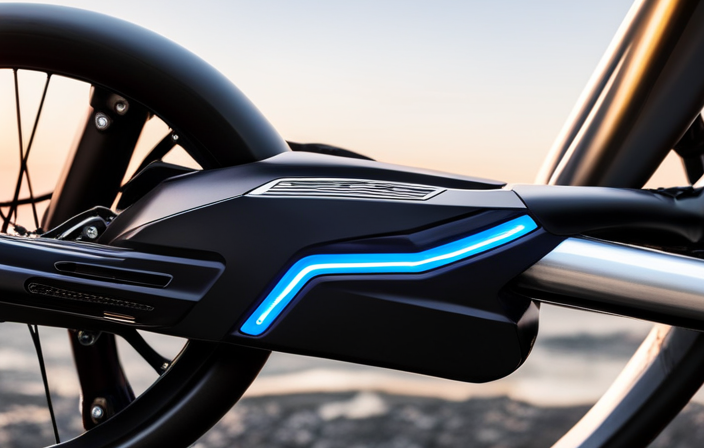
Converting a regular bike into an electric bike is an exciting project that can enhance your cycling experience. One of the key components needed for this conversion is an electric bike conversion kit. This kit typically includes a motor, battery, controller, throttle, and other necessary components.
The advantages of electric bikes are numerous. Firstly, they provide an eco-friendly mode of transportation, reducing carbon emissions and contributing to a greener environment. Secondly, electric bikes offer convenience and flexibility, allowing you to effortlessly cover longer distances and tackle hilly terrains with ease. Additionally, electric bikes can be a cost-effective alternative to traditional transportation methods, saving you money on fuel and parking fees.
By converting your regular bike into an electric bike, you can enjoy all these benefits while still maintaining the familiar and comfortable feel of your trusted bicycle.
Now that we understand the advantages of electric bikes, let’s move on to the next section where we will gather the necessary tools and materials.

Seatylock FoldyLock Compact Folding Bike Lock - Award Winning Patented Lightweight High Security Bicycle Lock - Heavy Duty Anti Theft Smart Secure Guard with Keys & Case for Bikes or Scooters
TOP RATED LIGHTWEIGHT COMPACT BIKELOCK - Best Light Weight Folding Bike Lock. Portable Solid Key Bike Lock Protects...
As an affiliate, we earn on qualifying purchases.
Gather the Necessary Tools and Materials
To begin, you’ll need to gather all the necessary tools and materials. When it comes to building an electric bike with a starter motor, choosing the appropriate tools is crucial for a successful conversion.
Some of the essential tools include a set of wrenches, screwdrivers, pliers, wire cutters, and a multimeter for electrical testing. Additionally, you’ll need a soldering iron and solder, heat shrink tubing, zip ties, and electrical tape for securing and insulating connections.
Understanding the necessary materials is equally important. You’ll need a suitable bike frame that can accommodate the weight and size of the motor and battery. The motor itself, along with a compatible controller, is a crucial component. A deep cycle battery, battery charger, and battery management system are necessary for storing and supplying power.
Other materials include a throttle, brake levers with motor cut-off switches, and various electrical connectors and wires.
With the right tools and materials in hand, you can now move on to the next section, where you will choose the right bike for conversion.

Kryptonite Folding Bike Lock, Compact Lightweight High Security Anti-Theft Foldable Bicycle Lock with 2 Keys and Mount for E-Bikes Scooter Road Mountain Bikes, 88.4cm (34.8 in)
HIGH-SECURITY DESIGN: This Anti-Theft folding bike lock is made from 3mm hardened steel bars with tightened rivets for...
As an affiliate, we earn on qualifying purchases.
Choose the Right Bike for Conversion
When choosing the right bike for conversion, it’s important to consider the weight and size of the components you’ll be adding. The frame of the bike should be strong enough to handle the additional weight of the electric motor and battery. Look for a frame made of durable materials such as steel or aluminum. A sturdy frame will ensure stability and safety during your electric bike rides.
Another important consideration is the battery capacity. Choosing the right battery capacity depends on your desired range and usage. If you plan on using your electric bike for longer rides or commuting, a higher battery capacity is recommended. This will allow you to cover more distance without worrying about running out of power. On the other hand, if you only need your electric bike for shorter rides or recreational purposes, a lower battery capacity may be sufficient.

Seatylock FoldyLock Compact Folding Bike Lock - Award Winning Patented Lightweight High Security Bicycle Lock - Heavy Duty Anti Theft Smart Secure Guard with Keys & Case for Bikes or Scooters
TOP RATED LIGHTWEIGHT COMPACT BIKELOCK - Best Light Weight Folding Bike Lock. Portable Solid Key Bike Lock Protects...
As an affiliate, we earn on qualifying purchases.
Remove the Bike’s Original Components
First, you should begin by removing the bike’s original components to prepare for the conversion process. This step is crucial in repurposing existing parts and making way for the installation of the starter motor. By removing the bike’s original components, you create the necessary space and ensure a smooth transition to an electric bike.
To help you understand the components that need to be removed, here is a table highlighting the main parts and their functions:
| Component | Function | Removal Process |
|---|---|---|
| Pedals | Power transfer from rider to bike | Unscrew and detach |
| Chain | Transfers power from pedals to wheels | Break the chain and remove |
| Crankset | Connects pedals to the chain | Unscrew and detach |
| Bottom Bracket | Allows the crankset to rotate | Use a bottom bracket tool to remove |
| Front Derailleur | Shifts the chain between gears | Unscrew and detach |
Once these components have been removed, you can move on to preparing the starter motor for installation. This step involves ensuring the motor is properly aligned and connected to the bike’s drivetrain.
Prepare the Starter Motor for Installation
Once you’ve removed the bike’s original components, it’s time to get the starter motor ready for installation. This step is crucial in ensuring the smooth functioning of your electric bike. Here’s what you need to do:
-
Install the motor mount: Begin by attaching the motor mount to the designated area on the bike frame. Make sure it is securely fastened using appropriate bolts and screws. This will provide a stable base for the starter motor.
-
Test the motor’s performance: Before proceeding further, it’s essential to check the motor’s performance. Connect the motor to a power source and observe its operation. Ensure that it runs smoothly and produces the desired power output. If any issues arise, troubleshoot and rectify them before proceeding.
With the motor mount securely in place and the motor’s performance tested, you are now ready to move on to the next step of the electric bike assembly: installing the motor and connecting it to the bike’s drivetrain. This crucial step will bring your electric bike one step closer to completion and allow you to experience the thrill of riding it.
Install the Motor and Connect it to the Bike’s Drivetrain
Now that the motor mount is securely fastened, it’s time to connect the motor to the bike’s drivetrain. This step is crucial in ensuring that the power from the motor is effectively transferred to the wheels, allowing the bike to move efficiently. To begin, locate the chain on your bike and remove the necessary links to create a gap for the motor sprocket. Once the chain is ready, align the motor sprocket with the bike’s chain and ensure that they are properly aligned. This will ensure smooth and efficient power transfer. To secure the motor sprocket to the bike’s drivetrain, use a suitable chain tensioner to maintain the tension in the chain. This will prevent any slippage or disengagement of the chain during operation.
To further illustrate the importance of this step, refer to the table below:
| Step | Task |
|---|---|
| 1 | Remove necessary links in the bike’s chain |
| 2 | Align the motor sprocket with the chain |
| 3 | Secure the motor sprocket using a chain tensioner |
Install the Battery and Controller
To complete the installation process, you’ll need to connect the battery and controller, ensuring a reliable power source for your ride. Here are some battery installation tips and troubleshooting controller issues:
-
Battery Installation Tips:
-
Choose a location on your bike that is secure and easily accessible for the battery.
-
Make sure the battery is securely attached to the bike using the provided mounting brackets or straps.
-
Connect the positive and negative terminals of the battery to the corresponding terminals on the controller.
-
Troubleshooting Controller Issues:
-
Check the connections between the controller and the battery, ensuring they are secure and free from any loose wires.
-
Ensure that the controller is receiving power from the battery by checking the voltage at the input terminals.
-
If the controller is not functioning properly, check for any error codes or indicators that may help identify the issue.
Once the battery and controller are connected, you can move on to the next step of the installation process: connecting the wiring and testing the system. This will ensure that all components are properly connected and functioning as intended.
Connect the Wiring and Test the System
After connecting the battery and controller, it’s time to wire everything up and test the system. Before diving into the wiring process, it is crucial to prioritize safety precautions. Ensure that the battery is disconnected and the controller is switched off to avoid any electrical mishaps. Now, let’s get started.
To properly connect the wiring, refer to the wiring diagram provided with the controller. This diagram will guide you on which wires to connect to specific components such as the motor, throttle, and brake sensors. Make sure to securely connect each wire, double-checking for any loose connections or exposed wires that could pose a safety risk.
Once the wiring is complete, it’s time to test the performance of your electric bike. Turn on the controller and gradually increase the throttle to check if the motor engages smoothly. Ensure that the brakes are working properly by testing them at different speeds. Take note of any issues or abnormalities during the testing phase, as these may require further troubleshooting.
In order to adjust the bike’s gearing and brakes, analyze the performance of each component and make necessary adjustments. This will optimize the overall functionality and efficiency of your electric bike. By carefully fine-tuning the gearing and brakes, you can achieve a smooth and controlled riding experience.
Transitioning into the subsequent section about adjusting the bike’s gearing and brakes, it is essential to fine-tune these components to maximize the performance of your electric bike.
Adjust the Bike’s Gearing and Brakes
Make sure you fine-tune the gearing and brakes of your bike to achieve optimal performance. Adjusting gear ratios and improving braking performance are key factors in creating a smooth and efficient electric bike.
Here are some important considerations:
-
Optimize gear ratios: Adjusting the gear ratios can help you find the right balance between power and speed. By finding the right combination of gears, you can maximize your electric bike’s efficiency and performance.
-
Check chain tension: Ensuring proper chain tension is essential for smooth gear shifting. A loose chain can cause slipping or skipping, while an overly tight chain can increase friction and wear on the drivetrain.
-
Calibrate derailleur: Fine-tuning the derailleur is crucial for precise gear shifting. Adjust the limit screws to ensure the derailleur moves smoothly between gears without any hesitation or noise.
-
Upgrade brake pads: Upgrading your brake pads can significantly improve your bike’s braking performance. Look for high-quality pads that offer better stopping power and durability.
-
Adjust brake lever reach: Properly adjusting the brake lever reach will ensure that you can comfortably and easily engage the brakes when needed.
Customize the Electric Bike with Accessories
Adding accessories to your e-bike can enhance your riding experience and personalize it to your preferences. Customizing your electric bike with accessories allows you to tailor it to your specific needs and style.
There are a variety of accessories available for electric bikes, each providing unique benefits and functionalities. One of the most sought-after accessories for electric bikes is a rear rack. This accessory not only adds storage space for carrying groceries or other items, but it also provides a stable platform for attaching panniers or baskets.
Another popular accessory is a front or rear light, which increases visibility and safety when riding in low light conditions. Other accessories for electric bikes include fenders, which protect you from splashes and dirt, and a phone mount, which allows you to easily access navigation or fitness apps while riding. Additionally, a comfortable saddle or ergonomic grips can make long rides more enjoyable by reducing strain on your hands and back.
Customizing your electric bike with these accessories not only improves functionality but also adds a personal touch. By selecting accessories that suit your needs and style, you can create a bike that is truly your own.
Now that you have customized your electric bike, it is important to learn how to properly maintain and charge the battery.
Learn How to Properly Maintain and Charge the Battery
After customizing your electric bike with accessories, it is crucial to learn how to properly maintain and charge the battery. The battery is the heart of an electric bike, providing the energy needed to power the motor and propel you forward. Neglecting battery maintenance can result in reduced performance and lifespan.
To ensure your battery stays in optimal condition, follow these guidelines:
-
Regular Cleaning: Keep the battery clean by wiping it with a damp cloth. Avoid using harsh chemicals or abrasive materials that could damage the battery casing.
-
Proper Storage: When not in use, store the battery in a cool, dry place away from direct sunlight and extreme temperatures. This helps prevent overheating and extends its lifespan.
-
Correct Charging Techniques: Follow the manufacturer’s instructions for charging your battery. Avoid overcharging or undercharging, as this can impact its capacity and overall performance.
By implementing these battery maintenance and charging techniques, you can maximize the lifespan and efficiency of your electric bike.
Now, let’s delve into understanding the rules and regulations for electric bikes in your area.
Understand the Rules and Regulations for Electric Bikes in Your Area
To ensure you are in compliance with the rules and regulations in your area, it’s important to understand the specific guidelines for operating an electric bike.
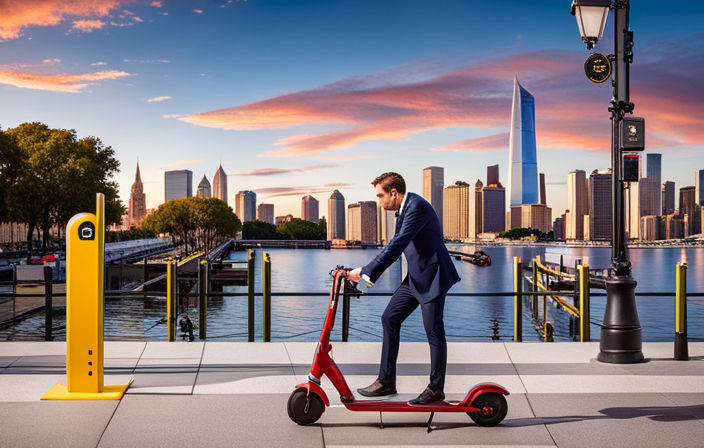
Electric bikes are a great way to commute in urban areas, but it’s crucial to prioritize safety precautions. When riding in busy city streets, always wear a helmet and reflective clothing to increase visibility. Follow traffic laws and be mindful of pedestrians and other vehicles.
Additionally, consider the battery for your electric bike conversion. Choosing the right battery can greatly impact the performance and range of your electric bike. Take into account factors such as capacity, voltage, and weight when selecting a battery. A higher capacity battery will provide a longer range, but it will also be heavier. It’s important to find a balance that suits your needs and preferences.
Enjoy the Benefits of Riding an Electric Bike
When riding an electric bike, you can experience the joy of effortless transportation while reducing your carbon footprint. Electric bikes, also known as e-bikes, have become increasingly popular due to their numerous advantages. Here are some benefits of riding an electric bike:
-
Increased speed and range: Electric bikes are equipped with a motor that provides assistance while pedaling, allowing you to travel at higher speeds and cover longer distances compared to traditional bicycles.
-
Easy conversion: With electric bike conversion kits readily available in the market, you can easily transform your existing bike into an electric one. These kits include a motor, battery, and controller, making the conversion process straightforward.
-
Eco-friendly transportation: By riding an electric bike, you contribute to reducing air pollution and greenhouse gas emissions. Electric bikes produce zero emissions while in use, making them a sustainable mode of transportation.
Transitioning into troubleshooting common issues, it is important to be aware of potential problems that may arise when using an electric bike.
Troubleshooting Common Issues
One common issue with e-bikes is that the battery may not hold a charge for as long as expected. This can be a frustrating problem, but there are some common troubleshooting techniques that can help.
First, check the battery connections to make sure they are secure. Loose connections can cause a loss of power and reduce the battery’s capacity.
If the connections are secure, try charging the battery fully and then using it until it is completely drained. This can help recalibrate the battery and improve its overall performance.
Another common issue with e-bikes is motor overheating. If your motor is getting too hot, it can cause the bike to lose power or even shut down completely.
To troubleshoot this issue, make sure that the motor is properly ventilated and not covered or obstructed by any objects. Additionally, check the motor’s wiring for any loose or damaged connections.
By following these troubleshooting techniques, you can address common issues with e-bikes and keep your ride running smoothly.
With these troubleshooting techniques in mind, you can now confidently share your experience and inspire others to build their own electric bikes.
Share Your Experience and Inspire Others to Build Their Own Electric Bikes
You can inspire others by sharing your experience of creating your own e-bike. Building an electric bike from scratch was a challenging yet rewarding endeavor for me. I faced various obstacles along the way, but overcoming them only made the final outcome even more satisfying. Let me share my inspiring story and the challenges I faced during the process.
| Challenge | Solution | Result |
|---|---|---|
| Finding suitable components | Extensive research and comparison | High-quality parts selected |
| Wiring and electrical connections | Patience and attention to detail | Neat and efficient electrical system |
| Battery range and capacity | Experimentation and optimization | Extended range and improved performance |
One of the biggest challenges I encountered was finding suitable components for my e-bike. I spent countless hours researching and comparing different options to ensure I selected high-quality parts that would meet my needs. Another hurdle was the wiring and electrical connections. It required patience and attention to detail to create a neat and efficient electrical system.
Battery range and capacity were also major concerns. Through experimentation and optimization, I was able to extend the range of my e-bike and improve its overall performance.
Sharing my experience of building an electric bike not only inspires others to embark on their own journey but also prepares them for the challenges they may face. It is through these challenges that we learn and grow, ultimately achieving our desired outcome. So, let’s inspire and empower others to build their own e-bikes and experience the joy of creating something unique and sustainable.
Frequently Asked Questions
How much does it cost to convert a regular bike into an electric bike?
Converting a regular bike into an electric bike can cost anywhere from $300 to $1500, depending on the quality and features of the conversion kit.
The benefits of this conversion include increased speed, reduced effort during uphill rides, and the ability to cover longer distances.
Moreover, it has a positive environmental impact as it reduces carbon emissions and promotes sustainable transportation.
Is it difficult to install the motor and connect it to the bike’s drivetrain?
Is it difficult to install the motor and connect it to the bike’s drivetrain? Well, it may seem daunting at first, but with the right tools and instructions, it can be a straightforward process.
To install the motor, you’ll need to secure it to the frame using brackets or mounts.
Connecting it to the drivetrain involves attaching a sprocket to the motor and aligning it with the bike’s chain.
Following these steps carefully will ensure a successful installation.
Can any type of bike be converted into an electric bike?
Yes, any type of bike can be converted into an electric bike using electric bike conversion kits. These kits include a motor, battery, and controller that can be installed on the bike.
Converting a bike into an electric bike has its pros and cons. The main advantage is that it allows you to enjoy the benefits of an electric bike without having to purchase a new one. However, the conversion process can be complex and may require some technical knowledge.
How long does it take to charge the battery fully?
The charging speed of an electric bike battery depends on its capacity. A larger capacity battery will take longer to charge compared to a smaller one.
For example, a battery with a capacity of 10Ah may take around 3 hours to charge fully, while a battery with a capacity of 20Ah may take around 6 hours.
It is important to consider the battery capacity and charging speed when planning your electric bike usage to ensure you have enough charge for your desired distance.
Are there any legal requirements or restrictions for riding an electric bike in my area?
Riding an electric bike in my area is subject to specific regulations and safety guidelines. Just like any other vehicle, electric bikes must adhere to certain legal requirements. These may include age restrictions, speed limits, and registration.
Safety guidelines may also include wearing a helmet, using lights at night, and following traffic rules. It is crucial to familiarize oneself with these regulations to ensure a safe and legal riding experience.
Conclusion
In conclusion, building my own electric bike with a starter motor has been an exhilarating and rewarding experience.
The process required gathering the necessary tools and materials, choosing the right bike for conversion, and removing the original components.
By preparing the starter motor for installation and understanding the rules and regulations in my area, I was able to enjoy the benefits of riding an electric bike.
Troubleshooting common issues along the way has taught me valuable lessons. As they say, ‘Where there’s a will, there’s a way.’
Sharing my experience and inspiring others to build their own electric bikes has been a fulfilling journey.