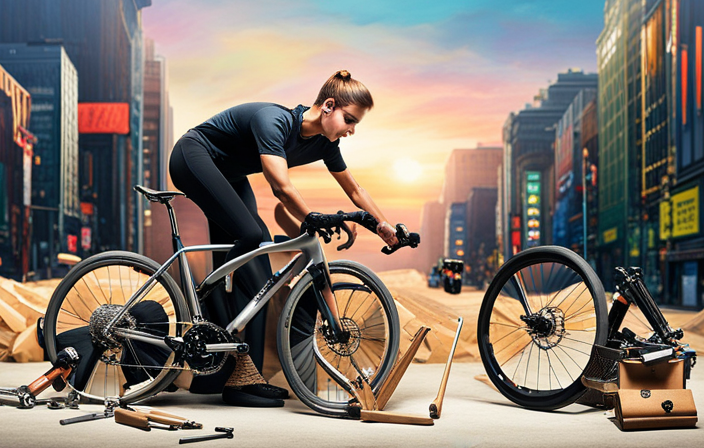
While standing in my workshop, with tools and components surrounding me, the dream of creating a bespoke gravel bike becomes a reality.
Crafting a gravel bike is an exhilarating journey that combines precision and technical expertise.
In this article, I will guide you through every step of the process, from selecting the perfect frame to fine-tuning performance.
Join me as we delve into the intricate world of building your very own gravel bike – a two-wheeled masterpiece that will conquer any terrain with ease.
Key Takeaways
- Consider weight, frame size, and material options for optimal performance and comfort
- Select components such as fork, drivetrain, brakes, wheels, and tires based on riding style and terrain
- Fine-tune performance by adjusting saddle height, handlebar position, tire pressure, and gear shifting
- Prioritize safety by installing proper lighting, wearing safety gear, and regularly maintaining the bike
Determine your bike’s purpose and specifications
Before you begin building a gravel bike, it’s important to determine your bike’s purpose and specifications. This will ensure that you create a bike that meets your specific needs and preferences. One key consideration is the weight of the bike. The weight of your gravel bike can greatly impact its performance, especially when riding on rough terrains. A lighter bike will be easier to maneuver and accelerate, allowing for faster speeds on gravel roads. On the other hand, if you plan on carrying heavy loads or tackling more challenging off-road trails, a slightly heavier bike may provide better stability and durability.
Another aspect to consider is the color of your gravel bike. While this may seem like a purely aesthetic choice, it can actually have practical implications as well. For instance, if you plan on doing a lot of night riding or commuting in low light conditions, choosing a brightly colored frame can improve visibility and make you more noticeable to other road users.
Now that we’ve determined the purpose and specifications of your gravel bike, let’s move on to the next step: choosing the right frame.
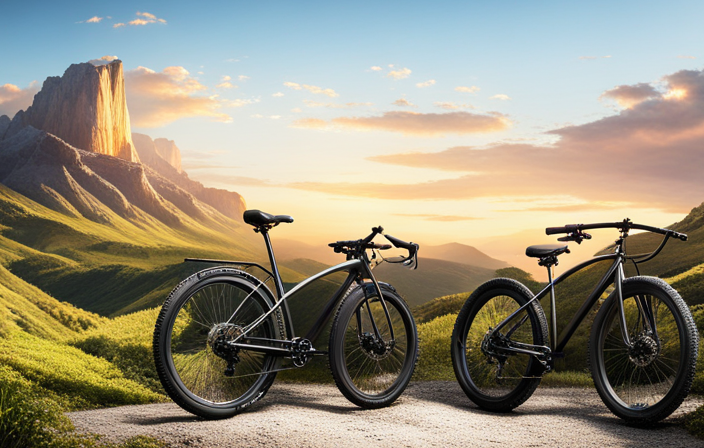
Choose the right frame
When choosing the right frame for your gravel bike, make sure to consider factors such as durability and weight. The frame is a crucial component that determines the overall performance and ride quality of your bike.
Here are some key factors to consider when selecting a gravel bike frame:
- Material: Choose between aluminum, steel, carbon fiber, or titanium frames based on your budget and riding preferences.
- Frame Geometry: Look for a frame that offers stability and comfort on rough terrain, with clearance for wider tires.
- Mounting Points: Consider the number and location of mounting points for racks, fenders, bottle cages, and other accessories you may want to add.
- Tire Clearance: Ensure that the frame has ample space to accommodate the tire width you desire for off-road adventures.
- Frame Size: Select a frame size that fits you properly to ensure optimal comfort and control.
Choosing the right gravel bike frame is essential for building a reliable and versatile bike. Once you have selected the appropriate fork, you can move on to assembling the remaining components.
Select the appropriate fork
To select the appropriate fork, you should consider factors such as suspension type and travel, axle compatibility, and steerer tube material. Different types of gravel forks include rigid forks, suspension forks, and gravel-specific suspension forks. Rigid forks are the simplest and lightest option with no suspension travel. They offer precise handling but lack comfort on rough terrain. Suspension forks come in various options such as air-sprung or coil-sprung with adjustable travel. They provide better comfort and control over bumps but add weight to the bike. Gravel-specific suspension forks are designed specifically for off-road riding with wider tire clearance and increased travel compared to traditional road bike suspensions.
Here is a table summarizing the pros and cons of suspension forks:
| Pros | Cons |
|---|---|
| Improved comfort | Added weight |
| Better control over rough terrain | Increased maintenance |
| Increased traction | Reduced pedaling efficiency |
Considering these factors will help you make an informed decision when selecting a fork for your gravel bike build. Once you have chosen the appropriate fork, you can move on to deciding on the drivetrain system for your bike without compromising its performance or capabilities.
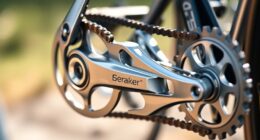
Decide on the drivetrain system
Once you’ve selected the appropriate fork, it’s time to decide on your drivetrain system. The drivetrain is a crucial component of any gravel bike, as it determines how efficiently power is transferred from your legs to the wheels. There are several drivetrain options available, each offering unique benefits and considerations.
-
Single-speed: A simple and reliable option that eliminates the need for shifting gears. However, it may limit your speed and performance on varying terrains.
-
1x (one-by): This setup features a single chainring in the front and a wide-range cassette in the rear. It offers simplicity, lighter weight, and improved chain retention.
-
2x (two-by): With two chainrings in the front and a wider gear range, this option provides more gear ratios for different terrains but adds complexity and additional weight.
-
Electronic shifting: Utilizing electronic components instead of mechanical ones, electronic shifting offers precise and effortless gear changes at the push of a button.
Considerations when choosing your drivetrain system include desired gear ratios for climbing steep hills or accelerating on flat surfaces. These ratios will depend on your fitness level, riding style, and terrain preferences.
Consider the type of brakes you want
Now it’s time to think about the type of brakes you prefer. When it comes to gravel bikes, there are different types of brake systems available, each with its own pros and cons for gravel riding.
To help you make an informed decision, let’s take a look at a comparison table that outlines the various brake options:
| Brake Type | Pros | Cons |
|---|---|---|
| Rim Brakes | – Lightweight |
- Easy maintenance
- Wide range of wheel compatibility | – Less stopping power compared to disc brakes
- Reduced performance in wet conditions |
| Mechanical Disc Brakes | – Good stopping power - Affordable
- Easier to maintain than hydraulic disc brakes | – Requires manual adjustment for optimal performance
- Not as powerful as hydraulic disc brakes |
| Hydraulic Disc Brakes | – Excellent stopping power - Consistent performance in all weather conditions
- Minimal maintenance required | – More expensive than rim or mechanical disc brakes
- Slightly heavier |
When choosing the type of brakes for your gravel bike, consider your riding style, terrain, and budget. If you prioritize lightweight components and don’t frequently ride in wet conditions, rim brakes could be a suitable choice. On the other hand, if you want maximum stopping power and consistent performance regardless of weather conditions, hydraulic disc brakes would be ideal.
Next up is selecting the wheels and tires for your gravel bike…
Without further ado, let’s move on to choosing the wheels and tires for your gravel bike.
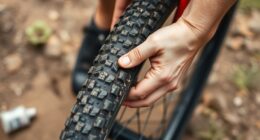
Choose the wheels and tires
When choosing the wheels and tires for your gravel adventure, there are several important factors to consider.
First and foremost, you need to think about the type of terrain you will be riding on. Gravel bike tires come in various tread patterns, widths, and compounds, each offering different levels of grip and rolling resistance. For loose or muddy surfaces, a wider tire with aggressive treads can provide better traction. On the other hand, if you anticipate mostly hard-packed gravel roads, a narrower tire with less aggressive treads may be more suitable.
Another factor to consider is your riding style. If you prefer a more aggressive approach with higher speeds and tighter cornering, you might want to opt for larger diameter gravel bike wheels. These can offer improved stability and handling at high speeds. However, if comfort is a priority or if your local trails have tight turns and technical sections that require maneuverability, smaller diameter wheels may be a better choice.
Finally, budget plays a role in making your decision too. Higher-end wheelsets often feature lighter materials like carbon fiber and advanced construction techniques that improve performance but also increase cost.
With the right combination of gravel bike tires and wheel size chosen based on your needs and preferences when it comes to terrain conditions as well as riding style considerations while taking into account budget constraints — you’ll be able to enhance both speed capabilities as well as overall comfort during those adventurous rides on any surface!
Now let’s move on to deciding on the handlebars and stem!
Decide on the handlebars and stem
To decide on the handlebars and stem, I carefully considered my riding preferences and budget constraints. There are several handlebar options available for gravel bikes, each offering a unique riding experience. Some popular choices include drop bars, which provide multiple hand positions and aerodynamic advantages; flat bars, which offer a more upright riding position and better control on technical terrain; and flared drop bars, which combine the benefits of both drop bars and flat bars.
When choosing a stem for your gravel bike, it is important to consider both the length and angle. The length of the stem affects the bike’s handling characteristics, with shorter stems providing quicker steering response while longer stems offer more stability. The angle of the stem determines how high or low your handlebars will be positioned relative to the frame.
To select the appropriate saddle for your gravel bike, it is crucial to find one that provides comfort and support during long rides. A well-fitted saddle can enhance your overall riding experience by reducing pressure points and preventing discomfort.
In conclusion, when deciding on the handlebars and stem for your gravel bike, take into account your preferred riding style as well as any budget limitations. Once you have made these decisions, you can proceed to select an appropriate saddle for optimal comfort on your rides.
Select the appropriate saddle
Finding the right saddle is crucial for a comfortable and enjoyable ride. When choosing the right saddle, it’s important to consider factors such as your riding style, bike fit, and personal preferences. To help you make an informed decision, here is a comparison table of different saddle types:
| Saddle Type | Description | Pros | Cons |
|---|---|---|---|
| Racing | Narrow and lightweight design for performance-oriented riders. | Provides more freedom of movement and reduces weight. | Less padding may not be suitable for longer rides or beginners. |
| Touring | Wider with extra padding for long-distance comfort. | Offers more support during extended hours in the saddle. | Can be heavier and restrict movement for more aggressive riding styles. |
| Cutout | Features a center groove or hole to relieve pressure on sensitive areas. | Helps prevent numbness and discomfort on longer rides. | May not provide enough support for riders who prefer a solid surface. |
Maintenance tips for your saddle include keeping it clean by wiping it down after each ride, applying leather conditioner (if applicable), and checking regularly for any signs of wear or damage.
Now that you have chosen the appropriate saddle, let’s move on to selecting the pedals that will best suit your needs.
Choose the pedals
Once you’ve selected the appropriate saddle, it’s time to choose the pedals that will best suit your needs. When it comes to gravel biking, there are different pedal options available in the market.
The two main types are flat pedals and clipless pedals. Flat pedals offer a larger platform for your feet and allow for easy foot placement and quick removal. On the other hand, clipless pedals provide a secure connection between your shoes and the bike, enhancing power transfer and control.
When choosing pedals, it is essential to consider pedal compatibility with different shoes. Some clipless pedal systems require specific cleats on your cycling shoes for proper attachment. It is crucial to ensure that your chosen pedals are compatible with the cleats on your shoes or vice versa.
Deciding on the gearing options will be our next focus as we continue building our gravel bike. By selecting the appropriate gear ratios, we can optimize our pedaling efficiency based on various terrains and riding styles.
Decide on the gearing options
Consider the different gearing options available to optimize your pedaling efficiency based on various terrains and riding styles. When it comes to gravel biking, having the right gears can make a significant difference in your overall performance. There are two main types of gearing options to choose from: 1) Single-speed or fixed gear, and 2) Multiple speeds with a derailleur system.
To help you make an informed decision, I have created a table below that outlines the pros and cons of each option:
| Gearing Option | Pros | Cons |
|---|---|---|
| Single-speed/Fixed | Lightweight and low maintenance | Limited gear range |
| Simple shifting technique | Difficult on steep hills | |
| Multiple speeds | Wide gear range for various terrains | Requires more maintenance |
| Easier climbing uphill | Heavier compared to single-speed/fixed gear |
When choosing between these options, consider factors such as the type of terrain you’ll be riding on, your fitness level, and personal preference. Once you’ve decided on the appropriate gearing option for your gravel bike, it’s important to learn proper shifting techniques to ensure smooth transitions between gears.
Now that we have covered gearing options and shifting techniques, let’s move on to considering additional accessories and components that can enhance your gravel biking experience without compromising performance.
Consider additional accessories and components
To enhance your gravel biking experience, you should think about adding extra accessories and components. These additional accessories can provide convenience, comfort, and safety during your rides.
One important accessory to consider is a bike computer or GPS device, which can track your speed, distance traveled, and even provide turn-by-turn directions. Another useful accessory is a saddlebag or frame bag that allows you to carry tools, spare tubes, and other essentials for repairs on the go.
When it comes to component considerations, there are a few key areas to focus on. First, think about upgrading your tires to ones with thicker treads for better traction on gravel surfaces. Additionally, consider installing wider handlebars for improved stability and control when riding off-road. Upgrading your brakes to disc brakes can also provide better stopping power in wet or muddy conditions.
Finally, don’t forget about comfort accessories such as ergonomic grips or padded gloves to reduce hand fatigue during long rides. A good quality saddle that suits your body type can also make a significant difference in terms of comfort.
By considering these additional accessories and component upgrades, you can customize your gravel bike to meet your specific needs and preferences. With these enhancements in place, you’ll be ready to tackle any gravel road with confidence.
Now let’s move on to assembling the frame and components…
Assemble the frame and components
Now it’s time to put together the frame and all the components. This is where the real fun begins as we start assembling our custom gravel bike.
First, let’s focus on the frame. After ensuring that all the necessary parts are present, I carefully attach the fork to the headset using a torque wrench to ensure proper tightness. Next, I align and install the bottom bracket, making sure it is snugly fitted into its designated housing.
Once the frame is ready, I move on to attaching the various components. Starting with the drivetrain, I mount the crankset and install both front and rear derailleurs according to their respective specifications. Assembling brakes is a crucial step; here, I connect both brake calipers with precision while adjusting their position for optimal performance.
As for additional accessories like a custom paint job or bikepacking setup, now is an excellent opportunity to add them before securing other components firmly in place. This personal touch adds flair and individuality to our gravel bike.
With everything assembled, my attention turns towards adjusting and fine-tuning my bike’s fit and performance. By meticulously checking saddle height, handlebar alignment, and tire pressure among other things, I ensure that my bike feels comfortable yet responsive when taking it out for a spin.
Transitioning into adjusting and fine-tuning our bike’s fit will allow us to optimize its performance without missing any crucial steps along the way.
Adjust and fine-tune the bike’s fit and performance
Start by making sure that the saddle height is adjusted properly to ensure a comfortable and efficient riding position. This is crucial for preventing discomfort or injury during long rides. Additionally, check the saddle tilt to make sure it is level and provides adequate support.
To further enhance bike fit adjustment, consider adjusting the handlebar position. Experiment with different stem lengths and angles to find the optimal reach and drop that suits your riding style. This will improve handling and reduce strain on your upper body.
Another important aspect of bike fit adjustment is determining the correct crank length. Shorter cranks can increase pedaling efficiency while longer ones provide more leverage for climbing. Find the right balance based on your riding preferences and terrain.
In terms of performance enhancement, focus on optimizing gear shifting. Ensure that the derailleurs are properly aligned and adjusted for smooth and precise shifting between gears. Lubricate the chain regularly to minimize friction and extend its lifespan.
Finally, adjust tire pressure according to your weight, terrain conditions, and desired ride quality. Higher pressure reduces rolling resistance but may sacrifice comfort, while lower pressure improves traction but increases rolling resistance.
By fine-tuning these aspects of bike fit adjustment and performance enhancement, you’ll be ready for a test ride where you can make necessary adjustments based on your experience before hitting the road or trail with confidence in your gravel bike setup.
Test ride and make necessary adjustments
Once you’ve adjusted and fine-tuned your bike’s fit and performance, it’s time to take it for a test ride and make any necessary adjustments.
The test ride experience is crucial in ensuring that your custom-built gravel bike performs optimally. Start by selecting a suitable location such as a quiet road or off-road trail where you can safely evaluate its functionality.
During the test ride, pay close attention to how the bike handles and feels. Take note of any discomfort or areas that may require further adjustment. This includes assessing the saddle height, handlebar position, and brake responsiveness. Shift through all gears to check for smoothness and accuracy.
If you notice any issues during the test ride, make the necessary adjustments immediately. This may involve tweaking the saddle position, adjusting brake pads, or fine-tuning gear indexing. It is important to address these issues promptly to ensure a comfortable riding experience.
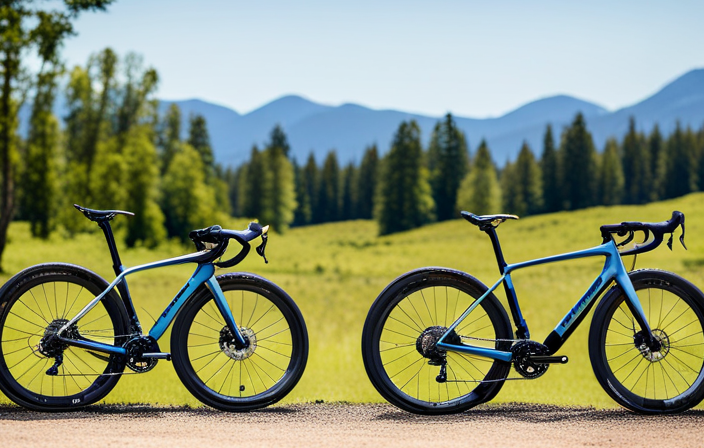
Once you are satisfied with the performance of your custom-built gravel bike after making any necessary adjustments, you can confidently move on to enjoy your new creation on various terrains. Whether it’s exploring rugged trails or embarking on long-distance rides, your custom-built gravel bike will provide an unparalleled riding experience.
Enjoy your new custom-built gravel bike!
After making any necessary adjustments, you can confidently enjoy your new custom-built gravel bike and experience the thrill of riding on various terrains. Here are four ways to enhance your enjoyment:
-
Custom paint: Personalize your gravel bike by choosing a unique color scheme or design for the frame. This not only adds aesthetic appeal but also makes your bike easily recognizable in a crowd.
-
Bikepacking gear: Gear up for adventure by equipping your gravel bike with bikepacking accessories such as racks, bags, and panniers. These allow you to carry essential items like camping gear, food, and water for multi-day trips, expanding the possibilities of where you can ride.
-
Explore diverse terrains: With your custom-built gravel bike, take advantage of its versatility and explore a variety of terrains. From smooth city streets to rugged off-road trails, this bike is designed to handle it all with ease.
-
Enjoy the freedom: Once you have made all the necessary adjustments and added personalized touches to your gravel bike, relish in the freedom it offers. Feel the wind in your face as you cruise through scenic landscapes or challenge yourself with demanding routes – the choice is yours.
Remember that safety should always be a priority when riding your custom-built gravel bike. Regularly maintain and inspect it for any signs of wear or damage before each ride.
Now go out there and embrace the joy of cycling on your newly built machine!
Frequently Asked Questions
How much does it typically cost to build a gravel bike?
Building a gravel bike can vary in cost depending on individual preferences and budget options. A cost comparison reveals that it typically ranges from around $1,000 to $5,000.
Budget options may include sourcing used components or opting for lower-priced alternatives. It’s important to consider factors such as frame material, groupset, wheels, and accessories when determining the final cost.
Detailed research and careful planning are essential to ensure a successful build within your desired budget.
Are there any specific tools or equipment required to assemble the frame and components?
To assemble the frame and components of a gravel bike, you’ll need specific tools and equipment. These include a set of allen wrenches, a torque wrench, cable cutters, a chain whip, a cassette lockring tool, bottom bracket tools, and more.
The assembly process requires attention to detail and precision to ensure proper functionality. It’s important to avoid common mistakes during assembly, as they can lead to issues later on.
In addition to proper assembly, careful frame selection or converting a road bike is crucial. This ensures that the bike is suitable for gravel riding and can handle the terrain effectively.
Once the bike is assembled, regular maintenance is essential for optimal performance and longevity. This includes cleaning and lubricating the drivetrain, checking and adjusting the brakes and gears, and inspecting the frame for any signs of wear or damage.
By following these steps and taking proper care of your gravel bike, you can enjoy many miles of off-road adventures.
What are some common mistakes to avoid when choosing the right frame for a gravel bike?
When choosing a gravel bike frame, it’s crucial to avoid common mistakes that can impact your riding experience. Factors to consider include:
- Material (aluminum, steel, carbon)
- Tire clearance
- Geometry (stability vs agility)
- Mounting options for racks and fenders
A sturdy frame with ample tire clearance is essential for tackling diverse terrain. It allows you to use wider tires, providing better traction and stability. Additionally, the right geometry ensures comfort and control, whether you’re riding on rough trails or smooth roads.
By carefully considering these factors, you can find a well-suited gravel bike frame that meets your specific needs and preferences.
Can I convert my existing road bike into a gravel bike, or do I need to start from scratch?
To convert your existing road bike into a gravel bike, some modifications are necessary.
You will need to replace the tires with wider ones that have more tread for better off-road traction. Additionally, adding disc brakes can improve stopping power in varied terrain.
It is important to consider the frame geometry as well, as gravel bikes typically have a more relaxed and stable design compared to road bikes.
However, starting from scratch might be a better option if significant changes are required.
Are there any specific maintenance tips or intervals I should be aware of for a custom-built gravel bike?
When it comes to maintaining a custom-built gravel bike, there are a few key maintenance tips and interval awareness that I keep in mind.
It’s like tending to a well-orchestrated symphony; each component plays its part.
Regularly clean and lubricate the drivetrain to ensure smooth shifting and prevent wear.
Check tire pressure before every ride, as gravel riding can be rough on tires.
Keep an eye on brake pads, chain wear, and cable tension for optimal performance.
Remember, attention to detail ensures a finely tuned machine.
Conclusion
In conclusion, building my own gravel bike has been a rewarding and fulfilling experience.
From selecting the perfect frame to assembling all the components, every step required meticulous attention to detail.
As I test rode my custom-built bike, I couldn’t help but feel a sense of accomplishment and excitement for the adventures that lay ahead.
With each pedal stroke, it’s as if my dreams are being painted on the canvas of the open road, creating a vivid tapestry of freedom and exploration.