Swapping out bicycle pedals may appear challenging at first, yet with the appropriate equipment and some basic knowledge, it turns into an easy and direct task. If your goal is to enhance your ride with better performing pedals or just to exchange an old component, changing your bike’s pedals is definitely achievable for any rider willing to invest a small amount of time and focus on the details.
Before you get started, it’s important to choose the right pedal for your bike. Different pedals are designed for different types of riding, so make sure to select a pedal that is appropriate for your needs.
Once you have your new pedals in hand, it’s time to gather the necessary tools and get to work removing the old pedals from your bike. With a few simple steps, you’ll be on your way to a smoother, more efficient ride in no time.
Key Takeaways
- Different types of pedals are suitable for different types of riding, and the material of the pedal should also be considered.
- Regular cleaning and lubrication of pedals is essential for maintenance, and specific tools such as a pedal wrench and grease are required.
- When replacing a bike pedal, assess the old pedal’s condition, clean the threads of the crank arm, and apply a thin layer of grease before attaching the new pedal. Proper alignment and tightness are important to avoid damage.
- Clipless pedals can provide more power and secure feet, but attention to detail and patience are important during the process, and a test ride should be conducted to ensure everything works properly.
Choose the Right Pedal for Your Bike
You’ll wanna choose the pedal that fits your ride like a glove, so you can pedal smoothly and keep on rollin’. When selecting a new pedal for your bike, there are a few things to consider.
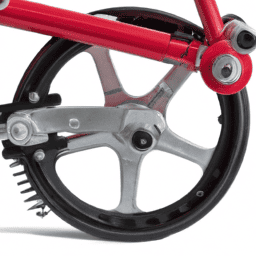
First, you’ll want to compare the different pedal materials available. Aluminum pedals are lightweight and durable, but they can also be slippery when wet. Steel pedals, on the other hand, are heavier but provide a more secure grip. Lastly, plastic pedals are the least expensive option and are great for casual riders, but they tend to wear out quickly.
Once you’ve chosen the pedal material that best meets your needs, it’s important to keep them maintained. Regular cleaning and lubrication can extend the life of your pedals and ensure smooth pedaling. You can use a soft brush or toothbrush to remove dirt and debris from the pedals, and apply a light coat of oil or grease to keep them lubricated.
With proper maintenance, your pedals will last longer and provide a smoother ride. Now that you know how to choose the right pedal and keep them maintained, it’s time to gather the necessary tools.
Gather the Necessary Tools
First, grab all the essential tools needed to successfully replace the pedal on your bike. Proper pedal maintenance is vital to keep your bike running smoothly. Common pedal issues include worn-out bearings, loose pedals, and damaged threads. Therefore, it is essential to have the right tools to fix these issues.
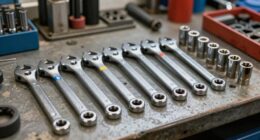
To replace your bike pedal, you will need a few tools. The table below outlines the necessary tools for the job:
| Tool | Description |
|---|---|
| Pedal wrench | A thin wrench with a long handle used to remove and install pedals |
| Allen wrench | A hexagonal-shaped tool used to remove and tighten bolts |
| Grease | A lubricant used to ensure smooth pedal movement |
| Rag | A cloth used to wipe clean the pedal and crank arm threads |
Make sure you have all the tools listed above before starting the process. Next, you will learn how to remove the old pedal from your bike.
Remove the Old Pedal
Before beginning the process of changing your bicycle pedal, it’s important to check the condition of the old pedal to assess any potential issues that may have caused it to malfunction. Pedal maintenance is crucial to ensuring a smooth ride and preventing accidents.
Here are some common pedal issues to look out for:
-
Loose or wobbly pedal: This may be caused by a worn-out pedal thread or a loose crank arm. Tighten the pedal or replace it if necessary.
-
Pedal squeaks: Squeaks can be caused by a loose or damaged pedal or a worn-out bearing. Try lubricating the pedal or replacing it.
-
Pedal falls off: If your pedal keeps falling off, it may be due to a stripped pedal thread or a broken crank arm. Replace the pedal or the crank arm as needed.
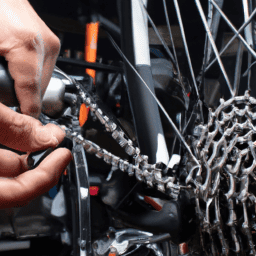
Once you’ve assessed the condition of the old pedal, it’s time to remove it. Use a pedal wrench to loosen the pedal by turning it counterclockwise. Be sure to hold the crank arm steady with your other hand to prevent it from turning. Once it’s loose enough, you can remove the pedal by turning it the rest of the way by hand.
With the old pedal removed, you can now move on to installing the new pedal.
Install the New Pedal
Now it’s time to attach the new pedal to your bike and get back on the road! Before starting, make sure to clean the threads of the crank arm to ensure a secure fit.
Apply a thin layer of grease to the pedal threads to prevent rust and make future pedal maintenance easier. Next, line up the threads of the new pedal with the crank arm and begin to tighten by hand.
Once the pedal is securely threaded, use a pedal wrench to tighten it further. Be sure to tighten the pedal to the proper torque, which can be found in the manufacturer’s instructions. It’s important to properly align the pedal to ensure smooth rotation and prevent any damage to the crank arm.
Once the new pedal is securely attached, it’s time to move on to testing it out on the road.
With the new pedal securely attached, it’s important to test it out before hitting the road.
Test the New Pedal
Now that you’ve installed the new pedal on your bike, it’s important to test it out to ensure it’s properly secured and functioning correctly.
Begin by checking the tightness of the pedal using a pedal wrench. Make sure it’s snug and doesn’t wiggle or move around.
Then, take your bike for a test ride, paying attention to any unusual noises or vibrations. This will help you confirm that the new pedal is securely in place and functioning as it should.
Check for Proper Tightness
Make sure the pedal is snug, but not too tight, like a handshake with a good friend. Over-tightening the pedal can cause damage to the threads, making it difficult to remove in the future, while under-tightening can lead to the pedal falling off during a ride.
Here are some tips to check for proper tightness:
- Use a pedal wrench to tighten the pedal securely, but stop when you feel resistance.
- Check the pedal by trying to wiggle it side to side. It shouldn’t move at all.
- If the pedal feels loose, tighten it a little more, but be careful not to strip the threads.
- Avoid the common mistake of not applying enough lubrication to the threads before installing the pedal. This can cause the pedal to become stuck and very difficult to remove later on.
Now that you have checked for proper tightness, it’s time to take your bike for a test ride.
Take Your Bike for a Test Ride
After ensuring the tightness of your pedals, it’s a good idea to take your bike for a quick test ride to ensure everything is working properly. Start by testing the pedal placement. Make sure that your feet are resting comfortably on the pedals and that they’re not slipping off. If you feel any discomfort, adjust the pedal placement until it feels right.
Another thing to consider is the benefits of clipless pedals. Clipless pedals give you more power when pedaling, as they allow you to pull up on the pedals as well as push down. They also keep your feet securely on the pedals, which can be important when riding over rough terrain. Test out your clipless pedals during your test ride to ensure that they’re working properly. If you’re not used to clipless pedals, it may take some time to get used to them, but once you do, you’ll likely never want to go back to regular pedals.
Frequently Asked Questions
How do I know if my pedal needs to be replaced?
So, you think your pedal might need replacing? Signs of wear include wobbling, grinding, or a strange clicking noise. To avoid this, regular maintenance is key. Keep your pedals clean and lubricated.
Can I use any pedal on my bike?
Before changing your bike pedal, ensure pedal compatibility. Not all pedals will fit your bike. Choosing the right pedal depends on your riding style, shoe compatibility, and bike type. Consult with a bike mechanic for expert advice.
Is it necessary to use a specific type of lubricant when installing the new pedal?
To ensure smooth operation and prevent rust, it’s important to use a specific type of lubricant when installing a new bike pedal. Types of lubricants for bike maintenance include grease and oil. Proper lubrication is essential for the longevity and performance of bike pedals.
How tight should I screw the new pedal onto the crank arm?
Ensure proper torque when screwing the new pedal onto the crank arm to prevent loosening or stripping. Use a torque wrench to tighten to manufacturer’s specifications. Regular pedal maintenance is important for safe and efficient riding.
How often should I replace my bike pedals?
Did you know that the average lifespan of bike pedals is around 10,000 miles? Reasons for replacement include worn bearings or cracked bodies. Regular cleaning and lubrication can prolong pedal life.
Conclusion
Congratulations! You’ve successfully learned how to change a bicycle pedal. Now you can customize your bike with the perfect pedals for your riding style. Choosing the right pedal is crucial for a comfortable and efficient ride. Whether you’re a casual cyclist or a competitive athlete, selecting the appropriate pedal can make all the difference in your performance.
Before you begin, make sure you have all the necessary tools and take your time throughout the process. Removing the old pedal may require some elbow grease, but with the right technique, it should come off easily. Installing the new pedal is a breeze, but be sure to tighten it securely to prevent any accidents.
Once you’ve completed the installation, take your bike for a test ride to ensure that the new pedal is functioning properly. You’ll be amazed at the difference a new set of pedals can make on your bike’s performance.
Changing a bicycle pedal may seem daunting, but with this guide, it’ll be a breeze. Take the time to choose the right pedal, gather the necessary tools, and follow the steps provided. You can customize your bike to meet your specific needs. Now you can enjoy a comfortable and efficient ride and show off your new pedals to all your cycling friends. So go ahead and give it a try, and experience the transformation of your bike with new pedals. It’s like giving your bike a pair of wings!