
Sitting here, looking at my dependable bike propped against the wall, its tires worn and covered in dust and gravel, I am reminded of the resilience and adaptability required when navigating difficult terrains.
Changing a bike tire on gravel is not just a mechanical task; it symbolizes our ability to overcome obstacles.
In this precise and detailed guide, I will share with you the necessary steps and techniques to confidently change your bike tire on gravel roads.
Let’s embark on this journey together, empowering ourselves to conquer any road ahead.
Key Takeaways
- Preparation and safety are crucial before changing a bike tire on gravel roads.
- Inspecting the tire for any damage or debris is essential to ensure optimal performance and safety.
- Proper installation of the new tire and inner tube, as well as correct inflation and alignment, are important steps in the process.
- Regular maintenance, including checking tire pressure and cleaning up any debris, helps to prolong the life of the tires and ensure safe riding conditions.
Gather the necessary tools and materials
You’ll need to gather the necessary tools and materials to successfully change a bike tire on gravel.
First and foremost, you will need a spare tire or tube that is compatible with your bike. It’s essential to carry a patch kit as well in case of minor punctures. A set of tire levers will come in handy for removing the old tire from the rim, while a portable pump or CO2 inflator will be needed to inflate the new tire once it’s installed.
When changing a bike tire on gravel, there are common mistakes that should be avoided.
One mistake is not checking for any debris or sharp objects lodged in the tire before installing it. Another mistake is not properly aligning the wheel with the frame, which can cause imbalances and affect riding performance.
To ensure success when changing a bike tire on uneven terrain like gravel, here are some helpful tips.
Firstly, find a flat spot where you feel safe pulling over without obstructing traffic. Secondly, position your bike so that it remains stable during the process and won’t roll away. Lastly, take extra caution when loosening or tightening bolts as loose parts can easily get lost in the rough surface.
Now that we have discussed gathering tools and materials, let’s move on to finding a safe spot to pull over.
Find a safe spot to pull over
First, locate a secure area to pull over on the side of the road. Changing a tire on a busy road can be dangerous, so it is important to find a spot where you can work safely without obstructing traffic. Look for a wide shoulder or an empty parking lot nearby.
If you are changing the tire in the rain, there are some additional tips to keep in mind. Firstly, avoid standing in the middle of the road as it may be slippery and increase your chances of getting hit by passing vehicles. Secondly, park your bike under a shelter if possible to minimize exposure to rainwater. This will make the tire-changing process more comfortable and prevent unnecessary water damage to your bike’s components.
To transition into the next section about releasing the brake and removing the wheel, remember that ensuring safety is crucial throughout this process. Once you have found a safe spot and taken precautions against rain, it’s time to release the brake and remove the wheel.
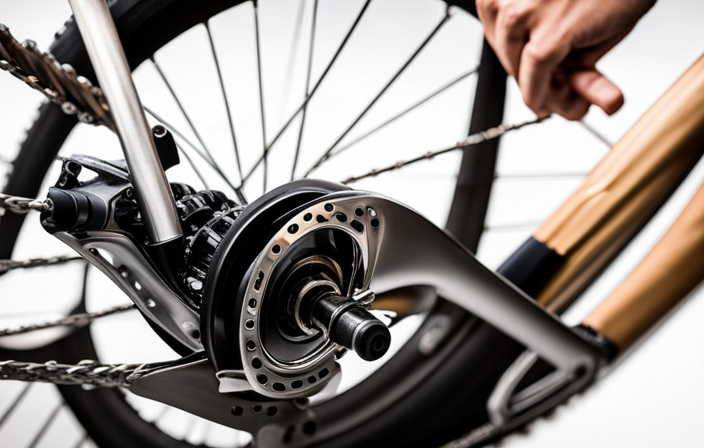
Release the brake and remove the wheel
To start, release the brake and take off the wheel. This is a crucial step in changing a bike tire on gravel as it allows for easy access to the tire. Here are five important things to keep in mind during this process:
-
Safety first: Always ensure that you are in a safe location away from traffic before attempting any repairs on your bike.
-
Brake release technique: Locate the brake lever near the handlebars and squeeze it firmly to loosen the brake pads from the rim of the wheel.
-
Quick-release mechanism: If your bike has a quick-release lever, flip it open or loosen it counterclockwise to release tension on the axle and allow for easy wheel removal.
-
Axle nuts or bolts: If your bike does not have a quick-release lever, use an appropriate wrench to loosen and remove the axle nuts or bolts securing the wheel onto the frame.
-
Wheel removal: Once released, gently slide or lift out the wheel from its position, taking care not to damage any other components.
With these steps completed successfully, you can now proceed to deflate the tire completely. This next phase will prepare you for removing and replacing your damaged gravel bike tire efficiently.
Deflate the tire completely
Once the brake is released and the wheel is removed, make sure to completely deflate the tire before proceeding with the next steps. Proper tire maintenance is crucial for a smooth and safe ride.
To properly deflate the tire, you will need a valve tool or a small screwdriver. Locate the valve on the inner tube, usually near the rim of the wheel. Insert the valve tool into the valve and turn it counterclockwise to release all of the air. You can also press down on the center of the valve with a small screwdriver if you don’t have a valve tool.
Properly deflating your tire allows for easier removal and prevents any potential damage to both your tube and tire during this process. It also ensures that you are starting with a clean slate when it comes to changing your bike’s tire.
Choosing the right tire size is essential for optimal performance and safety. Check your bike’s manual or look for markings on your old tire to determine its size. Make sure that you choose a replacement tire that matches these specifications.
Now that we have completely deflated our tire, let’s move on to using tire levers to remove it from the rim without causing any damage or unnecessary hassle.
Use tire levers to remove the tire from the rim
Using tire levers is an effective way to safely remove the tire from the rim. Tire levers are small, handheld tools that help in prying the tire off the rim without causing any damage. They are especially useful when changing bike tires on gravel roads.
Advantages of using tire levers for removing bike tires:
- Easy Removal: Tire levers provide leverage and make it easier to remove the tire from the rim compared to using bare hands.
- Time-Saving: With their efficient design, tire levers save time by quickly releasing the bead from the rim, allowing for a quicker tire change.
- Minimal Effort: By utilizing proper technique and leveraging the tool’s strength, minimal effort is required to remove stubborn or tight-fitting tires.
Common mistakes to avoid when using tire levers on gravel roads:
| Mistake | Consequence | Solution |
|---|---|---|
| Applying excessive force | Damage to tube or rim | Use controlled force and patience |
| Incorrect lever placement | Pinching or puncturing inner tube | Ensure proper positioning before levering |
| Rushing through the process | Damaging sidewalls or other components | Take time and follow a careful step-by-step approach |
Inspecting the tire for any damage or debris should be done after successfully removing it with tire levers. This ensures that any potential issues can be addressed promptly before proceeding further.
Inspect the tire for any damage or debris
Before proceeding further, make sure to inspect your tire for any signs of damage or debris. This step is crucial in ensuring the safety and longevity of your bike tire. Regular bike tire maintenance is essential to prevent unexpected punctures or blowouts while riding on gravel terrains. Inspecting the tire allows you to identify any potential issues that may affect its performance.
Start by visually examining the entire surface of the tire, looking for cuts, tears, or bulges. These can be caused by sharp objects such as glass shards or thorns commonly found on gravel paths. Additionally, check for any embedded debris like small stones or twigs that could cause further damage if left unattended.
Inspecting the tire also involves checking the tread depth. A worn-out tread can negatively impact traction and increase the risk of slipping on loose gravel surfaces. If you notice significant wear patterns or unevenness, it may be time to replace your bike tire.
Once you have completed a thorough inspection and ensured that there are no visible damages or debris present, you can proceed with installing the new inner tube.
Transitioning into the subsequent section about ‘installing the new inner tube,’ we will now focus on how to properly complete this task without encountering any difficulties.
Install the new inner tube
To install the new inner tube, start by deflating the tire completely. This will make it easier to work with and prevent any accidental damage. Once deflated, remove the tire from the rim using a tire lever or your hands.
Next, inspect the inside of the tire for any sharp objects or debris that could cause another flat. It’s important to thoroughly clean and remove any foreign objects before proceeding.
Once the tire is clean, take your new inner tube and check that it matches the size of your tire. Begin by inserting one end of the inner tube into the valve hole on the rim. Then, gradually work your way around, tucking in the rest of the tube between the rim and tire until it is evenly distributed.
Now comes troubleshooting tips when installing techniques: Ensure that there are no twists or kinks in the inner tube as you inflate it. This can lead to pinching and puncturing once back on gravel terrain. Additionally, be careful not to overinflate as this can also cause blowouts.
With these installing techniques in mind, carefully place the tire back onto the rim without compromising proper alignment.
Carefully place the tire back onto the rim
After ensuring that there are no twists or kinks, I carefully place the tire back onto the rim.
When placing the tire on the rim, it is important to use the proper technique to ensure a secure fit. Start by aligning one side of the tire bead with the rim edge and push it into place using your thumbs. Then, work your way around the circumference of the rim, gradually pushing more of the tire bead onto the rim. Use your hands or a set of tire levers if necessary, but be cautious not to pinch or damage the inner tube.
While placing the tire back onto the rim, there are some common mistakes that you should avoid. Firstly, make sure not to force or stretch the tire excessively as this can cause damage and increase chances of punctures in future rides. Secondly, pay attention to any bulges or unevenness in how the tire sits on top of the rim – these indicate improper placement and need adjustment.
Now that you have successfully placed the tire back onto the rim using proper technique and avoiding common mistakes, it is time to move on to inflating it to its recommended pressure.
Inflate the tire to the recommended pressure
After carefully placing the tire back onto the rim, it is crucial to inflate the tire to the recommended pressure. Maintaining proper tire pressure is of utmost importance for bike safety. Riding with underinflated or overinflated tires can lead to decreased control, increased rolling resistance, and higher risk of punctures.
To determine the right tire pressure for different riding conditions, consider a few tips. For rough gravel surfaces where traction is essential, lower tire pressures provide better grip by increasing the contact patch area. However, be cautious not to go too low as it may cause pinch flats or rim damage.
On smoother gravel roads or pavement sections, slightly higher pressures can improve speed and efficiency while maintaining adequate comfort. It’s important to strike a balance between grip and rolling resistance.
Remember that tire pressure should also be adjusted based on rider weight and preference. Heavier riders may require higher pressures compared to lighter riders.
In summary, proper tire inflation plays a vital role in ensuring safe and enjoyable rides on gravel terrain. Now that we have inflated our tire correctly, let’s move on to reinstalling the wheel onto the bike seamlessly without compromising any components’ alignment or stability.
Reinstall the wheel onto the bike
Attach the wheel back onto your bike, making sure to align it properly and secure it tightly. Start by placing the wheel into the dropouts on the frame, ensuring that the axle slots into place correctly. Once aligned, tighten the wheel bolts evenly on both sides using a wrench or an Allen key. This will ensure that the wheel is securely fastened to the bike and won’t wobble or come loose while riding.
Now that you have reinstalled the wheel, it’s time to realign the brakes. Begin by squeezing the brake lever to bring the brake pads closer together. Next, loosen the bolt holding one of the brake calipers in place and adjust its position so that it lines up with the rim of your tire. Tighten this bolt once you have achieved proper alignment.
Once both calipers are aligned with your tire’s rim, make sure they are centered and not rubbing against either side of the rim when you spin your wheel. If necessary, use a small adjustment screw or bolt on each caliper to fine-tune their position.
With both wheels properly secured and brakes realigned, you can now move on to adjusting them and ensuring proper alignment for optimal performance without any compromises.
Adjust the brakes and ensure proper alignment
To properly adjust the brakes and ensure proper alignment, start by squeezing the brake lever to bring the brake pads closer together. This will allow for easier troubleshooting of any alignment issues and improve braking performance. Once the brake lever is squeezed, visually inspect the alignment of the brake pads with the rim of the wheel. They should be centered and evenly spaced on either side of the rim. If there are any misalignments, loosen the bolts that hold the brake calipers in place using a wrench or Allen key. Gently move the caliper until it is aligned with the rim, making sure it doesn’t touch or rub against it. Tighten back up all bolts once alignment is achieved.
Incorporating a table can help organize this process:
| Step | Action |
|---|---|
| 1 | Squeeze brake lever to bring pads closer together |
| 2 | Visually inspect pad alignment with wheel rim |
| 3 | Loosen caliper bolts |
| 4 | Align caliper with rim |
| 5 | Tighten caliper bolts |
After adjusting and aligning your brakes, you can proceed to test your tire’s security by giving it a firm tug or gently rocking it back and forth. It should feel tight and secure without any wobbling or movement.
Transitioning into testing: Now that we have ensured proper brake adjustment and alignment, let’s move on to testing whether our tire is securely in place by performing some simple checks…
Test the tire to ensure it is securely in place
Now let’s check if the tire is firmly secured in place by performing some simple tests.
To ensure the tire is securely attached, follow these steps:
-
Test the tire pressure: Using a tire gauge, check the air pressure of the newly installed gravel bike tire. The recommended pressure can usually be found on the sidewall of the tire. Adjust as necessary to meet this specification.
-
Inspect the tire tread: Examine the surface of the tire for any signs of wear or damage. Make sure there are no cuts, punctures, or uneven tread patterns that could affect performance and safety while riding on gravel terrain.
-
Give it a spin: Lift the bike off the ground and spin each wheel individually. Observe if there is any wobbling or rubbing against brake pads or frame components. This will indicate if there are any alignment issues that need to be addressed.
-
Push and pull: While holding onto both ends of each wheel, give them a firm push and pull in different directions. There should be minimal movement or play between the axle and fork/frame interfaces.
Once you have completed these tests to ensure proper attachment and alignment, you can proceed to clean up any debris or tools left from changing your bike tire without delay.
Note: It’s important to regularly inspect your tires before every ride to maintain optimal performance and safety on gravel surfaces.
Clean up any debris or tools
Make sure you clean up any debris or tools left from the tire change process to ensure a tidy workspace. Cleaning techniques can vary depending on the type of debris present. For dirt and mud, use a damp cloth or sponge to wipe down the affected areas. If there are any grease or oil stains, apply a degreaser and scrub gently with a brush before wiping it clean. Organizing tools is essential to prevent misplacing them and making future repairs easier. Consider using a toolbox or designated storage area for bike repair tools. Additionally, creating a system where each tool has its place will save time searching for specific items later on.
| Tool | Description | Purpose |
|---|---|---|
| Wrench | A metal tool with adjustable jaws used for tightening nuts and bolts | Loosen or tighten bolts holding the wheel in place |
| Tire lever | A curved plastic or metal tool used to remove the tire from the rim without damaging it | Assist in removing and installing the tire |
| Patch kit | Contains patches, adhesive, and sandpaper used to repair small punctures in the inner tube | Fix minor damages |
Now that your workspace is clean and organized, it’s important to check the tire pressure before continuing your ride.
Check the tire pressure before continuing your ride
Before you continue your ride, be sure to check the tire pressure. It is crucial to regularly check the tire pressure on your bike to prevent accidents and ensure a smooth and safe ride. Understanding the importance of maintaining proper tire pressure can greatly enhance your biking experience.
To begin, grab a reliable tire pressure gauge. Remove the valve cap from the tube’s valve stem and press the gauge onto it firmly. The gauge will display a reading indicating the current pressure in pounds per square inch (PSI). Compare this reading to the recommended PSI range specified by the manufacturer for optimal performance.
If the tire pressure is too low, use a pump with a built-in gauge to add air until it reaches the desired level. Conversely, if it is too high, release some air using either a valve tool or by gently pressing down on the valve stem until you achieve the correct PSI.
Remember that maintaining proper tire pressure not only enhances traction but also improves comfort while riding on gravel roads. By practicing changing a tire on such surfaces, you can further develop your skills and confidently handle unexpected situations during rides.
In conclusion, checking your bike’s tire pressure regularly ensures safety and optimal performance. Now let’s move on to practicing changing tires on gravel roads to improve your skills further.
Practice changing a tire on gravel roads to improve your skills
To enhance your skills, practicing tire replacement on gravel roads is essential. Not only will it improve your efficiency in changing a bike tire, but it will also help you prevent flat tires while riding on rough terrains.
Changing a tire on gravel can be more challenging than on smooth pavement due to the uneven surface and potential for loose rocks. However, with the right technique and proper tools, it can be done effectively.
Firstly, find a safe spot off the road to perform the tire change. Make sure you have all the necessary tools: a spare tube or patch kit, tire levers, and a pump. Start by removing the wheel from the bike frame using quick release skewers or nuts.
Next, use the tire levers to gently pry one side of the tire off the rim. Be cautious not to damage the inner tube. Once one side of the tire is off, remove any debris that may have caused the flat. Inspect both sides of the inside of your tire thoroughly to ensure there are no sharp objects stuck in it. This step is crucial as it prevents future flats caused by punctures from gravel or other road hazards.
After inspecting and cleaning both sides of the inside of your tire, carefully place one side back onto the rim using your hands or leverage from your tire levers if needed. Then proceed to insert your new tube or patch kit into place before fitting in and securing the other side of the tire onto its corresponding rim.
Finally, inflate your newly replaced tube to an appropriate pressure level recommended by your bike manufacturer or within a specific range suitable for gravel riding conditions. Check for any visible bulges or misalignment between rim and sidewall as these could lead to another flat if not properly corrected.
Practicing changing a bike tire on gravel roads will significantly improve your skills and enable you to handle unexpected situations efficiently while preventing unnecessary delays during rides due to punctures caused by rough terrain hazards.
Frequently Asked Questions
What are the necessary tools and materials needed to change a bike tire on gravel?
To change a bike tire on gravel, you will need a few essential tools and materials.
Firstly, ensure you have a tire lever to remove the old tire easily.
Additionally, having a pump is crucial for finding the right tire pressure for optimal performance on different terrains.
To prevent punctures, consider using puncture-resistant tires or installing tire liners or sealant inside the tubes.
These measures will help ensure a smooth and hassle-free ride on gravel surfaces.
How do I find a safe spot to pull over when changing a bike tire on gravel?
When it comes to finding a safe spot to pull over while changing a bike tire on gravel, I must say it’s quite an exhilarating challenge.
One must carefully navigate the treacherous terrain, ensuring that no loose rocks or uneven surfaces hinder the task at hand. It is essential to locate a flat and stable area, far from any potentially dangerous obstacles.
Remember, safety first!
Now let’s delve into the proper technique for changing that tire on gravel.
How do I release the brake and remove the wheel on a bike tire when changing it on gravel?
To release the brake and remove the wheel on a bike tire, start by locating the brake lever near the handlebars. Squeeze the brake lever to loosen it, allowing enough slack for the wheel to be removed.
Next, locate the quick-release lever or axle nuts on both sides of the wheel hub. Loosen these to detach the wheel from the frame.
Once released, carefully lift and pull the wheel away from the bicycle frame.
Are there any specific instructions for cleaning up debris or tools after changing a bike tire on gravel?
When it comes to cleaning up debris after changing a bike tire on gravel, it is important to ensure a thorough and proper disposal of tools.
Begin by carefully collecting any loose gravel or dirt that may have accumulated during the tire change process.
Use a broom or brush to sweep away larger debris, making sure to dispose of it in an appropriate trash receptacle.
Additionally, wipe down any tools used with a clean cloth before storing them away properly for future use.
How can I practice changing a tire on gravel roads to improve my skills?
To practice changing a tire on gravel roads and improve my skills, I focus on two techniques: proper tire placement and avoiding punctures.
Firstly, I ensure the bike is stable by placing it on a flat surface. Then, I position the new tire correctly, aligning the valve stem with the rim hole.
Secondly, I meticulously inspect the gravel for sharp objects that could cause punctures.
By honing these techniques, I can confidently handle tire changes on challenging terrain.
Conclusion
In conclusion, changing a bike tire on gravel roads requires careful attention to detail and precise execution. It is like navigating through treacherous terrain, where every move must be calculated and deliberate.
By following the steps outlined in this article and practicing your skills, you will become proficient in handling such situations. Remember to gather the necessary tools, find a safe spot to pull over, and ensure that the tire is securely in place before continuing your ride.
Happy cycling!