
Every cyclist should be equipped with the knowledge to fix a flat bicycle tire. It’s a straightforward procedure, yet it can become irksome if you lack familiarity with the steps involved.
I remember my first time getting a flat tire on a ride – I had no idea what to do, and had to call a friend to come pick me up. But after learning how to change a tire, I’ve been able to handle the situation on my own and continue my ride without any issues.
In this article, I’ll walk you through the steps to change a flat tire, so you can feel confident and prepared the next time you encounter this common problem.
Before we get started, you’ll need a few tools to make the process easier. But don’t worry, you don’t need a lot of fancy equipment – just a few basic items that you should always carry with you on a ride.
With these tools and a little know-how, you’ll be able to fix a flat tire in no time. So let’s get started and learn how to change a flat bicycle tire!
Key Takeaways
- Regularly check tire pressure and replace worn tires to prevent flat tires.
- Use tire levers, spare tube/patch kit, and pump/CO2 inflator to repair a flat tire.
- Consider tubeless tires for self-sealing punctures.
- Carry spare tube and patch kit for emergency repairs.

Schwinn Sporterra RX Gravel Bike, 700c Mens and Womens Bike, 14-Speed Drop Bar Gravel Bicycle, Mechanical Disc Brakes, Rigid Fork, Aerodynamic Riding Position, Quick Release Seat Post, Adult Bicycle
GRAVEL BICYCLE: Enjoy next level riding with the Sporterra RX by Schwinn. With 700c wheels, this mens and...
As an affiliate, we earn on qualifying purchases.
Identify the Problem
Identify the problem.
Before you can get back on your bike, you’ll need to figure out what caused your flat tire. The most common cause of flat tires is a puncture caused by a sharp object like a nail or piece of glass. Other causes include worn or damaged tires, improper inflation, and rim damage. To prevent flat tires, it’s important to check your tire pressure regularly, avoid riding over debris on the road, and replace worn tires before they become too damaged.
Once you’ve identified the cause of your flat tire, it’s time to gather the necessary tools to fix the problem.

Swagman Standard Fork Mount Rooftop Bike Carrier
EASY TO ASSEMBLE: The STANDARD is easy to assemble with no tools required, sets up in just minutes...
As an affiliate, we earn on qualifying purchases.
Gather the Necessary Tools
As you embark on your journey, make sure to pack your trusty kit full of essential items to ensure a smooth ride. Here are three tools that you need to gather before changing a flat bicycle tire:
-
A spare tube or patch kit: Always carry a spare tube or patch kit so that you can repair the punctured tube on the spot. Make sure your patch kit has all the necessary components, such as patches, glue, and sandpaper.
-
Tire levers: These small plastic or metal levers will help you remove the tire from the rim. They come in handy when the tire is too tight to remove by hand.
-
Pump or CO2 inflator: Proper inflation is key to preventing future flats. You’ll need a pump or CO2 inflator to inflate the tire after you’ve replaced or patched the tube.
Now that you’ve got all the necessary tools, it’s time to move on to the next step: removing the wheel and tire.
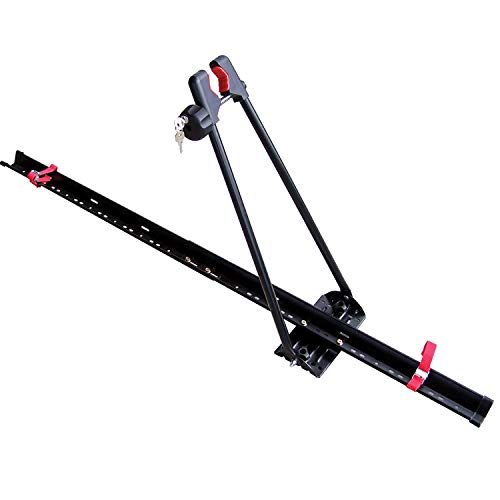
Swagman UPRIGHT Roof Mount Bike Rack
EASY TO ASSEMBLE: The UPRIGHT roof rack installs in minutes following the instructions and carries one bike with...
As an affiliate, we earn on qualifying purchases.
Remove the Wheel and Tire
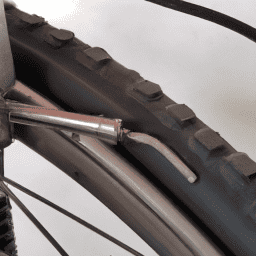
First, you’ll need to loosen the bolts or quick release lever on your wheel using a wrench or your hands. Once the wheel is loose, carefully lift it off the frame and set it aside. Next, use tire levers to pry the tire away from the rim. Starting at the valve stem, insert the lever under the bead of the tire and lift it up and over the rim. Move a few inches down the tire and repeat the process until you can remove the tire from the rim completely.
Before installing the new tube and tire, it’s important to check for the proper tire pressure and identify common causes of flats. Proper tire pressure can prevent flats and also provide a smoother ride. The recommended tire pressure is usually written on the sidewall of the tire. Common causes of flats include punctures from sharp objects, pinch flats from hitting curbs or potholes, and worn out or damaged tires. By identifying these causes, you can take preventative measures to decrease the likelihood of experiencing a flat in the future. With the tire removed and these precautions taken, you’re ready to move on to installing the new tube and tire.

SYDSZ Roof Bike Rack Mount Upright Roof Bike Rack 1 Bike Carrier Car Roof Bicycle for Car Only Suitable for Removable Universal Crossbars
【COMPATIBILITY】Only applicable for installation on the driver's roof, fits 20" - 29" wheels. 64" long tray. Fits up...
As an affiliate, we earn on qualifying purchases.
Install the New Tube and Tire
Once you’ve ensured the tire pressure is correct and identified potential causes of future flats, it’s time to mount the new tire onto the rim. Start by fitting the valve stem into the hole on the rim and work the tire onto the rim, starting at one side and working around until the other side is in place. Be sure to keep the tube inside the tire as you work, and be careful not to pinch the tube between the tire and the rim.
Once the tire is in place, use your hands to make sure the tire is seated evenly all the way around the rim. Proper inflation is crucial for the longevity of your new tire. Be sure to inflate the tire to the recommended pressure, which is usually indicated on the side of the tire.
Additionally, consider the tire tread when choosing a replacement tire. Different types of tread are better suited for different terrain. Lastly, consider whether a tubeless tire or a tube tire is right for you. Tubeless tires are becoming increasingly popular due to their ability to self-seal small punctures, but they require a specific type of rim and may not be compatible with all bikes.
When you’ve finished installing the new tube and tire, it’s time to reattach the wheel and test the tire for proper inflation and alignment.
Reattach the Wheel and Test the Tire
To ensure a smooth and safe ride, it’s crucial to properly reattach the wheel and check the tire’s alignment and inflation.
First, I align the axle with the dropouts and tighten the quick release lever. I then spin the wheel and check that it’s centered and not rubbing against the brake pads. If it’s off-center, I loosen the quick release and adjust the axle until it’s straight.
Next, I check the tire’s pressure using a tire gauge. It’s important to inflate the tire to the recommended pressure range, which is usually indicated on the tire sidewall. If the pressure is too low, it can cause the tire to pinch flat easily, while overinflation can cause the tire to burst.
Finally, I practice an emergency repair by carrying a spare tube and a patch kit in case of another flat tire.
With these steps, I can confidently hit the road knowing my bike is ready for any adventure.
Frequently Asked Questions
How often should I check my bike tires for wear and tear?
I make sure to perform proper maintenance on my bike by checking my tires regularly for wear and tear. I use various checking techniques, such as visually inspecting the tread and feeling for any bumps or roughness.
Can I reuse the old tube or do I need to buy a new one?
When it comes to tube maintenance, patching techniques can come in handy. However, it is not recommended to reuse an old tube once it has been punctured. It is better to purchase a new one for optimal safety and performance.
What should I do if I don’t have a spare tube or tire?
Oh no, I’m stranded without a spare tube or tire! Don’t panic, there are temporary fixes like using a patch kit to seal the puncture. Make sure to clean and dry the area before applying the patch, and inflate the tire to the recommended pressure.
How do I prevent getting a flat tire in the first place?
To prevent getting a flat tire, I regularly check my bike’s tire pressure and perform proper bike maintenance. This includes cleaning and lubricating the chain, inspecting the tires for wear and tear, and ensuring all bolts and screws are tightened.
What should I do if I encounter a more complex issue, like a bent rim or broken spoke?
If I encounter a more complex issue like a bent rim or broken spoke, I would first try fixing the bent rim with tips and tricks from online resources. If unsuccessful, I would find a bike repair shop with experienced technicians and good reviews.
Conclusion
In conclusion, changing a flat bicycle tire is a simple task once you know how to do it. The process involves identifying the problem, gathering the necessary tools, removing the wheel and tire, installing the new tube and tire, reattaching the wheel, and testing the tire.
It may seem like a daunting task, but with practice, you’ll be able to change a tire in no time. For example, I once had a flat tire while on a bike ride with friends. We were in the middle of nowhere and had no cell phone reception. I was the only one in the group who knew how to change a tire, so I quickly got to work.
It took me about 10 minutes to change the tire, and we were back on the road in no time. Without this knowledge, we would have been stranded for hours. Therefore, it’s important to learn how to change a flat tire, not only for convenience but also for safety.