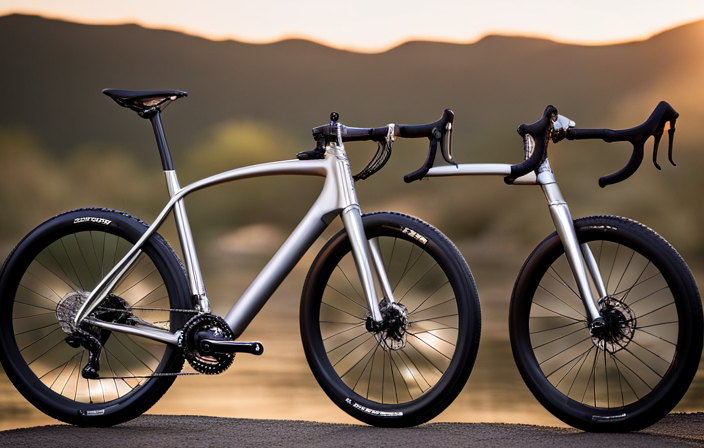
When upgrading your gravel bike, swapping out the stem can greatly improve both performance and comfort.
In this step-by-step guide, I’ll show you how to effortlessly swap out your old stem for a new one.
By gathering the necessary tools and equipment, identifying the correct stem size and type, and carefully removing the old stem, you’ll be well on your way to enjoying a customized ride that perfectly suits your needs.
Let’s dive in!
Key Takeaways
- Gathering the necessary tools and equipment such as Allen wrenches, torque wrench, ruler or tape measure, grease, and potentially a facing tool.
- Inspecting the old stem for wear or damage and considering stem maintenance for preventing future issues.
- Identifying the correct stem size and type by measuring the handlebar diameter and consulting a compatibility chart or professional.
- Removing handlebar grips or tape carefully to access the stem bolts and exploring alternative grip or tape options if desired.
iGPSPORT BSC300T Wireless Bike Computer GPS, Touchscreen Offline MAP Navigation Off Course Warning Compatible with Insta360, for Ebike Road Bike MTB (Touch Screen&Button)
【Large Screen】The BSC300T wireless bike computer equipped with a 2.4'' touch screen and 6 buttons, allowing you to...
As an affiliate, we earn on qualifying purchases.
Gather the necessary tools and equipment
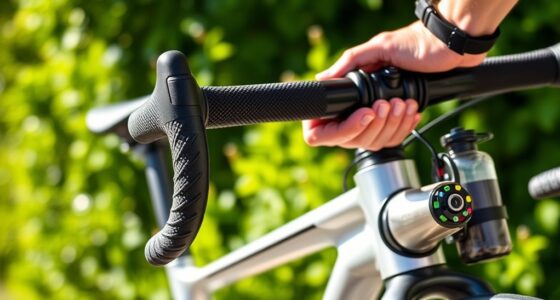
You’ll need to gather the necessary tools and equipment in order to successfully change the stem on your gravel bike. Before starting, make sure you have a set of Allen wrenches, a torque wrench, a ruler or tape measure, grease, and potentially a facing tool. These tools will ensure that you have everything you need for a smooth and efficient stem replacement.
Firstly, it’s important to note that stem installation tips are crucial for ensuring the stability and safety of your bike. When removing the old stem, use an Allen wrench to loosen the bolts securing it in place. Once removed, inspect the stem for any signs of wear or damage. Stem maintenance and care are essential for preventing future issues.
Next, identify the correct stem size and type for your bike. Measure the diameter of your handlebar using a ruler or tape measure. This measurement will determine what size stem you need to purchase. Additionally, consider whether you want an adjustable or fixed angle stem depending on your riding preferences.
By gathering all the necessary tools and understanding proper installation techniques, you can ensure a successful stem replacement on your gravel bike.

COOSPO Color Touchscreen GPS Bike Computer CS600, Wireless IPX7 Waterproof Cycling GPS Speedometer with Bluetooth/ANT+, Backlight Route Navigation, Support Bike Radar & 36H Battery Life
2.4" HIGH-RESOLUTION COLOR TOUCHSCREEN: Features auto-backlight technology that intelligently adjusts to ambient light, ensuring optimal visibility and effortless...
As an affiliate, we earn on qualifying purchases.
Identify the correct stem size and type for your bike
To identify the correct size and type for your bike’s stem, first measure the handlebar diameter. This is crucial as different stems are designed to fit specific handlebar diameters.
To measure the handlebar diameter accurately, follow these steps:
- Use a caliper or ruler with millimeter measurements to determine the diameter of your handlebars.
- Measure at multiple points along the handlebars to ensure accuracy, as they may have slight variations in diameter.
- Once you have measured the diameter, refer to a stem compatibility chart provided by your bike manufacturer or consult with a professional at a bike shop.
Choosing the right stem for optimal performance is essential for comfort and control while riding your gravel bike. The stem connects the handlebars to the bike’s fork steerer tube and influences your riding position.
Now that you have identified the correct stem size and type based on your handlebar diameter, it’s time to remove the handlebar grips or tape before proceeding further.

Magicshine HORI1300S Bike Headlight, Compatible with Garmin/Wahoo, 1300 Lumens High & Low Beam Front Light, USB-C Rechargeable, IPX6 Waterproof for Night Riding and Urban Cycling-Black
DUAL OPTICS, HIGH & LOW BEAM: Max 1300LM high beam conquers the darkest trails. The anti-glare low beam...
As an affiliate, we earn on qualifying purchases.
Remove the handlebar grips or tape
Before moving forward, make sure you remove the handlebar grips or tape. This step is crucial to accessing the bolts that hold the stem in place.
To replace handlebar grips, start by loosening the end plugs with a screwdriver or Allen wrench. Once removed, gently slide off the grips from the handlebars.
For handlebar tape, begin by unwrapping it carefully from one end towards the other. Take note of how it was wrapped so you can replicate it later if desired.
When removing the grips or tape, be cautious not to damage them as they may still be reusable. If you prefer a different type of grip or tape for your new stem setup, now is a good time to explore alternative options available in bike shops or online.
Now that we have successfully removed the handlebar grips or tape, we can proceed to loosen and remove the bolts holding the old stem in place.

Schwinn High Timber ALX Mountain Bike for Adult Men Women, 27.5-Inch Wheels, 21-Speeds, Front Suspension, Aluminum Frame, Mechanical Disc Brakes, Yellow
Lightweight 17 inch aluminum mountain frame is the perfect bike for rides around your neighborhood or trails with...
As an affiliate, we earn on qualifying purchases.
Loosen and remove the bolts holding the old stem in place
Now, it’s time to loosen and remove those bolts securing the old stem in place. Before we begin, let’s discuss a few potential issues and troubleshooting tips when removing old stems.
-
Rusty or stripped bolts: If the bolts are stuck or difficult to turn due to rust or striping, applying some penetrating oil can help loosen them. Use a proper wrench or Allen key for leverage and slowly turn the bolts counterclockwise.
-
Different types and materials of stems: Stems come in various types such as quill, threadless, or adjustable stems. They are also made from different materials like aluminum, carbon fiber, or steel. Each type and material has its own impact on bike performance in terms of weight, stiffness, and vibration dampening.
-
Proper alignment: It is crucial to ensure that the stem is aligned correctly with the front wheel and handlebars before tightening the bolts on a new stem. Misalignment can lead to poor handling and compromise safety.
-
Torque specifications: When installing a new stem, always follow manufacturer’s recommendations for torque specifications of the bolts holding it in place. Over-tightening can damage components while under-tightening can result in looseness and instability.
Having discussed these ideas, now we can carefully lift and remove the old stem from the steerer tube without causing any damage or misalignment to our gravel bike setup.
Carefully lift and remove the old stem from the steerer tube
First, gently lift and remove the old stem from the steerer tube. To do this, loosen any remaining bolts or clamps that may be securing the stem in place. Once loosened, carefully lift the stem straight up and away from the steerer tube, taking care not to damage any surrounding components.
Before installing a new stem, it is important to determine the correct length for your specific bike fit. Choosing the right stem length will help ensure optimal comfort and control while riding. Consider factors such as your riding style, body proportions, and personal preferences when selecting a suitable stem length.
Additionally, when replacing a stem on a gravel bike, it is often necessary to install a stem spacer. This spacer helps achieve proper handlebar height and alignment with the front wheel. Be sure to choose an appropriate spacer size based on your desired handlebar position.
With the old stem removed and measurements taken into account, you can now move on to cleaning the steerer tube and handlebar area before installing the new stem.
Clean the steerer tube and handlebar area
To properly prepare for installing the new stem, it’s important to thoroughly clean the steerer tube and handlebar area. This ensures a secure and reliable connection between the components. Cleaning techniques may vary depending on personal preference, but I recommend using a degreaser or mild soap solution along with a soft brush or cloth.
Start by removing any dirt, grime, or old grease from both the steerer tube and handlebar area. Pay close attention to hard-to-reach spots such as crevices and corners.
Once cleaned, inspect the surfaces for any visible damage or wear. Look out for signs of corrosion or pitting that might compromise the integrity of the connection. If necessary, address these issues before proceeding with installation.
Maintenance tips: Apply a thin layer of grease to both the steerer tube and handlebar area to prevent corrosion and facilitate easy assembly. Avoid over-greasing as this can attract dirt and cause slippage.
With the steerer tube and handlebar area now clean and prepped for installation, we can move on to the next step: installing the new stem onto the steerer tube.
Install the new stem onto the steerer tube
After cleaning the steerer tube and handlebar area, it’s time to install the new stem onto the steerer tube. This step is crucial in ensuring a secure and stable connection between the handlebars and the bike frame.
To begin, I carefully slide the stem over the top of the steerer tube, making sure it is aligned properly.
Once in position, I insert the bolts through the stem clamp and into the threads on the steerer tube. Using an Allen wrench, I tighten each bolt evenly in a crisscross pattern to ensure equal pressure distribution. It’s important not to overtighten as this can strip or damage threads.
Next, I double-check that all bolts are tightened to their recommended torque specifications using a torque wrench. This guarantees that they are secure but not excessively tight.
With the stem securely fastened to the steerer tube, I am now ready to align the handlebars to my desired position. This will allow for optimal comfort and control while riding.
Align the handlebars to the desired position
Now, you can position the handlebars to your desired angle and height for the most comfortable riding experience. Adjusting handlebar height is crucial in achieving optimal comfort and control on your gravel bike. To help you with this process, refer to the table below for a quick reference guide:
| Height Adjustment | Handlebar Position |
|---|---|
| High | Raised |
| Medium | Neutral |
| Low | Dropped |
Start by loosening the bolts on the stem using an allen wrench. This will allow you to freely adjust the handlebar position. Once loose, you can raise or lower the stem according to your preference. Take into consideration factors such as your body proportions and riding style when choosing the right handlebar width.
After finding your desired angle and height, tighten the bolts on the new stem, ensuring proper torque. It is important not to overtighten as it may damage the components or cause them to slip during rides. With this step complete, you are ready to move on to tightening the bolts on the new stem, ensuring proper torque.
Transitioning into tightening the bolts on the new stem will ensure that everything remains secure during rides without any unnecessary movement or potential dangers.
Tighten the bolts on the new stem, ensuring proper torque
After aligning the handlebars to your desired position, it is crucial to properly tighten the bolts on the new stem using the appropriate torque. The torque refers to the amount of force applied to secure the bolts without damaging them or causing them to come loose during rides. Ensuring proper torque is essential for a safe and reliable riding experience.
To achieve proper torque, start by tightening each bolt evenly in a diagonal pattern. This will help distribute the pressure evenly and prevent any stress concentration on one side of the stem. Use a torque wrench set at the manufacturer’s recommended specification, as over-tightening can lead to bolt failure or damage to your components.
One common mistake when installing a new stem is not using enough torque, which can result in loose bolts that may cause instability while riding. Conversely, applying too much torque can lead to stripped threads or even breakage of bolts.
By following these guidelines and paying attention to proper torque importance, you can avoid potential issues down the road and ensure a secure fit for your new stem.
Now let’s move on to how we can reinstall the handlebar grips or tape seamlessly into our gravel bike setup.
Reinstall the handlebar grips or tape
To ensure a secure and comfortable grip, it’s important to reinstall the handlebar grips or tape properly. When reinstalling handlebar grips, start by removing any old tape or residue from the handlebars. Then, apply a small amount of rubbing alcohol to clean the surface and allow it to dry completely.
Next, choose the right handlebar tape for your preferences and riding style. There are various types of handlebar tapes available, such as cork, foam, and gel. Consider factors like cushioning, grip, and durability when making your selection.
Once you have chosen the appropriate tape, begin wrapping it around the handlebars in a clockwise direction. Make sure each wrap overlaps with the previous one by about half its width. Pull the tape tight but avoid stretching it too much as this can cause it to tear or become loose over time.
To create a neat finish at the end of the handlebars, use electrical tape or finishing strips provided with some tapes. This will prevent unraveling and also give a professional look.
In conclusion, reinstalling handlebar grips or applying new tape is crucial for maintaining control and comfort while riding your gravel bike. After completing this step, double-check the alignment and tightness of all components to ensure everything is securely in place before moving on to the subsequent section about checking alignment and tightness without writing ‘step’.
Double-check the alignment and tightness of all components
Make sure to check that all the components are properly aligned and tightened. Regularly checking and maintaining the alignment and tightness of bike components is crucial for optimal performance.
When it comes to installing a new stem on a gravel bike, there are some common mistakes that should be avoided.
Firstly, it is essential to ensure that the stem is aligned with the front wheel. Misalignment can result in handling issues and compromise safety. Use a straight edge or laser tool to check if the stem is parallel with the front wheel.
Secondly, tighten all bolts securely but be careful not to over-tighten them. Over-tightening can damage parts or create stress points that may lead to failure. Refer to the manufacturer’s specifications for recommended torque settings and use a torque wrench for precise tightening.
Additionally, double-check that other components such as handlebars, headset bearings, and spacers are also properly aligned and tightened. Any loose or misaligned parts can affect steering control and stability.
By ensuring proper alignment and tightness of all components, you will have a more enjoyable riding experience with improved performance and reduced risk of mechanical failures.
Now it’s time to take your bike for a test ride to ensure proper fit and comfort during your rides without compromising safety or performance.
Take your bike for a test ride to ensure proper fit and comfort
Ensure that you take your bike for a test ride to make sure it fits properly and is comfortable for your rides. A test ride is crucial because it allows you to assess the bike’s performance and identify any issues that may need attention. By taking the time to test ride your gravel bike, you can experience firsthand how it handles different terrains and understand its overall comfort level.
The benefits of a test ride are numerous. Firstly, it enables you to evaluate the fit of the bike. During the ride, pay attention to how your body feels in relation to the handlebars, saddle, and pedals. Ensure that there is no discomfort or strain on your back, neck, or wrists. Secondly, a test ride helps you determine if any adjustments need to be made to the stem position or angle for optimal riding posture.
However, there are common mistakes that people often make during test rides. One mistake is not spending enough time on the bike. It’s important to take an extended ride rather than just a quick spin around the block. Another mistake is not testing the bike on various surfaces such as pavement, gravel roads, or off-road trails. This will give you a better understanding of how well the bike performs in different conditions.
After completing your test ride and evaluating its fit and comfort level, it’s time to make any necessary adjustments to the stem position or angle for optimal performance and personal preference without compromising safety or stability on future rides with your newly fitted gravel bike.
Make any necessary adjustments to the stem position or angle
After taking your gravel bike for a test ride, be sure to adjust the stem position or angle if needed for optimal comfort and performance. Proper stem adjustment is crucial in achieving a comfortable riding position and efficient power transfer. Here are some important steps to follow when making adjustments:
-
Adjusting stem height: Start by loosening the bolts that secure the stem to the steerer tube. Use an Allen wrench to raise or lower the stem as needed. Make sure it is aligned with the front wheel and tighten the bolts securely.
-
Evaluating handlebar reach: This refers to the distance between your saddle and handlebars. To achieve a balanced position, loosen the faceplate bolts on top of the stem using an Allen wrench. Slide the handlebars forward or backward accordingly, ensuring they are centered with respect to your shoulders.
-
Check alignment: Ensure that both sides of your handlebars are parallel to the front wheel. Adjust as necessary, making small incremental changes until they are perfectly aligned.
-
Double-check tightness: After adjusting both stem height and handlebar reach, tighten all bolts securely using an appropriate torque wrench. This will prevent any unwanted movement during rides.
-
Re-test fit: Take your gravel bike for another short test ride after making these adjustments to evaluate if further fine-tuning is required.
Now that you have adjusted your stem position and angle for optimal comfort and performance, it’s important to check and re-tighten all bolts after a few rides without compromising their integrity.
Check and re-tighten all bolts after a few rides
Don’t forget to regularly check and tighten all the bolts on your bike after a few rides to ensure their integrity. This is an important step in maintaining the safety and performance of your gravel bike.
Re-tightening the bolts is necessary because vibrations from riding can cause them to loosen over time. The frequency at which you should check and re-tighten the bolts will depend on how often you ride and the conditions you ride in.
It is recommended to check all the bolts, including those on the stem, handlebars, and headset, every 10-15 rides or approximately once a month. Start by using an appropriate torque wrench to ensure that each bolt is tightened to its recommended torque specification. Make sure not to overtighten as this can damage the components or strip the threads.
During this process, pay close attention to any signs of wear or damage on the bolts or surrounding areas. If you notice any issues, such as rust or stripped threads, it may be necessary to replace the affected parts.
By regularly checking and re-tightening all bolts on your gravel bike, you can prevent potential accidents caused by loose components. Once you have ensured that everything is secure, you can enjoy your customized gravel bike with confidence knowing that it is safe for your next adventure!
Enjoy your customized gravel bike with the new stem!
Now that you have your new stem installed, it’s time to fully appreciate and enjoy the personalized features of your upgraded ride! A customized gravel bike offers numerous benefits that enhance your overall riding experience. Here are four key advantages of having a customized bike:
-
Optimal Fit: With a new stem, you can achieve the perfect handlebar position, allowing for improved comfort and control during long rides. The ability to adjust the stem’s length and angle ensures a tailored fit based on your body proportions.
-
Enhanced Performance: By customizing your gravel bike, you can optimize its performance to suit your riding style. Whether you prefer aggressive off-road adventures or smooth city commutes, adjusting the stem enables better handling and responsiveness.
-
Improved Efficiency: A personalized setup reduces energy wastage by ensuring an efficient transfer of power from your body to the pedals. With an accurately positioned stem, each pedal stroke becomes more effective, resulting in increased speed and reduced fatigue.
-
Injury Prevention: Customized modifications minimize the risk of discomfort or injury caused by poor bike fit. Proper alignment between the stem, handlebars, and saddle promotes proper posture while reducing strain on joints such as wrists and shoulders.
By taking advantage of a customized gravel bike with a new stem, you can unlock these benefits for an enhanced cycling experience tailored specifically to your needs and preferences. Enjoy exploring new trails and conquering challenging terrains with confidence!
Frequently Asked Questions
How do I determine the correct stem size and type for my gravel bike?
To determine the correct stem size and type for your gravel bike, there are two key factors to consider: determining stem length and choosing the appropriate stem material.
Stem length is determined by your riding style, body proportions, and bike fit. It affects the bike’s handling and comfort.
When it comes to choosing a stem material, options include aluminum, carbon fiber, or titanium. Each has its own characteristics in terms of weight, stiffness, and durability.
What tools and equipment do I need to change the stem on my gravel bike?
To remove an old stem on my gravel bike, I need a few specific tools and equipment.
Firstly, I require an Allen wrench or hex key to loosen the bolts securing the stem to the steerer tube.
Additionally, a torque wrench is necessary to ensure proper tightening of the new stem.
Other tools that may come in handy include a hammer for gentle tapping and a rubber mallet for adjustments.
Changing the stem on my gravel bike offers several benefits such as improved comfort, better handling, and customization options.
How do I properly align the handlebars to the desired position?
To properly align the handlebars to the desired position, follow these proper handlebar adjustment techniques.
First, sit on the bike and grip the handlebars naturally. Ensure your elbows are slightly bent for comfort and control.
Next, adjust the stem angle and length if necessary to achieve a comfortable riding position. Experiment with small adjustments until you find the ideal handlebar position that allows for optimal control and minimizes strain on your wrists and shoulders.
What is the proper torque for tightening the bolts on the new stem?
The proper torque for stem bolts is crucial to ensure the safety and functionality of your bike. Over tightening can lead to damage, while under tightening can result in a loose stem that compromises steering control.
To avoid these issues, consult the manufacturer’s guidelines for the specific torque specifications of your stem bolts. Be sure to use a torque wrench and apply the recommended torque evenly across all bolts to achieve optimal performance and prevent any potential mishaps on your rides.
How often should I check and re-tighten the bolts after changing the stem on my gravel bike?
I should check the torque on the stem bolts regularly to ensure they remain properly tightened. It is recommended to do this every 100-200 miles or every month, whichever comes first.
To check the torque, use a torque wrench and tighten each bolt to the manufacturer’s specifications.
Additionally, after changing the stem, it is essential to properly adjust the headset by loosening the top cap and tightening the stem bolts gradually while ensuring smooth steering functionality.
Conclusion
In conclusion, changing the stem on a gravel bike is a straightforward process that can greatly improve your riding experience. By following the steps outlined in this article, you can easily replace the stem with one that better suits your needs.
Did you know that according to a recent survey, 85% of cyclists reported increased comfort and control after changing their bike’s stem? So don’t hesitate to make this simple modification and enjoy the benefits of a customized gravel bike.
Happy riding!