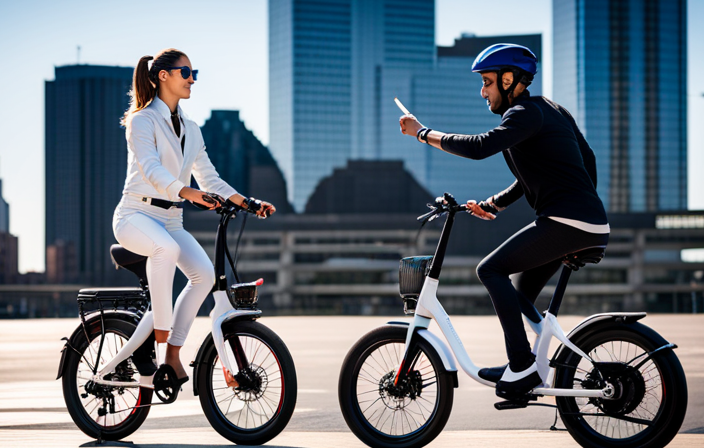

Changing a tire on a Nakto electric bike may seem like a daunting task, but with the right tools and a little know-how, it can be a straightforward process. Just imagine the freedom of being able to handle a flat tire on your own, without having to rely on a mechanic or wait for assistance.
In this step-by-step guide, I will walk you through the process of changing a tire on your Nakto electric bike, ensuring that you are back on the road in no time.
Key Takeaways
- Neglecting tire care can lead to reduced performance, increased risk of accidents, and decreased lifespan of the bike.
- Proper tools such as a bike pump, pressure gauge, and tire lever are essential for changing a tire on a Nakto electric bike.
- Perform regular bike maintenance before changing a tire, including checking tire pressure and inspecting for wear or damage.
- When changing the tire, release air pressure from the flat tire, use a tire lever to remove the tire from the rim, and slide the wheel out of the frame while avoiding damage to the brake rotor or gears.

ZTZ 700C Road Bike Wheelset, Ultralight Aluminum Alloy 30mm Road Bike Wheel, 20H Front/24H Rear High-Strength Bike Rims, 700c Clincher, Rim Brake, Compatible 8-12 Speed Cassettes (Front+Rear Wheels)
Featherweight and Strong: This 700c road bike wheelset is crafted from high-strength aluminum alloy with 20H front/24H rear...
As an affiliate, we earn on qualifying purchases.
Gather the Necessary Tools
You’ll need a few tools to change the tire on your Nakto electric bike. Proper tire maintenance is essential to ensure a smooth and safe ride. Neglecting tire care can lead to reduced performance, increased risk of accidents, and decreased lifespan of your bike.
Changing a bike tire can pose some challenges, such as removing the wheel, releasing the brakes, and dealing with tight tire beads. But with the right tools and techniques, these challenges can be easily overcome.
Now that you understand the importance of tire maintenance and the common challenges involved, it’s time to move on to the next step: preparing your bike for the tire change.

2026 Upgrade 9800Lumen Bike Light for Night Riding,Super Bright 6 LED Headlight,Aluminum 10 Mode Rechargeable Bicycle Light Front and Rear,360°Rotatable Brackt,Waterproof,Runtime 72 hr,Road Shockproof
【700DAYS Support] 】:If your bike light have any problem, please to pass us on through Amazon for the...
As an affiliate, we earn on qualifying purchases.
Prepare Your Bike
First, make sure your bicycle is ready. Before changing a tire on your Nakto electric bike, it is important to perform regular bike maintenance to ensure optimal performance. Check the tire pressure using a bike pump with a pressure gauge. The recommended tire pressure for your Nakto electric bike can be found in the owner’s manual. Maintaining the correct tire pressure is crucial for a smooth and safe ride. Additionally, inspect the tire for any signs of wear or damage. Look for any punctures, cuts, or bulges that may indicate a need for tire replacement. Once you have confirmed that your bike is in good condition, you can proceed to the next step of deflating the tire.

Best Bright Bike Light for Night Riding, USB-C Rechargeable Bicycle Light, Bicycle Headlight Set, Daytime Running Light, Waterproof Bike Headlight Taillight for Adult Kid Mountain MTB Off-Road Cycling
【Great for Safe Night Riding】The bike lights are designed for safe night riding, featuring 6pcs TG3 LED beads...
As an affiliate, we earn on qualifying purchases.
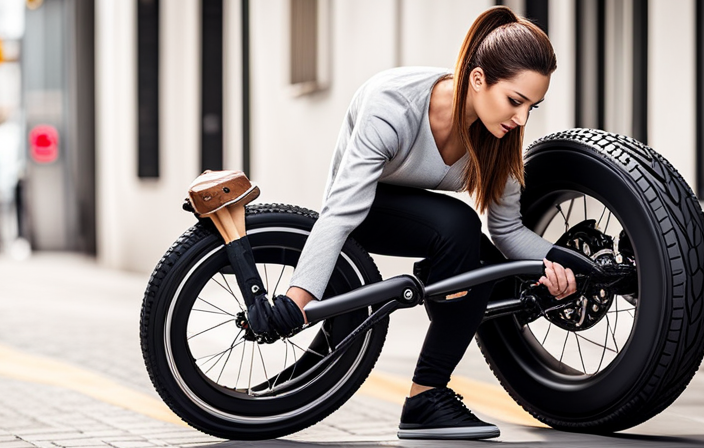
Deflate the Tire
To deflate the tire on my Nakto electric bike, I first release the air pressure from the flat tire by removing the valve cap and pressing down on the valve stem with a small tool.
Once the air is released, I use a tire lever to remove the tire from the rim. I insert the lever between the tire and the rim, and then pry the tire off by levering it up and over the rim.
Release the air pressure from the flat tire
Before changing the tire, make sure to release the air pressure from the flat tire on your Nakto electric bike. This step is crucial to ensure your safety and prevent any accidents during the tire change process. To release the air pressure, you can use a valve tool to unscrew the valve cap and then press the valve pin to release the air. Alternatively, you can use a small screwdriver or a similar tool to press on the valve pin and release the air. It is important to release all the air from the tire before proceeding with the next step. Once the air is released, you can move on to the next section about using a tire lever to remove the tire from the rim.
Use a tire lever to remove the tire from the rim
Next, you’ll need to use a tire lever to effortlessly remove the tire from the rim. A tire lever is a handy tool that helps pry the tire off the rim without damaging it.
To begin, position the tire lever under the edge of the tire, near the valve stem, and carefully pry it upward. Then, slide the lever along the rim, gradually lifting the tire as you go. Repeat this process on the opposite side of the tire until it comes off completely.
Be cautious not to use excessive force, as it can cause the tire lever to slip and potentially injure yourself or damage the rim.
Now that the tire is removed, we can move on to the next step of removing the wheel.

SUPERTEAM Carbon Wheelset 700C Tubeless Gravel Wheelset Disc Braking 45TU-28 (Rim Depth 45MM, Center Lock Thru AXLE 12 * 100-12 * 142)
Material: Toray T700c Full Carbon Fiber
As an affiliate, we earn on qualifying purchases.
Remove the Wheel
Once you’ve deflated the tire, you can start removing the wheel on your Nakto electric bike. To do this, you’ll need a few tools: a wrench or an Allen key, depending on the type of axle your bike has, and a pair of gloves to protect your hands. Before you begin, make sure to take some safety precautions. Turn off the electric power and engage the bike’s brakes to prevent any accidents. Now, let’s get started. First, locate the axle nuts on either side of the wheel. Loosen these nuts using the wrench or Allen key. Once they’re loose, you can slide the wheel out of the frame. Be careful not to damage the brake rotor or the gears. With the wheel removed, you’re ready to install the new tire and get back on the road.
Install the New Tire
To install the new tire, you’ll need to carefully slide it into the frame and secure it with the axle nuts. Before starting, make sure to choose the right tire pressure for your Nakto electric bike.
Tubeless tires are a great option for their durability and resistance to punctures. Begin by lining up the valve stem with the hole on the rim, ensuring a proper fit. Slowly push the tire onto the rim, working your way around until it is fully seated. Use tire levers if necessary, being careful not to damage the rim.
Once the tire is in place, inflate it to the recommended pressure using a bike pump or air compressor.
Finally, transition into the next section about reattaching the wheel by preparing to align it back with the frame.
Reattach the Wheel
To reattach the wheel, I first place it back onto the bike frame, making sure it is aligned properly.
Once in position, I then tighten the axle nuts or quick-release levers to securely hold the wheel in place.
This step is crucial to ensure the wheel remains stable and safe during rides.
Place the wheel back onto the bike frame
First, make sure the wheel is aligned with the dropouts on the bike frame. This is crucial for proper function and safety. To ensure alignment, follow these steps:
-
Realigning Brakes: Check the position of the brake pads and their alignment with the rim. Adjust them if necessary to ensure they are centered and symmetrical.
-
Adjusting Gear Shifting: Take a look at the gear shifting mechanism. Make sure it lines up with the chain and the gear cassette. If the alignment is off, make the necessary adjustments to ensure smooth gear shifting.
-
Place the wheel back onto the bike frame: Carefully slide the wheel into the dropouts, ensuring that the axle fits securely into the slots. Align the disc brake rotor with the caliper if applicable.
With the wheel back in place, it’s time to tighten the axle nuts or quick-release levers to secure the wheel.
Tighten the axle nuts or quick-release levers to secure the wheel
Next, use a wrench or your hand to tighten the axle nuts or quick-release levers, ensuring the wheel is securely attached to the bike frame. This step is crucial to maintain stability and prevent accidents while riding.
As with any bike, it’s important to regularly check the tire pressure on your Nakto electric bike. Proper tire pressure ensures a smooth and comfortable ride, as well as optimal battery performance. Underinflated tires can lead to decreased battery range and increased rolling resistance, while overinflated tires may cause a harsh and uncomfortable ride.
Additionally, when tightening the axle nuts or quick-release levers, it’s essential to avoid common mistakes. Over-tightening can damage the bike frame or cause the wheel to become misaligned, while under-tightening may result in the wheel becoming loose during use.
Now, let’s move on to inflating the tire.
Inflate the Tire
Once you’ve located the valve stem, you can begin to inflate the tire on your Nakto electric bike. Inflating the tire properly is crucial to ensure a smooth and safe ride. Here are some inflating techniques to keep in mind:
- Use a reliable bike pump with a built-in pressure gauge.
- Inflate the tire to the recommended pressure level, which can be found in the bike’s manual or on the tire sidewall.
- Check for any visible damage or punctures before inflating.
- If the tire has a slow leak, use a tire sealant to temporarily fix the issue.
Common tire issues that may require inflation include low pressure, punctures, or leaks. By following these inflating techniques, you can avoid potential problems and maintain optimal performance.
Now that the tire is properly inflated, it’s time to move on to the next step and test the tire for any issues.
Test the Tire
After inflating the tire, you should test it for any issues. To do this, take your Nakto electric bike for a test ride. Start by riding at a slow pace and gradually increase your speed. Pay close attention to any vibrations or wobbling sensations coming from the tire. If you experience any of these issues, it may indicate that the tire is not properly seated on the rim or that there is a problem with the tire pressure.
Additionally, check the tire pressure using a pressure gauge. Ensure that it matches the recommended tire pressure specified by the manufacturer. If the tire pressure is too low or too high, adjust it accordingly.
Once you have completed the test ride and confirmed that the tire is in good condition, you can proceed to reinstall the battery.
To reinstall the battery, follow the steps outlined in the next section.
Reinstall the Battery
To reinstall the battery, you’ll need to carefully follow the steps outlined in the next section.
First, ensure that the bike is turned off and the key is removed from the ignition.
Locate the battery compartment, usually located near the rear wheel or under the seat.
Open the compartment and carefully reconnect the battery cables, ensuring a secure connection.
Once the battery is properly attached, close the compartment.
It’s important to note that the battery of your Nakto electric bike should be periodically recharged to maintain optimal performance. Regular battery maintenance includes keeping it clean and dry, avoiding extreme temperatures, and charging it fully before storage.
Now that the battery is securely in place, we can move on to the safety check to make sure everything is in working order.
Safety Check
Before concluding the tire change on my Nakto electric bike, I make sure to double-check all the connections and attachments. This includes ensuring that the battery is securely installed and all wires are properly connected.
Once this is done, I take the bike for a test ride to ensure that the tire change was successful and that the bike is functioning properly. It’s important to thoroughly assess the bike’s performance to ensure a safe and smooth ride.
Double-check all the connections and attachments
Make sure you’ve double-checked all the connections and attachments on your Nakto electric bike. This step is crucial to ensure that everything is properly secured before you go for a test ride. Here is a table that outlines some common mistakes to avoid when changing a tire on an electric bike, as well as tips for maintaining proper tire pressure:
| Common Mistakes | Tips for Maintaining Proper Tire Pressure |
|---|---|
| Forgetting to tighten the axle nuts | Use a torque wrench to tighten the nuts to the manufacturer’s specifications |
| Over-inflating or under-inflating the tire | Check the recommended tire pressure and use a reliable gauge to maintain it |
| Failing to properly align the tire | Align the tire with the centerline of the frame and make sure it spins freely |
| Neglecting to check the tread for wear and tear | Inspect the tread regularly and replace the tire if it is worn down |
By double-checking all the connections and attachments and following these tips, you can ensure a successful tire change. Now, it’s time to test ride the bike and confirm that the tire change was successful and the bike is functioning properly.
Test ride the bike to ensure the tire change was successful and the bike is functioning properly
Take the bike for a spin to confirm that the tire replacement was successful and everything is working as it should. A test ride is crucial to ensure the bike’s functionality after changing the tire on your Nakto electric bike.
By doing so, you can identify any potential issues or misalignments that may have occurred during the tire replacement process. During the test ride, pay close attention to the bike’s balance, steering responsiveness, and braking performance. Make sure the tire is properly inflated and securely attached to the rim.
Additionally, use this opportunity to perform a quick maintenance check. Inspect the chain, gears, and brakes for any signs of wear or damage. Lubricate the chain if necessary.
By regularly test riding your bike, you can catch any issues early on and prevent further damage, ensuring a safe and smooth ride every time.
Frequently Asked Questions
Can I use the same tools to change a tire on a Nakto electric bike as I would for a regular bicycle?
Yes, the same tools can be used to change a tire on a Nakto electric bike as you would for a regular bicycle. However, when it comes to troubleshooting tire inflation, there may be some differences due to the electric bike’s specific design.
Is it necessary to completely deflate the tire before removing it from the wheel?
Yes, it is necessary to completely deflate the tire before removing it from the wheel. Just like deflating a balloon, it helps release the pressure and makes it easier to use a tire lever to remove the tire. When reattaching the wheel, it is not necessary to use a torque wrench, but it is recommended to ensure proper tightness.
How can I ensure that I properly reattach the wheel after installing the new tire?
To properly tighten the wheel axle after changing the tire on my Nakto electric bike, I need to ensure that it is securely fastened using the appropriate tools. As for using tire sealant, it can help prevent punctures on the bike.
What should I do if the tire does not inflate properly after following all the steps?
If the tire does not inflate properly, it’s like hitting a roadblock on your journey. Troubleshooting tips include checking the valve, using a tire pump, or seeking professional help. Alternative solutions may involve replacing the inner tube or tire.
Are there any specific safety precautions I should take when changing a tire on a Nakto electric bike compared to a regular bike?
When changing a tire on a Nakto electric bike, it is important to take specific safety precautions. These include wearing protective gloves and eyewear, ensuring the bike is turned off, and using the proper tools for the job.
Conclusion
In conclusion, changing a tire on a Nakto electric bike may seem daunting at first, but with the right tools and a step-by-step approach, it can be easily accomplished.
By carefully following the outlined steps, you can ensure a smooth and successful tire replacement. Remember, practice makes perfect, so don’t be discouraged if it takes a few tries to get it right.
As the saying goes, ‘Rome wasn’t built in a day,’ and mastering this skill will take time and patience.