Learning to change the chain on my bike was among the initial skills I acquired when I began riding. It’s an essential ability all riders should master, as it can help save both time and money over time.
In this article, I’ll take you through the steps of how to change a bicycle chain, from identifying when it needs replacing to installing the new chain on your bike.
The first step in changing your bicycle chain is knowing when it needs to be replaced. Signs of wear and tear include stretched links, a noisy chain, or difficulty shifting gears.
Once you’ve identified that your chain needs replacing, you’ll need to gather the right tools and prepare your bike for the procedure. It’s essential to have the correct chain length and type for your bike, so we’ll also cover how to select the right replacement chain.
With these basics in mind, let’s dive into the process of changing a bicycle chain.
Key Takeaways
- Regular maintenance can help prevent wear and tear on the bicycle chain.
- Tools and materials needed for chain replacement include a chain breaker, replacement chain, and cleaning tools.
- Steps for chain replacement include cleaning the bike and checking for wear or damage on drivetrain components, choosing a compatible replacement chain and determining the correct length, threading the new chain through gears and connecting with a chain tool, and adjusting chain tension.
- Proper lubrication is important for the performance and longevity of the new chain, and should be applied sparingly and evenly while ensuring the chain is dry to prevent dirt buildup.

Under Armour Squeeze Water Bottles, 32 oz Water Bottles, Sideline Sports Water Bottle with Quick-Shot Lid, Quick & Easy Hydration, Gym Water Bottles, Squeeze Bottle, 1 32oz Bottle
- Easy Hydration: Quick-shot lid and one-way valve
- On-the-Go Use: One-hand operation for active hydration
- Measurement Markings: Ounces and milliliters for tracking
As an affiliate, we earn on qualifying purchases.
Signs Your Bicycle Chain Needs Replacing
If you’re feeling some slipping or grinding while pedaling, it’s a sign that your bike chain needs replacing. But what causes bicycle chain wear?
Common causes include lack of maintenance, grit and grime buildup, and simply using your bike too much. Prevention of bicycle chain wear is relatively straightforward. Regular cleaning and lubrication can help to keep your chain in good condition, and you should also avoid using your bike in wet or muddy conditions.
Before starting the process of replacing your bicycle chain, you’ll need to prepare your bike and tools. This involves finding the right replacement chain, as well as getting your bike into a stable position for working on it.
By following these steps, you can ensure that your bike chain replacement goes smoothly and that you can continue to enjoy safe and reliable cycling.
Prepare Your Bike and Tools
Before you start getting your hands dirty, make sure you have everything you need and your bike is ready to go. First, gather the necessary tools and materials, such as a chain breaker, a replacement chain, and cleaning tools like degreaser and rags. It’s important to have these on hand before you begin the process of changing your bike’s chain.
Secondly, prepare your bike by cleaning it thoroughly and ensuring that it’s in good working order. This means checking the rear derailleur, front derailleur, chainrings, and cassette for any wear or damage. Once your bike is clean and ready, it’s time to choose the right lubrication option for your new chain. Refer to the table below for a quick guide on the different types of lubrication options and their benefits.
| Lubrication Type | Benefits |
|---|---|
| Wet Lube | Long-lasting, good for wet or muddy conditions |
| Dry Lube | Clean and easy to apply, good for dry conditions |
| Ceramic Lube | High-performance, reduces friction and wear |
| Wax Lube | Clean and long-lasting, good for reducing chain noise |
Now that your bike is prepped and you have your tools and materials ready to go, it’s time to move on to the next step: selecting the right replacement chain.
Selecting the Right Replacement Chain
Once I’ve assessed my bike’s needs and determined the correct number of links necessary, selecting a replacement chain becomes a straightforward process.
The first factor to consider when choosing a new chain is chain compatibility. The chain you select must be compatible with your bike’s drivetrain components, including the cassette, chainrings, and derailleur.
Next, I need to determine the correct chain length for my bike. The length of the chain is determined by the number of links required to span the distance between the cassette and chainring without tension. A chain that’s too long can lead to poor shifting performance, while a chain that’s too short can put excessive strain on the drivetrain and cause damage.
Once I have selected the correct chain, I can move on to installing the new chain. Note that it’s important to handle the chain with care to avoid any potential damage to the chain or bike components.
Installing the New Chain
Now that I’ve selected the right replacement chain for my bicycle, it’s time to install it.
The installation process involves threading the chain through the gears, connecting the chain, and adjusting the chain tension.
To begin, I’ll carefully thread the new chain through the gears, making sure it’s properly aligned.
Then, I’ll connect the chain using a chain tool, ensuring that the link pins are fully seated.
Finally, I’ll adjust the chain tension to ensure it’s not too loose or too tight.
Thread the Chain Through Gears
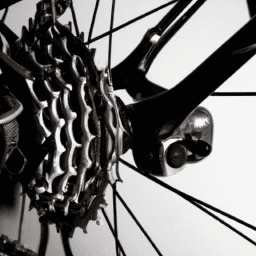
To properly thread the chain through the gears, you’ll need to ensure that the derailleur is aligned with the smallest cog on the rear wheel. This will allow the chain to easily slip into place without getting stuck or causing any damage.
Here are the steps to follow:
-
Shift the gears to the smallest cog on the rear wheel. This will create more slack in the chain and make it easier to thread through the gears.
-
Hold the chain with one hand and use the other hand to gently guide it through the derailleur and over the smallest cog.
-
Slowly pedal the bike forward while continuing to guide the chain through the gears. Make sure the chain is properly seated on each cog before moving on to the next one.
Once the chain is properly threaded through the gears, it’s time to connect it. This is the final step in the process of changing a bike chain and will ensure that your bike is ready to ride smoothly and efficiently.
Connect the Chain
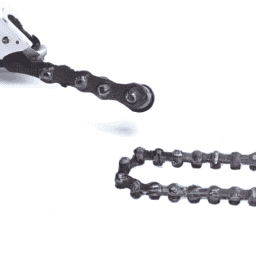
Loop the latch and link the links with a lively ‘click’. Now that the chain is threaded through the gears, the next step is to connect the chain.
First, determine the correct length of the chain. The new chain should be the same length as the old one, but if you don’t have the old chain, you can measure the chainstay. Once you have the correct length, remove any excess links using a chain tool.
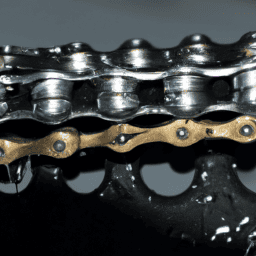
Before connecting the chain, make sure to lubricate it with chain lubrication to ensure smooth operation. Next, hold the ends of the chain together and use a chain tool to press the pin in place. Make sure the pin is fully inserted and clicks into place. Give the chain a tug to check that it’s secure.
With the chain connected, we can move on to adjusting the chain tension. It’s important to make sure that the chain is not too loose or too tight. This will affect the bike’s performance and can cause damage to the chain and gears. To adjust the tension, we’ll need to move the wheel back and forth until we find the right spot.
Adjust Chain Tension
First, you’ll want to make sure your chain tension is just right for optimal performance. Adjusting derailleur and chain lubrication are necessary steps to take in ensuring your chain is properly tensioned.
To adjust chain tension, you will need to first shift your bike into the smallest chainring and the smallest cog on the rear wheel. Then, loosen the bolts that attach the rear wheel to the frame. Next, move the rear wheel forward or backward until the chain has about a half-inch of play when pushed up and down. Finally, tighten the bolts back up and check the chain tension again. Repeat until the chain has the desired tension.
| Steps to Adjust Chain Tension | Tools Needed |
|---|---|
| Shift bike to smallest chainring and cog | None |
| Loosen bolts attaching rear wheel to frame | Wrench |
| Move rear wheel forward or backward for desired chain tension | Eye measurement |
| Tighten bolts back up | Wrench |
Now that the chain tension is properly adjusted, it’s important to maintain your new chain to prolong its lifespan.
Maintaining Your New Chain
As I ride with my new chain, I understand the importance of maintaining it to keep it running smoothly. Just like a gardener tends to their plants to help them grow strong and healthy, I need to give my chain some TLC to ensure its longevity.
Here are some tips and techniques I’ve learned for maintaining my new chain:
-
Chain lubrication: Use a high-quality lubricant specifically designed for bicycle chains. Apply the lubricant sparingly and evenly to the chain while turning the pedals backwards.
-
Cleaning techniques: Use a degreaser to remove any built-up grime or dirt from the chain. After cleaning, dry the chain thoroughly before applying lubricant to prevent dirt and debris from sticking to the chain.
By following these tips, I can ensure that my new chain will stay in top condition for as long as possible. It may seem tedious, but a little effort goes a long way in maintaining the performance and longevity of my bicycle chain.
Frequently Asked Questions
How do I know if I need to replace my bike’s cassette along with the chain?
I check wear on my bike’s cassette by inspecting the teeth for signs of wear and tear. If the chain has stretched beyond recommended limits, compatibility concerns arise and I replace the cassette along with the chain.
What tools are needed to remove the old chain from my bike?
To remove an old bike chain, I need chain removal tools such as a chain tool or pliers. Other methods include using a quick link or breaking the chain with a hammer and punch.
Can I reuse the master link from my old chain on the new chain?
Wow, reusing the master link from your old chain on a new chain is like trying to fit a square peg into a round hole. It’s not worth the risk. Always use a compatible master link and adjust the chain length accordingly for optimal performance and safety.
How often should I lubricate my new chain?
I recommend lubricating my new chain every 100-200 miles or after any wet rides. Chain maintenance is crucial for optimal performance and longevity. Using a high-quality lubricant and following best practices will ensure smooth shifting and prevent rust or wear.
Can I shorten the new chain if it’s too long for my bike?
To shorten a new bike chain that is too long, I use chain breakers to remove the excess links. It’s important to measure the chain length needed before shortening and to properly reattach the chain.
Conclusion
Well, congratulations on making it this far! You’ve learned all about the signs that your bicycle chain needs replacing, how to prepare your tools and bike for the task, selecting the right chain, and installing the new one.
But we’re not done yet! Now comes the fun part – maintaining your shiny new chain.
First things first, keep your chain clean and lubricated. No one wants to ride a squeaky bike, am I right?
Regularly inspect your chain for signs of wear and tear, and replace it as needed. And if you want to take it to the next level, invest in a chain wear indicator tool – it’s like a little ruler for your chain, and will let you know when it’s time for a swap.
You may have thought changing a bicycle chain was a simple task, but as you can see, it requires technical precision and attention to detail. But fear not, with these tips and tricks, you’ll be a pro in no time.
So go forth, my friends, and keep those chains in tip-top shape. Happy pedaling!