Did you know that 70% of electric bike owners have never changed a rear tire? If you find yourself in this majority, fret not! In this article, I will guide you step-by-step on how to change the rear tire on your electric bike.
With the right tools and a little know-how, you’ll be able to tackle this task with ease. So let’s get started and make sure you’re ready to hit the road again in no time.
Key Takeaways
- Gathering the necessary tools and equipment, such as tire levers, a wrench or Allen key, a pump, and a new tire, is essential for changing the rear tire on an electric bike.
- Properly preparing the bike for tire removal includes securing the bike, disconnecting the battery, loosening the axle nuts, and choosing the right tire size and type for the terrain.
- Releasing the brake tension by squeezing the brake lever, checking for brake issues, and selecting the right tire is important before removing the wheel from the bike frame.
- When removing the wheel from the bike frame, it is crucial to squeeze and hold the brake lever, shift the chain onto the smallest rear cog, use a wrench to loosen the nuts or quick release skewer, and gently pull the wheel straight out while avoiding contact with the chain or derailleur.

Schwinn Sporterra RX Gravel Bike, 700c Mens and Womens Bike, 14-Speed Drop Bar Gravel Bicycle, Mechanical Disc Brakes, Rigid Fork, Aerodynamic Riding Position, Quick Release Seat Post, Adult Bicycle
GRAVEL BICYCLE: Enjoy next level riding with the Sporterra RX by Schwinn. With 700c wheels, this mens and...
As an affiliate, we earn on qualifying purchases.
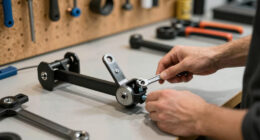
Gather the necessary tools and equipment
Gather all the necessary tools and equipment to change the rear tire on your electric bike. When it comes to properly maintaining an electric bike, changing the tire is an important skill to have.
The first step is to make sure you have the right tools. You will need a set of tire levers, a wrench or an Allen key, a pump, and a new tire. Selecting the right tire is crucial for the performance and safety of your electric bike. Consider factors like tread pattern, tire width, and puncture resistance.
Once you have gathered all the tools and equipment, you can then move on to preparing the bike for tire removal. This involves securing the bike, disconnecting the battery, and loosening the axle nuts.

Mongoose Men's Elroy Adventure Bike 700C Wheel Bicycle, Blue, 54cm frame size
Versatile adventure touring bike features capable adventure bike geometry, a sleek alloy frame and steel fork for the...
As an affiliate, we earn on qualifying purchases.
Prepare the bike for tire removal
Make sure you have all the necessary tools ready before starting the process. This will save you time and frustration later on.
To prevent flat tires in the future, it is important to choose the right tire size for your electric bike. Check the sidewall of your current tire for the size markings and match it exactly when purchasing a new one. Using an incorrect tire size can affect the performance and stability of your bike. Additionally, make sure the tire you choose is appropriate for the type of terrain you will be riding on.
Once you have chosen the correct tire size, you can proceed to the next step of releasing the brake tension. This will allow you to remove the rear tire safely and efficiently.

AVASTA 700C Road Adult Step-Over Gravel Hybrid Bike Bicycle for Men Woman Male Female,Lightweight Aluminum Alloy Frame with 21-Speed Gearing for City Commuting,Dual Disc Brakes,19 inch Frame,White
🚴♂️【Durable Aluminum Alloy Frame】This lightweight yet strong frame is built to last, offering a perfect balance of durability...
As an affiliate, we earn on qualifying purchases.
Release the brake tension
To release the brake tension, simply squeeze the brake lever and hold it in place. This will loosen the brake pads from the rim, allowing the wheel to spin freely.
It’s important to check for common brake issues before proceeding with the tire change. If you notice any problems such as squeaking, rubbing, or a lack of stopping power, you may need to adjust or replace the brake pads.
Additionally, make sure to choose the right tire for your electric bike. Consider factors such as tread pattern, tire size, and durability.
Once the brake tension is released and any necessary brake adjustments are made, you can move on to the next step of removing the wheel from the bike frame.

WEIZE Road Bike, 700C Wheel City Commuter Bicycle, 14 Speed Drop Bar, Racing Adult Bike with Caliper Brakes, High-Carbon Steel Hybrid Bikes, Urban Adult Bicycle for Men and Women,Black
Caliper brake system: The road bike adopts a dual caliper brake design, which is lighter in overall weight...
As an affiliate, we earn on qualifying purchases.
Remove the wheel from the bike frame
First, squeeze and hold the brake lever to release the tension, allowing the wheel to spin freely.
To remove the wheel from the bike frame, I recommend following these steps. Start by shifting the chain onto the smallest rear cog to provide some slack. Then, use a wrench to loosen the nuts or quick release skewer that secures the wheel to the frame. Once loose, gently pull the wheel straight out, making sure to avoid any contact with the chain or derailleur.
If the tire is stuck, you can try tapping it gently with a rubber mallet or using a tire lever to pry it off the rim.
With the wheel removed, we can now move on to the next step of deflating and removing the old tire.
Deflate and remove the old tire
Now you’ll need to release the air and remove the worn-out tire. Start by using a tire lever to gently pry off one side of the tire from the rim. Once you’ve created enough space, insert another tire lever a few inches away and continue prying until one side of the tire is completely free from the rim.
Next, carefully remove the inner tube from inside the tire, making sure not to damage it. If the tube is still inflated, release the air by pressing on the valve stem. Once the tube is deflated, remove it from the tire.
Finally, grab the tire with both hands and slide it off the rim, being mindful of any remaining tube. With the old tire removed, you’re now ready to install the new tire onto the wheel and get back on the road.
Install the new tire onto the wheel
Once you have the new tire ready, it’s time to put it on the wheel. Follow these steps to ensure a smooth installation:
-
Position the tire: Start by aligning the new tire with the wheel, making sure the directional arrow on the tire matches the rotation direction of the bike. Carefully place the tire onto the wheel rim, ensuring it is centered.
-
Push the tire onto the rim: Use your hands to push the tire onto the rim, starting at one side and working your way around. Be cautious not to pinch the inner tube between the tire and rim, as this can cause punctures.
-
Check for proper seating: Once the tire is fully on the rim, inspect it to ensure it is evenly seated. Make sure there are no bulges or uneven sections.
Installing a new tire can sometimes be tricky, but following these steps should help you avoid any common installation issues.
With the new tire securely in place, we can now move on to inflating it to the recommended pressure.
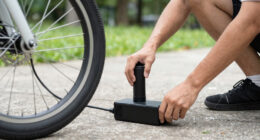
Inflate the new tire to the recommended pressure
To ensure optimal performance, make sure you inflate your new tire to the recommended pressure. The importance of proper tire pressure for electric bikes cannot be overstated. Maintaining the correct pressure is crucial for several reasons.
Firstly, it affects the overall stability and handling of the bike. Riding with underinflated tires can make steering more difficult and increase the risk of accidents.
Secondly, the right tire pressure ensures efficient power transfer from the motor to the road, maximizing the bike’s speed and range.
Lastly, proper inflation helps prevent premature wear and tear on the tire, ensuring its longevity. When inflating electric bike tires, there are common mistakes to avoid.
Overinflating can lead to a harsh ride and increase the risk of a blowout. Underinflating, on the other hand, can cause excessive rolling resistance and reduce battery efficiency.
Remember to check the recommended tire pressure in the manufacturer’s guidelines and use a reliable pressure gauge for accurate measurements.
With the tire properly inflated, we can now move on to reattaching the wheel to the bike frame.
Reattach the wheel to the bike frame
Attach the wheel back onto the frame of your bicycle. Make sure the axle is properly aligned with the dropouts on the frame. Tighten the axle nuts or quick release lever to secure the wheel in place.
Once the wheel is attached, check the alignment by spinning it and observing the clearance between the tire and the frame. If the wheel is not centered, make small adjustments by loosening the axle nuts or quick release lever and repositioning the wheel until it is perfectly aligned. Once the alignment is correct, tighten the nuts or lever securely.
Now that the wheel is securely reattached and properly aligned, you can move on to the next step of adjusting the brakes and ensuring proper alignment.
Adjust the brakes and ensure proper alignment
After reattaching the wheel to the bike frame, it is crucial to adjust the brakes and ensure proper alignment for a safe and smooth ride.
Start by squeezing the brake levers and observing if the brake pads make contact with the rim. If they don’t, locate the brake caliper and find the adjustment screws.
Loosen them slightly and position the brake pads closer to the rim until they are just a hair’s breadth away. Tighten the adjustment screws and check if the brake pads now make contact with the rim when the brake levers are squeezed.
Finally, spin the wheel and observe if it is centered between the brake pads. If it is not, use the brake caliper’s centering screws to adjust its position until it is properly aligned.
With the brakes adjusted and aligned, it’s time to proceed to the next step: test ride the bike to ensure the tire change was successful.
Test ride the bike to ensure the tire change was successful
Take the bike for a spin to make sure the tire replacement was successful. When test riding the bike, it’s important to prioritize safety and be aware of potential issues that may arise.
Here are a few key points to consider during the test ride:
-
Check the alignment: Ensure that the rear tire is properly aligned with the frame. Misalignment can cause unnecessary wear and tear on the tire and affect the bike’s performance.
-
Test the brakes: Confirm that the brakes are functioning correctly and provide adequate stopping power. Squeeze the brake levers firmly to check for any abnormalities or squeaking sounds.
-
Monitor tire pressure: Pay attention to the tire pressure and ensure it is within the recommended range. Underinflated or overinflated tires can affect the bike’s stability and handling.
By following these steps during the test ride, you can troubleshoot common issues and ensure that the rear tire replacement on your electric bike was successful.
Frequently Asked Questions
What tools and equipment do I need to change a rear tire on an electric bike?
To change a rear tire on an electric bike, you will need a few tools such as a tire lever, a wrench, and a pump. Follow this step-by-step guide to ensure a smooth tire replacement process.
How do I release the brake tension before removing the wheel?
To release brake tension on an electric bike and remove the rear wheel, start by locating the brake caliper and loosening the brake cable. Then, use a wrench to remove the axle nuts and slide the wheel out of the dropouts.
Can I reuse the old tire or do I need to purchase a new one?
To answer your question, yes, you can patch the old tire instead of buying a new one. However, there are benefits to using a new tire, such as improved traction, reduced risk of punctures, and better overall performance.
What is the recommended tire pressure for the new tire?
The recommended tire pressure for the new tire is typically indicated on the sidewall of the tire. Maintaining proper tire pressure is crucial for optimal performance, improved handling, and increased safety while riding.
How do I properly align the brakes after reattaching the wheel?
To properly align the brakes after reattaching the wheel, it is crucial to ensure that the brake pads are centered on the rim. This alignment is important for optimal braking performance and safety. Regular brake maintenance is essential to ensure consistent and reliable stopping power.
Conclusion
Well, congratulations! You’ve successfully changed the rear tire on your electric bike. Now you can proudly call yourself a tire-changing pro.
Just think of all the money you’ll save by not having to take it to a bike shop every time you get a flat. Plus, you’ll have the satisfaction of knowing that you can handle any tire mishaps that come your way.
So go ahead, take your newly-tire-changed bike for a spin and enjoy the smooth ride. Keep up the good work, bike mechanic extraordinaire!