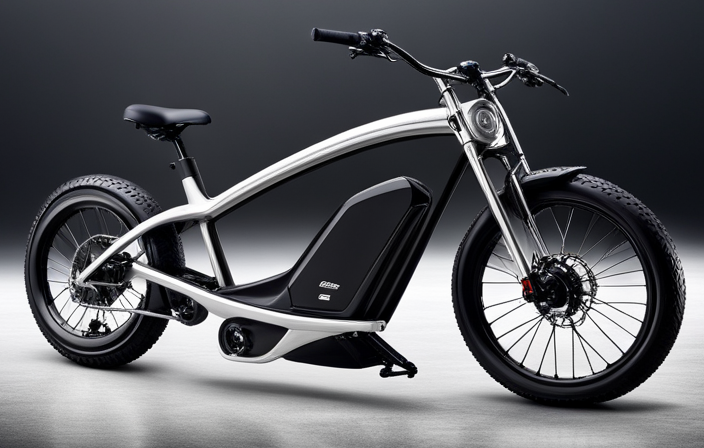

Imagine yourself cruising down the road on your Jetson electric bike, the wind in your hair and the thrill of the ride. But suddenly, you hit a bump and your tire goes flat.
Don’t panic! In this step-by-step guide, I will show you how to change the tire on your Jetson electric bike, ensuring a smooth and safe journey. With the right tools and a little know-how, you’ll be back on the road in no time.
Let’s get started!
Key Takeaways
- Gather the necessary tools and materials such as tire levers, a bicycle pump, and a spare inner tube or patch kit.
- Turn off the bike and remove the battery before starting the tire change process.
- Locate a safe and stable work area with enough space to maneuver around the bike.
- Release air pressure from the tire before removing the wheel from the bike.
Gather the Necessary Tools and Materials
You’ll need to gather the necessary tools and materials to change a tire on a Jetson electric bike. Start by having a set of tire levers, a bicycle pump, and a spare inner tube or patch kit on hand.
It’s also a good idea to wear gloves to protect your hands during the process. Before starting, make sure to turn off the bike and remove the battery. This will prevent any accidental activation of the motor.
Additionally, familiarize yourself with the bike’s manual to ensure you follow any specific instructions for your model. Once you have everything ready, you can proceed to locate a safe and stable work area where you can safely perform the tire change.
Locate a Safe and Stable Work Area
To ensure safety and stability, find a secure and steady location for performing this task. Look for an area that is level and free from any obstacles that could impede your work. It is important to have enough space to maneuver around the bike comfortably.
Once you have located a suitable work area, gather the necessary tools and materials as discussed in the previous subtopic. Additionally, find a suitable replacement tire for your Jetson electric bike. Make sure to choose the appropriate tire size that matches the specifications of your bike.
Once you have found the right tire, you can move on to the next step of releasing the air pressure from the tire. This will prepare you for the subsequent section where we will discuss removing the wheel from the bike.
Release the Air Pressure from the Tire
First, deflate the tire by releasing the air pressure. This step is crucial to ensure a safe and effective tire change.
Here are some discussion ideas for this subtopic that are not relevant to the other headings above:
-
Proper techniques for maintaining tire pressure on a jetson electric bike:
-
Regularly check the tire pressure using a pressure gauge.
-
Inflate the tires to the recommended PSI level specified in the bike’s manual.
-
Avoid overinflating the tires, as it can lead to a harsh ride and increased risk of punctures.
-
Tips for choosing the right type of tire for a jetson electric bike:
-
Consider the terrain you will be riding on and select a tire with appropriate tread pattern and width.
-
Opt for puncture-resistant tires to minimize the risk of flats.
-
Look for tires that provide good traction and stability.
Now that the tire pressure has been released, we can move on to the next step, which is to remove the wheel from the bike.
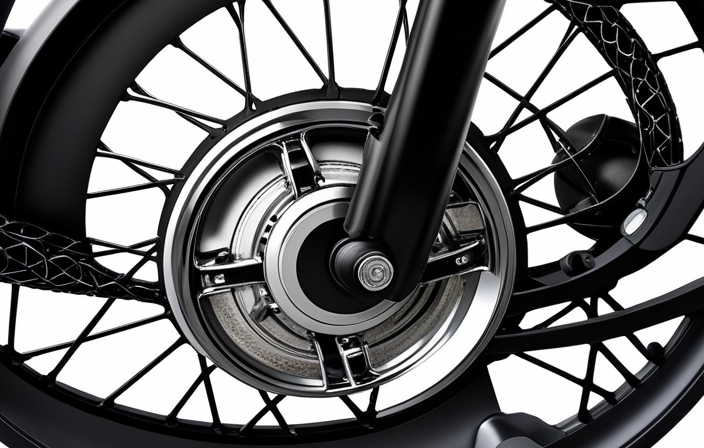
Remove the Wheel from the Bike
After releasing the air pressure from the tire, the next step is removing the wheel from the bicycle. To begin, ensure the bike is stable and secure.
Locate the quick release lever or axle nuts on both sides of the wheel. If there is a quick release lever, flip it open to release the tension. If there are axle nuts, use a wrench to loosen and remove them.
Once the quick release lever or axle nuts are loose, gently pull the wheel out of the bike frame. Be careful not to damage the brake rotor or derailleur.
It is important to understand tire sizes before removing the wheel, as this will help when installing a new tire.
Now, we can move on to the next step of releasing the tension on the brake system.
Release the Tension on the Brake System
To release the tension on the brake system, you’ll need to follow these steps. First, locate the brake cable adjuster on the brake lever. Turn it counterclockwise to loosen the cable. Next, use a 5mm Allen wrench to loosen the brake pad mounting bolt. Slide the brake pads out of the caliper and replace them if necessary. Now, locate the barrel adjuster on the brake caliper and turn it counterclockwise to increase the tension on the cable. Test the brake lever to ensure proper tension. If needed, adjust the tension further by turning the barrel adjuster clockwise. Once the tension is correct, tighten the brake pad mounting bolt. Now, you can proceed to the next step of removing the old tire from the rim.
Remove the old tire from the rim.
Remove the Old Tire from the Rim
Now, you’re going to need to carefully pry the old tire off of the rim. Start by deflating the tire completely using a tire pump or by pressing the valve stem until all the air is released.
Once the tire is deflated, use a tire lever or a flathead screwdriver to gently insert it between the tire and the rim. Slowly move the lever around the rim, prying the tire away from the rim little by little. Be careful not to damage the rim or the inner tube while doing this.
Continue prying until the entire tire is detached from the rim.
During this process, it’s important to note that changing tire brands or repairing a punctured tire are not relevant discussions for this particular subtopic.
With the old tire removed, you are now ready to move on to the next step and install the new tire onto the rim.
Install the New Tire onto the Rim
First, make sure the rim is clean and free of any debris. This ensures a smooth installation of the new tire.
To install the tire, start by aligning the tire with the rim, making sure the valve stem is positioned correctly. With your hands, push the tire onto the rim, starting at the opposite side of the valve stem.
Use your thumbs to push the tire bead over the rim edge, working your way around the entire circumference of the rim. If needed, use tire levers to help guide the tire onto the rim, being careful not to damage the tube.
Once the tire is fully seated on the rim, inflate it to the recommended pressure.
Finally, transition into the next step of reinstalling the wheel onto the bike by saying, "Now that the new tire is securely installed on the rim, it’s time to reinstall the wheel onto the bike."
Reinstall the Wheel onto the Bike
After securely installing the new tire on the rim, it’s time to put the wheel back on the bike.
To reinstall the wheel onto the bike, follow these steps:
- Start by aligning the wheel with the fork dropouts, ensuring that the disc rotor is properly positioned between the brake pads.
- Slide the wheel into the dropouts, making sure that it is fully seated.
- Tighten the axle nuts or quick-release skewer to secure the wheel in place.
- Check the wheel alignment by spinning it and ensuring that it runs straight and does not rub against the brake pads.
After reinstalling the wheel, the next step is to realign the brake system and adjust the wheel alignment as needed. This will ensure proper braking performance and prevent any potential issues while riding.
Now, we can move on to the subsequent section about inflating the new tire to the recommended pressure.
Inflate the New Tire to the Recommended Pressure
To properly inflate your new tire, follow these steps:
- Refer to the manufacturer’s guidelines for the recommended pressure.
- Locate the valve stem on the inner side of the wheel.
- Remove the valve cap and attach the air pump nozzle securely to the valve.
- Inflate the tire gradually, adding air in short bursts to prevent overinflation.
- Check the tire pressure using a pressure gauge to ensure it matches the recommended pressure.
- If the pressure is too low, use an air pump to add more air.
- If the pressure is too high, release some air using the valve.
Common tire problems and solutions include:
- Patching punctures
- Replacing worn-out tires
- Maintaining proper inflation
Once the tire is inflated to the correct pressure, it is time to test it and ensure proper functioning.
Test the Tire and Ensure Proper Functioning
Once you have inflated the new tire to the recommended pressure, it is important to test it and ensure that it is functioning properly. To do this, follow these steps:
-
Start by taking the bike for a short test ride on a smooth surface. This will help you assess the tire’s performance and detect any abnormalities.
-
Pay close attention to the bike’s stability and handling. A properly functioning tire should provide a smooth and stable ride.
-
Test the tire’s durability by riding over different surfaces, such as pavement, gravel, or grass. This will help you determine if the tire can withstand various road conditions.
During the testing process, it is important to troubleshoot any common issues that may arise. This includes checking for any signs of wear, such as bulges or cuts in the tire. Additionally, listen for any unusual noises or vibrations while riding, as these could indicate a problem with the tire.
By thoroughly testing the new tire and troubleshooting any issues, you can ensure that it is functioning optimally and ready for regular use.
Frequently Asked Questions
Can I use the same tools and materials to change the tire on a jetson electric bike as I would for a regular bike?
Yes, the same tools and materials can be used to change the tire on a Jetson electric bike as you would for a regular bike. The process is similar and requires basic bike repair tools.
What should I do if I don’t have a safe and stable work area to change the tire?
When lacking a stable work area, you can explore alternatives like using a sturdy table or a bike repair stand. Ensure safety by securing the bike, wearing gloves and eye protection, and working methodically to avoid accidents.
How do I know the recommended pressure for inflating the new tire?
To determine the recommended tire pressure for the new tire, check the sidewall of the tire or consult the manufacturer’s guidelines. Use a tire pressure gauge to measure the pressure and adjust accordingly.
Can I reuse the old tire if it is still in good condition?
Yes, you can reuse the old tire if it is still in good condition. However, when disposing of tires, it is important to follow proper tire disposal regulations to ensure environmental responsibility and safety.
Is it necessary to release the tension on the brake system before removing the wheel from the bike?
Yes, it is necessary to release the tension on the brake system before removing the wheel from the bike. This ensures the tire pressure doesn’t affect the brake performance and avoids any potential damage.
Conclusion
In conclusion, changing the tire on a Jetson electric bike is a straightforward process that can be done with the right tools and a bit of patience. By following the step-by-step instructions outlined in this article, you can successfully replace your bike’s tire and ensure its proper functioning.
Remember to gather all the necessary materials, work in a safe area, release air pressure, remove and reinstall the wheel, and inflate the new tire to the recommended pressure.
So get ready to hit the road again with a smooth ride on your Jetson electric bike!