Charging your electric bike may seem overwhelming at first, but don’t worry! This detailed guide will take you through the process step by step, making sure you can charge your electric bike easily and confidently.
From understanding your bike’s battery to troubleshooting common issues, we’ve got you covered.
So get ready to dive into the world of electric bike charging and unlock the power of limitless rides.
Key Takeaways
- Keep the battery clean and dry to prevent damage.
- Charge the battery regularly to keep the cells active.
- Avoid exposing the battery to extreme temperatures.
- Unplug the charger once the battery is fully charged.
Amazon Product B0CQ7PSNVX
As an affiliate, we earn on qualifying purchases.
Understanding Your Electric Bike’s Battery
Understanding your electric bike’s battery is important because it affects how you charge your bike. To ensure proper battery maintenance and maximize battery lifespan, it is crucial to have a comprehensive understanding of how the battery works.
Electric bike batteries are typically made of lithium-ion and have a limited number of charge cycles. It is essential to avoid overcharging or completely draining the battery, as this can significantly reduce its lifespan. Regularly checking the battery’s voltage and charge level can help you determine when it needs to be charged.
In addition, storing the battery in a cool, dry place when not in use can also help prolong its lifespan. Now that you understand the importance of battery maintenance, let’s move on to finding the right charging station.
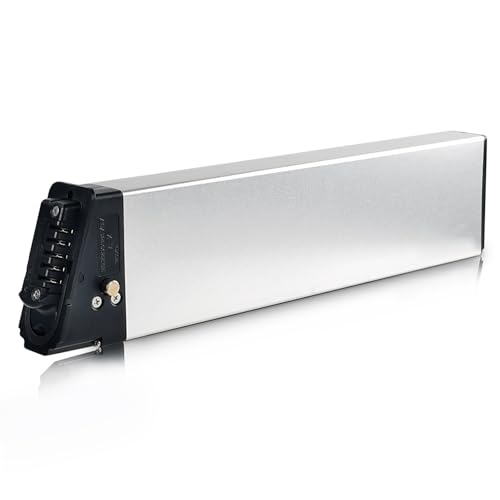
ShunTongDa 48V 10.4Ah 14Ah Folding Ebike Battery 48 Volt DCH-006 Built in Electric Bike Batteries with 30A BMS Totguard for 250W 500W 750W 1000W Motor Foldable E-Bike Battery (48V10.4Ah A Grade Cell)
①Battery Type: 18650 lithium ion batteries, Voltage: 48V, Capacity: 10.4Ah, Real High-Label Capacity. 30A BMS, Wattage at 500Wh,...
As an affiliate, we earn on qualifying purchases.
Finding the Right Charging Station
When searching for the ideal spot to plug in your e-bike, it’s crucial to locate a suitable charging station. Finding nearby charging stations is essential for a seamless charging experience. Here are two sub-lists to help you find the right one:
-
Public Charging Stations: These are often located in public areas such as shopping centers, parks, and city centers. They offer several benefits:
-
Accessibility: Public charging stations are usually easy to find and accessible to everyone.
-
Convenience: You can charge your e-bike while running errands or taking a break.
-
Safety: Public charging stations are often well-maintained and provide a secure environment for charging.
-
Online Charging Station Locators: Utilize online tools and apps to find charging stations near your location. These platforms provide real-time information about charging availability and can help you plan your route accordingly.
When you have located a suitable charging station, it’s time to prepare your bike for charging.
Amazon Product B0CYT6TBYX
As an affiliate, we earn on qualifying purchases.
Preparing Your Bike for Charging
To get your e-bike ready for charging, follow these steps:
-
Set the charging time according to the manufacturer’s instructions. This ensures efficient charging and prevents overcharging.
-
Take safety precautions during charging to prevent accidents or damage. Charge your e-bike in a well-ventilated area, away from flammable materials.
-
Use the charger that came with your bike. Using an incompatible charger can damage the battery.
-
Ensure that the charging port is clean and free from debris.
Once your bike is prepared for charging, you can proceed to the next step of connecting the charger to the battery, which we will discuss in the subsequent section.

EVAPLUS UL Certified 54.6V 1.5A Fast Electric Bike Charger for 48V Ebike Battery - Replacement for Razor, Jetson, Voyage, Gotrax, Ninebot,Segway, Hiboy(DC Connector:5.5x2.5/2.1mm)
54.6V 1.5A Smart Charger: for 48V Electric bicycle electric scooter battery, Input Voltage 120VAC 50/60HZ,Over output Voltage Protection;Over...
As an affiliate, we earn on qualifying purchases.
Connecting the Charger to the Battery
To connect the charger to the battery on your electric bike, start by locating the charging port on your battery. Ensure the charger is properly plugged into a power outlet before inserting the connector into the charging port. Following these steps is essential when learning how to charge electric bike batteries safely and efficiently. Always monitor the charging process and unplug the charger once the battery is fully charged to prevent overheating or damage.
Ensure the charger is connected correctly, making sure the positive and negative terminals align properly.
To ensure a secure connection and proper alignment, firmly insert the charger plug into the charging port, making sure it is fully seated and locked in place.
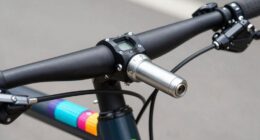
Locate the Charging Port on Your Battery
First, find the charging port on your electric bike battery. The charging port is where you will connect the charger to replenish the battery’s power. To locate the charging port, refer to your electric bike’s user manual or visually inspect the battery. The charging port is typically a small opening on the battery pack, often labeled with a charging icon. It is important to identify the correct port to ensure a proper connection. Additionally, before connecting the charger, check the battery’s capacity to determine if it needs charging. This can be done by referring to the battery indicator on your electric bike or using a battery capacity tester. Once you have located the charging port and checked the battery capacity, you can proceed to the next step of connecting the charger correctly, ensuring a successful charge.
Connect the Charger Correctly
Next, make sure to correctly connect the charger to the charging port on your battery. Proper charger handling is essential to ensure a successful charging process.
Start by aligning the charger plug with the charging port on the battery. Gently push the plug into the port until it fits securely. You may need to apply a slight amount of force, but be careful not to use excessive pressure, as it could damage the charging port.
If you encounter any connection issues, such as the plug not fitting or the charger not turning on, double-check that you are using the correct charger for your electric bike model. Additionally, inspect the charging port and plug for any dirt, debris, or damage that may be hindering the connection.
Once you have ensured a secure connection and proper alignment, you can proceed to the next step.
Ensure a Secure Connection and Proper Alignment
Make sure you align the charger plug with the charging port on your battery and gently push it in until it fits securely. A secure connection is crucial to ensure a proper charging process. To help you understand the importance of a secure connection and proper alignment, refer to the table below:
| Connection Type | Alignment | Secure Fit |
|---|---|---|
| Type A | Straight | Yes |
| Type B | Angled | Yes |
| Type C | Sideways | No |
| Type D | Diagonal | No |
| Type E | Straight | Yes |
Proper storage, handling, and disposal of your charger are essential to maintain its longevity and safety. Also, troubleshooting charging errors can save you time and frustration. In the subsequent section about setting up the charging environment, you will learn about the next steps to ensure a successful charging process.
Setting Up the Charging Environment
To set up the charging environment for your electric bike, you’ll need to find a suitable location near a power outlet. Here are some key steps to ensure an efficient charging process:
-
Choosing the right charging cable: Select a cable that is compatible with your electric bike’s battery and charging port. This will ensure a secure connection and prevent any damage to the components.
-
Optimizing charging time: It is recommended to charge your electric bike battery to its full capacity. However, if you’re in a hurry, you can charge it partially to get enough power for your ride.
-
Keeping the area clean and dry: Ensure that the charging area is free from any moisture or dirt, as it can damage the electrical components of your bike.
-
Avoiding overcharging: Once your electric bike battery is fully charged, unplug it from the power outlet to prevent overcharging, which can degrade the battery life.
By following these steps, you can set up an ideal charging environment for your electric bike.
Now, let’s move on to monitoring the charging process to ensure optimal performance.
Monitoring the Charging Process
To monitor the charging process of your electric bike, you’ll need to keep an eye on the battery level and ensure it is charging steadily. Monitoring efficiency and tracking battery health are crucial for maintaining optimal performance. A useful tool for this is the Battery Management System (BMS), which provides real-time data on the charging status. It allows you to track the battery’s voltage, temperature, and charging current. By monitoring these parameters, you can ensure that the charging process is efficient and identify any potential issues. Additionally, a 2 column and 5 row table can help you visually track the battery’s performance over time, evoking a sense of satisfaction as you witness its progress. By carefully monitoring the charging process and keeping track of battery health, you can take necessary actions to maintain your electric bike’s battery in the subsequent section about maintaining its longevity.
Maintaining Your Electric Bike’s Battery
You can ensure the longevity of your battery by following proper maintenance practices. Battery maintenance is essential for optimizing battery performance and getting the most out of your electric bike.
To maintain your electric bike’s battery, make sure to keep it clean and dry, as moisture can damage the battery cells. Regularly inspect the battery for any signs of damage or wear, such as cracks or leaks, and replace it if necessary.
It’s also important to charge your battery regularly, even if you don’t use your electric bike frequently, as this helps to keep the battery cells active and prevents them from deteriorating.
By taking these steps, you can maximize the lifespan of your battery and enjoy long-lasting performance.
Now let’s move on to some tips for extending battery life.
Tips for Extending Battery Life
If you want your battery to last longer, it’s important to avoid exposing it to extreme temperatures. Extreme heat or cold can negatively impact the performance and lifespan of your electric bike’s battery.
To maximize the range and preserve battery health, it is recommended to charge your battery at room temperature, ideally between 50°F and 77°F (10°C and 25°C). Additionally, avoid charging your battery immediately after a ride as it may still be warm, which can lead to overheating.
It is also essential to unplug the charger once the battery is fully charged to prevent overcharging, which can degrade the battery over time.
By following these tips, you can extend the life of your electric bike’s battery and ensure optimal performance.
To troubleshoot common charging issues, refer to the subsequent section.
Troubleshooting Common Charging Issues
Experiencing problems with charging? Let’s troubleshoot common issues. When it comes to troubleshooting common charging issues with your electric bike, there are a few key areas to focus on in order to optimize charging efficiency. Take a look at the table below for a quick reference guide to common charging problems and their potential solutions:
| Charging Issue | Potential Solution |
|---|---|
| Battery not charging | Check if the charger is properly connected and try a different outlet. |
| Slow charging | Ensure that the charger and battery are compatible and functioning correctly. |
| Overheating during charging | Allow the battery to cool down before attempting to charge again. |
| Inconsistent charging | Clean the charging contacts and check for any loose connections. |
| Insufficient range after charging | Consider replacing the battery if it is old or damaged. |
Now that you have a better understanding of troubleshooting common charging issues, let’s move on to answering frequently asked questions about electric bike charging.
Frequently Asked Questions about Electric Bike Charging
Let’s explore some frequently asked questions about charging electric bikes.
One common question is: How long does it take to charge an electric bike? The charging time varies depending on the battery capacity and the charger’s output. On average, it takes around 4 to 6 hours to fully charge an electric bike. However, some high-capacity batteries may require up to 8 hours.
Another important question is: What safety precautions should I take when charging my electric bike? Firstly, always use the charger provided by the manufacturer and avoid using third-party chargers. Secondly, make sure to charge your electric bike in a well-ventilated area to avoid overheating. Additionally, never leave your bike unattended while charging and avoid charging it overnight.
Following these safety precautions will help ensure a safe and efficient charging process for your electric bike.
Frequently Asked Questions
How often should I charge my electric bike’s battery?
To maximize the battery lifespan of your electric bike, it is recommended to charge it regularly but not excessively. A good charging habit is to charge your bike’s battery when it reaches around 20-30% and avoid letting it fully discharge.
Can I use any charging station to charge my electric bike?
Using any charging station for your electric bike can be risky. Ensure electric bike charging safety by using compatible charging stations. Check the specifications of your bike and choose a station that meets the requirements.
Can I charge my electric bike’s battery overnight?
Yes, you can charge your electric bike’s battery overnight, but it’s important to follow charging safety precautions. To extend battery life, it’s best to avoid overcharging and keep the battery at a moderate temperature.
How long does it take to fully charge an electric bike’s battery?
Charging an electric bike’s battery can take anywhere from a few hours to overnight, depending on factors like battery capacity, charger output, and remaining charge. Factors affecting charging time include battery age, temperature, and usage patterns.
Can I use a different charger to charge my electric bike’s battery if I lose the original one?
Yes, you can use a different charger to charge your electric bike’s battery if you lose the original one. However, ensure that the alternative charger has the same voltage and current rating to avoid damaging the battery. Follow all safety precautions while charging.
Conclusion
Congratulations! You’ve successfully learned how to charge your electric bike like a pro. By understanding your bike’s battery and finding the right charging station, you can ensure a seamless charging experience.
Remember to prepare your bike, connect the charger, and set up the charging environment correctly.
Maintaining your battery and following our tips for extending its life will keep you on the road for longer.
And if any charging issues arise, our troubleshooting guide has got you covered.
Happy charging!