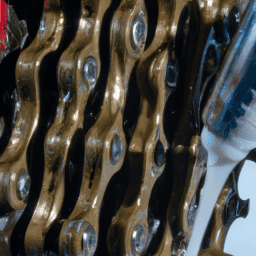
As someone passionate about biking, I understand the importance of keeping the bicycle chain in top condition for seamless and effective cycling experiences. Yet, as time passes, the chain can gather dirt, grime, and other particles, which results in increased wear and tear, reduced efficiency, and potential harm to other components of the bicycle.
That’s why knowing how to clean and lube a bicycle chain is an essential skill for any cyclist. To put it simply, a clean and lubricated bicycle chain is like a well-oiled machine, smoothly rotating and powering the bike forward. Neglecting to maintain your chain could lead to frustrating and potentially costly repairs down the line.
In this article, I’ll walk you through the step-by-step process of cleaning and lubricating your bike chain, so you can keep your ride running smoothly and enjoyably. So, let’s get started!
Key Takeaways
- Cleaning and lubricating a bicycle chain is essential for smooth and efficient rides.
- DIY alternatives such as hot water and dish soap or baking soda, and vegetable oil or paraffin wax can be used for chain maintenance.
- Removing the chain is necessary for thorough cleaning, and lubricant should be chosen based on riding conditions and frequency.
- Proper chain tension should be maintained and regularly tested for power transfer, and regular maintenance can prevent costly repairs down the line.
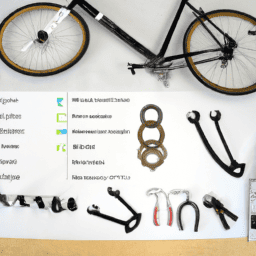
Gather the Necessary Materials
Before you can start cleaning and lubing your bicycle chain, you’ll need to gather a few essential materials that will ensure your bike stays in tip-top shape and runs smoothly. You can find these materials at your local bike shop or online retailers like Amazon.
Some of the necessary materials include a degreaser, a lubricant, a chain cleaner tool, a clean rag, and a brush. If you prefer a DIY approach, you can make your own degreaser by mixing a solution of hot water and dish soap or baking soda. You can also create your own lubricant by using household items like vegetable oil or paraffin wax. Just be sure to research the proper ratios and application methods before attempting to make your own cleaning and lubrication materials.
Once you have gathered all the necessary materials, you can move on to the next step of removing the chain.
Remove the Chain
First, you’ll want to release the tension on your chain by loosening the rear wheel axle. This will allow you to remove the chain from the bike and give you better access to clean it thoroughly. Here are some key things to keep in mind when removing your bike chain:
- Use a chain tool to break the chain if needed.
- Be careful not to lose any chain pins or links.
- Keep track of the direction the chain was facing before removing it.
- Take note of any particularly dirty or rusted sections of the chain that may require extra attention during cleaning.
- Remember the benefits of removing the chain regularly, such as preventing excess wear and tear on other parts of the bike.
Chain cleaning methods can vary depending on the level of dirt and grime on the chain. By removing the chain, you’ll have the freedom to clean it thoroughly without worrying about damaging other parts of your bike.
Once the chain is removed, it’s time to move on to the next step: lubricating the chain.
Lubricate the Chain
For lubricating my bike chain, I always make sure to choose the right lubricant for the conditions I’ll be riding in. This means using a wet lubricant for wet conditions and a dry lubricant for dry conditions.
Once I’ve chosen the right lubricant, I apply it to the chain by carefully dripping it onto each link while turning the pedals backwards. Finally, I remove excess lubricant with a clean rag to prevent dirt and debris from sticking to the chain.
Choose the Right Lubricant
To ensure optimal performance of your bike’s chain, make sure you select the right lubricant, one that matches your riding conditions and frequency. Here are some things to consider when choosing the right lubricant:
-
Benefits of oil-based lubricants: Oil-based lubricants are the most common type of lubricant used for bike chains. They provide excellent protection against rust and corrosion, and they also help to reduce friction between the chain and the gears. This means that your bike will run smoother and quieter, and your chain will last longer.
-
Alternatives to traditional bike chain lubricants: If you’re looking for an alternative to traditional bike chain lubricants, there are a few options to consider. One option is to use a dry lubricant, which is a wax-based lubricant that dries quickly and doesn’t attract dirt and debris. Another option is to use a ceramic-based lubricant, which provides excellent protection against wear and tear.
When you’ve chosen the right lubricant for your bike’s chain, it’s time to apply it.
Apply Lubricant to the Chain
Applying the right lubricant to your bike’s chain can make all the difference in the performance of your ride. Chain lubrication techniques can vary, but the basic steps involve holding the bottle of lubricant over the chain while turning the pedals backwards.
It’s important to apply the lubricant evenly and not to use too much, as excess lubricant can attract dirt and grime, causing the chain to become dirty and wear out faster. Benefits of regular lubrication include smoother and quieter shifting and reduced wear and tear on the chain and gears.
It’s recommended to lubricate your chain after every ride in wet or dirty conditions, and every few rides in dry conditions. Once you’ve applied the lubricant, let it sit for a few minutes to allow it to penetrate the chain before wiping off any excess lubricant with a clean rag.
This will prevent dirt buildup and ensure a longer-lasting, smoother ride.
Remove Excess Lubricant
After you’ve finished lubricating your bike’s chain, take a moment to wipe away any excess, ensuring a smooth and efficient ride with less mess. The wiping technique should be done carefully to avoid removing too much lubricant, which can cause the chain to wear out more quickly.
Here are some tips to help you remove excess lubricant from your bike’s chain:
- Use a clean rag or cloth to gently wipe the chain while rotating the pedals backwards.
- Pay attention to the hard-to-reach areas, such as the derailleur and cassette, as these areas tend to accumulate excess lubricant.
- Avoid using solvents or chemicals to clean the chain, as these can be harmful to the chain’s components.
- After wiping away excess lubricant, inspect the chain for any signs of damage or wear and tear.
- Finally, ensure that the chain is properly tensioned and that the gears shift smoothly before continuing with your ride.
It’s important to maintain the cleanliness of your bike’s chain, as a dirty chain can cause increased friction and wear on the chain and drivetrain components. With a clean and well-lubricated chain, you can enjoy a smoother and more efficient ride.
In the next section, we’ll discuss how to reinstall the chain after cleaning and lubrication.
Reinstall the Chain
Now that I’ve cleaned and lubricated my bicycle chain, it’s time to reinstall it.
First, I’ll need to reattach the chain to the rear derailleur and the front chainring.
Then, I’ll need to adjust the rear wheel to ensure that the chain is properly tensioned.
Finally, I’ll test the chain tension by gently pressing on it to ensure that it has the appropriate amount of slack.
Reattach the Chain
First, you’ll want to grab your chain tool and reattach the chain to your bike. Before you do that, make sure you’ve properly sized your chain by counting the number of links and matching it to your bike’s specifications. If you need to add or remove links, use your chain tool to do so.
To prevent premature chain wear and stretch, it’s important to make sure the chain is properly lubricated. Apply a small amount of lubricant to each link, making sure to cover the entire chain.
Now that the chain is reattached and well-lubricated, it’s time to adjust the rear wheel to ensure proper tension and alignment.
Remember that a clean and well-lubricated chain not only improves efficiency but also prolongs the life of your bike’s components.
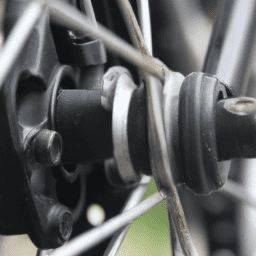
Adjust the Rear Wheel
To ensure a smooth ride, you’ll want to make sure the tension and alignment of your rear wheel are just right. The wheel alignment affects the straightness of your bike’s trajectory, while adjusting the tension affects how well the chain moves and stays in place. Here’s a table to help you understand the right tension range for your bike’s rear wheel:
| Bike Type | Tension Range |
|---|---|
| Road | 80-120 kgf |
| Mountain | 70-110 kgf |
| BMX | 60-100 kgf |
To adjust the wheel alignment, you’ll want to start by loosening the bolts that hold the wheel in place. Then, align the wheel by eye or using a tool like a string line or a laser. Once you’ve got the alignment right, tighten the bolts and check again to make sure the wheel is still straight. To adjust the tension, use a tension gauge to measure the force applied to the chain when you push down on it. Adjust the tension by tightening or loosening the nuts on the rear axle until the desired tension is reached.
With the wheel alignment and tension adjusted, it’s time to test the chain tension.
Test the Chain Tension
Next, you’ll want to hop on your bike and feel the tension of the chain as you pedal, imagining the power transferring smoothly from your legs to the wheels. Proper chain tension is crucial to ensure a smooth and efficient ride.
To adjust the tension, shift your bike into the smallest chainring and the smallest cog in the rear. Then, pull the chain downwards to check if there’s any slack. The chain should have a little bit of play, but not too much, as it can cause the chain to slip off or wear out prematurely.
If the chain is too loose, you’ll need to adjust the tension by moving the rear wheel back. Loosen the axle nuts and move the wheel backwards until the chain has proper alignment and tension. Once you’ve adjusted the tension, check the chain again by moving it up and down. If there’s still too much slack, repeat the process until the chain has proper tension. Remember to tighten the axle nuts properly to secure the wheel in place.
Now, you’re ready to move on to the maintenance tips to keep your chain running smoothly.
Maintenance Tips
Remember, regularly maintaining your bike chain by cleaning and lubricating it will keep it running smoothly and prolong its lifespan. Here are some tips to help you keep your chain in top condition:
-
Clean your chain regularly using a degreaser and a brush. This will help remove any dirt and grime that has accumulated on the chain, which can cause it to wear down faster over time.
-
Lubricate your chain with a high-quality lubricant, using just enough to coat the chain without leaving excess oil. This will help reduce friction between the chain and the gears, which can also contribute to wear and tear.
-
Check your chain for wear and damage regularly, and replace it if necessary. Common chain issues include stretching, which can cause the chain to skip or slip, and bent links, which can cause it to jam or break.
By following these preventive measures and keeping an eye out for common chain issues, you can help ensure that your bike chain stays in top condition for years to come.
Frequently Asked Questions
How often should I clean and lube my bicycle chain?
I’ve found that the best practice for maintaining my bike’s chain is to clean and lube it every 100-200 miles. Frequency may vary based on riding conditions, but regular maintenance is crucial for optimal performance and longevity.
Can I use any type of lubricant on my bicycle chain?
There are different types of lubricants for bicycle chains, such as wet and dry. Wet lubricants are better for wet conditions while dry lubricants are better for dry conditions. Proper application is crucial for maximum effectiveness.
What should I do if my chain is rusty or heavily corroded?
If my chain is rusty or heavily corroded, I’ll first remove it from my bike. I’ll then soak it in a rust dissolver solution to remove the rust and prevent further corrosion. If needed, I’ll also consider alternative solutions such as replacing the chain. Rust prevention is key.
Should I clean and lube my chain before or after each ride?
It’s best practice to clean and lube your bike chain after every ride to prevent wear and tear. However, there are pros and cons to doing it beforehand, such as better performance but potential mess.
Is it necessary to remove the chain for cleaning and lubrication, or can I clean it while it’s still on the bike?
It’s not necessary to remove the chain for cleaning, but it can increase cleaning efficiency. However, removing the chain can also cause chain wear. It’s best to clean the chain while it’s still on the bike, using a degreaser and lubricant.
Conclusion
Well, that’s it folks! Cleaning and lubing a bicycle chain isn’t too difficult, but it does require a bit of time and effort.
Remember to gather the necessary materials, remove the chain, lubricate it thoroughly, and reinstall it correctly. With just a little bit of maintenance, your bike will continue to perform at its best and last for many years to come.
Now, I know some of you may be thinking, "But I don’t have the time or patience to do all of this!"Trust me, I understand. However, neglecting your bike’s chain can lead to poor performance and even damage to your bike.
Plus, taking care of your bike now can save you time and money in the long run. So, set aside a little bit of time to give your bike some TLC. Your bike (and your wallet) will thank you!