I have been riding bikes for many years, and during this time, I’ve come to understand how vital it is to maintain my bicycle in excellent condition. A key aspect of this maintenance is ensuring my disc brakes are clean. Accumulation of dirt and grime on the brake pads and rotors over time can reduce their effectiveness and might lead to safety hazards.
That’s why I’d like to share my knowledge on how to clean bicycle disc brakes effectively.
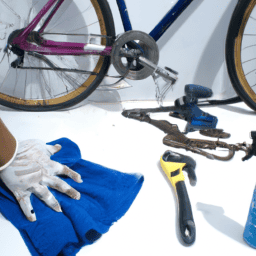
First, it’s essential to gather the right tools and materials. You’ll need a clean rag, rubbing alcohol, a soft-bristled brush, and a set of Allen wrenches. Once you have these items, remove the wheels and calipers from your bike, taking care not to damage the brake lines or pistons.
From there, you can begin cleaning the brake pads and rotors with the rubbing alcohol and soft-bristled brush. By following this simple but thorough cleaning process, you can ensure your bike’s braking system remains in top condition and keep yourself safe on the road.
Key Takeaways
- Regular maintenance is crucial for optimal performance and safety of bike disc brakes.
- Proper cleaning techniques using mild soap and water or dedicated brake cleaners are important to prevent damage.
- Contamination of pads and rotors can occur from oil, grease, and debris on the road.
- Regular cleaning, inspection, and replacement of worn out parts are necessary for long-lasting and efficient brake performance.

Schwinn Sporterra RX Gravel Bike, 700c Mens and Womens Bike, 14-Speed Drop Bar Gravel Bicycle, Mechanical Disc Brakes, Rigid Fork, Aerodynamic Riding Position, Quick Release Seat Post, Adult Bicycle
GRAVEL BICYCLE: Enjoy next level riding with the Sporterra RX by Schwinn. With 700c wheels, this mens and...
As an affiliate, we earn on qualifying purchases.
Gather the Right Tools and Materials
Before you start cleaning, make sure you’ve got all the necessary tools and materials. You’ll need a screwdriver to remove the wheels and calipers, a clean rag to wipe down the rotor, rubbing alcohol to remove any grease or oil, and a degreaser to clean the calipers.
It’s important to have the right tools to keep your bike in top condition.
When it comes to cleaning your bike’s disc brakes, there are a few things to keep in mind.
First, you should be aware of the different types of lubricants that are available. Some lubricants can cause damage to your brakes, so it’s important to choose the right one for your bike.
Additionally, you need to know the proper cleaning techniques to avoid damaging the brake components.
By taking the time to gather the right tools and materials and understanding the proper techniques, you can keep your bike’s disc brakes in top condition for longer.

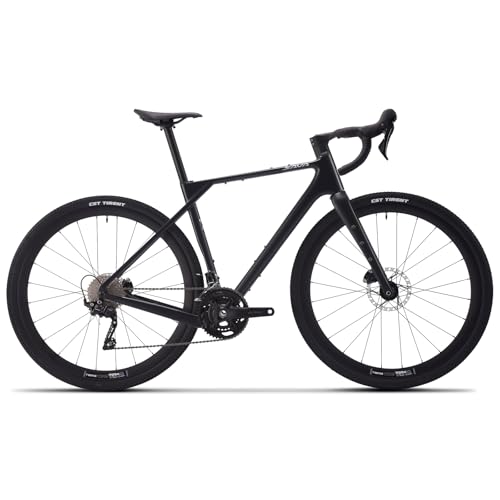
SAVADECK T800 Carbon Gravel Bike, with Shimano GRX610 12-Speed, Hydraulic Disc Brakes, 700x40c Tires for Road & Off-Road Adventure, Men's/Women's Bicycle(Elegant White, 51cm)
【With SHIMANO GRX Drivetrain Setup】Equipped with SHIMANO GRX610 shifters and RX822 rear derailleur, matched with a 12-speed M6100...
As an affiliate, we earn on qualifying purchases.
Remove the Wheels and Calipers
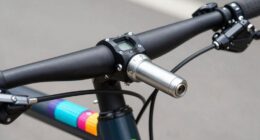
First things first, pop off those wheels and take those calipers off! Before removing the wheels, it’s important to take proper safety precautions. This includes making sure the bike is stable and won’t tip over during the process. If possible, use a bike stand or have someone hold the bike steady for you.
Once the bike is secure, remove the wheels by loosening the quick-release levers or unbolting the axles.
With the wheels off, it’s time to focus on cleaning the calipers. Start by removing the pads from the calipers, taking note of their orientation so you can put them back in the right way. Next, use a clean rag or brush to wipe away any dirt or debris from the calipers. If there is stubborn grime or residue, a gentle spray of brake cleaner can be used. Remember to avoid spraying the cleaner on any parts that shouldn’t come into contact with it, such as the brake pads or rotors.
Once the calipers are clean, it’s time to move on to cleaning the brake pads and rotors. Without delay, it’s time to clean the brake pads and rotors.
SAVADECK Carbon Gravel Bike - T800 Carbon Frame & Fork, Shimano GRX400 10-Speed Groupset, Hydraulic Disc Brakes, 700C x 40mm Tires - Lightweight Design for Road & Off-Road Adventures (Black, 58cm)
【Ultra-Lightweight T800 Carbon Frame】Built with a T800 R21 carbon fiber frame and fork, this bike weighs just 10.4kg...
As an affiliate, we earn on qualifying purchases.
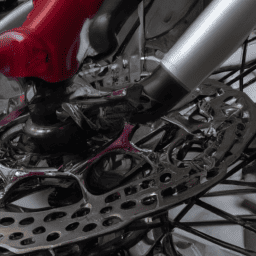
Clean the Brake Pads and Rotors
Now it’s your turn to give your ride the TLC it deserves by giving its stopping power a refreshing makeover that’ll have you feeling like a pro on the road. In this section, we’ll discuss the proper techniques for cleaning your brake pads and rotors. This is crucial for maintaining the performance of your disc brakes and ensuring they last longer.
One common issue with disc brakes is contamination of the pads and rotors. This can happen from oil, grease, or debris on the road. To clean the brake pads and rotors, start by using rubbing alcohol and a clean rag to wipe down the rotors. Then, use a clean rag and rubbing alcohol to clean the brake pads. If the pads are heavily contaminated, you may need to replace them.
| Proper Techniques | Common Issues |
|---|---|
| Use rubbing alcohol and a clean rag to wipe down the rotors | Contamination of pads and rotors |
| Use a clean rag and rubbing alcohol to clean the brake pads | Heavy pad contamination may require replacement |
| Check for uneven wear on the pads | Warping of the rotors |
| Replace pads if necessary |
With proper cleaning techniques, you can prolong the life of your brake system and avoid common issues. Now, let’s move on to the next step and reassemble the brake system.

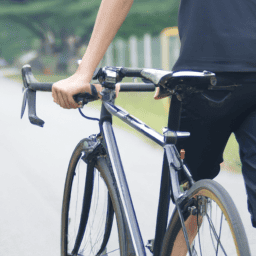
SAVADECK Carbon Gravel Bike - T800 Carbon Frame & Fork | Shimano U6000 11-Speed Groupset | Hydraulic Disc Brakes | 700CX40mm All-Terrain Tires | Men & Women Road/Off-Road Bicycle (Gray, 53cm)
【Ultralight T800 Carbon Performance】: Featuring a premium T800 R21 carbon fiber frame and fork weighing just 10.4kg (22.92...
As an affiliate, we earn on qualifying purchases.
Reassemble the Brake System
Once you’ve successfully cleaned your brake pads and rotors, it’s time to put everything back together and get back to riding with confidence.
First, you’ll want to make sure that the brake pads are properly aligned and secure in the caliper. Adjusting tension may be necessary, which can be done by using the barrel adjuster on the brake lever or by manually adjusting the cable tension. It’s important to ensure that the brake pads are not rubbing against the rotor, as this can cause unnecessary wear and tear.
Next, you’ll want to lubricate any moving parts in the brake system, such as the pivot points on the caliper or the brake lever. This will help to ensure smooth operation and prevent any squeaking or sticking. Be sure to use a lubricant that is compatible with your brake system, as some types of lubricants can damage brake components.
Once everything is reassembled and properly adjusted, give the brakes a few test squeezes to ensure that they are functioning properly. With a little bit of maintenance and care, your disc brakes should provide reliable stopping power for years to come.
As with any mechanical component on your bike, regular maintenance is key to ensuring optimal performance.
In the next section, we’ll discuss some tips and best practices for keeping your disc brakes in top condition.
Maintenance Tips and Best Practices
As a bike mechanic, I’ve learned that regular maintenance is crucial to keeping a bike in top shape.
When it comes to disc brakes, regular cleaning and inspection are particularly important.
In my experience, avoiding common mistakes and pitfalls can also make a big difference in the longevity and performance of your bike’s braking system.
Regular Cleaning and Inspection
To maintain your bicycle’s disc brakes, you should regularly clean and inspect them. The benefits of cleaning your brakes regularly are numerous. It helps to prevent the build-up of dirt and debris that could affect the performance of your brakes. It also helps to extend the lifespan of your brake pads and rotors.
Inspecting your brakes is equally important, as it allows you to identify any potential problems before they become major issues. During inspection, check your brake pads for wear and tear, ensure that the brake calipers are properly aligned, and check the rotor for any warping or damage.
Regular cleaning and inspection of your bicycle’s disc brakes will ensure that they perform optimally and keep you safe while riding. Now, let’s move on to avoiding common mistakes and pitfalls when maintaining your bicycle’s disc brakes.
Avoiding Common Mistakes and Pitfalls
Now that we’ve covered the importance of regular cleaning and inspection of bicycle disc brakes, let’s dive into avoiding common mistakes and pitfalls. It’s crucial to follow proper technique when cleaning the brakes to ensure optimal performance. However, even experienced cyclists can make mistakes that can cause damage to their brakes or lead to accidents on the road.
To avoid mishaps, here are some troubleshooting tips to keep in mind:
-
Avoid using harsh chemicals: While it may be tempting to use strong chemicals like bleach or ammonia to clean your disc brakes, these can actually damage the brake pads and rotor. Instead, stick to mild soap and water or dedicated brake cleaners.
-
Don’t over-tighten bolts: When reassembling your brakes after cleaning, be careful not to over-tighten the bolts. This can cause the rotor to warp or the brake pads to wear unevenly. Use a torque wrench if you’re unsure of the correct tightness.
Remember, proper technique and attention to detail are key when cleaning bicycle disc brakes. By avoiding common mistakes and pitfalls, you can keep your brakes in top condition and enjoy a safe and smooth ride.
Frequently Asked Questions
Can I clean my bicycle disc brakes with soap and water?
Sure, soap and water can clean your bike’s disc brakes, but there are pros and cons. Soap can remove dirt but may leave residue. Alternatives like rubbing alcohol or brake cleaner are more effective.
How often should I clean my bicycle disc brakes?
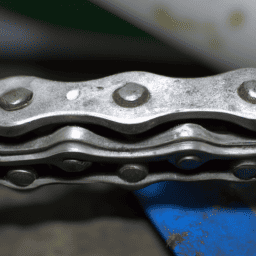
I recommend conducting bicycle maintenance frequently for optimal performance. Preventative maintenance tips include regularly checking brakes, lubricating chains, and cleaning the frame. This routine upkeep helps ensure a safe and smooth ride.
Should I lubricate my brake system after cleaning?
Oh, sure. After spending hours cleaning my bike’s disc brakes, why not add some silicone lubricant for good measure? Pros include smooth braking and prolonging the components’ lifespan. Proper application involves applying sparingly and avoiding contact with the rotor.
Can I use alcohol or acetone to clean my bicycle disc brakes?
Using alcohol or acetone to clean bicycle disc brakes has pros and cons. They are effective at removing oil and grease, but can damage brake pads and seals. To avoid damage, apply the solution to a rag instead of directly on the brakes.
What should I do if my brake pads are contaminated with oil or grease?
When dealing with oil or grease contamination on brake pads, I first remove the pads and clean them thoroughly with isopropyl alcohol. If the contamination is severe, brake pad replacement may be necessary. Additionally, regular maintenance can prevent rusted disc brakes.
Conclusion
In conclusion, cleaning your bicycle disc brakes is an essential task for any cyclist. Not only does it ensure your safety while riding, but it also helps prolong the life of your brake system.
By following the steps outlined above, you can easily clean your disc brakes with minimal effort. However, it’s important to note that regular maintenance is key to keeping your brake system in top condition.
This means checking your brake pads and rotors for wear and tear, ensuring proper alignment, and keeping the system lubricated. By taking the time to care for your brakes, you’ll not only have a smoother ride but also avoid any potential accidents on the road.
So why wait? Grab your tools and start cleaning those brakes today!