Hey there, fellow electric bike enthusiasts!
If you’ve ever found yourself in the position of needing to replace your electric bike’s battery, fear not! I’m here to guide you through the process with step-by-step instructions on how to connect replacement batteries to your beloved two-wheeled companion.
With the right tools and a little know-how, you’ll have your bike powered up and ready to go in no time.
So, let’s dive right in and get those wheels spinning again!
Key Takeaways
- Gathering the necessary tools and equipment is essential before starting the battery replacement process.
- Disconnecting the old battery requires detaching wiring or connectors and removing bolts or screws securing the battery.
- Preparing the replacement battery involves checking for corrosion or damage and measuring the voltage with a voltmeter.
- Connecting the terminals requires securely attaching the positive and negative terminals to their respective wires on the bike.

GPUTEK Mini Bike Tire Air Pump: Fast Inflate Portable Small Bicycle Electric Pump for Presta and Schrader Valves, 120 Psi High Pressure Pump with Digital Gauge for Road Bike, Mountain Bike, E-Bike
Portable and Lightweight Design: The GPUTEK bike electric pump measures a compact 2.81 x 1.77 x 1.25 inches...
As an affiliate, we earn on qualifying purchases.
Gather the Necessary Tools and Equipment
You’ll need to gather all the necessary tools and equipment to connect the replacement batteries to your electric bike.
Before starting the process, it’s crucial to ensure your safety by taking some necessary precautions. First, make sure you have a set of wrenches or a socket set that fits the bolts on your bike’s battery compartment.
Additionally, you’ll need a volt meter to measure the voltage of the new batteries and a wire cutter or stripper to prepare the wires for connection. It’s also important to have safety goggles and gloves to protect your eyes and hands while working.
Remember to always work in a well-ventilated area and keep any flammable materials away.
Now that you have all the tools and equipment ready, it’s time to disconnect the old battery.

HOTO Mini Bike Tire Pump, 25s Fast Inflate Bicycle Pump with Guage, 150PSI Portable Electric Bike Air Pump with Presta and Schrader Valve for Road Bike, Motorcycle, Mountain Bike, BMX, Sports Ball
NOTICE: The Presta valve adapter is a separate accessory, always attach the Presta adapter securely to the tire...
As an affiliate, we earn on qualifying purchases.
Disconnect the Old Battery
First, detach the old battery from the electric bike. Before removing the old battery, make sure to take proper safety precautions. This includes wearing protective gloves and eyewear to prevent any potential accidents or injuries.
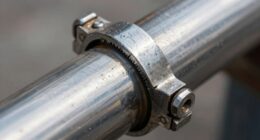
Begin by locating the battery compartment on the bike, usually located near the frame or under the seat. Once you have identified the compartment, carefully disconnect any wiring or connectors that are attached to the old battery. Use a wrench or screwdriver to loosen and remove any bolts or screws securing the battery in place.
Once all connections are detached and any fasteners removed, gently lift the old battery out of the compartment.
With the old battery removed, you can now proceed to prepare the replacement battery for installation.

CYCPLUS Electric Air Compressor Portable Bicycle Pump Car Tire Inflator, Max 150 PSI, Auto Shut-Off Air Pump with Presta and Schrader Valves for All Bicycles Motorcycles and Cars
【150PSI Fast Inflation】CYCPLUS Portable Air Compressor delivers 𝟏𝟓𝟎 𝐏𝐒𝐈/𝟏𝟎.𝟑 𝐁𝐚𝐫, allowing you to fully inflate a bike tire...
As an affiliate, we earn on qualifying purchases.
Prepare the Replacement Battery
To start, ensure you have the necessary tools for installing the new battery. You will need a wrench, pliers, and a voltmeter.
Before connecting the replacement battery, it is important to check its maintenance requirements. Refer to the manufacturer’s instructions for any specific guidelines regarding charging and storage.
Troubleshooting battery connection issues can be avoided by inspecting the terminals for any signs of corrosion or damage. Use the voltmeter to measure the voltage of the replacement battery, ensuring it matches the specifications of your electric bike.
Additionally, make sure the battery is securely positioned in the battery compartment, using the appropriate brackets or straps.
Finally, connect the positive and negative terminals of the replacement battery to the corresponding wires in your electric bike. This ensures a proper electrical connection, allowing for the smooth operation of your electric bike.

CYCPLUS AS2 PRO Tiny Bicycle Pump with Gauge, Max 120 PSI Electric Mini Pump, Auto Stop, with Presta and Schrader Valve for E-Bike, MTB, and Road Bike (2025 Updated Version)
【Pocket Size & Portable】: Weight: 𝟒.𝟐𝟑 𝐨𝐳 (𝟏𝟐𝟎𝐠); Size: 𝟐.𝟕𝟓 𝐱 𝟏.𝟏𝟎 𝐱 𝟏.𝟗𝟐 inches - mini and...
As an affiliate, we earn on qualifying purchases.
Connect the Positive and Negative Terminals
After ensuring the proper positioning of the battery, securely attach the positive and negative terminals to the corresponding wires in your e-bike. To do this, locate the positive terminal on the battery pack and connect it to the positive wire on your e-bike. Make sure to tighten the connection to ensure a solid electrical connection.
Next, locate the negative terminal on the battery pack and connect it to the negative wire on your e-bike. Again, tighten the connection securely. It is crucial to follow safety precautions during this process, such as wearing gloves and goggles to protect yourself from any potential electrical hazards.
Once the terminals are securely connected, you can proceed to the next step and test the battery connection.
Test the Battery Connection
Now, you can check if the battery connection is working properly by testing it. To troubleshoot any potential battery connection issues, follow these steps:
-
Use a multimeter to measure the voltage across the positive and negative terminals of the battery. A reading within the specified range indicates a good connection.
-
Inspect the terminals for any signs of corrosion or loose connections. Clean and tighten them if necessary to ensure a secure connection.
-
Test the battery by connecting it to the electric bike and turning it on. Verify if the bike receives power and if the battery functions as expected.
By conducting these battery troubleshooting steps, you can ensure that the connection is solid and the battery is functioning correctly.
Once you have verified the battery connection, you can proceed to install the battery in its proper position.
Install the Battery in its Proper Position
Make sure you install the battery in the correct position to ensure proper functionality.
To begin, locate the battery compartment on your electric bike and carefully place the replacement battery inside. It is crucial to install the battery securely to prevent any potential damage or accidents during your rides.
Ensure that the battery is aligned correctly with the connectors and fits snugly into the compartment. If you encounter any resistance, double-check if there are any obstructions or debris that need to be cleared.
Troubleshooting common battery installation issues may include checking for loose or damaged wires, loose connectors, or corrosion.
Once the battery is securely installed, you can proceed to reconnect any additional components such as the controller or motor. This will ensure that your electric bike functions optimally.
Reconnect any Additional Components
To complete the installation of the replacement battery on my electric bike, I need to reattach the wiring and cables. This step is crucial to ensure proper functioning of the bike’s electrical system.
Additionally, it is important to securely fasten any loose parts to prevent any potential damage or accidents.
Reattach Wiring and Cables
First, you’ll need to reattach the wiring and cables to the electric bike. Start by carefully repositioning the cables in their original locations, following any markings or guides that were present before disconnecting them.
Ensure that each cable is securely inserted into its corresponding connector, and double-check for any loose or damaged wires. If you encounter any connection issues, troubleshoot by inspecting the connectors for dirt or corrosion, cleaning them if necessary. Additionally, verify that the cables are properly seated and aligned before attempting to reconnect them.
Once all the wiring and cables are reattached, you can move on to the next step of securing any loose parts to ensure a safe and reliable connection.
Securely Fasten any Loose Parts
Next, make sure all loose parts are securely fastened to ensure a safe and reliable connection. Proper fastening techniques are crucial to prevent any potential issues with the replacement batteries on your electric bike. Here are some common mistakes to avoid and tips for securely fastening the loose parts:
- Use appropriate tools, such as wrenches or screwdrivers, to tighten bolts, nuts, and screws.
- Check for any loose brackets or mounts and tighten them securely.
- Use zip ties or cable clamps to secure loose cables and wiring, preventing any accidental disconnections.
- Apply thread-locking adhesive to fasteners that are prone to vibration, ensuring they stay in place.
By following these fastening techniques, you can avoid any potential hazards and ensure a reliable connection for your replacement batteries.
Once all loose parts are securely fastened, it’s time to proceed to the next step and test the electric bike’s functionality.
Test the Electric Bike
To test the electric bike, first, turn on the power and check for functionality. Ensure that all the components, such as lights, brakes, and gears, are working properly.
Next, take a short test ride to verify the performance of the bike. Pay attention to the speed, acceleration, and overall handling of the electric bike to ensure it is functioning as expected.
Turn on the Power and Check for Functionality
Make sure you turn on the power and check if everything is functioning properly.
To begin, test the battery voltage to ensure it is at the appropriate level for optimal performance. Connect a voltmeter to the battery terminals and verify that the voltage matches the manufacturer’s specifications.
Additionally, inspect all connections and wiring to ensure proper insulation and prevent any potential electrical hazards. Look for any signs of damage or loose connections that could affect the functionality of the replacement batteries.
Once you have confirmed the voltage and inspected the connections, you can proceed to take a short test ride to verify the performance of the electric bike with the new batteries. This will allow you to assess any improvements or issues that may need further attention.
Take a Short Test Ride to Verify Performance
After confirming the voltage and inspecting the connections, you can now take a short test ride to check the performance. This is an important step to ensure that the replacement batteries are functioning properly and that the connections are secure. Here are a few things to keep in mind during your test ride:
-
Observe the power output: Pay attention to how the electric bike responds when you accelerate, brake, and navigate different terrains. Make sure the power output is consistent and there are no sudden drops or surges.
-
Monitor battery life: Keep an eye on the battery indicator to see if it is draining at a normal rate. If the battery seems to be depleting too quickly, there might be an issue with the connection or the battery itself.
-
Test the range: Take note of how far you can travel on a full charge. If the range is significantly shorter than expected, it could indicate a problem with the battery connection.
After verifying the test ride performance and ensuring everything is working properly, it is important to properly dispose of the old battery to minimize environmental impact.
Properly Dispose of the Old Battery
When it comes to properly disposing of the old battery for my electric bike, I must follow local regulations and guidelines. This ensures that I am in compliance with any laws or restrictions in my area.
Additionally, I should consider recycling options for the old battery, as this is an environmentally responsible choice.
Follow Local Regulations and Guidelines
Remember to always check and follow your local regulations and guidelines when connecting replacement batteries to your electric bike. Local regulations and safety guidelines may vary depending on your location, so it’s crucial to stay informed and comply with the specific requirements in your area.
This ensures that you’re adhering to the necessary safety standards and avoiding any potential legal issues. Local regulations may include specifications for battery type, capacity, and installation procedures. Safety guidelines may involve proper handling of batteries, use of protective equipment, and recommended charging practices.
By adhering to these regulations and guidelines, you can ensure the safe and efficient operation of your electric bike.
Now, let’s consider recycling options for the old battery to minimize environmental impact.
Consider Recycling Options
To minimize environmental impact, you should consider recycling options for your old battery. Recycling options can help reduce the negative effects on the environment caused by improper disposal.
When it comes to recycling options for electric bike batteries, there are a few important things to keep in mind:
-
Look for battery recycling programs in your area. Many cities and towns have designated drop-off locations or collection events where you can safely dispose of your old battery.
-
Check with the manufacturer of your electric bike. They may have a take-back program or specific instructions for recycling their batteries.
-
Consider recycling organizations that specialize in battery recycling. These organizations have the expertise and infrastructure to handle the safe recycling of electric bike batteries.
Taking the time to properly recycle your old battery is crucial for minimizing environmental impact. By doing so, you can ensure that the materials are reused or disposed of responsibly.
This sets the stage for the subsequent section about maintenance and care tips for the new battery.
Maintenance and Care Tips for the New Battery
When it comes to maintaining and caring for a new electric bike battery, there are two key points to keep in mind.
First, it is crucial to charge the battery properly in order to maximize its lifespan and performance. This means following the manufacturer’s guidelines and using the recommended charger.
Additionally, storing the battery in a safe and dry location is of utmost importance to prevent damage and ensure its longevity. Avoid exposure to extreme temperatures and moisture, as these can negatively impact the battery’s performance and overall health.
Charge the Battery Properly
First, make sure you charge the battery properly to ensure optimal performance. Proper storage and charging techniques are essential for maximizing the battery lifespan.
To begin, always charge the battery fully before using it for the first time. This helps to activate the cells and establishes a baseline for future charging cycles. When charging, use the charger that came with the battery or a compatible one to avoid any potential issues.
It is important to charge the battery in a safe and well-ventilated area, away from flammable materials. Avoid overcharging the battery as it can lead to reduced capacity and shorter lifespan.
Once the battery is fully charged, safely store it in a dry location away from extreme temperatures and moisture. This ensures the longevity of the battery and allows for safe and convenient use in the future.
Store the Battery in a Safe and Dry Location
Make sure to store the battery in a safe and dry location to ensure its longevity and safe use in the future. Here are some important points to consider for safe battery storage and preventing moisture damage:
- Choose a storage area that is cool and dry, away from direct sunlight and extreme temperatures.
- Avoid storing the battery near water sources or in damp environments to prevent moisture damage.
- Store the battery in an upright position to minimize the risk of accidental damage or leakage.
- Use a battery storage container or bag specifically designed for safe battery storage, providing protection against physical damage and moisture.
Following these guidelines will help maintain the integrity of the battery, prolong its lifespan, and ensure it remains safe for use when needed.
Remember, proper storage is crucial for the overall performance and safety of your electric bike’s replacement battery.
Frequently Asked Questions
How long does it typically take to replace an electric bike battery?
Replacing an electric bike battery typically takes around 30 minutes to an hour, depending on the specific model and the user’s experience. To extend the lifespan of your battery, consider following these tips for choosing the right replacement battery for your electric bike.
Can I use any type of replacement battery for my electric bike?
Yes, using a compatible replacement battery for your electric bike is crucial. It ensures proper battery compatibility and allows for optimal performance. Advantages include longer battery life, improved efficiency, and reduced risk of damage to your electric bike.
What are the potential risks or dangers of replacing an electric bike battery?
Replacing an electric bike battery can pose potential dangers if not done carefully. Safety precautions, such as wearing protective gear, following manufacturer instructions, and ensuring proper connections, are crucial to avoid risks.
Are there any specific instructions for connecting the positive and negative terminals of the replacement battery?
To ensure proper connection of the positive and negative terminals on a replacement battery, it is crucial to follow the manufacturer’s instructions. The connecting method may vary depending on the battery compatibility with the electric bike.
How often should I expect to replace the battery on my electric bike?
The frequency of replacing an electric bike battery depends on several factors. These include how often you charge the battery and the overall lifespan, which can be affected by factors such as temperature, usage, and maintenance.
Conclusion
In conclusion, connecting replacement batteries to an electric bike requires careful preparation and attention to detail. By following the steps outlined in this article, you can successfully replace your old battery and ensure the proper functioning of your electric bike.
Remember to gather the necessary tools, disconnect the old battery, prepare the replacement, and connect the positive and negative terminals. Test the battery connection, reconnect any additional components, and thoroughly test the electric bike before disposing of the old battery responsibly.
With proper maintenance and care, your new battery will power your bike with an electrifying boost!