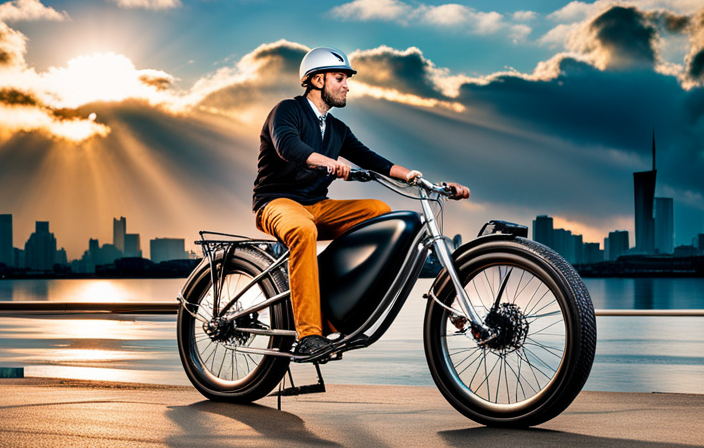

I’m gonna show you how to transform your 20-inch bike into an electric powerhouse.
This step-by-step guide will help you unleash the potential of your trusty two-wheeler.
We’ll dive into assessing compatibility, selecting the right conversion kit, and gathering the essential tools.
With precision and attention to detail, we’ll remove the old components, install the electric kit, and fine-tune it to perfection.
So buckle up, because we’re about to embark on an electrifying adventure!
Key Takeaways
- Assess the bike’s weight capacity and ensure compatibility with the chosen motor and conversion kit
- Consider factors such as motor power, torque, and efficiency, as well as terrain type and riding needs
- Select the right electric bike conversion kit based on compatibility, power output, and ease of installation
- Gather the necessary tools and equipment, including wrenches, screwdrivers, pliers, wire cutters, soldering iron, multimeter, and Allen wrenches, for the conversion process
Assess Your Bike’s Compatibility for Conversion
First, you’ll need to check if your bike is compatible for conversion to electric. To do this, start by evaluating the bike’s weight capacity. Electric bike conversion kits typically have weight restrictions, so it’s important to ensure that your bike can handle the additional weight of the motor and battery. Check the manufacturer’s specifications or consult a bike mechanic if you’re unsure.
Once you’ve determined that your bike can handle the weight, the next step is to choose the right motor for your conversion. Consider factors such as power output, torque, and efficiency. A higher wattage motor will provide more power, but it may also drain the battery faster. Torque is important for climbing hills or carrying heavier loads. Look for a motor that strikes the right balance for your needs.
Additionally, consider the type of terrain you’ll be riding on. If you’ll be tackling steep hills or rough terrain, you may need a more powerful motor. On the other hand, if you’ll mainly be riding on flat surfaces, a less powerful motor may suffice.
Choosing the right motor is crucial for a successful electric bike conversion. Once you’ve assessed your bike’s compatibility and chosen the appropriate motor, you can move on to selecting the right electric bike conversion kit.
Choose the Right Electric Bike Conversion Kit
To make sure you select the best electric bike conversion kit, it’s important to consider factors such as compatibility, power output, and ease of installation.
When it comes to choosing the right motor power, you need to consider the size and weight of your bike, as well as your desired speed and range. A motor with higher power output will provide more torque, allowing you to tackle steep hills and ride at higher speeds. However, keep in mind that a more powerful motor will also consume more battery power, reducing your overall range.
Speaking of batteries, selecting the appropriate capacity is crucial. A higher capacity battery will give you a longer range, but it will also be heavier and more expensive. Consider your typical riding distance and the terrain you’ll be riding on to determine the battery capacity that suits your needs.
Now that you have an idea of what to look for in an electric bike conversion kit, let’s move on to the next step: gathering the necessary tools and equipment.
Gather the Necessary Tools and Equipment
Once you’ve decided on the right electric bike conversion kit, it’s time to gather all the necessary tools and equipment. In order to successfully complete the bike modification for a DIY electric conversion, you will need a few key items.
First and foremost, you’ll need a set of wrenches, both open-end and adjustable, to loosen and tighten various bolts and nuts. Additionally, a set of screwdrivers, both Phillips and flathead, will come in handy for removing and installing screws. A pair of pliers will be necessary for gripping and twisting wires, while wire cutters will enable you to trim any excess wire. A soldering iron and solder are essential for connecting wires securely. Furthermore, a multimeter will be crucial for testing electrical connections and troubleshooting any issues that may arise. Finally, a set of Allen wrenches, also known as hex keys, will be needed for removing and installing components with hexagonal socket screws.
With these tools in hand, you’ll be well-prepared for the next step: removing the bike’s existing components.
Once you have all the necessary tools and equipment, it’s time to move on to the next phase of the electric bike conversion process: removing the bike’s existing components.
Remove the Bike’s Existing Components
Now that you’ve gathered all the necessary tools and equipment, it’s time to start removing the existing components from your bicycle. Before diving into the process, it’s crucial to assess the compatibility of your bike with an electric conversion kit. Ensure that the kit you choose is compatible with your 20 inch bike frame and components.
Here are the steps to remove the bike’s existing components:
-
Remove the pedals:
- Use a pedal wrench to loosen the pedal’s axle.
- Rotate the pedals counterclockwise to remove them from the crank arms.
-
Take off the chain:
- Use a chain tool to break the chain.
- Slide the chain off the chainring and rear cassette.
-
Remove the front and rear wheels:
- Release the quick-release levers or loosen the nuts on the wheel axles.
- Lift the bike slightly and slide the wheels off the dropouts.
With the existing components removed, you’re now ready to install the electric bike conversion kit. This process will transform your ordinary bike into an electric-powered machine, enhancing your riding experience.
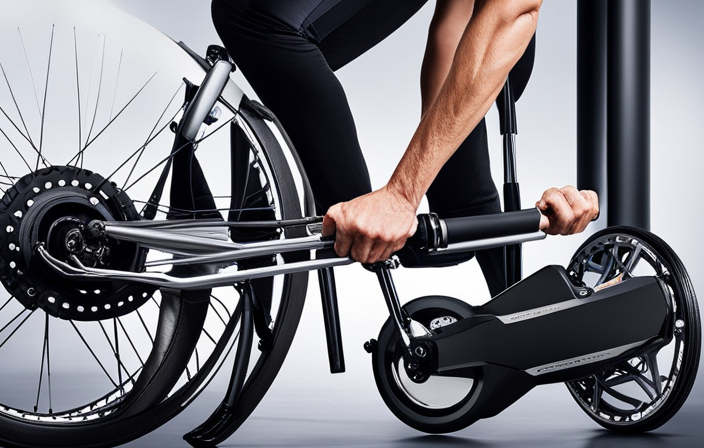
Install the Electric Bike Conversion Kit
First, make sure you have all the necessary tools and equipment for installing the conversion kit on your bicycle. This will ensure a smooth and efficient installation process. The cost of an electric bike conversion kit can vary depending on the brand and features, but on average, it ranges from $200 to $1000. While the upfront cost may seem high, the benefits of electric biking make it a worthwhile investment. Electric bikes offer a convenient and eco-friendly mode of transportation, allowing you to commute without relying on fossil fuels. They also provide the option to pedal manually or use electric assistance, making it easier to tackle hills or long distances. To help visualize the process, refer to the table below for a list of tools and equipment needed for installing the conversion kit:
| Tools | Equipment | Miscellaneous |
|---|---|---|
| Allen wrench | Conversion kit | Zip ties |
| Screwdriver | Battery | Electrical tape |
| Pliers | Controller | Wire connectors |
| Wire cutters | Throttle | Heat shrink tubing |
Now that you have gathered all the necessary tools and equipment, it’s time to install the electric bike conversion kit. Once the installation is complete, you can proceed to the next step of reinstalling the bike’s components.
Reinstall the Bike’s Components
To reinstall the components, make sure you securely fasten each part using the appropriate tools and hardware. Here are the steps to follow for reinstalling and adjusting the bike’s components:
-
Handlebars and Stem
-
Position the handlebars in a comfortable and ergonomic position.
-
Slide the stem onto the fork’s steerer tube and tighten the bolts evenly.
-
Ensure the handlebars are straight and tighten the clamp bolts securely.
-
Seat and Seatpost
-
Insert the seatpost into the seat tube and adjust it to the desired height.
-
Tighten the seatpost clamp bolt to secure it in place.
-
Attach the seat onto the seatpost and tighten the seat bolt.
-
Brakes and Gears
-
Reattach the brake calipers onto the frame or fork mounts.
-
Adjust the brake pads to ensure they are centered on the rim and tighten the mounting bolts.
-
Reinstall the derailleur and adjust the cable tension for smooth gear shifting.
Now that the bike’s components are reinstalled and adjusted, it’s time to move on to the next step: testing and adjusting the electric bike conversion. This will ensure that everything is functioning properly and ready for use.
Test and Adjust the Electric Bike Conversion
After reinstalling and adjusting the bike’s components, it’s important to test and make any necessary adjustments to the electric bike conversion. This step ensures that the conversion is functioning properly and optimizes its performance. There are several testing methods and performance evaluation techniques that can be employed to achieve this.
One common testing method is the on-road test, where the rider takes the electric bike for a ride to assess its performance in real-world conditions. This test allows for the evaluation of factors such as speed, acceleration, handling, and overall ride quality.
Another testing method is the hill climb test, which determines the electric bike’s ability to climb steep inclines and maintain a consistent speed.
To further evaluate the electric bike conversion, performance measurements can be taken using various tools and instruments. These measurements can include motor power output, battery capacity, and energy consumption. By analyzing these data, any necessary adjustments can be made to optimize the electric bike’s performance.
Once the testing and adjustments are complete, the electric bike conversion is ready for use. Now, it’s time to learn how to ride an electric bike and fully enjoy the benefits of this convenient and eco-friendly mode of transportation.
Learn How to Ride an Electric Bike
Learning how to ride an e-bike is an exciting and accessible way to embrace a more sustainable mode of transportation. As you embark on this journey, it is crucial to prioritize electric bike safety and choose the right electric bike for your needs. Here are four important considerations to keep in mind:
-
Familiarize yourself with the bike’s features: Before setting off, take the time to understand how the electric bike functions. Get familiar with the throttle, pedal-assist modes, and any additional features like regenerative braking or LCD displays.
-
Start in a controlled environment: Begin your e-bike adventure in a safe and open space, free from traffic and obstacles. This will allow you to practice maneuvering, braking, and getting accustomed to the bike’s responsiveness.
-
Gradually increase your speed and distance: As you gain confidence, gradually increase your speed and distance. Start with shorter rides and gradually work your way up to longer distances. Remember to always follow traffic rules and be aware of your surroundings.
-
Invest in safety gear: Prioritize your safety by investing in proper safety gear such as a helmet, knee pads, and reflective clothing. These precautions will provide added protection in case of any unforeseen incidents.
By following these guidelines, you can confidently learn how to ride an electric bike.
Now, let’s transition into the next section where we will explore how to maintain and troubleshoot your electric bike.
Maintain and Troubleshoot Your Electric Bike
When it comes to maintaining and troubleshooting my electric bike, I focus on three key points.
Firstly, regular cleaning and lubrication. This is important to keep the bike running smoothly and prevent any build-up of dirt or debris. By regularly cleaning the bike and applying lubrication to the necessary parts, I can ensure that everything is functioning properly.
Secondly, battery maintenance and charging. This is crucial for ensuring optimal performance and extending the lifespan of the battery. I make sure to follow the manufacturer’s guidelines for charging and storing the battery, as well as monitoring its overall health. By properly maintaining and charging the battery, I can maximize its efficiency and longevity.
Lastly, I make it a point to familiarize myself with common issues and troubleshooting tips. This allows me to quickly identify and resolve any problems that may arise while riding my electric bike. Whether it’s a flat tire, a malfunctioning component, or a software issue, having a basic understanding of troubleshooting techniques can save me time and frustration.
Regular Cleaning and Lubrication
To keep your bike running smoothly, make sure you regularly clean and lubricate it. Regular maintenance is crucial for the longevity and optimal performance of your electric bike.
When it comes to cleaning techniques, start by using a mild detergent and warm water to remove any dirt or grime from the frame, wheels, and components. Pay close attention to hard-to-reach areas, such as the chain and cassette. Use a soft brush or sponge to gently scrub these areas.
After cleaning, thoroughly dry the bike to prevent rusting. Once clean, it’s time to lubricate. Apply a high-quality bike lubricant to the chain, derailleur, and other moving parts. This will reduce friction and ensure smooth operation.
With regular cleaning and lubrication, your bike will be ready for the next adventure. Speaking of readiness, let’s now delve into battery maintenance and charging.
Battery Maintenance and Charging
Once you’ve finished cleaning and lubricating your bike, it’s important to properly maintain and charge the battery to ensure optimal performance. To maximize battery life and ensure safety, follow these three key steps:
-
Regularly check the battery’s charge level: Keep an eye on the battery’s charge level and avoid letting it fully discharge. Charging the battery before it reaches a critically low level helps maintain its overall health and extends its lifespan.
-
Store the battery properly: When not in use, store the battery in a cool and dry place. Extreme temperatures can negatively impact battery performance and reduce its life expectancy.
-
Follow safety precautions during charging: Always use the charger provided by the manufacturer and follow the recommended charging time. Avoid overcharging the battery, as it can lead to overheating and damage.
By properly maintaining and charging your electric bike’s battery, you’ll ensure its longevity and reliable performance.
Now, let’s delve into common issues and troubleshooting tips for electric bike conversions.
Common Issues and Troubleshooting Tips
One of the most common issues that arise with electric bike conversions is a loss of power due to a faulty connection. Troubleshooting common problems and electrical issues can help identify and resolve these issues.
When troubleshooting, start by checking all the electrical connections, ensuring they are properly connected and secure. Inspect the wiring for any signs of damage or loose connections. If necessary, replace any damaged wires or connectors.
Additionally, check the battery to ensure it is fully charged and functioning correctly. Sometimes, a simple reset of the system can solve the problem. If the issue persists, it may be necessary to consult a professional for further assistance.
By addressing these common electrical issues, you can ensure the optimal performance of your electric bike conversion.
Now, let’s explore the benefits of electric biking.
Explore the Benefits of Electric Biking
Discover all the advantages of electric biking and how it can enhance your cycling experience. Electric bike technology has revolutionized the way we ride, offering a range of benefits that traditional bicycles simply cannot match.
One of the key advantages of electric biking is the ability to effortlessly tackle hills and challenging terrains. With the assistance of an electric motor, you can conquer steep inclines without breaking a sweat, making your rides more enjoyable and less strenuous.
In addition to the physical benefits, electric biking also has a positive environmental impact. By choosing to ride an electric bike, you are reducing your carbon footprint and contributing to a cleaner, greener planet. Electric bikes produce zero emissions, making them an eco-friendly alternative to traditional vehicles. Furthermore, electric bikes are much quieter than cars or motorcycles, reducing noise pollution in our communities.
Another advantage of electric biking is the flexibility it offers. With an electric bike, you have the option to choose how much assistance you want from the motor. You can pedal as much or as little as you like, allowing you to customize your riding experience to fit your needs and fitness level.
Overall, electric biking provides a range of benefits, from effortless hill climbing to reducing environmental impact. Whether you are a seasoned cyclist or new to biking, electric bikes offer a convenient and enjoyable way to explore the outdoors while minimizing your carbon footprint.
Frequently Asked Questions
How long does it typically take to convert a 20 inch bike to electric?
Converting a 20 inch bike to electric typically takes around 4-6 hours, depending on experience level. To complete the conversion, you will need tools such as a wrench, screwdriver, wire cutters, and an electrical tape.
Can any 20 inch bike be converted to electric, or are there specific models that are more compatible?
Certain 20 inch bike models may pose compatibility issues when converting to electric due to limited space for battery and motor installation. Performance of a converted 20 inch electric bike may vary but can match or exceed pre-built electric bikes of the same size.
Are there any additional modifications or adjustments that need to be made to the bike frame during the conversion process?
To ensure bike frame compatibility, it is important to check for clearance, strength, and mounting points. Potential modifications may include adding reinforcement, adjusting the frame geometry, or installing additional brackets for battery and motor mounting.
How much does a typical electric bike conversion kit cost?
A typical electric bike conversion kit can cost anywhere between $300 to $1000, depending on the quality and features. The electric bike conversion guide highlights the benefits of converting a bike to electric, such as increased speed and range.
Are there any legal requirements or restrictions for riding an electric bike on public roads?
Sure, there are legal requirements and safety regulations for riding an electric bike on public roads. It’s important to comply with speed limits, wear a helmet, and follow traffic laws to ensure a safe and legal ride.
Conclusion
In conclusion, converting my 20-inch bike to electric has been a game-changer. The freedom and convenience it has brought to my daily commute is nothing short of extraordinary.
It’s like having my own personal superpower, effortlessly gliding through traffic and conquering hills with ease. Just like electricity powers our lives, it now powers my bike, propelling me forward on my journey.
With the right conversion kit and a little bit of know-how, anyone can unlock the electrifying potential of their bike and experience the exhilaration of electric biking.