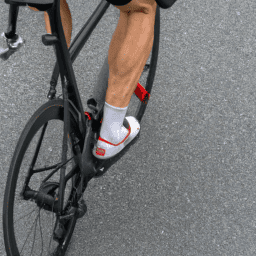
Cycling has always been a passion of mine, yet with age, I’ve noticed a decrease in my energy and endurance. This led me to transform my bike into an electric one. This modification allows me to enjoy all the advantages of bike riding without putting too much stress on my physique.
In this article, I’ll share with you the steps I took to convert my bike to electric, so you can do it too.
First, it’s important to understand the different types of e-bike conversion kits available. There are front wheel, rear wheel, and mid-drive kits, each with their own advantages and disadvantages.
Once you’ve chosen the right kit for your needs, you’ll need to select the right components, such as a motor, battery, and controller. It’s important to choose components that are compatible with your bike and that will provide the power and range you need.
With the right components in hand, you’ll be ready to prepare your bike for the conversion process.
Key Takeaways
- Choosing compatible components, including motor, battery, and controller, is crucial for a successful conversion.
- Safety precautions should be taken during the conversion process and testing phase to ensure a safe and functional e-bike.
- Regular maintenance is important for the battery, tire pressure, brakes, and overall upkeep of the e-bike.
- Benefits of using an e-bike include convenience, speed, improved health, and environmental friendliness.
Understand the Different Types of E-Bike Conversion Kits
Before you start converting your bicycle, it’s important to understand the various types of e-bike conversion kits and weigh the pros and cons of each.
One type of conversion kit is the front wheel kit, which replaces the front wheel with an electric one. The pros of this type of kit are that it’s easy to install and the weight distribution of the bike remains the same. However, the cons are that it can affect the handling of the bike, and it’s not recommended for bikes with front suspension.
Another type of kit is the rear wheel kit, which replaces the rear wheel with an electric one. The pros of this type of kit are that it provides more power and is better for bikes with front suspension. However, the cons are that it can affect the weight distribution of the bike and may be more difficult to install.
It’s important to compare the cost of each type of kit, as well as the pros and cons, to determine which type is right for your bike.
Choosing the right components for your e-bike conversion is also important.
Choose the Right Components
First things first, you gotta pick the components that fit your needs and budget. It’s important to consider component compatibility when choosing your electric conversion kit. You want to make sure that all the components are designed to work together seamlessly.
For example, if you’re upgrading your motor, you’ll want to make sure that it’s compatible with your battery and controller.
Budget considerations are also important when choosing your components. Electric conversion kits can range in price from a few hundred dollars to several thousand dollars. It’s important to decide how much you’re willing to spend on your conversion and choose components that fit within your budget.
When choosing your components, it’s important to keep in mind that quality components may cost more upfront, but they’ll likely save you money in the long run by lasting longer and requiring less maintenance.
With your components selected, it’s time to prepare your bike for the conversion process.
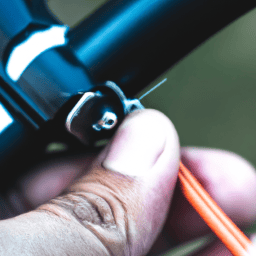
Prepare Your Bike
Now that I’ve chosen the right components, it’s time to prepare my bike for the electric conversion.
First, I need to remove the rear wheel in order to install the motor.
Once the motor is in place, I can install the battery, controller, throttle, and display.
These steps require precision and attention to detail to ensure a successful conversion.
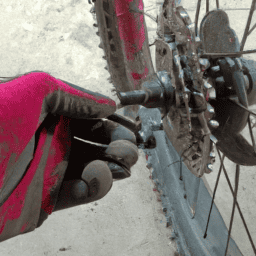
Remove the Rear Wheel
Gently lift the bike off the ground and unscrew the bolts on the rear wheel. You’ll feel the satisfying click as the wheel slides off the frame. Wheel removal techniques vary depending on the type of bike you have, but generally, you’ll need to follow a few standard steps.
First, shift your gears to the smallest chainring and the smallest cog. This’ll take tension off the chain and make it easier to remove the wheel. Second, use a wrench to loosen the nuts or quick-release skewer that holds the wheel in place. Finally, lift the bike off the ground and slide the wheel out of the dropouts.
When removing the rear wheel, it’s essential to take safety precautions to avoid injury. Make sure the bike is stable and won’t tip over while you’re working on it. Wear gloves to protect your hands from sharp edges or greasy parts. Make sure your tools are in good condition and are the correct size for the job.
Once you’ve removed the wheel, you can move on to the next step of installing the motor.
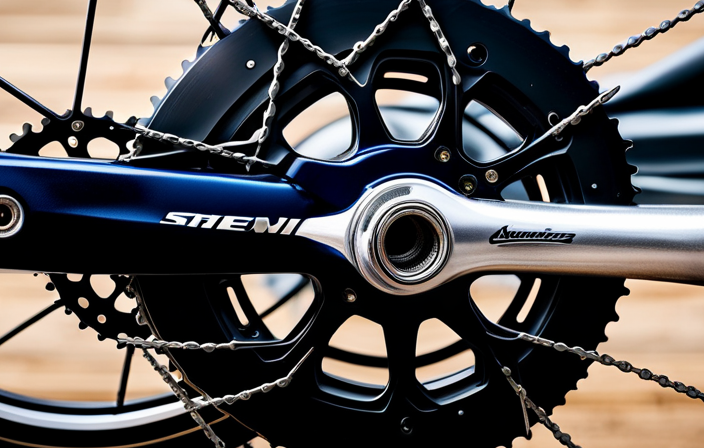
Install the Motor
Before installing the motor, have you made sure it is the correct size for your bike? Motor selection is a crucial step in converting your bicycle to electric. You want to make sure you choose a motor that is compatible with your bike’s wheel size and that can handle the weight and power requirements of your setup.
To install the motor, start by mounting it on the frame or swingarm using the appropriate brackets. Make sure the motor is securely fastened and that the chain lines up with the sprockets. You may need to adjust the chain tension or install a new chain altogether. It’s also important to consider the orientation of the motor. Some motors are designed to be mounted on the left side of the bike, while others are meant for the right. Be sure to follow the manufacturer’s instructions for your specific motor.
| Motor Selection | Installation Tips |
|---|---|
| Choose a motor that is compatible with your bike’s wheel size | Mount the motor on the frame or swingarm using the appropriate brackets |
| Consider the weight and power requirements of your setup | Ensure the motor is securely fastened |
| Check the orientation of the motor before installation | Align the chain with the sprockets |
Now that the motor is installed, it’s time to move on to the next step: installing the battery.
Install the Battery
Get ready to power up your ride by installing the battery! Before you begin, make sure you’ve chosen the right battery for your bike. The battery is the heart of your electric bike conversion, so you want to make sure it’s reliable and can withstand the demands of your daily commute.
Once you have your battery, it’s time to install it. First, you need to find a suitable location for the battery. Ideally, the battery should be mounted in a place that’s easily accessible for maintenance and won’t interfere with your pedaling.
Be sure to properly wire the battery to the motor and other components, following the manufacturer’s instructions carefully. Finally, don’t forget to perform regular maintenance on your battery, such as keeping it properly charged and keeping it clean and dry.
With these proper wiring and maintenance tips, you can ensure that your electric bike conversion will run smoothly and efficiently. Now, let’s move on to the next step and install the controller.
Install the Controller
Now it’s time for me to install the controller, which is a crucial component in making my ride smoother and more efficient. The controller is responsible for regulating the power from the battery and sending it to the motor. Without it, the motor would not receive the right amount of power and may not function properly.
Before installing the controller, I need to decide on its placement. The controller should be mounted in a location that is dry, cool, and easily accessible. It is important to keep it away from water and heat sources to prevent damage. Once I have determined the location, I can mount the controller using the provided hardware. If I encounter any issues during installation or while using the electric bike, I can refer to the troubleshooting tips in the table below.
| Issue | Solution |
|---|---|
| Motor does not run | Check wiring connections and battery charge |
| Motor runs but bike does not move | Check motor alignment and chain tension |
| Controller overheats | Check ventilation and reduce power usage |
| Battery drains quickly | Check for battery damage and reduce power usage |
| Throttle does not work | Check wiring connections and replace throttle if necessary |
Now that the controller is installed and ready to go, the next step is to install the throttle and display.
Install the Throttle and Display
Once the controller is securely mounted, it’s time to install the throttle and display to complete the electric bike setup.
The throttle is responsible for controlling the amount of power sent to the motor. It is important to choose the right type of throttle for your bike based on your preference for thumb or twist control, as well as its sensitivity. You can adjust the throttle sensitivity to determine how much power is needed to activate the motor. This can be done by adjusting the controller settings or by using a separate throttle adjuster.
The display is another important component of the electric bike setup. It provides useful information such as battery level, speed, and distance traveled. Some displays also allow for customization of settings such as pedal assist level and speed limit. It is important to choose a display that is compatible with your controller and has the features you need.
Once the throttle and display are installed, you can test and adjust your e-bike to make sure everything is working properly before taking it for a ride.
Test and Adjust Your E-Bike
To make sure your e-bike is running smoothly, you’ll want to give it a performance test ride and take safety precautions. Before testing, ensure that your e-bike is fully charged and the battery is securely fastened.
Start with a gentle ride in a safe, open area and gradually increase speed. Pay attention to the bike’s performance, including acceleration, braking, and handling. Note any issues or concerns and make necessary adjustments.
During the performance test, also take a moment to ensure that all safety precautions are in place. Check that your brakes are functioning properly and that your helmet is securely fastened. Additionally, make sure you are visible to other drivers and cyclists on the road by wearing reflective gear or adding lights to your bike.
By taking the time to test your e-bike and ensure that it is safe and performing well, you will be able to enjoy your new ride with confidence.
Enjoy Your New E-Bike!
You’re ready to hit the road and experience the thrill of riding your new e-bike! Before you do, let’s talk about some of the benefits of using an e-bike and some maintenance tips to keep your new ride running smoothly.
First, let’s talk about the benefits. One of the biggest advantages of using an e-bike is the convenience factor. You can get where you need to go faster and with less effort than with a traditional bike. Plus, you can avoid the hassle of finding parking or waiting for public transportation. E-bikes also provide a great way to stay active and improve your health, as you still get the benefits of pedaling and exercise, just with a little extra assistance. And finally, e-bikes are environmentally friendly, producing zero emissions and helping to reduce our carbon footprint.
Now, let’s talk about maintenance tips for your new e-bike. First and foremost, make sure to check your battery regularly and keep it charged. This will help ensure that your bike is always ready to go when you are. Additionally, check your tire pressure and brakes before each ride, as well as keeping your chain lubricated and your bike clean. Regular maintenance will not only keep your e-bike running smoothly, but it will also extend its lifespan. So, get out there and enjoy the many benefits of your new e-bike, but make sure to take good care of it along the way!
| Maintenance Tips | Frequency | Action |
|---|---|---|
| Check Battery | Regularly | Keep charged |
| Check Tire Pressure | Before each ride | Adjust as needed |
| Lubricate Chain | Regularly | Use bike lubricant |
| Clean Bike | After each ride | Use mild soap and water to remove dirt and debris |
Frequently Asked Questions
What is the average cost of converting a bicycle to electric?
Funny you ask, I just recently converted my bike to electric! The cost breakdown includes a motor kit ($200-$800), battery ($200-$500), and miscellaneous parts ($50-$100). If you’re handy, DIY options are available.
Will an electric conversion affect the weight and balance of my bike?
Yes, an electric conversion will affect weight distribution and handling changes. The added weight of the motor, battery, and controller will shift the center of gravity, making the bike feel heavier and potentially affecting cornering and stability.
How long does it take to fully charge an electric bike battery?
To fully charge my electric bike battery, I plug it into a wall outlet and wait for around 4-6 hours. I make sure to regularly maintain my battery to ensure optimal charging time and lifespan.
Can I still ride my electric bike if the battery dies?
Yes, I can still ride my electric bike if the battery dies. However, I need to adjust my riding techniques to account for the additional weight of the battery. Regular battery maintenance can prevent this situation.
Are there any legal requirements or restrictions for using an electric bike on public roads?
To use an electric bike on public roads, I must comply with licensing requirements and safety regulations. These vary by jurisdiction, but generally include wearing a helmet and following traffic laws.
Conclusion
After going through the process of converting my bicycle to electric, I can say that it was definitely worth the effort. The feeling of cruising down the road with the wind in my hair, while still having the option to use the electric motor for a boost, is unbeatable.
However, I must admit that the conversion process was not without its challenges. On one hand, the technical aspects of choosing the right components and adjusting the e-bike can be daunting for those who aren’t familiar with electronics and mechanics. On the other hand, the satisfaction of successfully converting a regular bike into a powerful e-bike is incredibly rewarding. It requires patience, attention to detail, and a willingness to learn new skills.
In the end, I believe that the benefits of having an e-bike far outweigh the initial challenges. It’s an eco-friendly mode of transportation that can save you money on gas and parking, while also providing a fun and efficient way to get around. So, if you’re willing to put in the time and effort, I highly recommend converting your own bicycle to electric.