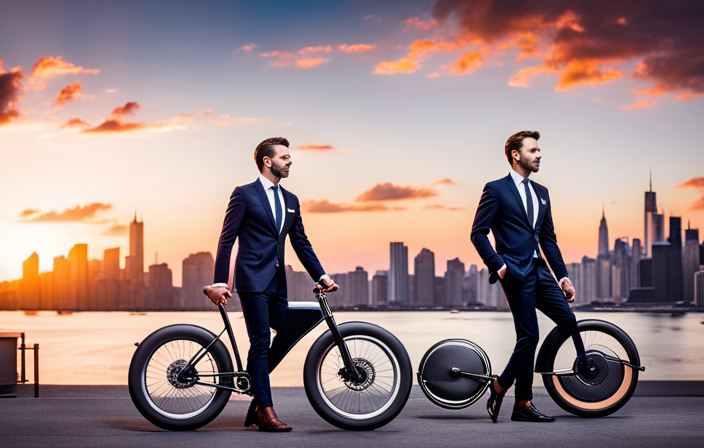
Are you prepared to upgrade your regular bike with a turbocharger? Converting your bike into an electric one is akin to giving it wings – it will reach new heights!
With the right conversion kit and a few simple steps, you can harness the power of electricity to enhance your cycling experience.
In this article, we will guide you through the process of converting your bike into an electric one, providing you with the knowledge and confidence to take on this electrifying project.
Let’s get started!
Key Takeaways
- Assess the bike frame and components for any damage or weakness before starting the conversion process.
- Choose the right conversion kit based on factors like motor power, battery capacity, and compatibility with the bike.
- Follow clear and straightforward installation instructions and gather all necessary tools for a hassle-free conversion.
- Properly label and organize removed components, use safety precautions, and handle fragile wires and cables with care.

Schwinn Sporterra RX Gravel Bike, 700c Mens and Womens Bike, 14-Speed Drop Bar Gravel Bicycle, Mechanical Disc Brakes, Rigid Fork, Aerodynamic Riding Position, Quick Release Seat Post, Adult Bicycle
GRAVEL BICYCLE: Enjoy next level riding with the Sporterra RX by Schwinn. With 700c wheels, this mens and...
As an affiliate, we earn on qualifying purchases.
Assess Your Bike and Determine Compatibility
You’ll need to assess your bike and determine if it’s compatible for conversion into an electric bike. To do this, there are a few key factors to consider.
First, check the frame of your bike to ensure it’s sturdy enough to handle the additional weight and stress of an electric motor and battery. Look for any signs of damage or weakness that may affect the bike’s overall stability.
Next, examine the wheels and brakes to ensure they are in good working condition and can handle the increased speed and power of an electric bike.
Additionally, consider the spacing and alignment of the bike’s components, as well as the availability of space for the battery and motor. These are common challenges in bike conversions, but with careful assessment, you can determine if your bike is suitable for the transformation.
Moving forward, let’s explore how to choose the right conversion kit.

SAVADECK T800 Carbon Gravel Bike, with Shimano GRX610 12-Speed, Hydraulic Disc Brakes, 700x40c Tires for Road & Off-Road Adventure, Men's/Women's Bicycle(Elegant White, 51cm)
【With SHIMANO GRX Drivetrain Setup】Equipped with SHIMANO GRX610 shifters and RX822 rear derailleur, matched with a 12-speed M6100...
As an affiliate, we earn on qualifying purchases.
Choose the Right Conversion Kit
When choosing a conversion kit for your electric bike, you need to decide between a front or rear wheel conversion kit. Consider factors such as the motor power and battery capacity to ensure it meets your needs and expectations.
Additionally, it’s important to look for a kit that comes with clear and easy installation instructions to make the process as smooth as possible.
Decide between a front or rear wheel conversion kit
To decide between a front or rear wheel conversion kit, you should consider the terrain you’ll be riding on. Front wheel conversion kits are generally easier to install and maintain, but they may not provide as much traction, especially on slippery or uneven surfaces. Rear wheel conversion kits, on the other hand, offer better traction and stability, making them more suitable for off-road or hilly terrains. Here is a comparison between the two options:
| Front Wheel Conversion Kit | Rear Wheel Conversion Kit |
|---|---|
| Pros: | Pros: |
| – Easier installation | – Better traction |
| – Lower cost | – Greater stability |
| Cons: | Cons: |
| – Less traction | – More difficult to install |
| – Can affect steering | – Higher cost |
When choosing between front and rear wheel conversion kits, consider the pros and cons as well as the terrain you’ll be riding on. Once you have made your decision, the next step is to consider the motor power and battery capacity.
Consider the motor power and battery capacity
Once you’ve decided between a front or rear wheel conversion kit, it’s important to consider the motor power and battery capacity. Choosing the right motor power and battery capacity is crucial for ensuring optimal performance and range for your electric bike.
Here are four key factors to consider when comparing different conversion kit options:
-
Motor Power: The motor power determines how much assistance the electric bike will provide. Higher wattage motors generally offer more power and better performance, especially when riding uphill or carrying heavy loads.
-
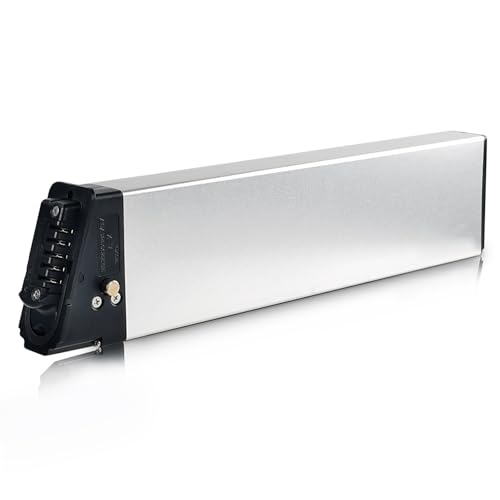
Battery Capacity: The battery capacity determines how far you can ride on a single charge. It is measured in watt-hours (Wh) or amp-hours (Ah). A higher capacity battery will provide a longer range, but it may also be heavier and more expensive.
-
Voltage: The voltage of the battery and motor should be compatible for the conversion kit to work properly. Ensure that the voltage requirements match for seamless integration.
-
Battery Type: Consider the type of battery, such as lithium-ion or lead-acid. Lithium-ion batteries are lighter, have higher energy density, and longer lifespan compared to lead-acid batteries.
Once you’ve chosen the right motor power and battery capacity, you can then look for a kit with easy installation instructions in the subsequent section.
Look for a kit with easy installation instructions
Finding a conversion kit with straightforward installation instructions is essential when converting your bike into an electric bike. It is important to consider different kit options available in the market, as some may come with complex installation processes that require professional assistance.
Look for a kit that provides clear and concise instructions, ensuring that the installation is a hassle-free experience. Start by gathering the necessary tools mentioned in the kit instructions, such as wrenches, screwdrivers, and pliers. These tools will be needed throughout the installation process, allowing you to easily attach the motor and battery to your bike.
Once you have a conversion kit with easy installation instructions and the necessary tools, you can proceed to the next step of gathering the necessary tools for the conversion process.

SAVADECK Carbon Gravel Bike - T800 Carbon Frame & Fork | Shimano U6000 11-Speed Groupset | Hydraulic Disc Brakes | 700CX40mm All-Terrain Tires | Men & Women Road/Off-Road Bicycle (Gray, 53cm)
【Ultralight T800 Carbon Performance】: Featuring a premium T800 R21 carbon fiber frame and fork weighing just 10.4kg (22.92...
As an affiliate, we earn on qualifying purchases.
Gather the Necessary Tools
Firstly, you’ll need a few tools to convert your bike into an electric bike. Assess the compatibility of your bike and choose a conversion kit that meets your needs. To assist you in visualizing the tools required, here’s a table outlining the necessary equipment:
| Tools | Quantity |
|---|---|
| Wrench | 1 |
| Allen key set | 1 |
| Screwdriver | 1 |
| Pliers | 1 |
| Wire cutters | 1 |
Once you have gathered these tools, you can proceed to the next step of removing the existing components. By having the appropriate tools, you’ll be able to efficiently and effectively convert your bike into an electric bike.
ShunTongDa 48V 10.4Ah 14Ah Folding Ebike Battery 48 Volt DCH-006 Built in Electric Bike Batteries with 30A BMS Totguard for 250W 500W 750W 1000W Motor Foldable E-Bike Battery (48V10.4Ah A Grade Cell)
①Battery Type: 18650 lithium ion batteries, Voltage: 48V, Capacity: 10.4Ah, Real High-Label Capacity. 30A BMS, Wattage at 500Wh,...
As an affiliate, we earn on qualifying purchases.
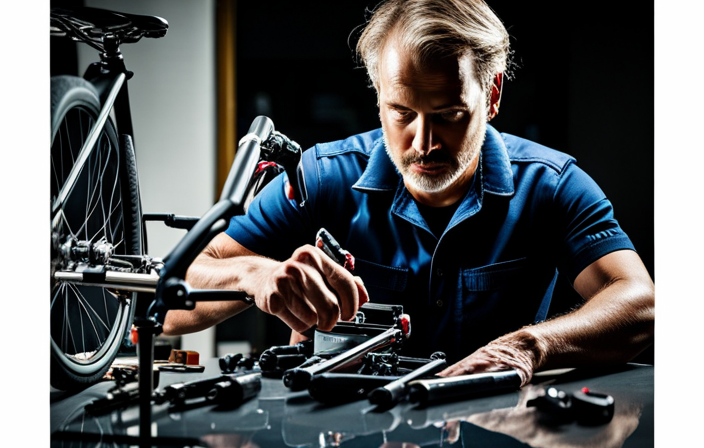
Remove the Existing Components
To begin converting your bike into an electric bike, the first step is to remove the existing components. Start by taking off the pedals, followed by the wheels, chain, and gears. Once these parts are removed, you can install the electric motor and battery pack, ensuring they are securely attached to the frame. Carefully connect the wiring and controller to guarantee smooth operation. By following these steps, you can successfully convert a bike to electric and enjoy a more efficient and eco-friendly ride.
It is crucial to label and organize each removed component to ensure easy reassembly later. Be careful during the removal process to avoid any damage to the bike or its parts.
Step-by-step guide for removing the bike’s existing parts
Next, you’ll need to start by removing the bike’s existing parts in order to convert it into an electric bike.
Before you begin, it’s crucial to prioritize safety precautions. Wear protective gloves and goggles to prevent any injuries.
Now, let’s dive into the common challenges you might face during this process.
Firstly, stubborn bolts and nuts can be difficult to loosen, so using penetrating oil or a heat gun can help.
Secondly, fragile components like wires and cables require careful handling to avoid damage.
Lastly, rusted parts may require extra effort to remove, such as using a rust dissolver or a wire brush.
Remember, taking your time and being patient is key.
Once you have successfully removed the existing parts, it’s time to move on to the next section about tips for labeling and organizing the components you’ve removed.
Tips for labeling and organizing removed components
Now, it’s important to consider some tips for labeling and organizing the components you’ve removed during the process.
Properly labeling the components will help you identify them later when you need to reassemble the bike. Begin by using small adhesive labels or masking tape to mark each component with its corresponding name or function. This will prevent any confusion or mix-up later on.
Additionally, it’s essential to keep the removed components organized. One effective method is to use small plastic bags or containers and label them accordingly. Place the labeled components in these bags or containers, ensuring they are securely sealed. By doing so, you’ll prevent any loss or damage to the components.
Now, let’s move on to the subsequent section where we’ll discuss the importance of careful removal to avoid any potential damage.
Importance of careful removal to avoid damage
Carefully removing the components is crucial to avoid any potential damage. When disassembling your bike, it is important to take certain precautions to ensure a smooth and successful removal process. By following these steps, you can minimize the risk of causing any harm to your bike or its components.
| Precautions to Take While Removing Bike Components |
|---|
| 1. Begin by disconnecting the battery and removing it from the bike. |
| 2. Use appropriate tools to loosen and remove any bolts or screws holding the components in place. |
| 3. Take note of the location and orientation of each component before removing it to aid in reassembly. |
| 4. Handle delicate components, such as wires and connectors, with care to avoid breaking or damaging them. |
| 5. Keep track of all removed components by labeling them properly. |
By following these precautions, you can ensure a smooth removal process and prevent any potential damage. Now, let’s move on to the next step of converting your bike into an electric bike: installing the electric motor and battery.
Install the Electric Motor and Battery
To install the electric motor and battery, you’ll need a few tools and some basic knowledge of bike mechanics. Start by choosing the right motor and battery for your electric bike. Consider factors such as power output, voltage, and compatibility with your bike’s frame.
Once you have the components, begin by removing the crankset and bottom bracket from your bike. This will provide the necessary space to install the motor. Next, attach the motor to the bottom bracket using the appropriate tools. Make sure it is securely fastened.
Now, mount the battery on your bike’s frame, ensuring it is well-balanced and won’t interfere with your pedaling. Troubleshooting common issues with electric bike conversion kits, such as motor overheating or battery connectivity problems, is essential to ensure a smooth installation.
With the motor and battery securely in place, you can now connect the wiring and controller, which we will discuss in the next section.
Connect the Wiring and Controller
Make sure you connect the wiring and controller properly to ensure the smooth operation of your electric bike.
Start by identifying the wires that correspond to the motor, battery, throttle, and controller.
Strip the ends of these wires to expose the metal and twist them together securely.
Use heat shrink tubing or electrical tape to insulate the connections and prevent any short circuits.
Double-check your connections to ensure they are secure and properly routed.
If you encounter any issues, refer to the wiring troubleshooting guide provided by the manufacturer.
Once the wiring is complete, you will need to program the controller.
Follow the instructions provided by the manufacturer to set up the controller according to your preferences.
With the wiring and controller properly connected and programmed, you can now move on to the next step of adjusting and testing your electric bike.
Adjust and Test the Electric Bike
To ensure a smooth and safe ride, it is crucial to adjust the brakes and gears properly.
Start by aligning the brake pads with the rims and adjusting the tension for optimal braking performance.
Next, fine-tune the gears by adjusting the cable tension and indexing the gears to ensure smooth and precise shifting.
Before taking off, make sure to thoroughly test the motor and battery to ensure they are functioning properly. Check for any strange noises, vibrations, or irregular power output.
Finally, take the bike for a test ride and pay attention to any issues that may arise. Adjustments may be needed to optimize the bike’s performance and ensure a comfortable ride.
Guide for adjusting the brakes and gears
First, you’ll need to adjust the brakes and gears on your bike. Start by identifying common brake and gear adjustment problems such as squeaking, rubbing, or difficulty shifting.
For the brakes, ensure that the brake pads are aligned properly with the rim and adjust the tension using an Allen wrench.
To adjust the gears, locate the barrel adjuster on the derailleur and turn it clockwise or counterclockwise to fine-tune the shifting. You may also need to adjust the cable tension using the barrel adjuster on the shifter.
Remember to test the brakes and gears after each adjustment to ensure smooth operation. Tools needed for brake and gear adjustments include an Allen wrench set, a screwdriver, and possibly a cable cutter.
Once you’ve successfully adjusted the brakes and gears, you can move on to the next section about tips for ensuring the motor and battery are functioning properly.
Tips for ensuring the motor and battery are functioning properly
To ensure your motor and battery are functioning properly, you should regularly check for any signs of wear or damage. Here are some tips for motor troubleshooting and battery maintenance:
-
Inspect the motor: Check for loose connections, frayed wires, or any physical damage. Make sure the motor is securely mounted and the wiring is intact.
-
Test the battery: Check the voltage and ensure it is within the recommended range. Look for any bulges, leaks, or corrosion on the battery casing. Clean the terminals regularly to prevent buildup.
-
Monitor the performance: Pay attention to any unusual noises, vibrations, or changes in power output. Keep track of the battery’s charging and discharging cycles to maintain its lifespan.
By following these steps, you can identify any potential issues with the motor or battery and address them promptly. This will ensure a smooth and reliable electric bike experience.
Now, let’s move on to the importance of a test ride and adjustments if needed.
Importance of a test ride and adjustments if needed
Take the time to go for a test ride and make any necessary adjustments for a smooth and personalized riding experience. The importance of a proper fit cannot be overstated when converting a bike into an electric bike. A test ride allows you to assess the comfort and ergonomics of your electric bike. Adjust the seat height, handlebar position, and pedal placement to ensure optimal riding posture. To troubleshoot common issues, pay attention to any unusual noises, vibrations, or handling problems during the test ride. Use the table below to track and address any adjustments needed:
| Issue | Adjustment | Result |
|---|---|---|
| Noisy motor | Check connections | Reduced noise |
| Poor acceleration | Adjust throttle sensitivity | Improved speed |
| Uneven braking | Adjust brake pads | Smoother braking |
By conducting a test ride and making necessary adjustments, you can optimize your electric bike’s performance. In the next section, you will learn how to ride and maintain your electric bike seamlessly.
Learn to Ride and Maintain Your Electric Bike
You’ll need to regularly maintain your electric bike to ensure it runs smoothly. Here are three key steps for riding and maintaining your electric bike:
-
Perform regular maintenance: Keep your electric bike in top shape by regularly checking and maintaining key components such as the brakes, tires, chain, and battery. This includes cleaning and lubricating the chain, checking tire pressure, and inspecting the brake pads for wear.
-
Troubleshoot common electric bike issues: Familiarize yourself with common problems that may arise, such as battery issues or motor malfunctions. Learn how to troubleshoot these issues, such as checking the battery connections or resetting the motor controller. This will help you quickly identify and resolve any problems that may arise during your rides.
-
Stay informed: Stay updated on the latest electric bike maintenance practices and safety guidelines. Regularly check the manufacturer’s website or consult the user manual for any specific maintenance recommendations. This will help you prolong the lifespan of your electric bike and ensure a safe and enjoyable riding experience.
As you explore electric bike accessories, remember that proper maintenance is essential for maximizing the performance and longevity of your electric bike.
Explore Electric Bike Accessories
One way to enhance your riding experience is by exploring accessories for your e-bike. Electric bike accessories are essential for a safe and enjoyable ride. To choose the right accessories for your electric bike, consider your needs and preferences. Here is a table showcasing three must-have accessories for a safe and enjoyable ride:
| Accessory | Description | Benefits |
|---|---|---|
| Helmet | Protects your head in case of accidents or falls | Safety |
| Lights | Enhances visibility during nighttime rides | Nighttime safety |
| Lock | Secures your bike from theft | Security |
By investing in these accessories, you can ensure a safer and more enjoyable ride. As you embrace the benefits of an electric bike, incorporating these accessories will further enhance your riding experience.
Embrace the Benefits of an Electric Bike
Now that you’ve explored electric bike accessories, it’s time to delve into the exciting world of electric bike benefits and conversion kits.
Electric bikes offer numerous advantages for commuting, making them an excellent choice for daily transportation. Firstly, electric bike commuting is eco-friendly, as it reduces carbon emissions and promotes a greener environment. Secondly, electric bikes are cost-effective, allowing you to save on fuel and parking expenses. Lastly, electric bikes provide a healthier lifestyle by incorporating exercise into your daily routine.
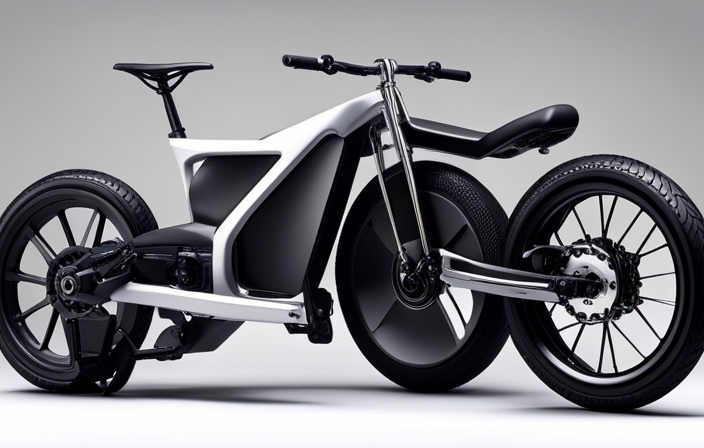
To convert your bike into an electric one, you’ll need to choose the right electric bike conversion kit. Consider factors such as motor power, battery capacity, and compatibility with your bike’s frame. Determine whether you want a front-wheel, rear-wheel, or mid-drive conversion kit, each with its own benefits.
Research the different conversion kits available in the market, read reviews, and compare prices to make an informed decision. Remember, the right conversion kit can transform your regular bike into a powerful and efficient electric bike, opening up a whole new world of possibilities for your daily commute.
Frequently Asked Questions
What are the benefits of converting a bike into an electric bike?
Converting a bike into an electric bike has several advantages. You can enjoy faster speeds, longer rides, and easier uphill climbs. However, there are also disadvantages such as increased weight and the need for regular maintenance.
Can any type of bike be converted into an electric bike?
Of course, any type of bike can easily be converted into an electric bike! Thanks to electric bike conversion kits, you can transform your beloved old bike into a powerful and eco-friendly ride. Compatibility with different bike frames is not an issue at all!
How much does it typically cost to convert a bike into an electric bike?
Converting a bike into an electric one can cost anywhere from $300 to $1,500, depending on the quality of parts and desired features. Cost considerations include battery, motor, controller, and accessories. Budget options exist for those looking to keep costs low.
How long does it take to complete the conversion process?
To complete the conversion process, it typically takes a few hours depending on your skill level and familiarity with the necessary tools. The conversion time can vary based on the complexity of the task.
Are there any maintenance or safety considerations to keep in mind after converting a bike into an electric bike?
When converting a bike into an electric bike, it is crucial to consider maintenance considerations and safety precautions. Regularly inspect the battery, motor, and wiring for any signs of damage. Ensure that all connections are secure and follow proper safety protocols while riding.
Conclusion
In conclusion, converting your bike into an electric bike is a rewarding and practical project that can be accomplished with the right knowledge and tools. By following the step-by-step process outlined in this article, you can successfully transform your bike into an electric-powered machine.
Did you know that the global electric bike market is projected to reach a value of $38.6 billion by 2025? This statistic highlights the growing popularity and demand for electric bikes worldwide.
So why not join the trend and enjoy the benefits of an electric bike yourself? Happy riding!