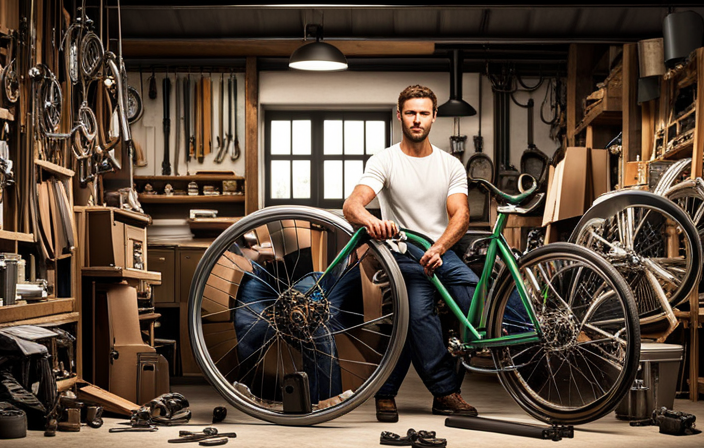
Want to boost your bicycle’s power? In this article, I’ll demonstrate the steps to turn your regular bike into an electric powerhouse.
Converting a bike to electric may sound like a daunting task, but fear not! By following these step-by-step instructions, you’ll be zipping down the streets with ease in no time.
From assessing your bike’s suitability for conversion to selecting the right motor and battery, I’ll guide you through every technical detail to ensure a successful transformation.
Let’s get started!
Key Takeaways
- Testing and troubleshooting the electric system is essential before converting a bike to electric.
- Gearing and performance optimization can greatly enhance the bike’s speed and torque for different terrains.
- Choosing the right throttle or pedal assist system is crucial for a customized and efficient biking experience.
- Enhancing the electric bike experience with accessories like lights, fenders, and bike racks can greatly improve safety and convenience.
![LISEN Bike Phone Holder, [Super Easy Install] Motorcycle Phone Mount Ebike Accessories Bicycle Handlebar Holder Mount Gifts for Adults Kids Men Mountain Mini Bike Scooter Gear Accessories for iPhone](https://m.media-amazon.com/images/I/41f8iCmkMsL._SL500_.jpg)
LISEN Bike Phone Holder, [Super Easy Install] Motorcycle Phone Mount Ebike Accessories Bicycle Handlebar Holder Mount Gifts for Adults Kids Men Mountain Mini Bike Scooter Gear Accessories for iPhone
[Ultra-Secure Hold] – LISEN bike phone holder mount keeps your phone firmly in place even on bumpy or...
As an affiliate, we earn on qualifying purchases.
Assess Your Bike’s Suitability for Conversion
You’ll need to evaluate whether or not your bike is suitable for conversion to an electric bike. Before starting any bike modification, it’s important to assess the frame, wheels, and brakes.
The frame should be sturdy and in good condition to handle the additional weight of the electric components. Check for any cracks or structural weaknesses.
The wheels should be able to support the extra load and have enough clearance for the motor and battery. Ensure that the brakes are in proper working order to handle the increased speed and weight of the electric bike.
Additionally, consider the size and shape of your bike, as it may determine the type of electric motor that will fit best. Choose the right electric motor that matches your bike’s specifications and meets your desired performance goals.

amzluv Bike Phone Holder Mount, Secure Handlebar Phone Mount Holder for Bike and Motorcycle, Suitable for iPhone and 4.5-6.8" Smartphones, Black
Universal Fit for 4.5-6.8 Inch Phones (Fits up to 3.19" Wide, 0.47" Thick): This motorcycle phone mount and...
As an affiliate, we earn on qualifying purchases.
Choose the Right Electric Motor
Selecting the suitable electric engine is pivotal for a successful bike electrification. When choosing an electric motor, there are several factors to consider.
First, determine the power requirements of your bike. Consider the weight of the rider, cargo, and the terrain you’ll be riding on.
Next, decide between a hub motor or a mid-drive motor. Hub motors are easier to install but can affect the bike’s balance, while mid-drive motors offer better performance on hills.
Lastly, consider the motor’s power output. Higher power motors provide more speed and torque but may drain the battery faster. Finding the right balance is crucial.
Transitioning into the next section, selecting the appropriate battery is equally important to ensure optimal performance for your electric bike.

SY Bicycle Speedometer and Odometer Wireless Waterproof Cycle Bike Computer with LCD Display & Multi-Functions by YS
【Auto Wake-up Function】Automatically wakes from sleep mode upon sensing vibration in the bicycle. Bright LCD display to easily...
As an affiliate, we earn on qualifying purchases.
Select the Appropriate Battery
When it comes to electrifying your bicycle, finding the right battery is crucial for achieving maximum performance and efficiency. Choosing battery capacity is an important factor to consider. You need to determine how much power you require to meet your desired speed and distance goals. It is essential to choose a battery with sufficient capacity to meet these requirements.
Additionally, comparing battery types is crucial. There are various options available, such as lithium-ion, nickel-cadmium, and lead-acid batteries. Each type has its own advantages and disadvantages in terms of weight, lifespan, cost, and charging time. Consider these factors and select the battery type that best suits your needs.
Now that you have chosen the appropriate battery, it’s time to gather the necessary tools and equipment to continue the conversion process.

Lamicall Bike Phone Holder, Motorcycle Mount - Motorcycle Phone Holder, Handlebar Cell Phone Clamp, E-Bike Scooter Phone Clip for iPhone 17 Air Pro Max, 16 15 Plus, S20, 4.7 to 6.8" Smartphones
Sturdy and Safe: A special shape of this motorcycle & bike phone holder grips each corner of your...
As an affiliate, we earn on qualifying purchases.
Gather the Necessary Tools and Equipment
After deciding on the appropriate battery, it’s time to gather all the tools and equipment needed to proceed with the bike conversion process. Here is a list of three essential items you will need:
-
Wrench set: You’ll need a set of wrenches to remove the bike’s existing components, such as the pedals, crankset, and bottom bracket. This will allow you to access the space needed for the electric motor and battery installation.
-
Wire cutters and strippers: These tools are necessary for cutting and stripping wires during the electrical connections. They ensure a clean and secure connection between the motor, battery, and other electrical components.
-
Allen wrench set: An Allen wrench set is crucial for loosening and tightening bolts throughout the conversion process. It will be used to remove the bike’s handlebars, seat post, and any other components that might obstruct the installation.
With these necessary tools in hand, you can now move on to the next step of removing the bike’s existing components and preparing it for the electric conversion.
Remove the Bike’s Existing Components
Now that you have gathered the necessary tools, it’s time to bid farewell to the old parts that have faithfully served you on countless rides. First, let’s focus on the bike frame. Start by removing the handlebars, seat, and pedals using the appropriate tools. Carefully detach the wheels by loosening the bolts or quick-release levers. Next, take off the chain by using a chain tool to break the link and remove it from the bike. It’s important to be cautious and handle the bike frame with care to avoid any damage. Additionally, you will need to remove the brake system. Begin by loosening the brake cable and removing it from the frame. Once the cable is detached, unscrew the brake calipers from the bike frame. Now that we have removed the bike’s existing components, let’s move on to installing the electric motor and giving your bike a new lease on life.
Install the Electric Motor
To start the installation process, you’ll need to carefully position the powerful electric motor onto the bike frame. Before doing so, ensure that the electric motor is compatible with your bike and will provide the desired performance.
Begin by removing any existing components that may hinder the installation, such as the bottom bracket or crankset. Once the frame is clear, align the motor in a way that allows for easy access to the battery and other necessary connections.
Secure the motor tightly using the appropriate mounting brackets and bolts. This step is crucial to ensure the motor remains stable and does not shift during operation.
With the electric motor securely in place, you can now proceed to the next step of connecting the battery to the motor, which will provide the necessary power for your electric bike.
Connect the Battery to the Motor
Attach the battery to the motor, ensuring a secure connection that will deliver the necessary power for optimal performance of your electric bike. To connect the battery, follow these steps:
-
Wiring setup: Begin by identifying the positive and negative terminals on both the battery and the motor. Connect the positive terminal of the battery to the positive terminal of the motor using a suitable gauge wire. Similarly, connect the negative terminal of the battery to the negative terminal of the motor.
-
Battery placement: Find a suitable location on your bike to mount the battery. Ensure that it is securely fastened and protected from any potential damage or exposure to water.
-
Secure connection: Double-check all the connections to ensure they are tight and secure. Loose connections can lead to poor performance or even damage to the components.
Now that the battery is connected, let’s move on to the next section, where we will discuss how to mount the controller and wiring for your electric bike.
Mount the Controller and Wiring
After connecting the battery, it’s time to securely mount the controller and organize the wiring for optimal performance. To begin, gather the necessary materials: mounting brackets, zip ties, and electrical tape. First, attach the mounting brackets to the bike frame using screws or bolts, ensuring a stable and secure fit. Next, carefully route the wires from the battery to the controller, avoiding any sharp edges or areas prone to damage. Use zip ties to secure the wires along the frame, keeping them neat and preventing any interference with moving parts. Finally, use electrical tape to secure any loose wires and provide added protection against moisture and vibrations. Now that the controller and wiring are in place, we can move on to the next step of testing the electric system.
Test the Electric System
After mounting the controller and wiring, it’s time to test the electric system. This step is crucial to ensure everything is functioning properly before hitting the road.
Begin by turning on the main power switch and checking if the display lights up. If it does, test the throttle and make sure it responds smoothly. If not, double-check the wiring connections and consult the user manual for troubleshooting common issues.
Next, check the battery level and ensure it is adequately charged. Optimizing battery performance is essential for longer rides and better overall efficiency.
Finally, test the brakes to ensure they are working correctly and that the electric system disengages when the brakes are applied.
With the electric system successfully tested, we can now move on to adjusting the bike’s gearing for optimal performance and control.
Adjust the Bike’s Gearing
To get the most out of your ride, you’ll want to fine-tune the bike’s gearing for optimal performance and control. When converting a bike to electric, adjusting the gearing is crucial to enhance bike performance and ensure a smooth ride. Gear ratio optimization allows you to find the perfect balance between speed and torque, making it easier to tackle different terrains and inclines.
To help you visualize the impact of gear ratio optimization, consider the following table:
| Gear Ratio | Speed (mph) | Torque (Nm) |
|---|---|---|
| 1 | 10 | 40 |
| 2 | 15 | 30 |
| 3 | 20 | 20 |
| 4 | 25 | 10 |
By adjusting the gears, you can customize the bike’s performance to suit your preferences and riding conditions. Achieving the right gear ratio will significantly enhance your overall biking experience.
Now that the bike’s gearing is fine-tuned, the next step is to install a throttle or pedal assist system to further enhance the electric conversion.
Install a Throttle or Pedal Assist System
To adjust the bike’s gearing, we looked at the different options available to ensure a smooth and efficient ride. Now, let’s move on to the next step: installing a throttle or pedal assist system.
When it comes to converting a bike to electric, there are two main options to consider: a throttle system or a pedal assist system.
Throttle System:
- Pro: Provides instant power with a simple twist of the throttle.
- Pro: Allows you to control the speed without pedaling.
- Con: May require more frequent charging due to increased power consumption.
Pedal Assist System:
- Pro: Provides assistance while pedaling, making it feel more natural.
- Pro: Offers different levels of assistance to match your desired effort.
- Con: Requires continuous pedaling to activate the motor.
Now that we’ve explored the pros and cons of each system, let’s discuss the importance of considering additional accessories, such as lights and fenders, to enhance your electric bike experience.
Consider Adding Accessories (lights, fenders, etc.)
Enhance your electric bike experience by considering additional accessories like lights and fenders.
When adding accessories to your electric bike, there are several considerations to keep in mind. First, consider the type of riding you’ll be doing and the conditions you’ll encounter.
If you plan on riding at night or in low light conditions, adding lights to your bike is essential for visibility and safety.
Fenders are also important accessories to consider, as they help protect you from mud and water splashes, keeping you clean and dry during your rides.
Additionally, consider the benefits of other accessories such as a bike rack, which allows you to carry items or a phone holder to keep your phone secure and accessible.
By carefully selecting and adding accessories, you can customize your electric bike to suit your specific needs and preferences.
Transitioning into the next section, it is important to ensure proper safety measures such as wearing a helmet and using reflectors.
Ensure Proper Safety Measures (helmet, reflectors, etc.)
After considering adding accessories to your electric bike, it is crucial to ensure proper safety measures are in place. Safety should always be a top priority when riding any bike, and this is especially true for electric bikes.
One of the most important safety measures is wearing a helmet. When choosing a helmet, it is essential to select the right size and fit for maximum protection. A helmet that is too small or too large may not provide adequate safety in case of an accident.
Additionally, it is essential to have reflectors installed on your electric bike to increase visibility, especially when riding at night.
Regular maintenance is also vital for electric bike safety. By regularly inspecting and servicing your bike, you can prevent potential issues and keep your electric bike running smoothly.
Now, let’s delve into learning how to maintain and service your electric bike.
Learn How to Maintain and Service Your Electric Bike
Keep your e-bike in peak performance by properly maintaining and servicing it on a regular basis to ensure a smooth and safe ride.
Electric bike maintenance is essential for maximizing the lifespan and efficiency of your converted bike. To start, regularly check the tire pressure, brakes, and chain tension.
Lubricate the chain and gears to prevent rust and ensure smooth operation. Clean the bike after each ride using a mild detergent and water, paying special attention to the electrical components.
Troubleshooting common issues such as battery charging problems or motor malfunctions requires a basic understanding of the electrical system. Consult the user manual for specific instructions or seek professional help if needed.
By maintaining your electric bike properly, you can enjoy the benefits of your newly converted electric bike without any hassle.
Enjoy the Benefits of Your Newly Converted Electric Bike
Experience the incredible advantages of your freshly transformed e-bike and relish in the newfound freedom and convenience it brings to your daily commute or outdoor adventures. As a commuter, you’ll love the benefits of an electric bike for commuting. Say goodbye to traffic jams and hello to a faster, more efficient way of getting to work.
The electric motor provides a boost that makes uphill climbs effortless and allows you to arrive at your destination without breaking a sweat. Plus, with the ability to pedal or use the motor, you have the flexibility to choose how much exertion you want to put in.
To make the most of your electric bike, it’s important to extend the battery life. Start by charging the battery fully before each ride and avoid letting it completely drain. Optimize your riding by using the pedal-assist mode instead of relying solely on the motor. This will help conserve battery power and increase the overall range.
Additionally, maintain a steady speed and avoid sudden accelerations or braking, as this can drain the battery more quickly. Finally, consider investing in a spare battery or a portable charger for longer rides or when you’re away from a power source.
Enjoy the benefits of your newly converted electric bike and make your daily commute or outdoor adventures more enjoyable and convenient. Take advantage of the benefits of an electric bike for commuting and follow these tips to extend the battery life. Happy riding!
Frequently Asked Questions
What are the advantages and disadvantages of converting a bike to electric?
Before converting a bike to electric, it’s important to consider the pros and cons. The advantages include increased speed and range, eco-friendliness, and cost savings in the long run. However, there are also disadvantages such as the initial cost and added weight.
How long does it typically take to convert a bike to electric?
Converting a bike to electric takes an average of 4-6 hours. Pros include eco-friendliness and cost savings, while cons include weight and limited range. To choose the right conversion kit, consider factors like power, battery capacity, and compatibility with your bike.
Is it possible to convert any type of bike to electric?
Yes, it is possible to convert any type of bike to electric. However, there are pros and cons to consider. Factors such as bike weight, battery capacity, and motor power should be taken into account when deciding to convert a bike to electric.
How much does it cost to convert a bike to electric?
The cost to convert a bike to electric depends on various factors. A cost breakdown includes the price of the conversion kit, batteries, and additional components. DIY conversion can be cheaper, but professional services ensure quality and warranty.
Are there any legal requirements or regulations for riding an electric bike?
There are legal requirements and safety regulations for riding electric bikes. It is important to familiarize yourself with electric bike laws in your area to ensure you are riding within the guidelines and staying safe.
Conclusion
In conclusion, converting a bike to electric can be a rewarding and exhilarating experience. By assessing your bike’s suitability, choosing the right motor and battery, and gathering the necessary tools, you can embark on this electrifying journey.
Don’t forget to remove the bike’s existing components and consider adding accessories for added convenience. Remember to prioritize safety by wearing a helmet and using reflectors.
Lastly, learning how to maintain and service your electric bike will ensure its longevity. So saddle up and savor the benefits of your newly converted electric bike!