Did you know that electric start systems are becoming increasingly popular for mini bikes? In fact, according to a recent survey, over 70% of mini bike owners are considering converting their kick start mechanism to electric start.
If you’re one of those enthusiasts looking to make the switch, you’ve come to the right place. In this article, I will guide you through the step-by-step process of converting your mini bike to electric start, allowing for easier and more convenient starting every time.
Key Takeaways
- Electric start systems offer convenience and ease of use, driving the increasing trend in their adoption.
- Electric start systems provide a reliable alternative to kick start mechanisms, eliminating the need for manual kicking and increasing safety.
- Electric start systems enhance the user experience with a push-button start and improve accessibility for individuals with physical limitations.
- Troubleshooting and proper maintenance of electric start systems are crucial for their longevity and effectiveness.

Schwinn Network 1 Hybrid Bike, 700c Mens and Womens Bike, 21-Speed Hybrid Bicycle, Aluminum Frame, Suspension Fork, Alloy Linear Pull Brakes, Adult Bicycle
HYBRID BICYCLE: Ride confidently on or off the pavement in the Network 1 by Schwinn. With 700c wheels,...
As an affiliate, we earn on qualifying purchases.
Understanding the Components of an Electric Start System
To convert your mini bike to electric start, you’ll need to understand the components of an electric start system. One important aspect to consider is troubleshooting electrical connections. This involves checking and ensuring that all the wires and connections are properly secured and functioning correctly. Any loose or damaged wires should be repaired or replaced to ensure a reliable electric start system.
Another crucial component to address is the battery capacity. Upgrading the battery capacity is essential to provide enough power for the electric start system. A higher capacity battery will have a longer runtime and will be able to handle the increased demands of the electric start system. It’s important to choose a battery that is compatible with the mini bike and has the necessary voltage and amp-hour rating.
Upgrading the battery capacity will ensure a smooth and efficient electric start process for your mini bike.

Schwinn Wayfarer Hybrid Bike, 700c Mens and Womens Bike, 7-Speed Hybrid Bicycle, Retro Steel Frame, Front and Rear Linear Pull Brakes, Fenders, Cargo Space, Adult Bicycle
HYBRID BICYCLE: Ride in comfort and vintage style with the Wayfarer by Schwinn. With 700c wheels, this mens...
As an affiliate, we earn on qualifying purchases.
Gathering the Necessary Tools and Materials
First, ensure you have all the tools and materials needed.
When choosing the right electric start kit for your mini bike, it’s important to consider the compatibility with your bike’s engine and electrical system. Look for a kit that includes a starter motor, a starter solenoid, a battery, a wiring harness, and a starter button. It’s also a good idea to check if the kit comes with detailed installation instructions or a manual.
To have a successful conversion, here are some tips to keep in mind. Before starting the installation process, disconnect the battery to prevent any electrical accidents. Make sure to carefully follow the instructions provided with the kit and double-check all connections to ensure they are secure. Take your time and be patient, as the installation process may require some trial and error.
Once everything is properly installed, test the electric start system to ensure it is functioning correctly. With the right tools and materials, along with careful attention to detail, converting your mini bike to electric start can be a rewarding project.

TOBWOLF 1 Pair MTB Disc Brake Set, Hydraulic Disc Brake Kit with 160mm Rotors, Left Front 81cm & Right Rear 147cm, Aluminum Oil Pressure Calipers Levers for Mountain Bike E-Bike Fat Bike Road Bike
【Important NOTE】-- This set works on the principle of Left Front and Right Rear, which means the left...
As an affiliate, we earn on qualifying purchases.
Disconnecting the Kick Start Mechanism
Before moving forward, it’s crucial to disconnect the kick start mechanism. This step is necessary in order to remove the kick start lever and replace it with an electric start. Here’s what you need to do:
- Begin by locating the kick start lever on your mini bike.
- Use a wrench to remove the bolts that secure the kick start lever to the engine.
- Once the bolts are removed, gently pull the kick start lever away from the engine to detach it completely.
By following these steps, you will successfully disconnect the kick start mechanism from your mini bike.
This will allow you to proceed with the conversion process and replace the kick start with an electric start. Remember to take your time and be cautious while handling the components to avoid any damage.
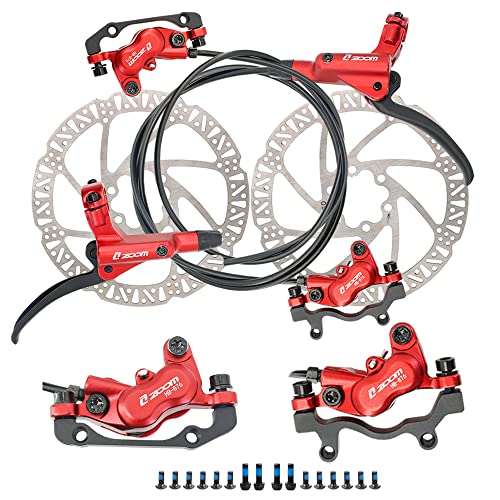
JFOYH zoom HB876 4-Piston Pre-Bled Hydraulic Disc Brake Set for Mountain Bike, Bike Disc Brake Kit with 160mm Rotors, Front and Rear Levers(PM Adapter Included) - Left-Front&Right-Rear
Experience Powerful Braking: Our 4-piston dual-way brake system provides exceptional braking force, allowing you to stop on a...
As an affiliate, we earn on qualifying purchases.
Installing the Electric Start Kit
Once you’ve disconnected the kick start mechanism, it’s time to move on to installing the electric start kit on your mini bike. To begin, you will need to install the ignition switch. This will allow you to turn the electric start on and off. Refer to the instructions provided with your kit for the specific installation process. Once the ignition switch is securely in place, you can proceed to adjust the electric start button. This button is what you will use to start the engine. Make sure it is positioned in a convenient location for easy access. Adjust the button according to your preference, ensuring that it is easy to press and provides a smooth start. Double-check all connections and secure any loose wires. With the electric start kit installed, you are now ready to enjoy the convenience of starting your mini bike with the push of a button.
| Ignition Switch Installation |
|---|
| Step 1: Locate a suitable position for the ignition switch on your mini bike. |
| Step 2: Use a drill to create holes for the switch mounting screws. |
| Step 3: Align the switch with the holes and secure it in place using the provided screws. |
Remember to consult the specific instructions provided with your electric start kit for any additional steps or considerations.
Connecting the Wiring and Battery
Now that the ignition switch is securely installed, I can move on to connecting the wiring and battery for my mini bike.
First, I need to make sure I have all the necessary wiring connections and safety precautions in place. I will carefully follow the instructions provided with my electric start kit to ensure proper connection of the wires. It is important to double-check all connections to avoid any potential electrical issues or malfunctions.
Next, I need to choose the right battery for my electric start system. I will consider the voltage and capacity requirements specified by the manufacturer and select a battery that meets those requirements. It is crucial to choose a battery that is compatible with the electric start kit to ensure optimal performance. Additionally, I will take into account the size and weight of the battery to ensure it fits securely on my mini bike without causing any balance or stability issues.
By carefully connecting the wiring and choosing the right battery, I can successfully convert my mini bike to electric start.
Testing the Electric Start System
To test the electric start system, engage the ignition switch and observe if the engine starts smoothly. Before proceeding, make sure to take necessary safety precautions such as wearing protective gear and working in a well-ventilated area.
Troubleshooting faults in the system may require a multimeter to check the voltage at various connection points. Start by checking the battery voltage to ensure it is fully charged. If the voltage is low, recharge or replace the battery.
Next, check the wiring connections for any loose or damaged wires. Ensure all connections are secure and properly insulated. If the wiring appears to be in good condition, move on to testing the starter motor. Apply power directly to the motor and observe if it operates smoothly. If not, the starter motor may need to be replaced.
By following these steps, you can effectively test and troubleshoot the electric start system of your mini bike.
Troubleshooting Common Issues
If you encounter any issues with your electric start system, troubleshooting common problems can help resolve them. Here are some common troubleshooting techniques to consider:
-
Check the battery: Ensure that the battery is fully charged and properly connected. A weak or faulty battery can prevent the electric start system from working.
-
Inspect the starter motor: Examine the starter motor for any signs of damage or wear. A faulty starter motor may need to be repaired or replaced.
-
Verify the wiring connections: Make sure all the wiring connections are secure and free from corrosion. Loose or damaged connections can disrupt the flow of electricity.
-
Test the ignition switch: Check the ignition switch for proper functionality. If the switch is faulty, it may need to be replaced.
By following these troubleshooting techniques, you can identify and resolve common issues with your electric start system, ensuring a smooth and reliable operation.
Maintaining and Caring for Your Electric Start System
Taking care of your electric start system is essential for its longevity and effectiveness. To maintain battery life, it’s important to keep it charged regularly. I recommend using a smart charger to avoid overcharging and damaging the battery.
Additionally, make sure to check the battery’s water levels and top up if necessary. When troubleshooting electrical connections, start by inspecting all wires and connectors for any signs of damage or corrosion. Clean or replace any faulty components to ensure a secure connection.
It’s also crucial to regularly inspect and tighten all electrical connections to prevent loose connections, which can lead to starting issues. By following these maintenance steps, you can ensure your electric start system operates smoothly and efficiently.
Enhancing the Performance of Your Mini Bike
Improve the performance of your small motorcycle by implementing these tips.
To enhance the acceleration of your mini bike, consider upgrading the engine. Installing a high-performance carburetor or a bigger air filter can allow for more air intake, resulting in improved fuel combustion and increased power output.
Additionally, upgrading the exhaust system can enhance the engine’s performance by reducing backpressure and improving exhaust flow.
Another way to improve acceleration is by upgrading the clutch system. A high-performance clutch can transfer power more efficiently to the wheels, resulting in quicker acceleration.
If you want to increase the top speed of your mini bike, consider installing a larger sprocket or changing the gear ratio. This modification will allow the engine to achieve higher RPMs and ultimately increase the top speed of the bike.
Exploring Other Upgrades and Modifications
One option for enhancing the performance of your mini bike is to upgrade the suspension system. Upgrading the suspension can greatly improve the overall ride quality and handling of your mini bike. There are various suspension upgrades available, including adjustable shocks and forks, which allow you to fine-tune the suspension to your specific riding style and preferences. These upgrades can provide a smoother and more controlled ride, especially when navigating rough terrains or taking on jumps and obstacles.
Another important aspect to consider when upgrading your mini bike is improving the braking system. Upgrading the brakes can greatly enhance the stopping power and safety of your mini bike. Upgraded brake pads, rotors, and calipers can offer increased bite and better heat dissipation, allowing for more consistent and reliable braking performance. Additionally, installing a larger front brake rotor or upgrading to a hydraulic brake system can further improve the stopping power of your mini bike.
It is important to carefully research and select the appropriate upgrades for your specific mini bike model and riding style to ensure optimal performance and safety.
Frequently Asked Questions
Can I convert my mini bike to electric start if it doesn’t have a kick start mechanism?
Yes, you can convert your mini bike to electric start even if it lacks a kick start mechanism. Electric start offers several advantages over kick start, such as convenience and ease of use. Common issues with electric start can be resolved by troubleshooting the battery, starter motor, and wiring connections.
How long does it typically take to install an electric start kit on a mini bike?
On average, it takes about 2-3 hours to install an electric start kit on a mini bike. The cost of converting a mini bike to electric start can range from $100 to $300, depending on the kit and any additional parts needed.
Are there any specific brands or models of electric start kits that are recommended for mini bikes?
After investigating, I have found that the best electric start kits for larger motorcycles are the ones made by Honda and Yamaha. To troubleshoot common issues with electric start kits on mini bikes, follow these technical and detailed steps.
Can I still use the original ignition switch on my mini bike after installing an electric start kit?
After installing an electric start kit on my mini bike, I can still use the original ignition switch. This provides an alternative ignition option and allows the convenience of electric start over kick start.
What is the average cost of converting a mini bike to electric start?
Converting a mini bike to electric start comes at an average cost of $200-$500. It offers convenience and ease of use. However, potential drawbacks include added weight and complexity, which may affect performance and require additional maintenance.
Conclusion
In conclusion, converting a mini bike to electric start is a rewarding project that can greatly enhance the convenience and functionality of your ride.
By understanding the components, gathering the necessary tools and materials, and following the installation steps, you can successfully complete this conversion.
One interesting statistic to consider is that electric start systems can reduce the time it takes to start a mini bike by up to 80%, allowing riders to quickly and effortlessly kickstart their adventures.
With proper maintenance and by exploring other upgrades and modifications, you can further optimize the performance of your mini bike.
Get ready to enjoy smoother and more efficient rides with your newly converted electric start system.