
Looking to elevate your bicycle riding experience? Converting your bike into an electric one can make a significant difference. This comprehensive guide will assist you in the step-by-step process, starting from determining your bike’s suitability to navigating through the legal aspects of electric bikes.
With the right tools, equipment, and electric conversion kit, you’ll be able to transform your regular bicycle into a powerful and efficient electric bike. Get ready to enjoy the thrill of effortless pedaling and explore new horizons with your newly converted electric bike.
Key Takeaways
- The conversion process involves adjusting gears, testing and fine-tuning the electric system, and reassembling the front wheel and fork.
- Enhancements and accessories for an electric bike include adding accessories, considering disc brakes, upgrading the suspension system, installing a rear rack, and adding lights and a bell.
- Safety and maintenance tips for electric bikes include regularly checking tire pressure, keeping brakes in good working condition, lubricating the chain and gears, tightening loose bolts and screws, and cleaning the bike regularly.
- Understanding laws and regulations is important, including familiarizing yourself with e-bike classification, following age restrictions, wearing a helmet and reflective clothing, and knowing the maximum speed limit.

Under Armour Squeeze Water Bottles, 32 oz Water Bottles, Sideline Sports Water Bottle with Quick-Shot Lid, Quick & Easy Hydration, Gym Water Bottles, Squeeze Bottle, 1 32oz Bottle
- Easy Hydration: Quick-shot lid and one-way valve
- On-the-Go Use: One-hand operation for active hydration
- Measurement Markings: Ounces and milliliters for tracking
As an affiliate, we earn on qualifying purchases.
Assessing Your Bicycle’s Compatibility
You’ll need to assess your bike’s compatibility before converting it to an electric bike. Start by evaluating compatibility, considering factors such as frame design, wheel size, and available space for battery installation.
Electric bike conversion kits typically require a certain frame type, such as a rigid or hardtail frame, for proper installation. Additionally, check if your bike has adequate clearance for the battery and motor. Necessary modifications may include removing components like the front derailleur or disc brakes to make room for the motor.
Take measurements and compare them with the specifications provided by the conversion kit manufacturer. Once you’ve assessed compatibility and identified any necessary modifications, you can move on to gathering the necessary tools and equipment for the conversion process.
Gathering the Necessary Tools and Equipment
To start the conversion process, it’s important to gather all the tools and equipment needed. First, you’ll need a set of wrenches, both metric and standard, to remove and adjust various components on your bicycle. Additionally, a torque wrench will come in handy for properly tightening bolts to the recommended specifications.
Next, you’ll need wire cutters and strippers to work with the electrical components. These tools will allow you to cut and strip the wires, ensuring a clean and secure connection. It’s also important to have a multimeter on hand to test the voltage and continuity of the electrical system. Lastly, you’ll need a soldering iron and solder for any necessary electrical connections.
Understanding the electrical components and having the right tools will make the conversion process smoother and more efficient.
Now, let’s move on to choosing the right electric conversion kit.
Choosing the Right Electric Conversion Kit
When selecting the appropriate kit for your conversion, it’s crucial to consider factors such as motor power, battery capacity, and compatibility with your current setup.
Choosing the right battery capacity is essential to ensure that your electric bike has enough power to meet your needs. Look for a battery that has a higher amp-hour rating to provide longer ride times.
Additionally, understanding the motor power requirements is vital for a successful conversion. Consider the terrain you’ll be riding on and the level of assistance you desire. A higher wattage motor will provide more power and better performance, especially on hills or rough terrain.
Once you have chosen the right electric conversion kit, you can move on to the next step of removing the front wheel and fork.
Removing the Front Wheel and Fork
First, detach the front wheel and fork from your bicycle. Start by loosening the bolts or quick-release mechanism that secure the front wheel to the fork. Once loosened, lift the front wheel off the ground and slide it out of the fork dropouts.
Next, you will need to remove the brake caliper from the fork. Unscrew the mounting bolts and carefully detach the caliper without damaging the brake cable.
Now, it’s time to remove the fork from the bicycle frame. Begin by loosening the stem bolts, then use a wrench to unscrew the headset locknut. Gently slide the fork out of the frame, taking care not to damage any cables or housing.
When removing the front wheel and fork, some potential challenges may arise. One challenge is dealing with rusted or stuck bolts. To overcome this, apply penetrating oil to the bolts and allow it to sit for a few minutes before attempting to loosen them. Another challenge is ensuring proper alignment when reassembling the front wheel and fork. Take note of any alignment marks or indicators on the fork and frame to ensure correct positioning.
With the front wheel and fork removed, you are now ready to move on to installing the electric motor.
Installing the Electric Motor
Now you can proceed with installing the electric motor by following these steps.
Start by choosing the appropriate location on your bicycle frame to mount the motor. Ensure that it is securely fastened and aligned properly with the chain and rear wheel.
Next, attach the motor to the frame using the provided mounting brackets and screws. Make sure to tighten them firmly to prevent any movement during operation.
Connect the motor wires to the corresponding wires on the controller, making sure to match the colors correctly. Once connected, secure the wires with zip ties to avoid any potential damage.
Finally, test the motor by turning on the controller and slowly applying throttle. If you encounter any issues, such as abnormal sounds or vibrations, consult the troubleshooting guide provided by the manufacturer.
With the electric motor successfully installed, you can now move on to mounting the battery and controller, ensuring a seamless conversion into an electric bike.
Mounting the Battery and Controller
To mount the battery and controller, start by selecting a suitable location on the bicycle frame. Consider factors such as weight distribution and accessibility. The mounting position should be secure and provide enough space for the components.
Once you have chosen the spot, use brackets or straps to secure the battery and controller in place. Make sure they’re tightly fastened to avoid any movement during rides. Additionally, ensure that the battery and controller are protected from water and other elements by using waterproof covers or enclosures.
After securing the components, you can proceed to the next step of connecting the wiring and components. This will allow the battery and controller to communicate with the motor and handle the power distribution effectively.
Connecting the Wiring and Components
Once you have securely mounted the battery and controller, you can connect the wiring and components to ensure effective communication and power distribution. Here are the steps to follow:
-
Start by identifying the wiring connections on both the battery and controller. Match the corresponding wires and connect them securely, ensuring a tight fit to prevent loose connections.
-
Next, connect the throttle and brake sensors to the controller. Ensure that the throttle is properly calibrated and that the brake sensors are functioning correctly.
-
Connect the motor to the controller, making sure to match the correct wires. Use zip ties or tape to secure the wires and prevent them from getting tangled or damaged during rides.
-
Double-check all the connections to ensure they are tight and secure. Loose connections can lead to power loss or even damage to the components.
-
Finally, test the system and troubleshoot any issues that may arise. Check for any loose connections, faulty wiring, or sensor malfunctions.
With the wiring and components connected, you can now move on to adjusting the brakes and gears to ensure optimal performance and safety.
Adjusting the Brakes and Gears
Make sure you properly adjust the brakes and gears to ensure optimal performance and safety.
Start by adjusting the brakes. Begin by loosening the cable tension and aligning the brake pads with the rim of the wheel. Adjust the brake pads so that they are evenly spaced on both sides of the rim. Next, tighten the cable tension until the brake pads make solid contact with the rim when the brake lever is squeezed.
Test the brakes by squeezing the brake lever and ensuring that the bike comes to a complete stop without any rubbing or squeaking noises.
Moving on to gear adjustment, shift the bike to the highest gear and adjust the rear derailleur so that the jockey wheel lines up with the smallest cog. Then, shift to the lowest gear and adjust the front derailleur so that the chain lines up with the smallest chainring.
Test the gears by shifting through all the gears and ensuring smooth and accurate shifting.
Once you have adjusted the brakes and gears, you can move on to testing and fine-tuning the electric system.
Testing and Fine-Tuning the Electric System
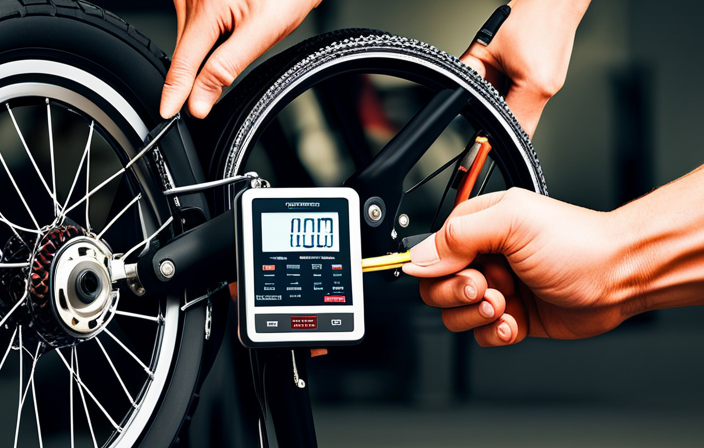
First, you should check and adjust the electric system to ensure it is functioning properly. Start by testing the battery voltage using a multimeter. Make sure it’s fully charged and delivering the expected voltage.
Next, test the throttle response by twisting it and checking if the motor engages smoothly. You can also test the pedal-assist function by pedaling and observing if the motor provides the expected assistance.
Finally, evaluate the overall performance of the electric system by taking the bike for a test ride. Pay attention to the acceleration, top speed, and battery range. Make any necessary adjustments to improve the system’s performance.
With the electric system tested and fine-tuned, you can now proceed to reassembling the front wheel and fork to complete the conversion process.
Reassembling the Front Wheel and Fork
To reassemble the front wheel and fork, you’ll need to carefully align the axle with the fork dropouts and secure it in place with the quick release skewer.
Start by inserting the axle through the center of the hub, making sure it fits snugly.
Then, align the fork dropouts with the axle, ensuring they are properly seated.
Once aligned, slide the quick release skewer through the hollow axle and tighten it by turning the lever clockwise.
Make sure the skewer is securely fastened to prevent any wobbling or looseness.
If you encounter any issues during this process, such as difficulty aligning the axle or a loose skewer, try adjusting the fork dropouts or tightening the skewer further.
Finally, with the front wheel and fork successfully reassembled, you can move on to adding accessories and enhancements to your electric bike.
Adding Accessories and Enhancements
Now that you’ve successfully reassembled the front wheel and fork, it’s time to take your electric bike conversion to the next level. By adding accessories and enhancements, you can increase the functionality of your bike and enhance your overall riding experience.
To upgrade the brakes, consider installing disc brakes. They provide better stopping power and performance. Improving the suspension system can greatly enhance your bike’s comfort and stability, especially when riding on rough terrains.
In addition to these upgrades, here are five accessories and enhancements you can consider:
- Installing a rear rack for carrying cargo or panniers.
- Adding a front or rear light for improved visibility during night rides.
- Installing a bell or horn for safety and alerting pedestrians.
- Adding fenders to protect yourself from splashes and debris.
- Upgrading the seat for increased comfort during long rides.
By incorporating these accessories and enhancements, you can transform your electric bike into a more versatile and efficient mode of transportation.
In the next section, we will discuss important safety precautions and maintenance tips to ensure a smooth and enjoyable ride.
Safety Precautions and Maintenance Tips
One important aspect to consider when modifying your bicycle with an electric conversion kit is ensuring the safety and maintenance of your new ride. To keep your electric bike running smoothly, regular maintenance is crucial. Here are some maintenance tips to keep in mind.
- Firstly, check the tire pressure regularly and ensure they are properly inflated to avoid any mishaps on the road.
- Additionally, keep an eye on the brakes, ensuring they are in good working condition.
- Lubricating the chain and gears will prevent rust and keep them running smoothly.
- Another common problem is loose bolts and screws, so make sure to tighten them regularly.
- Finally, don’t forget to regularly clean your electric bike to prevent dirt buildup.
Understanding the laws and regulations surrounding electric bikes is the next important step in ensuring a safe and hassle-free ride.
Understanding the Laws and Regulations
Understanding the laws and regulations surrounding e-bikes is essential for a safe and hassle-free riding experience. To ensure you’re in compliance with legal requirements, here are some important points to consider:
-
Understand the classification: E-bikes are categorized based on their top speed and power output. Familiarize yourself with the specific classification that applies to your converted electric bike.
-
Follow age restrictions: Different jurisdictions may have age restrictions for riding e-bikes. Make sure you’re aware of the minimum age requirement in your area.
-
Wear safety gear: Just like with regular bicycles, it’s important to wear a helmet when riding your electric bike. Additionally, consider wearing reflective clothing to enhance visibility.
-
Know the speed limit: E-bikes often have speed limits imposed by law. Familiarize yourself with the maximum speed allowed in your area.
Understanding the legal requirements and ensuring safety measures are in place will help you enjoy your newly converted electric bike.
Now, let’s delve into the next section about enjoying the thrill of riding your e-bike.
Enjoying Your Newly Converted Electric Bike
Get ready to fully enjoy the thrill of riding your newly converted e-bike! Now that your bicycle has been transformed into an electric bike, it’s time to hit the road and experience the joy of effortless pedaling. To make the most of your ride and maximize battery life, it’s important to understand how to properly operate and maintain your e-bike.
To help you visualize the key aspects of enjoying your electric bike, here’s a handy table:
| Column 1 | Column 2 | Column 3 |
|---|---|---|
| Riding Technique | Battery Usage | Riding Experience |
| Pedal Assist | Moderate | Effortless |
| Full Throttle | High | Thrilling |
| Downhill Coasting | Low | Relaxing |
By following these guidelines, you’ll be able to fully enjoy your ride while ensuring the longevity of your e-bike’s battery. In the next section, we’ll delve into troubleshooting common issues to help you overcome any potential challenges during your electric bike journey.
Troubleshooting Common Issues
To troubleshoot common issues with your e-bike, you should familiarize yourself with basic maintenance and troubleshooting techniques. Here are some tips to help you troubleshoot battery and motor issues:
-
Troubleshooting Battery Issues:
-
Check the battery connections to ensure they are secure.
-
Test the battery voltage using a multimeter to determine if it is fully charged.
-
Inspect the battery for any signs of damage or corrosion.
-
If the battery is not holding a charge, consider replacing it with a new one.
-
Troubleshooting Motor Issues:
-
Check the motor connections to ensure they are properly connected.
-
Look for any loose wires or damaged cables.
-
Test the motor by applying power directly to it to see if it spins.
-
If the motor is not functioning, it may need to be replaced or repaired by a professional.
By following these troubleshooting techniques, you can quickly identify and resolve common issues with your e-bike’s battery and motor.
Frequently Asked Questions
How long does it typically take to convert a bicycle to an electric bike?
Converting a bicycle to an electric bike typically takes around 4-8 hours, depending on your experience and the complexity of the conversion kit.
The cost of converting a bicycle to an electric bike can vary, but it’s generally more affordable than buying a new electric bike.
The benefits of converting include increased speed and range, as well as the ability to tackle hills and longer commutes with ease.
Can I convert any type of bicycle into an electric bike?
Converting any type of bicycle into an electric bike is indeed possible. By using electric bike conversion kits, you can easily transform your regular bike into an efficient and eco-friendly mode of transportation.
These kits come with all the necessary components such as a motor, battery, and controller. The benefits of converting a bicycle to an electric bike are numerous – increased speed, reduced effort, extended range, and the ability to tackle hilly terrains with ease.
What kind of maintenance is required for an electric bike?
To ensure optimal performance and longevity of your electric bike, regular maintenance is essential. Here are some maintenance tips to keep in mind.
-
First, regularly clean and lubricate the chain to prevent rust and ensure smooth operation.
-
Check the tire pressure and tread wear regularly to maintain proper traction and avoid flats.
-
Additionally, inspect the brakes, cables, and electrical connections for any signs of wear or damage.
-
Lastly, keep the battery charged and store it in a cool, dry place to maximize its lifespan.
Common issues may include battery degradation, motor malfunctions, and electrical failures.
Will converting my bicycle to an electric bike affect its weight and handling?
Converting your bicycle to an electric bike will definitely have an impact on its weight and handling. It’s just science, really.
By adding an electric motor, battery, and all the necessary components, you’re essentially adding extra pounds to your beloved two-wheeler. This increased weight will affect how your bike feels and handles, especially when maneuvering tight corners or climbing steep hills.
So, be prepared for some changes in your cycling experience, my friend.
Are there any legal restrictions or regulations I should be aware of when using an electric bike on public roads?
When using an electric bike on public roads, there are legal requirements and safety precautions you need to be aware of.
Legal requirements vary by jurisdiction, but generally, you may need to follow speed limits, use lights and reflectors, and have a valid driver’s license or permit.
Safety precautions include wearing a helmet, using hand signals, and being aware of traffic laws.
It is important to familiarize yourself with your local regulations to ensure a safe and legal ride.
Conclusion
Congratulations on successfully converting your bicycle into an electric bike! You’ve unlocked a new level of freedom and efficiency on your two-wheeled companion. With the right tools and equipment, you’ve transformed your bike into a powerful and eco-friendly mode of transportation.
Remember to always prioritize safety and follow the laws and regulations regarding electric bikes. Enjoy the wind in your hair as you effortlessly glide through the streets, symbolizing your commitment to a greener future.
Don’t forget to troubleshoot any issues that may arise to ensure a smooth and enjoyable ride every time. Happy riding!