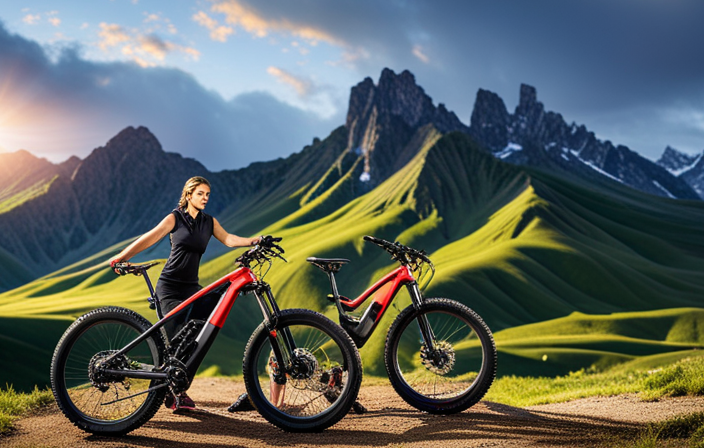
Picture this: you’re pedaling up a steep mountain trail, feeling the burn in your legs and the wind in your face. Suddenly, you hit a wall, unable to conquer that last daunting climb.
But what if I told you there was a way to give your mountain bike an electrifying boost, transforming it into a powerful machine that effortlessly conquers any terrain?
In this article, I will guide you through the precise steps to convert your mountain bike to electric, unlocking a world of limitless adventure and conquering the impossible.
Key Takeaways
- Troubleshoot common issues and refer to manufacturer’s instructions for electric bike conversion troubleshooting
- Adjust and fine-tune the system for optimal performance
- Test ride and gather feedback to make necessary adjustments
- Regularly maintain and operate your electric mountain bike for longevity and optimal performance
Assess Your Bike’s Compatibility
You’ll need to assess if your bike is compatible for conversion to an electric bike. Before diving into the conversion process, it’s crucial to determine if your mountain bike has the necessary components and features.
Begin by inspecting the frame to ensure it’s sturdy and suitable for the additional weight of an electric motor and battery. Check if your bike has a standard bottom bracket, as this will determine the type of motor you can use. Assess the spacing of the rear dropouts to ensure they can accommodate the width of an electric hub motor. Additionally, consider the size of the front fork and whether it can support the weight of a front hub motor.
Once you’ve completed the bike compatibility assessment, you can proceed to the next section where we’ll delve into research and choosing the right conversion kit.
Research and Choose the Right Conversion Kit
To choose the right conversion kit for your off-road bicycle, start by conducting thorough research. It is essential to consider the factors that will affect the performance and functionality of your electric mountain bike. Here are three important things to keep in mind:
-
Choosing the right motor power and torque: The motor is the heart of your electric conversion. Make sure to select a motor that provides sufficient power and torque to tackle the off-road terrain. Consider factors such as the steepness of the trails and your desired level of assistance.
-
Considering the weight and size of the battery: The battery is another crucial component of your electric conversion. Opt for a battery that offers a good balance between capacity and weight. Remember that a heavier battery may affect the handling and agility of your bike.
-
Research and compare conversion kits: Take the time to research and compare different conversion kits available in the market. Consider factors such as compatibility with your bike’s frame, ease of installation, and customer reviews.
With these considerations in mind, you can move on to gathering the necessary tools and equipment for the conversion process.
Gather the Necessary Tools and Equipment
Before starting the conversion process, make sure you have all the tools and equipment necessary for the project. It is important to have a well-stocked toolbox to handle any bike maintenance that may come up during the conversion.
Some common tools you will need include a set of Allen wrenches, a torque wrench, a chain tool, and a pedal wrench. Additionally, you may need specific tools depending on the type of conversion kit you choose.
Troubleshooting common issues that may arise during the conversion process is also essential. This includes being able to diagnose and fix problems such as loose connections, faulty wiring, or motor issues.
Once you have gathered all the necessary tools and equipment, you can proceed to the next step: removing the old components from your bike.
Remove the Old Components from Your Bike
Once you’ve gathered all the necessary tools and equipment, it’s time to start removing the old components from your bike.
To convert your mountain bike to electric, it is crucial to choose the right components that suit your needs and preferences. Consider factors like motor power, battery capacity, and compatibility with your bike frame.
Proper disposal of the old components is essential to ensure environmental sustainability. You can take them to a local bike shop for recycling or donate them if they are still in good condition.
When removing the old components, start by disconnecting the cables and wires connected to the brakes, derailleurs, and shifters. Carefully unscrew and remove the pedals, crankset, and bottom bracket. Then, loosen the bolts holding the front and rear derailleurs and remove them. Finally, take off the chain, cassette, and wheels.
Now that you have successfully removed the old components, it’s time to move on to the next step of installing the electric motor and battery.
Install the Electric Motor and Battery
Start by installing the electric motor and battery onto your bike. Before beginning, it’s crucial to take proper safety precautions, such as wearing protective gear and ensuring the bike is securely supported.
Carefully follow the manufacturer’s instructions for mounting the motor and battery, ensuring a secure and stable attachment. Make sure to position the motor in a way that maintains the bike’s balance and stability.
Once installed, take the time to understand the maintenance and troubleshooting procedures specific to your electric motor and battery. Regularly check for any loose connections or signs of wear to ensure optimal performance and longevity.
It’s important to note that converting a mountain bike to electric has its benefits, such as increased speed and range, but there are also drawbacks to consider, such as added weight and reduced pedaling exercise.
With the motor and battery securely in place, we can now move on to connecting the wiring and cables.
Connect the Wiring and Cables
Now that the electric motor and battery are properly installed, it’s time to connect the wiring and cables. This step is crucial for wire management and ensuring the smooth functioning of your electric mountain bike. To begin, refer to the user manual provided with your conversion kit to identify the appropriate connectors and cables. Carefully connect the wires from the motor to the controller, ensuring that they are securely fastened. Next, connect the battery to the controller, making sure to observe the correct polarity. Once all the connections are made, double-check for any loose or exposed wires. Troubleshooting electrical issues at this stage is essential to avoid potential hazards. A systematic approach in connecting the wiring will save you time and prevent future complications. Now that the wiring is complete, it’s time to mount the controller and display, which will be covered in the next section.
Mount the Controller and Display
To mount the controller and display, follow these steps to ensure a proper installation:
-
Choose a suitable spot on your bike’s handlebars or stem to mount the display. Ensure it is easily visible and within reach while riding.
-
Find a convenient location on your bike’s frame to mount the controller. It should be protected from the elements and securely fastened to prevent unwanted movement.
-
Use zip ties or mounting brackets to secure both the display and controller in their designated positions. Double-check that all cables are properly connected and routed to avoid interference.
By properly mounting these accessories, you can ensure easy access and optimal functionality while riding your electric mountain bike. Additionally, troubleshooting common issues with the display or controller will be easier if they are securely mounted.
Now, let’s move on to the next step: installing the pedal assist sensor and throttle.
Install the Pedal Assist Sensor and Throttle
Begin by installing the pedal assist sensor and throttle on your bike. This step is crucial in converting your mountain bike to electric as it allows for seamless control and assistance when riding. The pedal assist sensor detects your pedaling motion and provides power assistance accordingly, making your ride smoother and more efficient. The throttle, on the other hand, gives you the option to have full control over your bike’s speed without pedaling.
There are several benefits to converting your mountain bike to electric. Firstly, it allows you to tackle challenging terrains with ease, providing you with the necessary power to conquer steep hills and rough trails. Additionally, it extends your riding range, enabling you to explore farther without getting tired.
When troubleshooting common issues with electric bike conversion, it is essential to check the wiring connections, ensure that the batteries are fully charged, and inspect the controller for any signs of damage. It is also helpful to refer to the manufacturer’s instructions and seek assistance from professionals if needed.
With the pedal assist sensor and throttle successfully installed, the next section will focus on adjusting and fine-tuning the system for optimal performance.
Adjust and Fine-Tune the System
To optimize the performance of your newly installed system, you’ll need to make adjustments and fine-tune it accordingly. Here are some key steps to fine tune the performance:
-
Check the alignment of the pedal assist sensor and throttle. Make sure they are properly aligned and secured to avoid any interference.
-
Fine tune the sensitivity of the pedal assist sensor. Adjusting the sensitivity will ensure that the electric assist engages smoothly and accurately according to your pedaling effort.
-
Troubleshoot common issues like erratic power delivery or inconsistent motor response. Check the wiring connections and battery voltage to identify any potential issues and fix them accordingly.
-
Test the system by taking it for a ride and make any necessary adjustments based on your experience. Pay attention to the responsiveness, power delivery, and overall performance of the electric conversion.
By following these steps, you can fine tune your electric mountain bike conversion for optimal performance.
Now, let’s move on to the next step of the process and test ride the bike to make any necessary adjustments.
Test Ride and Make Any Necessary Adjustments
After adjusting and fine-tuning the electric conversion system on my mountain bike, it was time to put it to the test. I took it for a test ride to assess its performance and make any necessary adjustments. The test ride allowed me to gather valuable feedback on the bike’s handling, power delivery, and overall performance. I paid close attention to how the electric motor responded to my input and how smoothly it transitioned between power levels. Based on my observations, I made a few necessary adjustments to ensure optimal performance. I fine-tuned the motor’s power output and adjusted the throttle response to better suit my riding style. With these adjustments made, I was ready to move on to the next step: learning how to operate and maintain my electric mountain bike.
Learn How to Operate and Maintain Your Electric Mountain Bike
Once you’ve familiarized yourself with your new e-mountain bike, it’s important to learn how to operate and maintain it properly. Here are three key aspects of electric mountain bike maintenance:
-
Battery Care:
Regularly check the battery level and charge it fully before each ride. Avoid overcharging or draining the battery completely, as it can reduce its lifespan. Store the battery in a cool and dry place when not in use. -
Motor Maintenance:
Keep the motor clean and free from debris. Regularly inspect the motor for any signs of damage or loose connections. Lubricate the motor bearings as per the manufacturer’s instructions to ensure smooth operation. -
Troubleshooting Common Issues:
Familiarize yourself with common issues such as error codes or motor malfunctions. Consult the bike’s manual or contact customer support for guidance on resolving these issues.
By understanding electric mountain bike maintenance and troubleshooting common issues, you can ensure optimal performance and extend the lifespan of your bike.
Now, let’s explore different riding modes and settings.
Explore Different Riding Modes and Settings
Take the time to familiarize yourself with the various riding modes and settings available on your e-mountain bike. Understanding these options will allow you to customize your riding experience and optimize battery life.
| Riding Mode | Description | Best Use |
|---|---|---|
| Eco Mode | Provides a conservative level of assist, ideal for longer rides or when battery life needs to be extended. | Commuting or leisure rides |
| Trail Mode | Offers a balanced level of assist, suitable for most off-road terrains. | General trail riding |
| Boost Mode | Delivers maximum power assist for tackling steep climbs or accelerating quickly. | Technical climbs or aggressive riding |
By selecting the appropriate riding mode for the terrain and your desired riding style, you can maximize both performance and battery efficiency. It is important to experiment with these settings to find the ideal balance for your needs. This knowledge will set the stage for the subsequent section on practicing proper battery management and charging.
Practice Proper Battery Management and Charging
After exploring different riding modes and settings, it’s crucial to understand how to practice proper battery management and charging to ensure optimal performance and longevity.
Battery life optimization is key when converting a mountain bike to electric. To maximize the battery’s lifespan, it’s essential to avoid fully draining it and instead maintain a charge between 20% and 80%. This range helps prevent over-discharging and overcharging, which can both negatively impact battery health.
Additionally, safe charging practices should be followed, such as using the manufacturer’s recommended charger, avoiding extreme temperatures during charging, and disconnecting the battery once it reaches a full charge. By adhering to these guidelines, you can extend the battery’s life and enjoy longer rides with your electric mountain bike.
Moving forward, let’s explore how to upgrade and customize your electric mountain bike.
Upgrade and Customize Your Electric Mountain Bike
To enhance your e-MTB, you can personalize and enhance its features and performance. Upgrading your electric mountain bike will allow you to customize it according to your preferences and needs. There are various upgrade options available, such as upgrading the suspension system, brakes, drivetrain, and tires. These upgrades can improve the overall performance and handling of your e-MTB, providing a more enjoyable riding experience.
However, when upgrading your electric mountain bike, it is important to consider safety considerations. Ensure that the upgrades you choose are compatible with your e-MTB and do not compromise its safety features. It is also essential to follow the manufacturer’s guidelines and recommendations for installing upgrades to avoid any potential issues.
By upgrading and customizing your electric mountain bike, you can optimize its performance and tailor it to your riding style. Join the electric mountain biking community and share your experiences of riding your highly personalized e-MTB.
Join the Electric Mountain Biking Community and Share Your Experiences
Join the e-MTB community and share your experiences of riding and customizing your electric mountain bike.
Being a part of this community allows you to connect with fellow electric mountain bikers and exchange valuable insights.
One of the main topics of discussion within this community is electric mountain bike gear. By sharing your experiences, you can provide valuable information about the gear you’ve used and how it has enhanced your riding experience.
Additionally, sharing your experiences can also help others understand the benefits of electric mountain biking. You can discuss how electric mountain bikes provide assistance on steep climbs, allowing riders to explore more challenging terrains.
Moreover, you can highlight the advantages of electric mountain biking in terms of longer rides, reduced fatigue, and the ability to tackle more trails in a single outing.
So, don’t miss out on the opportunity to join the e-MTB community and contribute to the collective knowledge of electric mountain biking.
Frequently Asked Questions
Can I convert any type of mountain bike to electric?
Yes, any type of mountain bike can be converted to electric. The cost of converting a mountain bike to electric varies depending on the components chosen. The benefits include increased speed, easier climbing, and extended range.
How long does the installation process typically take?
The installation process for converting a mountain bike to electric typically takes around 3-6 hours, depending on the individual’s mechanical skills and experience. Common challenges during installation include wiring and battery placement.
Can I still use my bike’s original gears and brakes after the conversion?
Yes, you can still use your bike’s original gears and brakes after the conversion. However, it’s important to consider the pros and cons of using different types of batteries for electric conversion.
Are there any specific safety precautions I should take when riding an electric mountain bike?
When riding an electric mountain bike, it is important to take specific safety precautions. These include wearing a helmet, using proper lighting for visibility, maintaining control over the bike, and being aware of the increased speed and power.
Can I switch back to a non-electric setup if I change my mind in the future?
Yes, it is possible to switch back to a non-electric setup if you change your mind in the future. There are alternatives to electric mountain bike conversion, such as purchasing a new non-electric bike or removing the electric components from the bike.
Conclusion
After converting my mountain bike to electric, I am amazed at the possibilities it has opened up for me. The process wasn’t as difficult as I thought, thanks to the detailed research and careful selection of the conversion kit.
One interesting statistic that stood out to me is that electric mountain bikes can reach speeds of up to 28 miles per hour, allowing riders to effortlessly conquer even the steepest and toughest terrains.
The combination of power and precision has truly transformed my biking experience.
