
If you’ve ever dreamed of zipping through city streets effortlessly or conquering steep hills with ease, then converting your pedal bike to electric might just be the solution you’ve been searching for.
With the right conversion kit and a few basic tools, you can transform your trusty two-wheeler into a powerful, eco-friendly machine.
In this article, I’ll guide you through the step-by-step process to convert your pedal bike to electric, so you can experience the thrill of a faster and more convenient ride.
So, let’s get started!
Key Takeaways
- Ensure secure connections and fully charged battery
- Check and adjust brake alignment for safety
- Examine and adjust chain tension for optimal performance
- Check and adjust tire pressure for a smooth ride

Kryptonite Folding Bike Lock, Compact Lightweight High Security Anti-Theft Foldable Bicycle Lock with 2 Keys and Mount for E-Bikes Scooter Road Mountain Bikes, 88.4cm (34.8 in)
HIGH-SECURITY DESIGN: This Anti-Theft folding bike lock is made from 3mm hardened steel bars with tightened rivets for...
As an affiliate, we earn on qualifying purchases.
Understand the Benefits of Electric Bikes
Electric bikes are becoming increasingly popular because they provide a convenient and eco-friendly mode of transportation. With advancements in electric bike technology, these bikes have become more efficient and practical for commuting purposes.
One of the main advantages of electric bike commuting is the ability to travel longer distances without getting tired. The electric motor assists the rider, making it easier to pedal uphill or against strong headwinds.
Additionally, electric bikes allow for faster travel speeds, reducing commute times and avoiding traffic congestion. They are also a cost-effective option, as they require less maintenance compared to cars and are cheaper to operate.
Moreover, electric bikes are environmentally friendly, producing zero emissions and contributing to a cleaner, greener future.
Understanding these benefits is crucial when considering the next step in converting your pedal bike to electric, which is choosing the right conversion kit.

Master Lock Black Hardened Steel Link Folding Bike Lock with Key, Heavy Duty Anti-Theft Lock for Bicycles, Electric Scooters, 2-3/4ft (84cm) Length x 0.13 in (3.5 mm), 8335EC
HARDENED STEEL SECURITY: The folding bike lock has hardened steel links that resist cutting, sawing, and prying
As an affiliate, we earn on qualifying purchases.
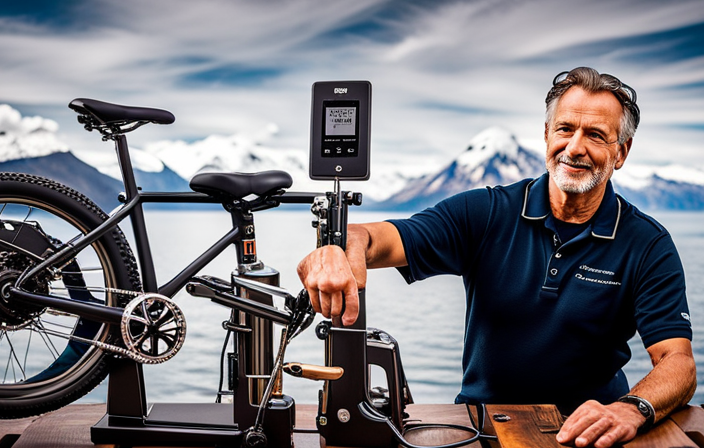
Choose the Right Conversion Kit
To make sure you select the correct conversion kit, you should research and consider various options available on the market. When choosing the right motor, it is important to consider factors such as power, torque, and efficiency. Assess your needs and preferences to determine the motor size and type that would best suit your requirements.
Additionally, selecting the appropriate battery is crucial for the performance and range of your electric bike. Consider the battery capacity, voltage, and weight to ensure it aligns with your desired riding distance and weight preferences. By carefully evaluating these options, you can make an informed decision and choose a conversion kit that will optimize your electric bike’s performance.
Now that you have chosen the right conversion kit, it’s time to gather the necessary tools and materials for the installation process.

Seatylock FoldyLock Compact Folding Bike Lock - Award Winning Patented Lightweight High Security Bicycle Lock - Heavy Duty Anti Theft Smart Secure Guard with Keys & Case for Bikes or Scooters
TOP RATED LIGHTWEIGHT COMPACT BIKELOCK - Best Light Weight Folding Bike Lock. Portable Solid Key Bike Lock Protects...
As an affiliate, we earn on qualifying purchases.
Gather the Necessary Tools and Materials
Once you’ve decided on the conversion kit, gather all the tools and materials you’ll need for the installation process. It is crucial to have everything at hand before starting the project to ensure a smooth and efficient conversion. Two key components to consider when gathering your tools and materials are choosing the right battery and understanding the motor specifications. The battery is the powerhouse of your electric bike, so selecting the right one is essential for optimal performance. Additionally, understanding the motor specifications will help you determine the power and capabilities of your electric bike. To further emphasize the importance of these considerations, refer to the table below.
| Tools | Materials |
|---|---|
| Wrench set | Conversion kit |
| Screwdriver set | Battery |
| Allen key set | Motor |
With all the necessary tools and materials gathered, we can now proceed to the next step of the conversion process, which is to remove the pedals, crank, and bottom bracket.

CROPS Q5-COCON Compact Bike Lock Cable, 6 ft, Yellow – Resettable 3-Digit Combination, Compact & Portable
Resettable 3-digit dial lets you set your own combination for added security.
As an affiliate, we earn on qualifying purchases.
Remove the Pedals, Crank, and Bottom Bracket
Now that you have gathered all the necessary tools and materials, it’s time to remove the pedals, crank, and bottom bracket. Here’s how to do it properly:
-
Benefits of removing pedals for an electric bike:
- Allows for the installation of a mid-drive motor or a bottom bracket motor, which provides better power and efficiency.
- Makes it easier to maintain and repair the bottom bracket and crank components.
- Reduces the weight of the bike, making it easier to handle and ride.
-
Proper technique for removing the crank and bottom bracket:
a. Start by removing the pedal on the non-drive side using a pedal wrench.
b. Use a crank puller tool to remove the crank from the bottom bracket spindle.
c. Use a bottom bracket tool to remove the bottom bracket from the frame.
Install the Electric Bike Conversion Kit
Start by assembling the components of the conversion kit according to the manufacturer’s instructions. Once the kit is ready, it’s time to install the motor and controller onto your bike frame. Position the motor in the designated area, aligning it with the chain and rear wheel. Secure it tightly using the provided mounting brackets and bolts. Next, connect the controller to the motor, ensuring the wires are properly connected and insulated. To help you visualize this process, refer to the table below:
| Component | Location |
|---|---|
| Motor | Rear wheel area |
| Controller | Frame |
| Mounting Brackets | Motor to frame |
Troubleshooting common conversion kit issues may arise during installation. Some common problems include incorrect wiring connections, loose bolts, or motor misalignment. Refer to the manufacturer’s troubleshooting guide for specific solutions. Transitioning to the next section, we will now discuss how to install the battery and wiring without the need for additional steps.
Install the Battery and Wiring
To complete the installation, you’ll need to position the battery securely on your frame and connect the wiring according to the manufacturer’s instructions. Follow this wiring guide for a successful battery installation:
- Carefully mount the battery pack onto the bike frame, ensuring it is stable and secure.
- Locate the wiring harness and connect it to the battery terminals, ensuring a snug fit.
- Connect the motor controller to the wiring harness, ensuring the connections are tight.
- Route the wiring along the frame, using zip ties to keep it neat and out of the way.
- Double-check all connections and make sure they are secure before proceeding.
Now that the battery is installed and the wiring is connected, it’s time to test the electric bike conversion.
Test the Electric Bike Conversion
Before attempting to test the electric bike conversion, make sure that all the connections are secure and the battery is properly charged. To test the conversion, follow these procedures.
First, turn on the battery and check if the LED lights up. If it does, it indicates that the battery is functioning properly.
Next, engage the throttle or pedal the bike to see if the motor kicks in. If the motor doesn’t start, check the connections and wiring for any loose or damaged components. Additionally, ensure that the controller is properly programmed and calibrated.
If you encounter any issues during the test, refer to the troubleshooting tips provided in the conversion kit manual.
Once you have successfully tested the electric bike conversion, you can proceed to adjust and fine-tune the electric bike for optimal performance.
Adjust and Fine-tune the Electric Bike
Once you’ve ensured that the connections are secure and the battery is fully charged, it’s time to make adjustments and fine-tune your electric bike.
To start, check the brake alignment and adjust if necessary. Make sure the brakes engage smoothly and evenly for optimal safety.
Next, examine the chain tension and make any necessary adjustments. A loose chain can lead to poor performance and potential damage.
Additionally, check the tire pressure and adjust as needed. Proper tire pressure ensures a smooth and efficient ride.
If you notice any issues with the motor or electronics, consult the troubleshooting tips provided by the manufacturer.
These adjustment techniques will help optimize your electric bike’s performance and ensure a comfortable and enjoyable ride.
With your bike finely-tuned, it’s time to enjoy your new electric bike to its fullest potential.
Enjoy Your New Electric Bike
Now that we have successfully adjusted and fine-tuned our electric bike, it’s time to enjoy the fruits of our labor. Riding an electric bike is a thrilling experience, and with proper maintenance and the right accessories, you can enhance your enjoyment even further.
Here are some key points to consider:
- Battery care: Regularly charge and store your battery properly to ensure optimal performance and longevity.
- Tire maintenance: Check tire pressure regularly and replace worn-out tires to ensure a smooth and safe ride.
- Brake adjustments: Keep your brakes in top condition by regularly checking and adjusting them for optimal stopping power.
- Accessories: Enhance your electric bike experience with accessories such as lights, fenders, racks, and bags.
With these maintenance tips and the right accessories, you can have a fantastic time riding your electric bike. Now, let’s move on to the next section to learn how to maintain and care for your electric bike without skipping a beat.
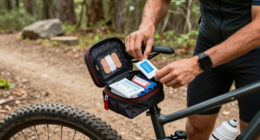
Maintain and Care for Your Electric Bike
To ensure optimal performance and longevity of your electric bike, it’s important to regularly maintain and care for it. Here are some maintenance tips and troubleshooting common issues that will help you keep your electric bike in top shape.
First, make sure to regularly clean your electric bike to remove any dirt, debris, or grime that may accumulate during rides. Use a mild detergent and a soft cloth or sponge to clean the frame, wheels, and other components. Avoid using high-pressure water as it can damage sensitive electronic parts.
Next, check the tire pressure regularly and inflate them to the recommended PSI. Proper tire pressure not only ensures a smooth ride but also prevents premature wear and tear.
Additionally, keep an eye on the battery level and charge it regularly. Most electric bikes have a built-in battery indicator that shows the remaining charge. It’s best to charge the battery after each ride to ensure it’s ready for the next one.
If you experience any issues with your electric bike, such as a loss of power or strange noises, start by checking the connections and wiring. Loose connections or damaged wiring can cause performance issues. If the issue persists, consult the user manual or contact the manufacturer for further assistance.
Frequently Asked Questions
How long does it take to convert a pedal bike to electric?
Converting a pedal bike to electric typically takes a few hours, depending on the complexity of the installation. The cost comparison between converting a bike and buying a new electric bike varies, but conversion is often more affordable.
Can any type of bike be converted to electric?
Yes, any type of bike can be converted to electric. Electric conversion offers numerous benefits such as increased speed, extended range, and reduced effort while pedaling. However, bike compatibility should be considered before starting the conversion process.
Is it necessary to remove the pedals, crank, and bottom bracket during the conversion process?
It is not necessary to remove the pedals, crank, and bottom bracket during the conversion process. However, it is important to consider the pros and cons of converting a pedal bike to electric, and to choose the right electric bike conversion kit.
What kind of battery is recommended for an electric bike conversion?
For an electric bike conversion, there are various electric bike battery options available, each with its own pros and cons. Lithium-ion batteries are commonly recommended due to their high energy density, lightweight design, and long lifespan.
Are there any legal requirements or restrictions for riding an electric bike on public roads?
To ride an electric bike on public roads, it is important to adhere to safety regulations. These may include wearing a helmet, using lights at night, and obeying traffic laws. Insurance requirements vary depending on local regulations.
Conclusion
In conclusion, converting a pedal bike to an electric one can be a rewarding and cost-effective project. By understanding the benefits of electric bikes and choosing the right conversion kit, you can enjoy the convenience of an electric bike without having to purchase a new one.
According to a survey conducted by the National Association of City Transportation Officials, electric bike sales in the United States have increased by 145% from 2018 to 2019. This statistic demonstrates the growing popularity and demand for electric bikes as a sustainable and efficient mode of transportation.
So, why not join the trend and convert your own pedal bike into an electric one today?