
I’ve always been fascinated by the idea of converting a regular bike into an electric one.
Did you know that electric bike conversions have become increasingly popular, with sales expected to reach 130 million units by 2025?
In this article, I will guide you through the process of converting your bike to electric using a drill.
From assessing your bike’s suitability to installing the electric hub motor, I’ll provide you with detailed steps and tips to successfully complete this DIY project.
Get ready to enjoy the thrill of riding your very own electric bike!
Key Takeaways
- Choose appropriate connectors for throttle and brake sensors
- Ensure proper alignment and secure connection of connectors for the pedal assist sensor
- Double-check all wiring connections and secure them properly
- Test the performance of the electric bike conversion and address any issues identified during testing
Assess Your Bike’s Suitability for Conversion
First, you’ll need to assess if your bike’s frame is suitable for conversion. Bike modification requires a frame that is sturdy enough to handle the added weight and power of an electric motor. Look for a frame that is made of steel or aluminum, as these materials offer strength and durability. Additionally, consider the design of the frame. A step-through frame is easier to work with because it allows for easier access to the motor and battery. It’s also important to consider the size of the frame and whether it can accommodate the necessary components.
By ensuring that your bike’s frame is suitable for conversion, you can optimize electric bike efficiency and ensure a successful conversion.
Now, let’s move on to gathering the necessary tools and materials.
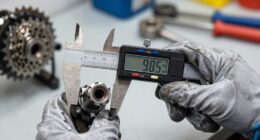
Gather the Necessary Tools and Materials
Before you begin, make sure you have all the tools and materials you need. Assessing your bike’s condition is crucial to determine if it is suitable for conversion. Once you have done that, it’s time to gather the necessary tools and materials for the conversion process.
Here are two sub-lists to guide you:
Tools:
- Wrench set
- Screwdriver set
- Pliers
- Allen wrench set
- Drill with appropriate drill bits
- Electrical tape
- Wire cutters and strippers
Materials:
- Electric bike conversion kit
- Battery pack
- Battery holder
- Controller
- Throttle
- Wiring harness
- Mounting brackets
Choose the Right Electric Bike Conversion Kit
To choose the right electric bike conversion kit, you’ll want to consider factors such as your budget, desired speed, and range. When it comes to choosing the right conversion kit, there are several options available in the market.
One important consideration is your budget. Luckily, there are budget-friendly conversion options that still provide excellent performance. These conversion kits typically include a motor, battery, controller, and other necessary components.
Another factor to consider is the desired speed of your electric bike. Different kits offer varying top speeds, so you’ll want to choose one that aligns with your needs.
Additionally, you’ll need to consider the range of the electric bike. Some conversion kits have a longer battery life and can cover more distance on a single charge.
By considering these factors, you can find the perfect electric bike conversion kit for your needs.
Now, let’s move on to the next step, which is removing the bike’s rear wheel.
Remove the Bike’s Rear Wheel
Now, you’ll need to grab a wrench and loosen the nuts securing the rear wheel to the frame.
To successfully remove the bike’s rear wheel, follow these steps:
- Begin by flipping the bike upside down, ensuring it rests securely on its handlebars and seat.
- Locate the quick-release lever or nuts on either side of the rear wheel axle.
- If there is a quick-release lever, flip it open and unscrew the nuts slightly to release tension.
- If there are nuts, use the wrench to loosen them counterclockwise until they are finger-tight.
With the nuts loosened, you can now slide the rear wheel out of the frame. If you encounter any difficulties during this process, troubleshooting rear wheel removal steps can be found in the bike’s user manual.
Transitioning into the subsequent section, it is crucial to remove the rear wheel before proceeding to install the electric hub motor.
Install the Electric Hub Motor
After removing the bike’s rear wheel, you’ll attach the electric hub motor using the provided hardware and a wrench. The electric hub motor is the heart of your electric bike conversion, responsible for powering your ride.
Here’s a step-by-step guide on how to install the electric hub motor:
-
Position the motor: Place the electric hub motor in the center of the rear wheel hub, aligning it with the axle.
-
Secure the motor: Use the provided hardware to attach the motor to the wheel hub. Use a wrench to tighten the screws or bolts securely.
-
Install the motor controller: The motor controller regulates the power flow to the motor. Follow the manufacturer’s instructions to connect and mount the motor controller securely on your bike frame.
Troubleshooting common conversion issues:
- Ensure all connections are secure and properly tightened.
- Check that the motor cables are correctly connected to the motor controller.
- Test the motor by turning on the power and observing any unusual noises or vibrations.
With the electric hub motor successfully installed, the next step is to connect the motor to the battery for power.
Connect the Motor to the Battery
Once you have the motor securely attached to the wheel hub, the next step is to connect it to the battery for power.
To start, locate the wires coming out of the motor and identify the positive and negative terminals. These terminals will need to be connected to the corresponding terminals on the battery.
It is important to ensure a secure connection, as any loose or faulty connections can lead to issues with the motor’s performance. If you encounter any problems with the connection, such as a lack of power or intermittent operation, double-check the wiring and try reconnecting the terminals.
Additionally, make sure the battery is fully charged and functioning properly.
Once the motor is successfully connected to the battery, you can move on to the next section, which involves mounting the battery and controller securely onto the bike frame.
Mount the Battery and Controller
To mount the battery and controller securely onto the bike frame, you’ll need to make sure you have the necessary tools and hardware.
First, locate a suitable position on the frame to mount the battery. It should be easily accessible and well-balanced to ensure optimal weight distribution. Once you have determined the ideal position, use the provided brackets and screws to attach the battery securely.
Next, position the controller near the battery, ensuring that the wiring connections are easily reached. Use zip ties or mounting brackets to secure the controller in place.
Proper positioning of the battery and controller is crucial for a successful electric bike conversion, as it ensures stability and ease of access for maintenance.
Now that the battery and controller are securely mounted, we can move on to wiring the controller and connecting the throttle and brake sensors.
Connect the Throttle and Brake Sensors
After successfully mounting the battery and controller, it is now time to connect the throttle and brake sensors.
Ensuring throttle and brake compatibility is crucial for a smooth and efficient electric bike conversion. Start by identifying the appropriate connectors for both the throttle and brake sensors on the controller. Carefully match the connectors and plug them in securely.
It is essential to check for proper alignment and connection to avoid any potential sensor malfunctions. In case you encounter any issues, troubleshooting common sensor problems can be done by inspecting the wiring, checking for loose connections, or testing the sensors with a multimeter.
Once the throttle and brake sensors are successfully connected, we can now move on to the next step of installing the pedal assist sensor.
Install the Pedal Assist Sensor
Before installing the pedal assist sensor, ensure that all the necessary connectors are properly aligned and securely plugged in. The pedal assist sensor is a crucial component in converting your bike into an electric bike, as it detects the movement of the pedals and sends signals to the motor to provide assistance.
Here are the steps to install the pedal assist sensor:
- Locate the bottom bracket of your bike and remove the crank arms if necessary.
- Attach the pedal assist sensor to the bottom bracket, making sure it is aligned with the pedal motion.
- Secure the sensor in place using the provided screws or clamps.
Troubleshooting common issues with pedal assist sensors:
- If the sensor is not detecting pedal movement, check the alignment and make sure it is securely attached.
- If the sensor is not sending signals to the motor, check the wiring connections and make sure they are properly connected.
Now that the pedal assist sensor is installed, it’s time to secure and test the wiring to ensure a smooth and reliable electric bike conversion.
Secure and Test the Wiring
Make sure you have secured all the wiring connections properly and test them to ensure a smooth and reliable electric bike conversion.
Proper wiring is crucial for the functioning of your electric bike, so it’s important to troubleshoot any potential issues.
Start by double-checking all the connections between the battery, motor, controller, and throttle. Ensure that there are no loose or frayed wires that could cause a short circuit or electrical malfunction.
Additionally, it’s important to take safety precautions during this process. Always turn off the power before working with the wiring and wear protective gloves to avoid any potential electric shocks.
Once you’ve secured all the connections, it’s time to test the wiring by turning on the power and checking if everything is functioning properly. Make sure the throttle responds smoothly and the motor engages without any issues.
If you encounter any problems during the testing phase, refer to the troubleshooting guide provided by the manufacturer.
With the wiring successfully secured and tested, you can now move on to the next step of your electric bike conversion, which is to reinstall the rear wheel.
Reinstall the Rear Wheel
Once you’ve secured and tested the wiring, it’s time to reinstall the rear wheel.
Begin by placing the wheel back into the dropouts on the frame, making sure it is centered.
Tighten the quick-release skewer or axle nuts to secure the wheel in place.
Next, realign the spokes by adjusting the tension using a spoke wrench. This will help ensure that the wheel spins true and straight.
Once the spokes are properly aligned, check the tire pressure and adjust as needed.
A properly inflated tire will provide better performance and a smoother ride.
With the rear wheel securely installed and the spokes and tire pressure adjusted, you can now move on to the next step: adjusting the chain and gears.
This will ensure smooth shifting and efficient power transfer.
Adjust the Chain and Gears
To adjust the chain and gears, you’ll want to shift through all the gears to ensure smooth and precise shifting. Here’s how to adjust the chain tension and select appropriate gear ratios for your electric bike conversion:
-
Start by loosening the rear wheel nuts or quick-release skewer to provide some slack in the chain.
-
Use a chain tensioner tool or your hand to adjust the tension of the chain. It should have a slight amount of play, about 1/2 inch, up and down.
-
Next, check the gear ratios. The front chainring should be aligned with the middle of the rear cassette. If it’s not, adjust the front derailleur’s high and low limit screws until it aligns properly.
-
Finally, shift through all the gears while pedaling to ensure smooth and precise shifting. Make any necessary adjustments to the barrel adjuster or derailleur position.
By following these steps, you’ll have properly adjusted chain tension and gear ratios for optimal performance in your electric bike conversion.
Now, let’s move on to testing and fine-tuning the electric bike conversion.
NEXT SUBTOPIC: ‘Test and Fine-Tune the Electric Bike Conversion’
Test and Fine-Tune the Electric Bike Conversion
First, you’ll want to ensure that all the electrical connections are securely fastened before testing and fine-tuning your electric bike conversion. Start by checking the battery connections, making sure they are tight and free from any corrosion.
Next, double-check the connections between the motor and the controller, ensuring they are securely plugged in.
Once everything is properly connected, it’s time to test your electric bike conversion. Take it for a spin and pay close attention to the performance. Note any issues or irregularities in the test results, such as strange noises, lack of power, or uneven acceleration.
These troubleshooting tips will help you identify and address any potential problems.
Once you’ve fine-tuned your electric bike conversion, you can move on to the next step and enjoy your DIY electric bike with confidence.
Enjoy Your DIY Electric Bike
Now that you have successfully tested and fine-tuned your electric bike conversion, it’s time to enjoy the fruits of your labor. Converting your bike into an electric one has several advantages, such as increased speed, reduced effort, and a greener way to commute. However, there are a few common mistakes that DIY enthusiasts often make during the conversion process.
To ensure a smooth and enjoyable experience with your DIY electric bike, here are some key points to keep in mind:
- Properly secure all electrical components to avoid damage or disconnection while riding.
- Regularly check and maintain the battery to ensure optimal performance and longevity.
- Adjust the motor settings to match your desired speed and power requirements.
- Stay informed about local regulations and safety guidelines for electric bikes in your area.
By following these guidelines, you can maximize the benefits of your DIY electric bike conversion.
Now let’s move on to some essential maintenance and safety tips to keep your electric bike in top shape and ensure a safe riding experience.
Maintenance and Safety Tips
Regularly maintaining your DIY electric bike is essential to ensure its optimal performance and to keep yourself safe while riding. Here are some maintenance tips and safety precautions to follow.
- Check the tire pressure regularly and inflate them to the recommended levels.
- Inspect the brake pads for wear and replace them if necessary.
- Lubricate the chain and gears to reduce friction and enhance the bike’s efficiency.
- Additionally, inspect the battery connections to ensure they are secure and clean.
- It is important to regularly clean your electric bike to prevent dirt and debris from affecting its performance.
Lastly, always wear a helmet and other protective gear while riding, and follow traffic rules to ensure your safety.
Frequently Asked Questions
How long does it usually take to convert a bike to an electric bike?
Converting a bike to an electric bike usually takes a few hours, depending on your experience and the complexity of the conversion. Common challenges include finding the right components and ensuring proper installation for optimal performance.
Can any type of bike be converted to an electric bike?
Yes, any type of bike can be converted to an electric bike. Whether it’s a mountain bike, road bike, or even a folding bike, as long as it meets the compatibility requirements, the benefits of converting are immense.
Do I need any specialized knowledge or skills to convert a bike to an electric bike?
I need specialized knowledge and skills to convert a bike to an electric bike. It requires understanding of electrical systems, battery installation, motor mounting, and wiring. Specialized tools and safety precautions are necessary for a successful conversion.
How much does an electric bike conversion kit typically cost?
Electric bike conversion kit prices vary depending on factors such as battery capacity, motor power, and brand. The average cost ranges from $200 to $1000. However, it’s important to consider the quality and compatibility of the kit before making a purchase.
What are the legal requirements and restrictions for riding an electric bike?
Electric bike speed limits and insurance requirements vary by country and region. In some places, there may be speed limits of 20-28 mph (32-45 km/h). Insurance requirements also differ, so it’s important to check local regulations.
Conclusion
In conclusion, converting a regular bike to an electric bike using a drill is a challenging but rewarding DIY project.
By assessing the bike’s suitability, gathering the necessary tools and materials, and choosing the right conversion kit, you can successfully transform your bike.
With proper installation of the electric hub motor, adjustment of the chain and gears, and thorough testing, you can ensure a smooth and efficient electric bike ride.
Remember to prioritize maintenance and safety to enjoy your homemade electric bike for years to come.
So, why wait? Start your electric bike conversion today and experience the thrill of riding with power!