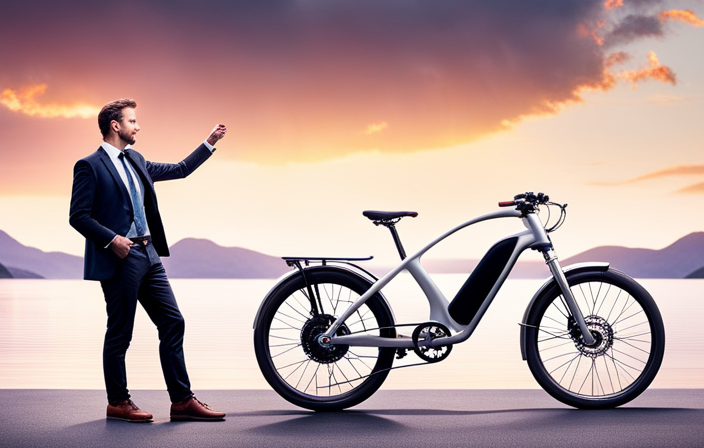
I gotta tell you, creating your own electric bike is a thrilling endeavor. Trust me, once you experience the power and freedom of cruising on your self-made electric bike, you’ll never look back.
In this article, I’ll guide you through the step-by-step process of building your very own electric bike. From determining your needs and budget to selecting the right motor and battery system, I’ve got you covered.
So, let’s dive in and embark on this electrifying journey together!
Key Takeaways
- Determine needs and budget before starting the electric bike conversion
- Choose the right bicycle frame and select the appropriate motor and battery system
- Gather the necessary tools and supplies for the conversion process
- Troubleshoot common issues and perform regular maintenance to ensure longevity and enjoyment of the electric bike

Fanttik X9 Ace Mini Bike Pump, 32s Fast Inflate Bike Pump with Gauge, 150PSI Electric Air Pump with Presta and Schrader Valve, Suitable for Motorcycle, Road Bike, Electric Bike, MTB
Jet-inflate continuous work: with 5000 mAh battery, X9 Ace can inflate 8 tires in a single charge; Also...
As an affiliate, we earn on qualifying purchases.
Determine Your Needs and Budget
You’ll need to figure out your specific needs and budget for creating an electric bike. When determining the ideal range for your electric bike, consider how far you plan to travel on a single charge. If you only need to commute a short distance, a lower range battery may be sufficient. However, if you plan on taking longer rides, you’ll want to invest in a battery with a higher range.
It’s also important to consider the terrain you’ll be riding on. If you’ll be facing steep hills or rough terrain, you may need a battery with a larger range to ensure you don’t run out of power.
When it comes to finding affordable options for your electric bike, there are a few things to consider. First, look for sales or discounts on electric bike components. Many retailers offer deals on batteries, motors, and other parts that can help you save money. Additionally, consider purchasing used parts or even a used electric bike. This can be a more cost-effective option, as long as you do your research and ensure the components are in good working condition.
Now that you’ve determined your needs and budget, it’s time to choose the right bicycle frame.

Powools Tire Inflator Portable Air Compressor, 150 PSI Cordless Bike Pump, Air Pump for Auto, Motorcycle, Bicycle, Balls with Pressure Gauge, LED Light & Car Accessories, Black, Standard Capacity
3X FASTER INFLATION: Powools portable air pump is born with a powerful motor and a high-performance chip, providing...
As an affiliate, we earn on qualifying purchases.
Choose the Right Bicycle Frame
When picking out a bicycle frame, make sure you select the right one for your needs. Choosing the right frame material and finding the right frame size are crucial factors to consider. Here are three important points to help you make an informed decision:
-
Frame Material:
-
Aluminum: Lightweight and affordable, perfect for casual riders.
-
Steel: Offers durability and a smooth ride, but can be heavier.
-
Carbon Fiber: Provides excellent strength-to-weight ratio, ideal for performance-oriented riders.
-
Frame Size:
-
Standover Height: Ensure you have enough clearance when straddling the bike.
-
Reach: Find a frame that allows for a comfortable riding position.
-
Stack: Consider the height of the front end to avoid excessive strain on your back.

AstroAI L7 Tire Inflator Portable Air Compressor,150 PSI Cordless Mini Air Bike Auto Shut-Off Pump with Digital Display Pressure Gauge, Fast Inflation & LED Light for Car Tires,Motorcycles,Bikes,Balls
ADVANCED TRUEGAUGE SCREEN: This battery tire inflator includes updated sensor technology, capable of collecting pressure data from tire...
As an affiliate, we earn on qualifying purchases.
Select the Motor and Battery System
To choose the right motor and battery system, consider the power output and range that best suits your needs. The motor selection and battery capacity are crucial factors in determining the performance and efficiency of your electric bike. When choosing a motor, you need to consider its power output, which is typically measured in watts (W). Higher power output will provide more speed and acceleration, but it may also drain the battery faster. On the other hand, if you prioritize longer range over speed, a lower power output motor might be more suitable.
In terms of battery capacity, it is measured in ampere-hours (Ah) and determines how long your electric bike can run before needing a recharge. The higher the battery capacity, the longer the range you can achieve. However, a higher capacity battery will also be larger and heavier, affecting the overall weight and handling of your bike.
Consider the following table, which outlines different motor options and their corresponding battery capacities:
| Motor Power (W) | Battery Capacity (Ah) |
|---|---|
| 250 | 10 |
| 500 | 14 |
| 750 | 17 |
| 1000 | 20 |
By analyzing the table, you can see how motor power and battery capacity are interrelated. Once you have determined your desired power output and range, you can choose the appropriate motor and battery system accordingly.
Transitioning into the subsequent section about deciding on the type of electric bike conversion kit, it is essential to have a clear understanding of the motor and battery system you require.

CYCPLUS Electric Air Compressor Portable Bicycle Pump Car Tire Inflator, Max 150 PSI, Auto Shut-Off Air Pump with Presta and Schrader Valves for All Bicycles Motorcycles and Cars
【150PSI Fast Inflation】CYCPLUS Portable Air Compressor delivers 𝟏𝟓𝟎 𝐏𝐒𝐈/𝟏𝟎.𝟑 𝐁𝐚𝐫, allowing you to fully inflate a bike tire...
As an affiliate, we earn on qualifying purchases.
Decide on the Type of Electric Bike Conversion Kit
Once you’ve decided on the motor and battery system, it’s time to consider the type of conversion kit that best suits your needs. Choosing the right conversion kit is crucial because it determines how well your electric bike will perform. There are several factors to consider when making this decision.
Firstly, you need to determine the type of bike you have and whether the conversion kit is compatible with it. Different kits are designed for specific types of bikes, such as mountain bikes or road bikes. It’s important to choose a kit that fits your bike’s frame and components seamlessly.
Next, consider the power and range of the conversion kit. This will depend on your preferences and how you plan to use your electric bike. If you want a powerful motor with a long range, you may opt for a higher wattage kit and a larger battery capacity.
Understanding the installation process is also crucial. Some conversion kits require more technical know-how and tools, while others are more user-friendly and can be installed with basic tools. Make sure to read the instructions carefully and assess your DIY skills before making a decision.
Gather the Necessary Tools and Supplies
Gathering the necessary tools and supplies for the installation process involves checking your toolkit and making a list of any additional items you’ll need. To determine the cost of your electric bike conversion, it’s important to research and compare prices for different conversion kits. Finding the best deals on electric bike conversion kits can save you money without compromising quality. When it comes to required tools and supplies, refer to the instructions provided by the conversion kit manufacturer. They will typically list the specific tools you’ll need for the installation process.
Additionally, here are some tips for a successful conversion:
- Research and compare different electric bike conversion kits to find the one that best suits your needs.
- Join online forums and communities to learn from the experiences of others who have created electric bikes.
- Follow safety precautions and regulations when installing your electric bike conversion kit.
- Regularly maintain and service your electric bike to ensure optimal performance and longevity.
In terms of troubleshooting common issues, refer to the troubleshooting guide provided by the conversion kit manufacturer. It’s also helpful to join online forums and communities where you can seek advice from experienced electric bike enthusiasts.
As for the eco-friendly advantages of electric bikes, they produce zero emissions and help reduce air pollution. Electric bikes also promote a healthier lifestyle by encouraging exercise and reducing reliance on cars. To properly dispose of old bike components after conversion, check with your local recycling center for any specific guidelines.
Transitioning to the subsequent section, it’s time to remove the existing components from your bike to prepare for the installation process.
Remove the Existing Components
Before beginning the installation process, it’s important to remove the existing components from your current bike. This dismantling process will ensure a smooth transition to the electric bike conversion kit. Here are the steps to follow:
-
Start by removing the pedals and crankset using a crank puller tool. This will allow you to access the bottom bracket area.
-
Next, detach the front and rear derailleurs by using an Allen wrench to loosen and remove the bolts. Carefully disconnect the cables and set them aside.
-
Now, remove the chain by using a chain tool to break the links. Make sure to keep the chain in a safe place, as it can be reused later.
-
In order to install the electric motor, remove the front wheel by loosening the quick-release lever or unscrewing the axle nuts. Gently slide the wheel out of the fork.
-
Finally, remove the brake calipers by loosening the bolts and sliding them off the mounting brackets. Make sure to store them safely.
Once you have successfully dismantled the necessary components, you can explore recycling options for the parts you no longer need. This ensures a more sustainable approach to your electric bike conversion project.
Now, let’s move on to the exciting part of installing the electric bike conversion kit.
SUBSEQUENT SECTION: ‘Install the Electric Bike Conversion Kit’
Install the Electric Bike Conversion Kit
Now that the existing components have been removed, it’s time to start installing the conversion kit onto your bike. The electric bike conversion kit is a great way to transform your regular bike into an efficient and eco-friendly electric bike. Before we dive into the installation process, let’s take a look at a handy table that outlines the components included in the kit:
| Component | Description |
|---|---|
| Motor | The main power source of your electric bike |
| Battery | Stores the energy needed to power the motor |
| Controller | Regulates the flow of electricity between the motor and battery |
| Throttle | Allows you to control the speed of the electric bike |
Now that you’re familiar with the components, let’s move on to the installation process. First, attach the motor to the frame of your bike using the provided brackets and screws. Make sure it is securely fastened. Next, mount the battery onto the bike, usually on the frame or rear rack. Connect the wiring from the motor, battery, and controller according to the instructions provided. Troubleshooting common issues during installation may include checking the connections and ensuring all components are properly secured. Once everything is connected, you can proceed to the next section about connecting and securing the wiring.
Connect and Secure the Wiring
To ensure a safe and efficient installation, you’ll want to carefully connect and secure the wiring of your newly installed conversion kit. Proper wire organization is essential for a tidy and functional setup.
Start by identifying the different wires included in the kit, such as the battery wires, motor wires, and controller wires. Make sure to refer to the instruction manual provided by the manufacturer for specific guidance on which wires to connect.
Before starting the wiring process, it is crucial to take safety measures. Ensure that the power source is turned off and the battery is disconnected to prevent any accidents or electric shocks. Additionally, wear appropriate safety gear like gloves and goggles for added protection.
When connecting the wires, it is important to match the color-coded connectors or follow the manufacturer’s instructions for proper alignment. Use wire connectors or soldering techniques to secure the connections. Remember, a loose or improper connection can lead to malfunctioning or even damage to the conversion kit.
Once all the wires are properly connected and secured, it’s time to move on to the next step – testing the electric bike conversion kit. By conducting a thorough test, you can ensure that all the components are functioning correctly and that the installation was successful.
Test the Electric Bike Conversion Kit
Make sure you thoroughly test the conversion kit to ensure all components are functioning correctly and that the installation was successful. Testing the electric bike conversion kit is an essential step in ensuring that your bike will perform optimally.
To begin, check the battery pack for any damage or loose connections. Connect the battery to the controller and switch on the power. Verify that the battery voltage is within the specified range.
Next, test the throttle by gently twisting it and observing if the motor responds accordingly. If the motor does not engage, check the throttle wiring and connections.
Additionally, test the brakes to ensure they are functioning properly. Apply the brakes and check if the motor disengages immediately. If not, troubleshoot the brake sensor or wiring.
Finally, take the bike for a test ride and monitor its performance. Pay attention to any unusual noises, vibrations, or issues with acceleration. If any problems arise, refer to the troubleshooting tips provided by the manufacturer.
Adjust and Fine-Tune the Components
Before adjusting and fine-tuning the components, it is important to thoroughly test the electric bike conversion kit. Once the kit has been tested and deemed functional, it is time to move on to the next step of the conversion process.
Adjusting and fine-tuning the components is crucial in ensuring optimal performance and a smooth riding experience.
To begin, it is essential to understand the various adjustment techniques available for the different components of the electric bike conversion kit. This includes adjusting the motor, throttle, brakes, and gears. Each component may require specific adjustments to achieve the desired performance.
When encountering any issues or inconsistencies during the adjustment process, troubleshooting tips can be helpful. For example, if the motor is not running smoothly, checking the wiring connections and the motor controller settings can help identify and resolve the problem. Similarly, if the brakes are not responding effectively, adjusting the brake pads and checking for any obstructions in the braking system can improve their performance.
Install the Battery and Mounting System
You should start by securely attaching the battery and mounting system to ensure a stable and reliable connection. Proper battery maintenance is crucial for the longevity and performance of your electric bike.
Begin by identifying a suitable location on your bike frame to mount the battery. Ensure that the mounting system is compatible with your bike and provides a secure fit. Once you have determined the ideal position, use the provided brackets and fasteners to firmly attach the battery to the frame.
Troubleshooting common issues related to battery installation involves checking for loose connections or damage to the battery terminals. Make sure all the wiring is properly connected and tightened to avoid any electrical faults. It is also essential to periodically inspect the battery for signs of wear or damage and replace it if necessary.
Now that the battery and mounting system are securely in place, you can proceed to install the controller and throttle. The controller is responsible for regulating the power flow from the battery to the motor, while the throttle allows you to control the speed of your electric bike. Connecting these components correctly is essential for a smooth and controlled riding experience.
Install the Controller and Throttle
Now that the battery and mounting system are secure, it’s time to connect the controller and throttle for optimal power regulation and speed control.
The controller is the brain of the electric bike, responsible for managing the power flow from the battery to the motor. It also controls the speed and monitors various parameters such as voltage and temperature. To install the controller, locate the designated spot on your bike frame and attach it securely using zip ties or screws.
Next, connect the throttle to the controller. The throttle allows you to control the speed of the electric bike. It is usually mounted on the handlebars for easy access. Connect the throttle cable to the controller, ensuring a secure and tight connection. Once connected, test the throttle to ensure it is working properly.
Now that the controller and throttle are installed, it’s time to focus on the brakes and gears. Make sure the brake levers are properly installed and adjusted. Test the brakes to ensure they are functioning correctly. Additionally, check the gears to ensure smooth shifting and proper alignment.
If you encounter any issues during the installation process, such as the controller not powering on or the throttle not responding, consult the user manual or contact the manufacturer for troubleshooting guidance.
With the controller, throttle, brakes, and gears installed and functioning correctly, we can now move on to the next step of attaching the display and control panel.
Attach the Display and Control Panel
To attach the display and control panel, locate the designated area on your handlebars and securely fasten it using the provided screws or clamps. This step is crucial as it ensures that the display and control panel are securely mounted and easily accessible while riding your electric bike. Once the display and control panel are securely attached, you can proceed with programming them to suit your preferences.
To program the display and control panel, refer to the user manual provided with your electric bike kit. The manual will guide you through the programming process, allowing you to customize settings such as speed limits, pedal assist levels, and display brightness. Make sure to follow the instructions carefully to avoid any programming errors.
The display and control panel play a vital role in providing real-time information about your electric bike’s performance, including battery level, speed, distance traveled, and more. The table below highlights some of the key features and functions you can expect from a typical display and control panel:
| Feature | Function | Description |
|---|---|---|
| Battery Level | Indicator | Displays the current battery level |
| Speed | Measurement | Shows the current speed at which you are traveling |
| Distance Traveled | Odometer | Tracks the total distance traveled on your electric bike |
Double-Check all Connections and Adjustments
Make sure to thoroughly inspect all the connections and adjustments to ensure they are properly secured before proceeding. This step is crucial in the process of creating your electric bike as it ensures the safety and functionality of the bike. Start by double-checking all the connections, such as the wiring connections between the battery, motor, and display. Make sure they are securely fastened and free from any loose or frayed wires. Additionally, ensure that all adjustments, such as the position of the control panel and display, are properly aligned and tightened. Troubleshooting any loose connections or misalignments at this stage will save you from potential issues later on.
Once you have double-checked all the connections and adjustments, it’s time to move on to testing and fine-tuning adjustments. Carefully turn on the electric bike and test the functionality of the display and control panel. Check if the battery level is accurately displayed and if the motor responds properly to the control panel commands. If you encounter any issues, refer to the troubleshooting guide provided with your electric bike kit.
After testing, make any necessary adjustments to the display and control panel. This may involve fine-tuning the position or angle to ensure optimal visibility and accessibility while riding. Finally, secure all the connections by tightening any screws or bolts that may have come loose during the testing and adjustment process.
Following these steps and taking proper safety precautions throughout the process will ensure that your electric bike is not only functional but also safe to ride. Now that you have double-checked all the connections and adjustments, it’s time to move on to the next exciting stage of creating your own electric bike – enjoy your newly created electric bike!
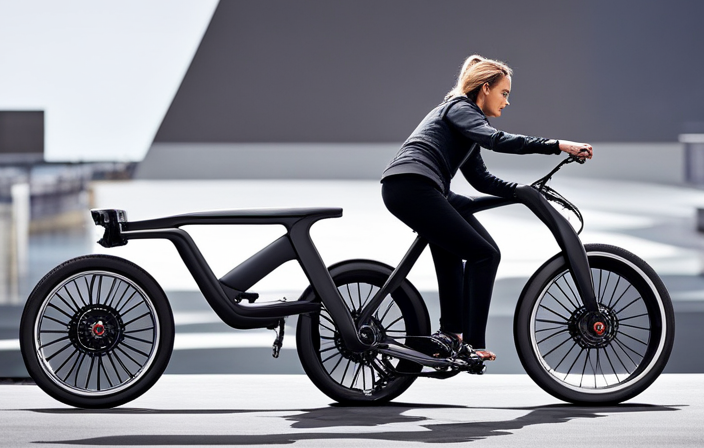
Enjoy Your Newly Created Electric Bike!
Take a moment to savor the excitement of riding your brand new electric bike! As the proud owner of this cutting-edge mode of transportation, it’s important to familiarize yourself with some troubleshooting common issues and maintenance tips to ensure a smooth and enjoyable ride for years to come.
To help you navigate any potential hiccups you may encounter, I’ve compiled a handy table below that outlines some common issues and their corresponding solutions:
| Issue | Solution |
|---|---|
| Battery not charging | Check the power source and charging cable |
| Motor not engaging | Verify the throttle and motor connections |
| Brakes not functioning | Inspect brake pads and adjust cable tension |
Now, let’s talk about maintenance tips to keep your electric bike in top shape. Regularly check the tire pressure, ensuring it is within the recommended range. Lubricate the chain every few weeks to prevent rust and improve performance. Additionally, clean the bike regularly, paying special attention to the electrical components. Finally, store your electric bike in a dry and secure location when not in use.
Frequently Asked Questions
How much does it cost to create an electric bike?
Creating an electric bike can vary in cost depending on several factors. These factors include cost considerations and whether you choose to do it yourself or opt for professional installation.
DIY projects generally have lower costs as you can source and assemble the components yourself. However, professional installation ensures expert handling and may incur additional charges.
Overall, the cost of creating an electric bike can range from a few hundred to several thousand dollars, depending on your preferences and budget.
What are the benefits of converting a regular bicycle into an electric bike?
Converting a regular bicycle into an electric bike offers several benefits.
One advantage is the cost savings compared to buying a brand new electric bike. Additionally, it allows for customization and the ability to choose the right electric bike conversion kit based on one’s specific needs.
However, there are a few cons to consider such as the added weight of the kit and the need for regular maintenance.
When choosing a conversion kit, it’s important to consider factors like motor power, battery capacity, and compatibility with your bike’s frame.
Can any bicycle be converted into an electric bike?
Absolutely! Converting any bicycle into an electric bike is a breeze.
The electric bike conversion process only requires a few necessary equipment. Firstly, you’ll need an electric bike conversion kit, which typically includes a motor, battery, controller, and throttle. Additionally, you’ll need basic tools like wrenches and screwdrivers.
How long does it take to install an electric bike conversion kit?
The installation time of an electric bike conversion kit depends on various factors, such as the complexity of the kit and your level of experience. On average, it can take anywhere from 1-4 hours to install the kit.
The necessary tools typically include wrenches, screwdrivers, pliers, and wire cutters. It is important to carefully follow the instructions provided with the kit to ensure a successful installation.
Are there any safety considerations when using an electric bike conversion kit?
When it comes to using an electric bike conversion kit, safety should be a top priority. Regular maintenance is crucial to ensure the kit functions properly and to prevent any accidents.
Remember to check the battery, wiring, and motor regularly. Additionally, always wear a helmet and protective gear, follow traffic rules, and be cautious of your speed.
Conclusion
In conclusion, creating an electric bike is an exciting and rewarding project. By carefully determining your needs and budget, selecting the right frame, motor, and battery system, and choosing the appropriate conversion kit, you can easily transform a regular bicycle into a powerful electric ride.
With the right tools and supplies, installing the controller, throttle, display, and control panel is a breeze. Just remember to double-check all connections and adjustments for a smooth and safe ride.
So, hop on your newly created electric bike and let the wind be your guide as you cruise through the streets with exhilarating speed and freedom.