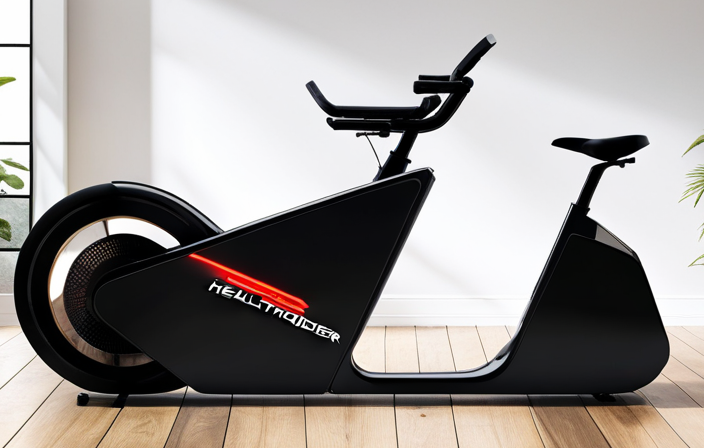

Are you ready to revamp your ride?
Transform your trusty two-wheeler into an electrifying machine with our comprehensive guide on how to customize your bike with an electric conversion kit.
From assessing your bike’s compatibility to fine-tuning the electric system, we’ll walk you through every step of the process.
Gather your tools, remove non-essential components, and get ready to give your bike a jolt of power.
Get ready to cruise in style with your very own customized electric bike.
Key Takeaways
- Fine-tuning and adjusting the electric system, including battery voltage, controller settings, pedal assist levels, and motor alignment.
- Customizing the bike for personal preference by adding accessories, enhancing functionality and safety with lights, fenders, and racks, and painting or decorating the bike.
- Ensuring safety considerations and maintenance by wearing a helmet, installing reflective lights, checking brakes, using hand signals, and keeping tires properly inflated.
- Enjoying the benefits of a customized electric bike, such as conquering challenging terrains, extended rides with a long-lasting battery, customizable settings, and the thrill of exploring new routes and adventures.
Assess Your Bike’s Compatibility
You’ll need to check if your bike’s components are compatible with an electric conversion kit.
Start by examining your bike’s frame. Make sure it has enough space to accommodate the battery, motor, and controller. The frame should also be sturdy enough to handle the additional weight.
Next, check the fork and rear dropouts. They need to be compatible with the motor hub or wheel you plan to install.
Assess the brakes as well. If your bike has rim brakes, you might need to upgrade to disc brakes for better stopping power.
Additionally, consider the gearing system. If your bike has a derailleur, make sure it can handle the torque from the electric motor.
Once you’ve assessed your bike’s compatibility, you can move on to researching and choosing the right electric conversion kit.
Research and Choose the Right Electric Conversion Kit
Before deciding, research and choose the appropriate electric conversion kit for your desired bike modification. This step is crucial as it ensures that you select the kit that best matches your needs and preferences. To help you make an informed decision, consider the following factors:
-
Motor power: Determine the amount of power you require based on your intended use and terrain. Higher wattage motors are better suited for hilly areas or heavier loads.
-
Battery capacity: Consider the range you need and the weight you are willing to carry. Higher capacity batteries provide longer rides but may add additional weight.
-
Conversion type: Decide whether you want a front, rear, or mid-drive conversion kit. Each type has its own advantages and considerations.
-
Compatibility: Ensure that the conversion kit is compatible with your bike’s frame, wheel size, and brake system.
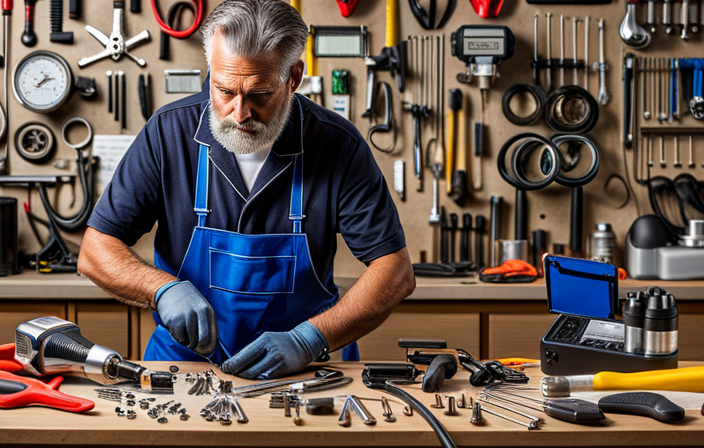
Gather the Necessary Tools and Equipment
To successfully complete the conversion, gather all the tools and equipment needed for the installation process.
First, you will need a set of Allen wrenches in various sizes, as they are essential for removing and attaching bike components. Additionally, a torque wrench is crucial for tightening bolts to the recommended specifications.
Make sure to have a screwdriver set with both flathead and Phillips head options, as they will come in handy for adjusting and securing different parts. You will also need a chain tool for removing the bike chain, as well as a pedal wrench for removing the pedals.
Lastly, don’t forget a set of cable cutters for trimming and installing any necessary cables.
With these tools in hand, you can now move on to the next step of removing non-essential bike components.
Remove Non-Essential Bike Components
Once you’ve gathered the necessary tools and equipment, it’s time to start removing non-essential bike components.
Begin by loosening the bolts that secure the pedals to the crank arms using a pedal wrench.
Once the pedals are off, remove the front and rear derailleurs by disconnecting the shift cables and loosening the mounting bolts.
Take off the chain by using a chain tool to break it at any link.
Next, remove the front and rear brakes by releasing the cable tension and unscrewing the mounting bolts.
Finally, take off the bike’s chainrings and cassette by loosening the bolts or lockrings that hold them in place.
With these non-essential components removed, you’re now ready to install the electric motor and battery, which will give your bike an electric boost without compromising its functionality.
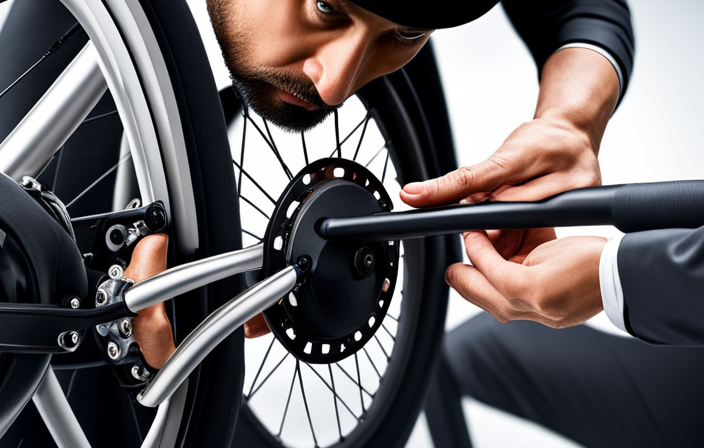
Install the Electric Motor and Battery
To install the electric motor on your bike, it’s crucial to carefully follow the manufacturer’s instructions.
These instructions will provide you with the necessary steps and guidelines to ensure a proper and efficient installation.
Additionally, you must securely mount the battery in a suitable location on your bike to ensure stability and safety during operation.
Be sure to choose a location that allows easy access for charging and maintenance, while also considering factors such as weight distribution and overall balance of the bike.
Follow the manufacturer’s instructions for motor installation
Be sure to carefully follow the manufacturer’s instructions when installing the motor on your customized electric bike. The motor is a crucial component of your electric bike’s power system, and proper installation is essential for optimal performance and safety.
Begin by determining the appropriate location for the motor on your bike frame. Ensure that the motor’s mounting bracket aligns with the designated mounting points on the frame. Use the provided hardware to securely attach the motor to the frame, making sure it is level and aligned correctly. Tighten all bolts and screws to the recommended torque specifications.
Once the motor is securely installed, you can proceed to the next step of securely mounting the battery in a suitable location on the bike, ensuring it is easily accessible and well-balanced for stability during the ride.
Securely mount the battery in a suitable location on the bike
Now that you have successfully installed the motor, it’s time to securely mount the battery in a suitable location on your bike. This step is crucial to ensure optimal performance and safety of your customized electric bike.
Follow these steps to securely mount the battery:
-
Choose a suitable location on your bike that is easily accessible and provides enough space for the battery.
-
Use the appropriate mounting brackets or straps to attach the battery securely to your bike frame.
-
Ensure that the battery is positioned in a way that it doesn’t interfere with your pedaling or any other bike components.
-
Double-check the tightness of the mounting brackets or straps to ensure the battery is securely attached.
Connect and Test the Electrical Wiring
Once you’ve connected and tested the electrical wiring, you can move on to the next step in customizing your bike with electric.
Before you start connecting the wires, make sure you have all the necessary components, including the controller, throttle, and motor.
Begin by identifying the positive and negative terminals on each component and the battery. Use wire connectors to join the wires securely, ensuring a tight connection.
Double-check your connections to ensure they are correct and properly insulated.
Once everything is connected, it’s time to test the system. Turn on the power and check if the lights and other electrical components are functioning correctly. Test the throttle and make sure the motor responds accordingly.
If everything is working as intended, you’re ready to fine-tune and adjust the electric system for optimal performance.
Fine-Tune and Adjust the Electric System
After connecting and testing the electrical wiring, it’s time to fine-tune and adjust the electric system for optimal performance.
Start by checking the battery voltage to ensure it is within the recommended range.
Adjust the controller settings, such as throttle response and regenerative braking, to match your riding style.
Fine-tune the pedal assist levels to provide the desired amount of assistance.
Verify the motor alignment and adjust if necessary.
Test the brakes and make any necessary adjustments to ensure proper function.
Check all the connections and secure them tightly.
Finally, test the system by taking a short ride and make any additional adjustments as needed.
With the electric system properly tuned, you can now move on to customizing your bike for personal preference, including adding accessories and modifying the frame without compromising the electrical components.
Customize Your Bike for Personal Preference
To enhance the functionality of your bike, consider adding accessories such as lights, fenders, or racks.
Lights will improve visibility in low-light conditions, fenders will protect you from mud and water splashes, and racks will provide additional storage space.
Additionally, to give your bike a personalized touch, you can paint or decorate it according to your preferences.
This will not only make your bike stand out but also reflect your unique style and personality.
Add accessories such as lights, fenders, or racks to enhance functionality
You can easily enhance the functionality of your bike by adding accessories such as lights, fenders, or racks. These accessories not only improve the overall performance and safety of your bike, but they also allow you to carry extra gear and make your rides more enjoyable.
Lights are essential for visibility, especially during low light conditions, while fenders protect you from mud and water splashes. Racks provide a convenient way to carry bags or baskets, allowing you to transport your belongings effortlessly.
By adding these accessories, you can transform your bike into a versatile and practical mode of transportation.
Once you have enhanced the functionality of your bike, the next step is to paint or decorate it to give it a personalized touch.
Paint or decorate your bike to give it a personalized touch
Adding a fresh coat of paint or some decorative decals can give your bike a personalized touch. When it comes to customizing your bike’s appearance, there are several options to consider.
First, ensure that you choose a high-quality paint that is specifically designed for use on bicycles. This will ensure durability and a professional finish. Before applying the paint, make sure to clean and prepare the surface properly. Sand any rough areas and remove any existing paint or decals.
Apply multiple thin coats of paint, allowing each coat to dry completely before adding the next. If you prefer, you can also add decorative decals to further personalize your bike. Just make sure to choose decals that are weather-resistant and adhere well to the surface.
With your bike now customized to your liking, it’s time to move on to safety considerations and maintenance.
Safety Considerations and Maintenance
When customizing your electric bike, it’s important to prioritize safety and maintenance. Ensuring the safety of your customized bike will not only protect you but also prolong the lifespan of your investment. Regular maintenance is crucial to keep your bike running smoothly and efficiently. Here are some safety considerations and maintenance tips to keep in mind:
| Safety Considerations | Maintenance Tips |
|---|---|
| Always wear a helmet | Keep tires properly inflated |
| Install reflective lights | Lubricate the chain regularly |
| Check brakes before every ride | Clean and inspect the battery connections |
| Use hand signals when turning | Tighten all bolts and screws periodically |
Enjoy Your Customized Electric Bike
Now that you’ve customized your electric bike, it’s time to take it for a spin and feel the exhilaration of electric-assisted cycling.
Strap on your helmet, hop on the saddle, and prepare to be amazed as the electric motor propels you forward with ease.
With your newly upgraded bike, you can also explore new routes and embark on exciting adventures, knowing that the electric-assist will provide you with the extra power and speed you need to conquer any terrain.
So go ahead, embrace the thrill of electric-assisted cycling and discover the endless possibilities that await you with your customized electric bike.
Take your bike for a test ride and experience the thrill of electric-assisted cycling
Hop on your bike and feel the exhilaration of electric-assisted cycling during a test ride.
Experience the seamless integration of power as you embark on your journey. The electric motor seamlessly kicks in as you pedal, providing an extra boost to your speed and making those uphill climbs effortless.
With the ability to customize the level of assistance, you can adjust the power output to suit your preferences and fitness level. The intuitive controls make it easy to switch between modes and monitor your battery level.
Take this opportunity to familiarize yourself with the features and performance of your newly upgraded electric bike. This test ride will give you the confidence and excitement to explore new routes and adventures with your upgraded electric bike.
Explore new routes and adventures with your newly upgraded electric bike
Discover the thrill of exploring uncharted routes and embarking on exciting adventures with your newly upgraded e-bike. With its electric assistance, you can now conquer challenging terrains and go further than ever before. Picture yourself gliding effortlessly up steep hills, feeling the wind in your hair as you zoom down exhilarating descents. The possibilities are endless with your customized electric bike.
To give you an idea of the capabilities and features of your upgraded e-bike, take a look at the table below:
| Features | Benefits |
|---|---|
| Powerful Motor | Conquer steep hills with ease |
| Long-lasting Battery | Enjoy extended rides without worrying about charge |
| Customizable Settings | Adjust the performance to match your preferences |
Now, armed with this knowledge, you can confidently embark on new journeys, knowing that your electric bike will provide the perfect blend of power and control. Whether you’re exploring rugged trails or cruising through the city, your upgraded e-bike will be your trusted companion, offering you endless possibilities for adventure. So go ahead, explore new routes, and make unforgettable memories with your newly customized electric bike.
Conclusion
Congratulations! You’ve successfully customized your bike with an electric conversion kit, transforming it into a powerful and efficient mode of transportation.
By carefully assessing compatibility, researching the right kit, and following the installation process, you’ve created a personalized electric bike that suits your needs.
With regular maintenance and safety considerations in mind, you can now enjoy the exhilarating experience of riding your own lightning-fast, supercharged electric bike.
Get ready to leave everyone in your dust as you zip through the streets with ease!