Slicing through a bike chain might appear challenging at first glance, yet if you have the proper equipment and some knowledge, it’s really quite simple. Imagine it as conducting an operation on your bicycle – you’re excising a piece of the chain to ensure the machine operates flawlessly. Similar to a surgeon, accuracy and attention are required to guarantee the bicycle functions seamlessly.
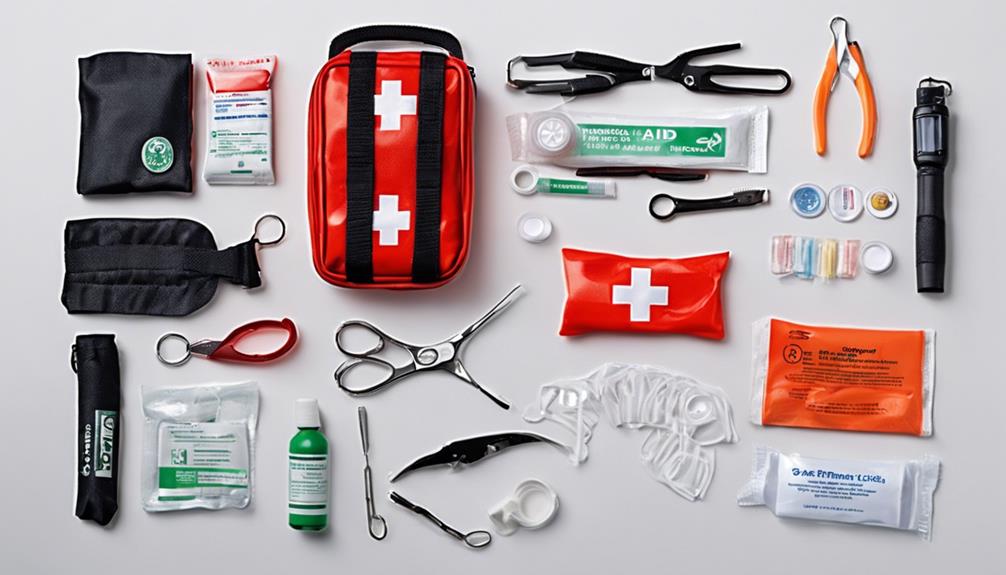
Before you begin, gather the necessary tools – a chain tool, pliers, and a ruler or measuring tape. Once you have your tools, it’s time to measure and mark the chain. This step is crucial to ensure you cut the right section of the chain and don’t accidentally remove too much.
With these steps in mind, let’s dive into the process of cutting a bicycle chain.
Key Takeaways
- Regular chain maintenance is important to prevent rusting and extend lifespan.
- Always use a new chain when replacing an old one, and properly size it before cutting.
- Mark the cutting point precisely to avoid damage or slipping, and use pliers or a chain tool to remove excess links.
- When reattaching the chain, use the excess links left intact and ensure proper chain tension for smooth and efficient cycling.

Happy Travel Bike Storage Shed Tent,Outdoor Portable Bicycle Storage Sheds with 210D Oxford Fabric PU4000 Waterproof for 2/3/4/6/8 Bikes,Bike Covers Shelter for Motorcycle,Garden Tools,Toys,Lawn Mower
【Spacious Vertical Storage Sheds】:We have adopted a new vertical design, which gives the bicycle storage shed 30% more...
As an affiliate, we earn on qualifying purchases.
Gather the Necessary Tools
You’ll need to gather all the necessary tools to successfully cut a bicycle chain, so make sure you have everything you need before starting the process. Choosing the right tools is crucial as it can make the process easier and safer.
For cutting a chain, the essential tools include a chain tool, a pair of pliers, and a wrench. A chain tool is used to break the chain, and it’s recommended to use a tool specifically designed for bicycle chains. Pliers are needed to hold the chain in place while cutting, and a wrench is needed to remove the chain from the bike.
In addition to having the right tools, there are also some tips for chain maintenance that can help keep your bike running smoothly. Regularly cleaning and lubricating your chain can prevent it from rusting and extend its lifespan. It’s also important to check for any damage or wear and tear on the chain, as a damaged chain can lead to accidents while riding.
By following these tips and having the proper tools, you’ll be able to successfully cut your bicycle chain. Now, let’s move on to measuring and marking the chain.

PZT Upgraded Bike Tent with Rain Cover, Portable Outdoor Storage Shed for 2 Bikes, 210D Oxford Fabric PU4000 Waterproof, Bike Shed/Bike Cover for Motorcycles, Garden Tools, Lawn Mower
Innovative Upgrade: A rain cover is added on the top of this bike tent/bike shed to enhance wind...
As an affiliate, we earn on qualifying purchases.
Measure and Mark the Chain
Before cutting the bicycle chain, I’ll measure and mark it. To determine the chain length, I’ll wrap the chain around the largest chainring and the largest rear sprocket, adding two links for flexibility.
Then, I’ll mark the cutting point with a sharpie or a chain breaker tool, making sure that the link is entirely separated from the rest of the chain.
Determine Chain Length
To figure out the chain length, simply count the number of links needed to fit around the largest chainring and the largest sprocket.
It’s important to know some chain sizing tips to avoid common mistakes in chain length estimation. Here are some tips to help you determine the correct chain length:
- Always use a new chain when replacing an old one.
- Make sure to properly size the chain before cutting it.
- Don’t rely solely on the old chain’s length to determine the new chain’s length.
Once you’ve determined the correct chain length, it’s time to mark the cutting point. It’s important to be precise in this step to avoid damaging the chain or having it slip off during use.
Mark the Cutting Point
Now that you’ve determined the correct length for your chain, it’s time to mark the spot where you’ll be making your adjustments, just like a surgeon marking the spot for a delicate incision.
The importance of precision cannot be overstated in this step. If you mark the wrong spot, you’ll end up with a chain that’s too short, too long, or worse, damaged beyond repair. So take your time and double-check your measurements before you make any cuts.
There are different types of chain cutters available, such as a chain tool or a rotary tool with a cutting wheel. Whichever one you use, make sure it’s designed for your specific type of chain. The last thing you want is to damage your new chain or your tool.
Once you have your cutter ready, place the chain in the tool with the pin you want to break aligned with the cutting point you marked. With a steady hand, tighten the tool and apply pressure until the pin breaks and the chain separates.
Now that you’ve marked the cutting point and broken the chain, you’re one step closer to getting your bike ready for your next adventure.

Bike Storage Shed Tent, Waterproof Outdoor Storage Shed for Bicycle, Easy Setup, Portable Storage Tent for Motorcycle,Garden Tools,Lawn Mower
【High Quality Bike Storage Tent】This versatile storage tent protects your bicycles and outdoor gear from the elements. Made...
As an affiliate, we earn on qualifying purchases.
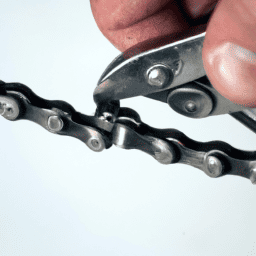
Break the Chain
Firstly, you’ll need to locate a chain break tool to effectively break the chain. This tool is essential in removing the pin that links the chain together.
Common mistakes when using the chain break tool include applying too much force, which can damage the chain or the tool itself. It’s important to read the instructions carefully and apply gentle pressure to avoid these mistakes.
Always ensure that the bike is stable and secure before proceeding to the next step. Safety precautions should also be taken when using the chain break tool. Wear protective gloves to avoid injuring your hands, and keep the tool away from children.
It’s also important to inspect the chain for any damage or wear before breaking it. Once the tool is in place, rotate the handle to break the chain pin. After breaking the chain, remove the excess links to achieve the desired length.

Happy Travel Bike Storage Shed Tent, Waterproof Portable Bicycle Cover with 30% More Top Storage Space for 2/3/4/5 Bikes,Clips Easy Setup Outdoor Sheds Shelter for Motorcycle, Garden Tools, Lawn Mower
【Large Capacity Bike Shed】:The outdoor bike storage tent size has been increased to 86.5in×31.5in×73in, and we have adopted...
As an affiliate, we earn on qualifying purchases.
Remove the Excess Links
Congratulations on successfully breaking the chain! You’re now ready to trim off any excess links using a pair of pliers, making sure to leave enough length for easy reattachment.
Chain maintenance is important to keep your bike running smoothly. Removing excess links is necessary when fitting a new chain or when the current chain has stretched over time.
To remove excess links, first, firmly grip the chain with pliers, making sure to avoid damaging the links. Then, use a chain tool or a hammer and a nail to push out the pins that hold the unwanted links together. Be careful not to push too hard, as this may cause damage to the surrounding links. Once the pins have been pushed out, the excess links can be separated from the chain.
Alternatively, a bolt cutter can be used to remove the excess links, but this may cause damage to the chain and is not recommended.
With the excess links removed, it’s time to reconnect the chain.
Reconnect the Chain
Ready to get back on the road? It’s time to reattach the chain using the excess links you left intact. Before starting, make sure the chain is properly lubricated. This will ensure smooth movement and prevent rusting. Apply a few drops of lubricant to each link and let it sit for a few minutes before wiping off any excess oil.
To reconnect the chain, first, align the two ends of the chain and insert the connecting link pin through both ends. Push the pin in until it is flush with the outer plate. Then, use a chain tool or pliers to snap off the ends of the connecting pin.
Afterward, check the chain’s tension and adjust it if necessary. Proper chain tensioning is crucial for smooth and efficient cycling. Finally, spin the pedals to check that the chain runs smoothly and without any kinks.
Congratulations, you’ve successfully reconnected your bicycle chain!
Frequently Asked Questions
How often should I replace my bicycle chain?
Honestly, I replace my bicycle chain as often as I replace my toothbrush. Chain maintenance is crucial, and I always keep an eye out for chain wear indicators. It’s a small investment that pays off in the long run.
Can I use the same tool to break and reconnect the chain?
Yes, you can use the same chain tool to break and reconnect a chain, but using a master link has pros and cons. Different types of chain tools for bicycles include chain pliers, chain breakers, and multi-tools.
Should I wear gloves when handling the chain?
When handling bike chains, I always wear gloves to prevent injuries and maintain the chain’s condition. Proper chain maintenance is crucial for a bike’s performance, and gloves provide protection while handling the chain.
How do I know if my chain is too short or too long for my bike?
As a bike enthusiast, I’ve learned that chain measurement is crucial for proper bike maintenance. A chain that’s too short can cause shifting issues, while a chain that’s too long can lead to chain slap. Don’t underestimate the importance of proper chain length.
Is it necessary to lubricate the chain after cutting and reconnecting it?
After cutting and reconnecting a bicycle chain, it is advisable to lubricate it to reduce friction and prolong its lifespan. Proper technique includes applying lubricant evenly and wiping off excess. Pros include improved performance. Cons may include attracting dirt and debris.
Conclusion
In conclusion, cutting a bicycle chain is a simple process that can be done with the right tools and a little bit of patience. It’s important to measure and mark the chain before breaking it, to ensure that you remove the correct number of links. Once the chain is broken, carefully remove the excess links to avoid damaging the remaining links.
Reconnecting the chain is also important, as it ensures that the chain is securely attached and won’t come loose while riding. By using a chain tool and following the steps outlined in this article, you can easily cut and reconnect your bicycle chain to the desired length.
With a little bit of practice, you’ll be able to quickly and confidently adjust your chain to fit your needs.