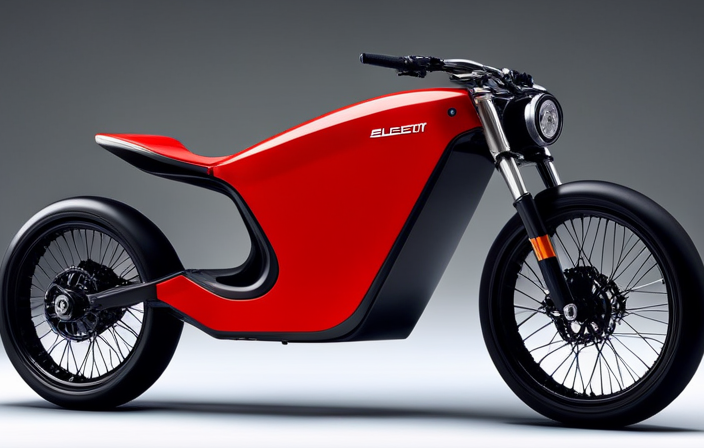
So, you want to design and build your own electric bike motor, huh? Well, you’re in luck! In this article, I’ll guide you through the step-by-step process of creating your very own motor that will give your bike that extra boost of power.
From understanding the basics to gathering the necessary tools and materials, we’ll cover it all.
So, grab your wrench and let’s get started on this electrifying adventure!
Key Takeaways
- Use sturdy mounting brackets or clamps for secure positioning of the motor.
- Implement proper insulation and grounding to prevent electrical shocks and short circuits.
- Consider motor specifications and programming language for building a custom controller for precise motor control.
- Evaluate power requirements, motor efficiency, and optimize power delivery for optimal performance.

Sportneer Bike Lock: 5 Digit Combination High Security Anti Theft Bike Chain Lock - 3.2/3.6/4ft Heavy Duty Keyless Bicycle Lock for Bike Motorcycle Scooter Door & Gate - Easy to Use, Bike Accessories
High Security & Keyless Design: Say goodbye to the hassle of carrying keys and hello to keyless convenience....
As an affiliate, we earn on qualifying purchases.
Understand the Basics of Electric Bike Motors
To understand the basics of electric bike motors, you’ll need to know the different types available on the market. Electric bike motors come in various forms, including hub motors, mid-drive motors, and friction drive motors. Each type has its own advantages and disadvantages compared to traditional bike motors.
Hub motors, for instance, are easy to install and maintain, but they can add extra weight to the bike. On the other hand, mid-drive motors provide better balance and control, but they require more maintenance.
When troubleshooting common issues with electric bike motors, it’s important to check the battery connections, inspect the wiring for any damage, and ensure that the controller is functioning properly.
By understanding these basics, you can make an informed decision when designing and building your own electric bike motor.
Now, let’s move on to gathering the necessary tools and materials for this project.

Seatylock FoldyLock Compact Folding Bike Lock - Award Winning Patented Lightweight High Security Bicycle Lock - Heavy Duty Anti Theft Smart Secure Guard with Keys & Case for Bikes or Scooters
TOP RATED LIGHTWEIGHT COMPACT BIKELOCK - Best Light Weight Folding Bike Lock. Portable Solid Key Bike Lock Protects...
As an affiliate, we earn on qualifying purchases.
Gather the Necessary Tools and Materials
Gathering the necessary tools and materials is essential for this project. When it comes to building an electric bike motor, choosing the right battery is crucial. You’ll need to consider factors such as voltage, capacity, and weight to ensure optimal performance.
A lithium-ion battery is commonly used for electric bike motors due to its high energy density and long lifespan. Additionally, selecting the appropriate tools for motor assembly is important for a successful build. You’ll need tools like wrenches, screwdrivers, pliers, and a multimeter to ensure proper connections and measurements. These tools will help you assemble the motor components accurately and efficiently.
Now that we have gathered the necessary tools and materials, let’s move on to choosing the type of motor and battery for your electric bike.

Kryptonite Folding Bike Lock, Compact Lightweight High Security Anti-Theft Foldable Bicycle Lock with 2 Keys and Mount for E-Bikes Scooter Road Mountain Bikes, 88.4cm (34.8 in)
HIGH-SECURITY DESIGN: This Anti-Theft folding bike lock is made from 3mm hardened steel bars with tightened rivets for...
As an affiliate, we earn on qualifying purchases.
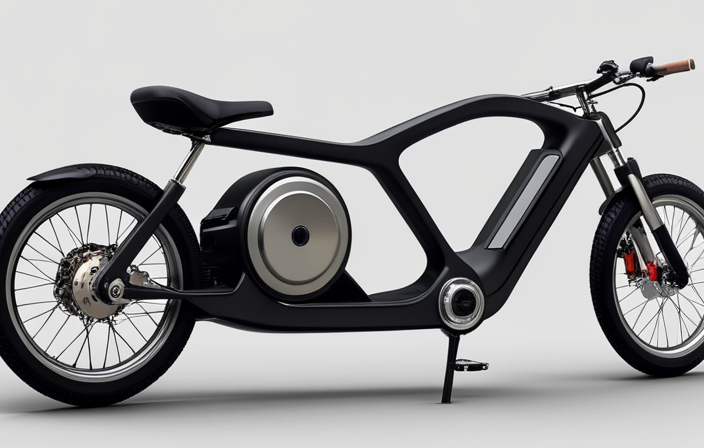
Choose the Type of Motor and Battery
Once you have selected the type of motor and battery, it’s important to consider factors such as power output and compatibility with your bike frame.
When it comes to motor selection, there are a few options to choose from. The most common types of electric bike motors are hub motors and mid-drive motors. Hub motors are located in the wheel hub and provide direct power to the wheel, while mid-drive motors are mounted in the center of the bike and transfer power through the bike’s drivetrain.
As for battery options, you can choose between lithium-ion and lead-acid batteries. Lithium-ion batteries are lighter, more efficient, and have a longer lifespan, but they are usually more expensive. Lead-acid batteries, on the other hand, are heavier and have a shorter lifespan, but they are more affordable. It’s important to consider your specific needs and budget when making these decisions.
With the motor and battery selected, the next step is to design the motor mount and integrate it with the bike frame.

Seatylock FoldyLock Compact Folding Bike Lock - Award Winning Patented Lightweight High Security Bicycle Lock - Heavy Duty Anti Theft Smart Secure Guard with Keys & Case for Bikes or Scooters
TOP RATED LIGHTWEIGHT COMPACT BIKELOCK - Best Light Weight Folding Bike Lock. Portable Solid Key Bike Lock Protects...
As an affiliate, we earn on qualifying purchases.
Design the Motor Mount and Frame Integration
Now that you’ve chosen your motor and battery, it’s time to figure out how to mount and integrate them with your bike frame. This step is crucial to ensure the stability and functionality of your electric bike.
Here’s what you need to do:
-
Motor mount fabrication: Carefully measure the dimensions of your motor and design a mount that will securely hold it in place. Consider using sturdy materials such as steel or aluminum for optimal strength and durability.
-
Frame compatibility analysis: Examine your bike frame to identify suitable mounting points for the motor. Look for areas that can provide enough clearance and support for the motor without interfering with other components or compromising the structural integrity of the frame.
-
Integration process: Once you have fabricated the motor mount and identified the mounting points on your frame, carefully align and attach the motor to the frame. Use appropriate hardware and ensure a tight and secure fit.
With the motor mount and frame integration complete, you can now move on to the next step of wiring and connecting the motor to the battery, ensuring a seamless and efficient electric bike setup.
Wire and Connect the Motor to the Battery
To wire and connect your motor to the battery, start by carefully identifying the appropriate terminals on both components.
Begin by connecting the positive terminal of the battery to the positive terminal of the motor. Do the same for the negative terminals, ensuring a secure connection.
It is important to ensure that the wires used for the connection are compatible with the battery’s voltage and current rating. Use wires of appropriate gauge to handle the current flow without overheating or causing voltage drops. Additionally, ensure that the wires are properly insulated and protected from any potential damage.
Once the wiring is complete, it is crucial to test and fine-tune the motor performance to ensure optimal functionality and efficiency. By adjusting parameters such as the speed controller settings and throttle response, you can optimize the motor’s performance to suit your specific needs.
Test and Fine-Tune the Motor Performance
After completing the wiring process, it is crucial to test and fine-tune the motor’s performance for optimal functionality and efficiency.
Motor performance testing is an essential step in ensuring that the electric bike functions as intended. To begin, I recommend conducting a basic functionality test by connecting the motor to the battery and checking if it starts smoothly.
Next, it is important to evaluate the motor’s speed and torque capabilities. This can be done by gradually increasing the throttle and observing the motor’s response.
Additionally, performance optimization can be achieved by adjusting the controller settings. By fine-tuning parameters such as acceleration, top speed, and regenerative braking, you can tailor the motor’s performance to your specific needs.
Once the motor performance has been thoroughly tested and optimized, it is time to move on to the next section: installing and securing the motor on the bike.
Install and Secure the Motor on the Bike
To install and secure the motor on your bike, ensure that you have the necessary tools and equipment readily available. Here are some motor installation tips to help you secure the motor properly:
-
Positioning: Determine the ideal placement for the motor on your bike frame. Consider factors such as weight distribution and clearance.
-
Mounting: Use sturdy mounting brackets or clamps to attach the motor securely to the frame. Double-check for any loose connections or vibrations.
-
Wiring: Connect the motor to the bike’s electrical system using appropriate wiring and connectors. Make sure all connections are secure and insulated to prevent any short circuits.
Table:
| Motor Installation Tips | Securing the Motor Properly |
|---|---|
| Positioning | Use sturdy mounting brackets or clamps |
| Mounting | Double-check for any loose connections or vibrations |
| Wiring | Ensure secure and insulated connections |
Build a Custom Controller for Motor Control
Building a custom controller allows for precise control over the motor’s speed and acceleration. The custom controller features can be tailored to suit specific requirements and preferences. One of the key aspects of building a custom controller is the programming techniques used to control the motor.
By programming the controller, one can define the desired speed and acceleration profiles, and even implement advanced features such as regenerative braking or torque control. The controller programming techniques involve writing code that communicates with the motor and other components, such as sensors and displays. It is essential to have a good understanding of the motor’s specifications and the programming language used for the controller.
With a custom controller, one can optimize the motor’s performance and achieve the desired level of control. However, it is important to consider safety measures and regulations to ensure the motor’s safe operation.
Consider Safety Measures and Regulations
When considering safety measures and regulations, you should ensure that your custom controller meets all necessary guidelines and standards. It is crucial to prioritize safety precautions and legal requirements to ensure the reliability and smooth operation of your DIY electric bike motor. Here are five key factors to consider:
-
Proper insulation and grounding: Implement insulation materials and grounding techniques to prevent electrical shocks and short circuits.
-
Overcurrent protection: Install fuses or circuit breakers to safeguard against excessive current flow, preventing damage to the motor and controller.
-
Temperature monitoring: Incorporate temperature sensors to monitor the heat generated by the motor and controller, preventing overheating.
-
Emergency stop mechanism: Equip your custom controller with an emergency stop button or switch for immediate motor shutdown in case of emergencies.
-
Compliance with local regulations: Familiarize yourself with the legal requirements and regulations regarding electric bike motors in your area to ensure compliance and avoid potential penalties.
Enjoy Your DIY Electric Bike Motor
Get ready to experience the thrill and freedom of riding your custom electric bike with ease and excitement. Building your own electric bike motor allows you to create a personalized design that meets your specific needs. To achieve optimal performance, it’s crucial to focus on custom motor design and performance optimization. By customizing the motor design, you can ensure that it fits seamlessly into your bike frame and delivers the desired power output. Performance optimization involves fine-tuning the motor’s parameters, such as torque and speed, to achieve the best possible efficiency and performance. It’s important to consider factors like battery capacity, controller settings, and gear ratios to maximize the motor’s capabilities. Take a look at the table below for a visual representation of the key aspects to consider when designing and optimizing your custom electric bike motor.
| Aspect | Description |
|---|---|
| Motor Type | Select a motor type that suits your riding style and power requirements. |
| Frame Integration | Ensure the motor can be seamlessly integrated into your bike frame for a clean and sleek look. |
| Power Output | Determine the desired power output of your motor to meet your specific riding needs. |
| Efficiency | Optimize the motor’s efficiency by fine-tuning parameters like torque and speed. |
| Battery and Controller | Consider the battery capacity and controller settings to maximize performance and range. |
Frequently Asked Questions
How do I calculate the power output of an electric bike motor?
To calculate the power output of an electric bike motor, you need to consider two main factors: motor efficiency and the factors that affect it. Motor efficiency is typically calculated by dividing the output power by the input power.
What are the different types of electric bike motor controllers?
There are various types of electric bike motor controllers, including brushed and brushless controllers. Brushless motor controllers have higher efficiency, resulting in improved performance and longer battery life.
Can I use a regular bike frame for an electric bike motor conversion?
Yes, a regular bike frame can be used for an electric bike motor conversion. However, the compatibility of the bike frame depends on factors such as size, strength, and mounting points, which should be considered during the motor conversion process.
Are there any legal requirements or restrictions for electric bike motors?
There are licensing requirements and safety regulations for electric bike motors. It is important to comply with these regulations to ensure the legal operation and safe use of electric bikes.
How can I optimize the battery life of my electric bike motor?
To optimize the battery life of my electric bike motor, I focus on battery maintenance and charging techniques. By properly storing the battery, avoiding overcharging, and using a smart charger, I can extend the lifespan and performance of my motor.
Conclusion
In conclusion, designing and building an electric bike motor requires a deep understanding of the basics, as well as the right tools and materials. By carefully choosing the type of motor and battery, designing the motor mount and frame integration, and wiring and connecting the motor to the battery, you can create a powerful and efficient motor for your bike.
Building a custom controller for motor control and considering safety measures and regulations are crucial steps. So, are you ready to embark on this electrifying journey and experience the thrill of riding your own DIY electric bike motor?