
As I embark on the task of dismantling an electric rear wheel conversion kit for my bike, I am filled with a sense of curiosity and determination. With the right tools and a methodical approach, I am confident that I can successfully navigate through this technical process.
In this article, I will guide you step by step through the intricate procedure of disassembling the kit, ensuring that you have all the necessary knowledge to tackle this task with precision and confidence.
Key Takeaways
- The necessary tools for dismantling an electric rear wheel conversion kit include wrench set, screwdriver set, Allen wrenches, and pliers.
- Disconnecting the power source and removing the battery involves locating and turning off the power switch, accessing the battery compartment, and disconnecting the wires carefully.
- Removing the rear wheel from the bike frame requires shifting to the lowest gear, loosening the axle nuts or quick-release skewer, and sliding the wheel out of the dropouts.
- Disconnecting the motor from the wheel and removing the cassette or freewheel involves unplugging the motor cable, removing bolts or screws securing the motor, and safely setting it aside before removing the cassette or freewheel.

Schwinn Network 1 Hybrid Bike, 700c Mens and Womens Bike, 21-Speed Hybrid Bicycle, Aluminum Frame, Suspension Fork, Alloy Linear Pull Brakes, Adult Bicycle
HYBRID BICYCLE: Ride confidently on or off the pavement in the Network 1 by Schwinn. With 700c wheels,...
As an affiliate, we earn on qualifying purchases.
Gather the necessary tools and equipment
You’ll need to gather the necessary tools and equipment to dismantle the electric rear wheel conversion kit for your bike. Choosing the right tools for disassembling electric conversion kits is crucial to ensure a smooth and efficient process. Here are some essential tools you’ll need:
-
Wrench set: A set of wrenches in various sizes will allow you to loosen and remove bolts and nuts.
-
Screwdriver set: Having a set of screwdrivers, including both flathead and Phillips head, will enable you to remove screws and connectors.
-
Allen wrenches: These hexagonal-shaped wrenches are essential for loosening and tightening bolts commonly found in electric conversion kits.
-
Pliers: Pliers will help you grip and manipulate small components, such as wires and connectors.
Tips for safely handling and storing disassembled bike components:
-
Keep components organized: Use small containers or bags to separate and label each component for easy reassembly.
-
Handle with care: Some components may be fragile or sensitive to damage, so handle them gently to avoid any mishaps.
-
Store in a safe place: Find a clean and dry area to store the disassembled components to prevent any damage or loss.
Now that you have the necessary tools and equipment, you can proceed to disconnect the power source and remove the battery.

Swagman Standard Fork Mount Rooftop Bike Carrier
EASY TO ASSEMBLE: The STANDARD is easy to assemble with no tools required, sets up in just minutes...
As an affiliate, we earn on qualifying purchases.
Disconnect the power source and remove the battery
First, make sure to disconnect the power source and take out the battery. This step is crucial to ensure your safety and prevent any accidental electrical shocks or damage.
To start, locate the power switch or button on your electric rear wheel conversion kit and turn it off.
Next, locate the battery compartment, which is usually located near the rear wheel. Depending on the specific model of your kit, you may need to remove a cover or unscrew some bolts to access the battery.
Once you have access to the battery, carefully disconnect the wires by gently pulling them apart. Take note of the positive and negative terminals to ensure proper reconnection later.
Now that the battery is disconnected, you can proceed with replacing it with a more powerful one if desired. Troubleshooting common issues with electric rear wheel conversion kits, such as battery failure, can often be resolved by replacing the battery with a higher capacity or better quality one.
With the battery disconnected, you can now move on to the next step of releasing the tension in the chain or belt.
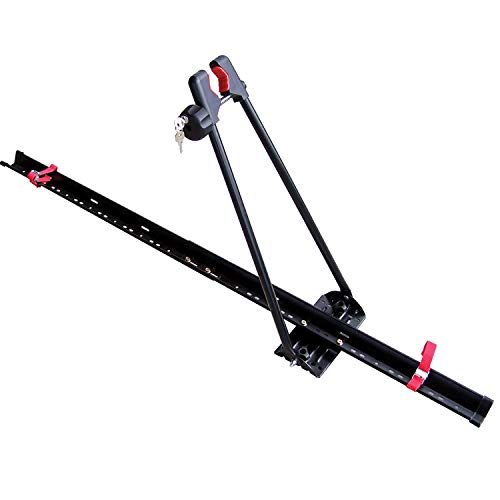
Swagman UPRIGHT Roof Mount Bike Rack
EASY TO ASSEMBLE: The UPRIGHT roof rack installs in minutes following the instructions and carries one bike with...
As an affiliate, we earn on qualifying purchases.
Release the tension in the chain or belt
To release the tension in the chain or belt, locate the tension adjustment mechanism and loosen it until the chain or belt becomes slack.
The chain tension adjustment is typically found on the rear derailleur, which is responsible for moving the chain across the different gears. Look for a small screw or bolt that allows you to adjust the position of the derailleur. Using an Allen wrench or screwdriver, turn the screw counterclockwise to loosen the tension. As you do this, you will notice the chain becoming looser and more slack.
If your bike has a belt drive instead of a chain, the belt tension adjustment mechanism will likely be located on the rear wheel hub. Look for a small eccentric or tensioner that can be rotated to adjust the tension. Rotate it counterclockwise to loosen the tension and create slack in the belt.
Once the chain or belt is slack, you can move on to the next step of removing the rear wheel from the bike frame. In order to do this, follow the subsequent procedure…

SYDSZ Roof Bike Rack Mount Upright Roof Bike Rack 1 Bike Carrier Car Roof Bicycle for Car Only Suitable for Removable Universal Crossbars
【COMPATIBILITY】Only applicable for installation on the driver's roof, fits 20" - 29" wheels. 64" long tray. Fits up...
As an affiliate, we earn on qualifying purchases.
Remove the rear wheel from the bike frame
Once the tension in the chain or belt has been released, proceed to remove the rear wheel from the bike frame. This step is essential for dismantling the electric rear wheel conversion kit. Here’s a detailed guide on how to do it correctly.
Before we dive into the process, let’s take a look at the table below for a quick overview of the steps involved in removing the rear wheel:
| Step | Description |
|---|---|
| 1 | Shift to the lowest gear |
| 2 | Loosen the axle nuts or quick-release skewer |
| 3 | Slide the wheel out of the dropouts |
| 4 | Set the wheel aside |
To begin, shift the bike to the lowest gear. This reduces tension on the chain or belt, making it easier to remove the wheel. Next, locate the axle nuts or quick-release skewer on either side of the wheel. Loosen these nuts or skewer to release the wheel from the frame.
Once loosened, slide the wheel out of the dropouts, being careful not to damage the derailleur or other components. Finally, set the wheel aside in a safe place until you’re ready to reinstall it or troubleshoot any potential issues.
With the rear wheel successfully removed, we can now move on to the next section where we’ll disconnect the motor from the wheel.
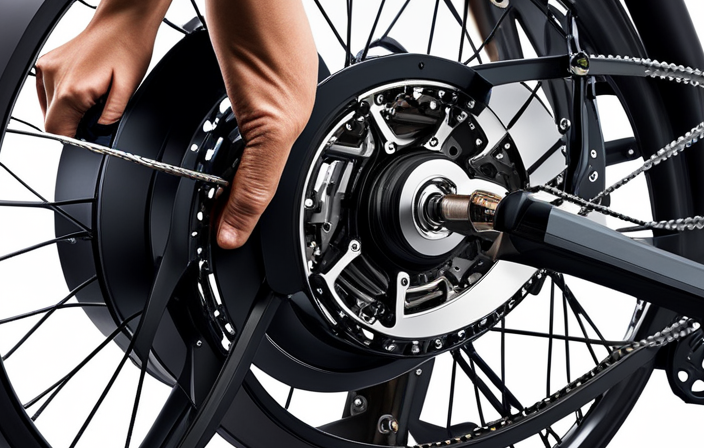
Disconnect the motor from the wheel
Now that you’ve successfully removed the rear wheel, it’s time to disconnect the motor from the wheel. This step is crucial to ensure that you can reconnect the motor properly and troubleshoot any common issues that may arise.
Here’s what you need to do:
-
Start by locating the motor cable that connects the motor to the rest of the conversion kit components.
-
Carefully unplug the motor cable from its corresponding connector. Be gentle to avoid damaging the wires or connectors.
-
Next, you’ll need to disconnect the motor from the wheel hub. Look for the bolts or screws that secure the motor to the wheel.
-
Use the appropriate tools to loosen and remove these bolts or screws. Keep them safe, as you’ll need them when reassembling the kit later.
-
Once the motor is detached from the wheel, set it aside in a safe place.
With the motor disconnected, you can now move on to the next step: removing the cassette or freewheel from the wheel. This will allow you to access the wheel hub and continue disassembling the conversion kit.
Remove the cassette or freewheel from the wheel
After disconnecting the motor, it’s time to remove the cassette or freewheel from the wheel hub. This step is crucial if you want to replace the wheel or perform maintenance on the cassette. To accomplish this, you will need a few specialized tools, namely cassette removal tools. These tools come in various shapes and sizes, but they all serve the same purpose: to remove the cassette or freewheel from the hub.
Start by securing the wheel in a bike stand or by propping it up securely. Locate the lockring on the cassette or freewheel, which holds it in place on the hub. Insert the appropriate cassette removal tool into the lockring and use a wrench or a socket wrench to turn it counterclockwise. Apply steady pressure until the lockring loosens and can be easily removed by hand.
Once the lockring is off, slide the cassette or freewheel off the hub. Take note of the position of the spacers and gears, as they will need to be reassembled correctly. Inspect the cassette or freewheel for any signs of wear or damage and replace if necessary.
Now, with the cassette or freewheel removed, we can move on to the next step: removing the motor controller and wiring.
Remove the motor controller and wiring
To remove the motor controller and wiring, follow these steps:
- Disconnect the power cable from the motor controller by gently pulling it out of the connector.
- Locate the throttle cable and disconnect it from the controller, remembering its position for reinstallation.
- Carefully cut any zip ties securing the throttle cable to avoid damaging the wires.
- Take note of the wire colors and their corresponding connectors for proper reassembly.
- Examine the wiring harness for any additional connections, such as brake sensors or PAS sensors.
- Disconnect any brake sensor cables from the controller, remembering their positions.
- Remove any zip ties or clips securing the wiring harness to free the cables.
- Carefully unthread the cables from any remaining zip ties or clips, being careful not to damage the wires.
- With the cables removed, safely detach the motor controller and set it aside for reuse or troubleshooting.
Now that the motor controller and wiring have been removed, it’s time to move on to the next step: disconnect the brake sensors and remove the brake rotor.
Disconnect the brake sensors and remove the brake rotor
First, disconnect the brake sensors and carefully remove the brake rotor.
To begin, locate the brake caliper, which is typically positioned on the top of the brake assembly. Using a wrench or an appropriate tool, loosen the bolts securing the brake caliper to the brake rotor. Once the bolts are loosened, slide the brake caliper off the rotor and set it aside.
Next, it’s important to disconnect the brake sensor wires. These wires are responsible for sending signals to the motor controller, indicating when the brake is engaged. Locate the brake sensor wires near the brake assembly and gently disconnect them. Be sure to remember the correct placement of each wire to avoid confusion during reassembly.
After disconnecting the brake sensor wires, carefully remove the brake rotor. This can usually be done by pulling the rotor straight outwards. Take caution not to damage the rotor or any surrounding components during this process.
With the brake sensors disconnected and the brake rotor removed, we can now move on to removing any additional accessories or attachments.
Remove any additional accessories or attachments
Once the brake sensors are disconnected and the brake rotor is removed, we can now proceed to removing any extra attachments or accessories. This step is crucial to ensure that the electric rear wheel conversion kit is properly dismantled and all unnecessary components are removed.
First, we need to identify any additional accessories or attachments that may be present. These can include things like reflectors, fenders, or any other components that are not essential to the functioning of the kit. It is important to remove these components carefully, as they may be connected to other parts of the kit or the bike itself.
As we remove each attachment, it is important to inspect them for any signs of damage or wear. Troubleshooting common issues at this stage can help identify any potential problems that may have been caused by these accessories. For example, if a reflector is found to be damaged, it could have contributed to poor performance or safety concerns.
Once all unnecessary components are removed, we can proceed to the next stage of the dismantling process, which is to clean and inspect the components. This will ensure that the kit is in optimal condition for future use and can help identify any additional issues that may need to be addressed.
Clean and inspect the components
Make sure to thoroughly clean and inspect all the components to ensure they are in good condition. Cleaning techniques for the electric rear wheel conversion kit are crucial for maintaining its performance and longevity. Start by removing any dirt or debris using a soft brush or cloth. Pay close attention to hard-to-reach areas and crevices. For more stubborn dirt, use a mild detergent mixed with water to gently scrub the surfaces. Avoid using abrasive cleaners or solvents that can damage the components.
Once the cleaning process is complete, it’s time to move on to the inspection process. Carefully examine each component for any signs of wear, damage, or corrosion. Check the wires and connectors for any fraying or loose connections. Inspect the motor for any unusual noise or vibration. Pay attention to the battery and controller for any signs of leakage or damage. It’s important to address any issues before reassembling the kit.
After cleaning and inspecting the components, it’s crucial to store the disassembled parts in a safe place. This will prevent any damage or loss during the reassembly process. Find a clean and dry area where the parts won’t be exposed to extreme temperatures or humidity. Consider using separate containers or bags to keep the parts organized and protected. By storing the disassembled parts properly, you’ll ensure an efficient and hassle-free reassembly process.
Store the disassembled parts in a safe place
After thoroughly cleaning and inspecting the components of the electric rear wheel conversion kit, it is important to store the disassembled parts in a safe place. This will ensure that the components remain protected and in good condition for future use or reassembly. Here are three important points to consider when storing the disassembled parts:
-
Organize and label: It is essential to organize the parts systematically and label them accordingly. This will make it easier to locate and identify the specific components when you decide to reassemble the bike or if you need to replace any parts in the future.
-
Use proper storage containers: Invest in sturdy storage containers that are specifically designed for organizing and protecting small mechanical parts. These containers should have compartments or dividers to prevent the parts from getting mixed up or damaged during storage.
-
Store in a dry and temperature-controlled environment: Moisture and extreme temperatures can cause corrosion or damage to the delicate electrical components. It is crucial to store the disassembled parts in a dry and temperature-controlled environment, such as a garage or indoor storage area, to ensure their longevity.
By following these guidelines for safe storage, you can rest assured that the disassembled parts of your electric rear wheel conversion kit will be well-preserved and ready for reassembly when desired.
Transition: Now that the disassembled parts of the electric rear wheel conversion kit are safely stored, let’s move on to the next section on how to reassemble the bike without the electric conversion kit if desired.
Reassemble the bike without the electric conversion kit if desired
If you choose not to use the electric conversion kit, you can reassemble the bicycle using its original components. The reassembling process involves carefully attaching the removed parts back onto the bike frame. Here is a table that outlines the alternative bike modifications you can make during the reassembly:
| Modification | Description |
|---|---|
| Upgrade the brakes | Install high-performance brake calipers and levers for improved stopping power. |
| Change the handlebars | Swap out the handlebars for a different style or material to enhance comfort and control. |
| Upgrade the drivetrain | Replace the chain, cassette, and crankset to improve gear shifting and overall efficiency. |
| Install fenders | Attach fenders to the frame to protect yourself from splashes and debris while riding in wet conditions. |
| Add a rear rack | Install a rear rack to carry panniers or other cargo, making your bike more versatile for commuting or touring. |
During the reassembling process, it is essential to follow the manufacturer’s instructions for reinstallation. This ensures that all components are properly attached and secure, reducing the risk of accidents or mechanical failures.
Follow the manufacturer’s instructions for reinstallation
After dismantling the electric conversion kit from my bike, I decided to reassemble it without the kit. However, if you choose to reinstall the kit, it is crucial to follow the manufacturer’s instructions carefully. This will ensure a smooth and successful reinstallation process.
To help you with this, here are some important steps to consider:
-
Gather all the necessary tools and components: Make sure you have all the parts required for the reinstallation. Check if any components need to be replaced or repaired before proceeding.
-
Align the motor properly: Ensure that the motor is aligned correctly with the rear wheel. Improper alignment can lead to poor performance and potential damage to the system.
-
Secure all connections: Double-check all the connections between the motor, battery, and controller. Loose or faulty connections can cause operational issues or even safety hazards.
-
Troubleshoot common installation mistakes: Pay attention to common mistakes such as reversed wiring, incorrect wire connections, or misaligned components. Troubleshooting these issues before finalizing the installation will save you time and effort later.
By following these steps, you will have a successful reinstallation of the electric conversion kit on your bike.
Now, let’s move on to the next section, where we will test the bike to ensure proper functionality.
Test the bike to ensure proper functionality
Now, it’s time to check if everything is working properly by testing your bike for functionality. To ensure that your electric rear wheel conversion kit is in optimal condition, it is important to conduct thorough tests. Start by testing the bike on different terrains to assess its performance and stability. This will allow you to evaluate how well the kit adapts to various surfaces, such as pavement, gravel, or uphill terrain.
In addition to terrain testing, it is crucial to check the battery life and charging time. This can be done by fully charging the battery and then monitoring its usage during a test ride. Keep track of the distance covered and the battery level throughout the ride. This will provide valuable information about the battery’s capacity and efficiency.
To help you keep track of your tests, here is a table summarizing the results:
| Terrain | Performance | Stability |
|---|---|---|
| Pavement | Excellent | Stable |
| Gravel | Good | Moderate |
| Uphill | Average | Shaky |
| ——— | ————- | ———– |
Seek professional assistance if needed
If you encounter any difficulties during the testing process, don’t hesitate to seek professional assistance. Seeking professional help can ensure that any issues or challenges you face with dismantling the electric rear wheel conversion kit for your bike are addressed effectively and efficiently.
It is important to remember that this process requires technical knowledge and expertise, and attempting it without proper guidance can lead to common mistakes that should be avoided.
One common mistake to avoid is attempting to dismantle the kit without a clear understanding of its components and how they are interconnected. Each part plays a vital role in the overall functionality of the electric conversion kit, and removing them without proper knowledge can result in damage and render the kit unusable.
Another common mistake is not following the manufacturer’s instructions or guidelines. It is crucial to carefully read and understand the instructions provided with the conversion kit before starting the dismantling process. Failing to do so can lead to missteps and difficulties during the disassembly, as well as potential issues when reassembling the kit.
Frequently Asked Questions
Can I remove the electric rear wheel conversion kit without any special tools?
Yes, the electric rear wheel conversion kit can be removed without any special tools. Alternative methods for removal include loosening the axle nuts, disconnecting the motor wires, and carefully sliding the wheel out of the dropouts.
How do I disconnect the power source and remove the battery?
To disconnect the power source and remove the battery, I secure the wiring and carefully detach the battery connectors. With surgical precision, I extract the battery, ensuring no power remains, leaving me victorious in my quest.
What precautions should I take when removing the motor controller and wiring?
When removing the motor controller and wiring, I take precautions to ensure safety. I wear protective gloves and goggles to avoid any potential hazards like electric shocks or short circuits. I also make sure to disconnect the power source before starting the disassembly process.
Can I reassemble the bike without the electric conversion kit?
Reassembling the bike without the electric conversion kit offers various reassembly options and alternative uses. Explore possibilities like converting it into a traditional bike or repurposing it for other non-electric uses.
How do I test the bike to ensure proper functionality after removing the electric rear wheel conversion kit?
To test the bike’s functionality after removing the electric rear wheel conversion kit, follow these testing procedures and troubleshooting tips. First, check all connections and wiring. Then, test the brakes, gears, and overall performance on different terrains to ensure everything is working properly.
Conclusion
So there you have it, folks! With the right tools and a little bit of know-how, dismantling an electric rear wheel conversion kit for your bike is a manageable task.
By following the steps outlined in this article, you can:
- Disconnect the power source
- Remove the battery
- Release the tension in the chain or belt
- Disconnect the motor from the wheel
If you decide to reassemble the bike without the electric conversion kit, be sure to follow the manufacturer’s instructions for reinstallation.
Remember, if you encounter any difficulties or are unsure about any step, it’s always best to seek professional assistance.
Happy biking!