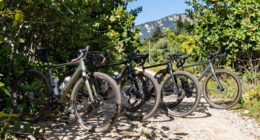

I’m excited to share with you how I built my own electric bike.
Did you know that electric bikes are becoming increasingly popular, with sales expected to reach 40 million units worldwide by 2025?
In this article, I will guide you through the process step-by-step, from assessing your needs and budget to installing the motor and battery.
Get ready to experience the thrill of riding your very own DIY electric bike!
Key Takeaways
- Assess needs, terrain, and distance before choosing motor and battery
- Consider frame materials, sizes, and geometry when selecting a bicycle frame
- Evaluate power output and battery capacity for motor and battery system
- Compare pros and cons of throttle and pedal-assist systems before deciding on one
Assess Your Needs and Budget
Before starting your DIY electric bike project, it’s important to assess your needs and budget.
Assessing your needs involves considering factors such as the purpose of the bike, the terrain you will be riding on, and the distance you plan to travel. For example, if you plan to use the electric bike for commuting in a hilly area, you may need a more powerful motor and a larger battery capacity. On the other hand, if you only plan to use it for short trips on flat terrain, a smaller motor and battery may be sufficient.
Budget constraints are another important aspect to consider. Electric bike conversion kits can vary in price, so it’s essential to set a budget and stick to it. Take into account the cost of the kit, any additional accessories you may need, and any tools you may need to purchase or rent.
Once you have assessed your needs and set a budget, you can move on to choosing the right bicycle frame. The frame is the foundation of your electric bike, so it’s crucial to choose one that is not only compatible with the conversion kit but also suits your riding style and preferences.
Choose the Right Bicycle Frame
When selecting the right bicycle frame, it’s important to prioritize factors such as size and material. The frame of a bicycle plays a crucial role in determining its overall performance and comfort. Here are three key considerations when choosing a bicycle frame:
-
Bicycle frame materials: There are various materials used in bicycle frame construction, each with its own characteristics. Aluminum frames are lightweight and stiff, providing a responsive ride. Carbon fiber frames offer excellent vibration dampening and are known for their strength and durability. Steel frames provide a smooth and comfortable ride, absorbing road vibrations. The choice of material depends on your riding style, preferences, and budget.
-
Frame sizes and geometry: The right frame size is essential for a comfortable and efficient riding experience. Frame sizes are typically measured in centimeters and are determined by your height, leg inseam, and riding style. Additionally, frame geometry affects the bike’s handling and performance. A relaxed geometry is suitable for leisurely rides, while a more aggressive geometry is preferred by those seeking speed and performance.
Considering these factors, you can select a bicycle frame that suits your needs and preferences. Once the frame is chosen, it’s time to transition into the subsequent section about selecting the motor and battery system for your DIY electric bike.
Select the Motor and Battery System
To select the motor and battery system for your bike, it’s important to consider factors such as power output and battery capacity. The motor power determines how fast and how efficiently your electric bike will run. Higher motor power means more speed and better performance, but it may also drain your battery faster.
On the other hand, battery capacity determines how far you can go on a single charge. It’s crucial to choose a battery with sufficient capacity to meet your desired travel distance.
When selecting a motor, you need to consider the power output that suits your needs. If you plan on using your electric bike for commuting or leisurely rides, a motor power of around 250-500 watts should be sufficient. However, if you’re looking for more power and performance, you may opt for a motor with a higher wattage, such as 750 watts or even 1000 watts.
In terms of battery capacity, it’s essential to determine how far you intend to travel on a single charge. Battery capacity is measured in watt-hours (Wh). Higher capacity batteries, such as those in the range of 400-600 Wh, can provide longer travel distances. However, keep in mind that higher capacity batteries are generally larger and heavier, which might impact the overall weight and handling of your electric bike.
Choosing the right motor power and battery capacity is crucial to ensure that your electric bike meets your specific needs and preferences. Once you have selected the appropriate motor and battery system, the next step is to decide on a throttle or pedal-assist system for your electric bike.
Decide on a Throttle or Pedal-Assist System
Deciding on a throttle or pedal-assist system for your e-bike is an important step in customizing your ride. When it comes to choosing between these two options, there are several factors to consider.
Let’s take a look at the pros and cons of each:
-
Throttle System:
-
Pros:
-
Provides instant acceleration with just a twist of the throttle.
-
Allows for easier maneuverability in traffic or tight spaces.
-
Offers full control over the speed without pedaling.
-
Ideal for riders with limited mobility or physical limitations.
-
Provides a more motorcycle-like riding experience.
-
Pedal-Assist System:
-
Pros:
-
Offers a more natural riding experience by providing assistance while pedaling.
-
Extends the range of your e-bike by conserving battery power.
-
Encourages physical exercise and helps improve fitness.
-
Allows for a smoother transition between electric and manual modes.
-
Provides a quieter and more stealthy riding experience.
Considering these pros and cons, it’s important to choose the system that aligns with your riding style, needs, and preferences. Once you’ve made this decision, you can move on to the next section and install the motor and battery seamlessly.
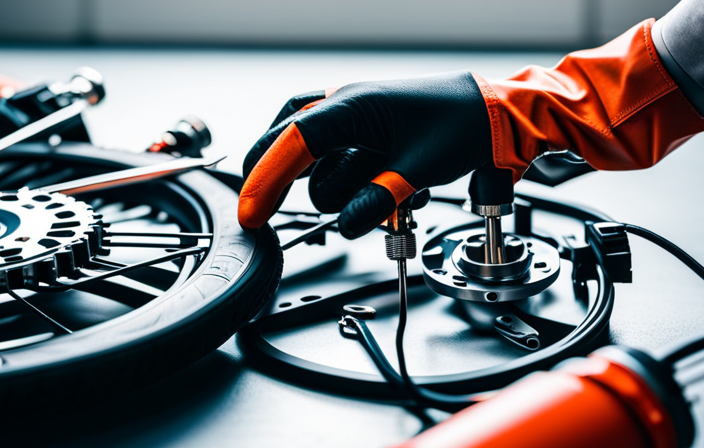
Install the Motor and Battery
Now that you’ve chosen your preferred system, it’s time to install the motor and battery for your e-bike.
The motor installation is a crucial step in converting your regular bicycle into an electric one. First, you need to locate the ideal position for the motor on your bike frame. Ensure that there is enough clearance for the motor to fit comfortably without interfering with other components. Once you’ve found the perfect spot, securely mount the motor using the provided brackets and screws. Make sure the motor is aligned properly with the chain or belt drive system.
Next, let’s move on to the battery installation. The battery is the powerhouse of your e-bike, providing the necessary energy to the motor. Most e-bike batteries are designed to be mounted on the frame. Find a suitable location, such as the downtube or rear rack, and securely attach the battery using the included mounting brackets or straps. Ensure that the battery is easily accessible for recharging and that the weight distribution is balanced.
With the motor and battery successfully installed, we can now transition to the next section, which covers connecting the wiring and controls. This step is crucial for the proper functioning of your e-bike and will allow you to control the motor’s power and speed.
Connect the Wiring and Controls
Once you’ve mounted the motor and battery, it’s time to connect the wiring and controls for your e-bike. This step is crucial in ensuring that your electric bike functions properly and safely. The wiring connects the various components of your e-bike, such as the motor, battery, throttle, and display. It allows for the flow of electricity and enables you to control the speed and power of your bike.
To help you understand the wiring and controls better, here is a table outlining the connections and their functions:
| Component | Connection | Function |
|---|---|---|
| Motor | Controller | Converts electrical energy into mechanical energy to propel the bike |
| Battery | Controller | Supplies power to the motor and other electrical components |
| Throttle | Controller | Regulates the speed of the e-bike by controlling the power output |
| Display | Controller | Provides information about speed, battery level, and other important data |
In case you encounter any issues with the wiring, troubleshooting can be done by checking for loose connections, damaged wires, or faulty components. Control customization is also possible, allowing you to adjust settings such as acceleration and speed limits to suit your preferences.
Now that the wiring and controls are in place, it’s time to upgrade your brakes and suspension for an even better riding experience.
Upgrade Your Brakes and Suspension
With upgraded brakes and suspension, you’ll experience a smoother and safer ride. Brake performance is crucial when it comes to electric bikes, especially considering their higher speeds and potentially heavier weight. Upgrading your brakes will enhance your ability to stop quickly and effectively, giving you more control over your bike. Look for high-performance brake systems that offer excellent stopping power and durability. Consider disc brakes, which provide consistent performance in wet and dry conditions.
Next, let’s discuss suspension upgrades. A good suspension system is essential for absorbing shocks and vibrations, ensuring a comfortable and stable ride. Look for front forks with adjustable damping and preload settings, as they allow you to fine-tune your suspension according to your preferences and terrain. Rear suspension systems, such as air shocks or coil shocks, can also greatly improve your ride quality and control.
Choose the Right Wheels and Tires
To ensure optimal performance, it’s important to select the right wheels and tires for your electric bike. The wheels and tires you choose can greatly impact your riding experience. Factors such as tire pressure and the different types of electric bike tires available should be considered.
One of the key factors to consider when choosing the right wheels and tires is tire pressure. Maintaining the correct tire pressure is crucial for both comfort and efficiency. If your tire pressure is too high, you’ll experience a harsh ride and decreased traction. Conversely, if your tire pressure is too low, you’ll have a smoother ride but risk damaging your rims and increasing rolling resistance.
When it comes to electric bike tires, there are a few different types to choose from. The most common types include slick tires, which have a smooth tread pattern for maximum efficiency on paved roads, and knobby tires, which have a more aggressive tread pattern for better traction on off-road terrains. There are also hybrid tires that offer a balance between efficiency and off-road capability.
In conclusion, choosing the right wheels and tires for your electric bike is crucial for optimal performance. Consider the importance of tire pressure and explore the different types of electric bike tires available to find the perfect fit for your riding needs.
Now, let’s move on to the next section and discuss how to install the electric bike conversion kit.
Install the Electric Bike Conversion Kit
Now you’ll learn how easy it is to install the conversion kit on your bike.
When it comes to electric bike conversion kit options, there are many to choose from.
To get started, make sure you have all the necessary tools: a wrench, screwdriver, and pliers.
Begin by removing the front wheel of your bike and disconnecting the brakes.
Next, attach the electric motor to the front fork using the provided brackets and screws. Make sure the motor is securely fastened.
Then, connect the motor to the battery pack using the included wiring harness. It’s important to follow the manufacturer’s instructions for this step to ensure proper connections.
Once the motor is connected, reattach the front wheel and adjust the brakes if necessary.
Finally, secure the battery pack to the frame of your bike using the mounting brackets.
Now that you’ve successfully installed the conversion kit, you’re ready to test and adjust your electric bike for optimal performance.
Test and Adjust Your Electric Bike
Once you’ve finished installing the conversion kit, it’s time to test and adjust your new electric bike for optimal performance.
Testing and adjusting your bike is crucial to ensure that everything is working as it should and to identify any potential issues or areas that require further maintenance.
To begin, start by checking the battery level and making sure it is fully charged.
Next, take your bike for a test ride in a safe and open area. Pay close attention to how the motor engages, the responsiveness of the brakes, and the overall handling of the bike.
If you notice any issues, such as the motor not engaging properly or the brakes feeling spongy, you may need to troubleshoot and make necessary adjustments.
This could involve adjusting the tension on the motor cables, ensuring the brake pads are properly aligned and adjusted, or checking the tire pressure for optimal performance.
Regular maintenance and troubleshooting are key to keeping your electric bike running smoothly and efficiently.
By taking the time to test and adjust your bike, you can address any issues before they become major problems.
Once you’ve completed this step, you can move on to adding accessories and personalizing your ride, further enhancing your electric bike experience.
Add Accessories and Personalize Your Ride
After adjusting your electric bike for optimal performance, it’s time to add accessories and personalize your ride.
Adding lighting and reflectors is crucial for safety when riding in low light conditions. I recommend installing a front light and a rear light, as well as reflective strips on your bike frame and wheels. This will ensure that you are visible to other road users, reducing the risk of accidents.
To further customize your electric bike, consider adding decals and paint. Decals are a great way to show off your personality and make your bike stand out. You can choose from a wide range of designs and colors to suit your style. Additionally, painting your bike can give it a fresh new look. Just make sure to use paint that is suitable for the material of your bike frame and follow proper painting techniques.
By adding these accessories and personalizing your electric bike, you can make it truly your own. Not only will it look great, but it will also enhance your safety on the road.
Now that your bike is ready, let’s move on to the next section and learn how to ride safely and responsibly.
Learn How to Ride Safely and Responsibly
To ensure your safety and the safety of others on the road, it’s important to learn how to ride your electric bike responsibly. Here are some safe riding tips and responsible bike ownership practices to keep in mind:
-
Wear a helmet: Protect your head by wearing a properly fitted helmet at all times. It can greatly reduce the risk of head injuries in case of an accident.
-
Obey traffic laws: Treat your electric bike like any other vehicle on the road. Follow traffic signals, yield to pedestrians, and use hand signals to indicate your intentions.
-
Be visible: Increase your visibility by wearing bright clothing and using reflective accessories. Install front and rear lights on your electric bike to ensure you can be seen by others, especially during low-light conditions.
-
Ride defensively: Anticipate potential hazards and be prepared to react. Maintain a safe distance from vehicles, watch out for opening car doors, and always be aware of your surroundings.
By practicing these safe riding tips and being a responsible bike owner, you can enjoy the many benefits of electric biking while minimizing the risks.
Now, let’s delve into how to maintain and service your electric bike without compromising its performance.
Maintain and Service Your Electric Bike
After mastering the art of safe and responsible riding, it’s crucial to shift our attention to the maintenance and servicing of our electric bikes. Proper upkeep ensures optimal performance and extends the lifespan of our trusty two-wheeled companions. Electric bike troubleshooting is an essential skill that every rider should possess.
From time to time, issues may arise, such as a malfunctioning motor, faulty brakes, or a dead battery. By familiarizing ourselves with common maintenance issues, we can quickly diagnose and resolve these problems, ensuring that we are back on the road in no time.
Regular check-ups should include inspecting the tires for wear and tear, ensuring that they are properly inflated for smooth and efficient riding. Furthermore, it is vital to examine the brakes, ensuring that they are functioning correctly and have adequate pad thickness. Lubricating the drivetrain and checking the chain tension will guarantee a smooth and noise-free ride.
Explore Charging and Battery Maintenance Tips
Regular check-ups should include inspecting the battery for any signs of damage or degradation. Maintaining the charging efficiency and battery lifespan of your DIY electric bike is crucial for optimal performance.
To ensure charging efficiency, use a charger specifically designed for your battery type and follow the manufacturer’s instructions. Avoid overcharging or leaving the battery connected to the charger for an extended period. This can lead to reduced battery capacity and overall lifespan.
It’s important to keep the battery clean and free from debris or moisture, as this can affect its performance. Regularly check the battery connections to ensure they are secure and free from corrosion. If you notice any signs of damage, such as swelling or leaking, it’s important to replace the battery immediately.
By following these charging and battery maintenance tips, you can enjoy the thrill of riding your DIY electric bike with confidence, knowing that your battery is in optimal condition.
Now, let’s move on to explore the next step in building your DIY electric bike: selecting the right motor!
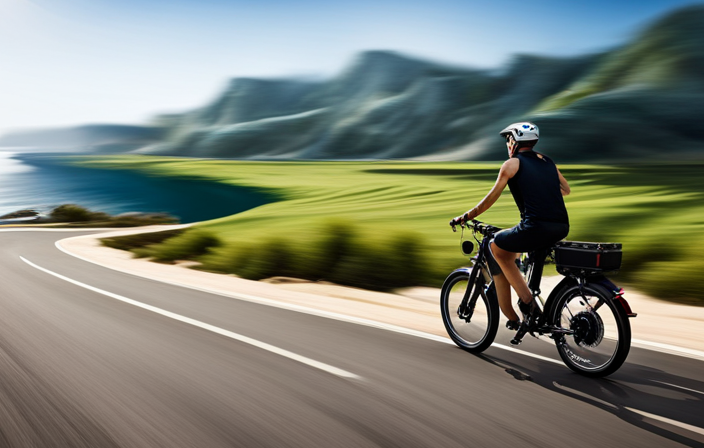
Enjoy the Thrill of Riding Your DIY Electric Bike!
Get ready to experience the exhilaration of riding your own DIY e-bike! As a passionate electric bike enthusiast, I have learned some valuable tips for maintaining my bike and tackling those challenging uphill rides. Here are three essential pieces of advice to ensure a smooth and enjoyable riding experience:
-
Regular Maintenance: To keep your electric bike in top condition, it is crucial to perform regular maintenance tasks. This includes checking the tire pressure, inspecting the brakes, and lubricating the chain. Additionally, make sure to clean your bike regularly, especially after riding in muddy or dusty conditions. Proper maintenance will not only extend the lifespan of your bike but also optimize its performance.
-
Gear Selection: When facing uphill terrains, selecting the right gear is paramount. Start by shifting to a lower gear before you reach the incline, allowing you to maintain a steady pedaling cadence. This will prevent unnecessary strain on the motor and battery, ensuring a more efficient ride. Experiment with different gear combinations to find the most comfortable and effective setup for uphill riding.
-
Pedal Assist Mode: Utilizing the pedal assist mode on your DIY e-bike can greatly assist you when tackling uphill slopes. By engaging pedal assist, the motor provides additional power, making it easier to conquer steep inclines. However, it’s important to note that using too much assistance can drain the battery faster. Find the right balance between pedal power and motor assistance to maximize your battery life.
Frequently Asked Questions
How long does it typically take to install the motor and battery system?
The installation time for an electric bike motor and battery system varies depending on the complexity of the bike and the skill level of the person doing the installation. On average, it can take anywhere from a few hours to a full day. The battery range also varies depending on factors such as the size of the battery and the terrain you’ll be riding on.
Are there any specific tools required to install the electric bike conversion kit?
To install an electric bike conversion kit, you’ll need a few necessary tools such as wrenches, screwdrivers, and pliers. It’s important to ensure the kit you choose is compatible with your bike for a successful DIY project.
What are some common troubleshooting tips for the wiring and controls?
When troubleshooting the wiring and controls of an electric bike conversion kit, common issues include loose connections, faulty wiring, and malfunctioning controls. Use a multimeter to check for continuity, inspect all connections, and consult the kit’s manual for specific troubleshooting techniques.
How often should the brakes and suspension be upgraded or serviced?
Brake maintenance and suspension upgrades should be performed regularly to ensure optimal performance and safety. It is recommended to service the brakes every 6 months and consider upgrading the suspension based on your riding preferences and terrain.
What are some recommended accessories to add to your DIY electric bike?
When it comes to accessories for a stylish electric bike, there are a few essential safety gear items that every rider should have. This includes a helmet, reflective gear, and front and rear lights for increased visibility on the road.
Conclusion
After successfully completing the DIY electric bike project, I feel a great sense of accomplishment. The careful planning and execution have resulted in a reliable and efficient mode of transportation.
With each ride, I can’t help but wonder, ‘Who knew building an electric bike could be so rewarding?’
The thorough maintenance and charging tips ensure that my bike will continue to perform at its best.
So why wait? Start your own DIY electric bike project and experience the thrill of riding with a sustainable twist!